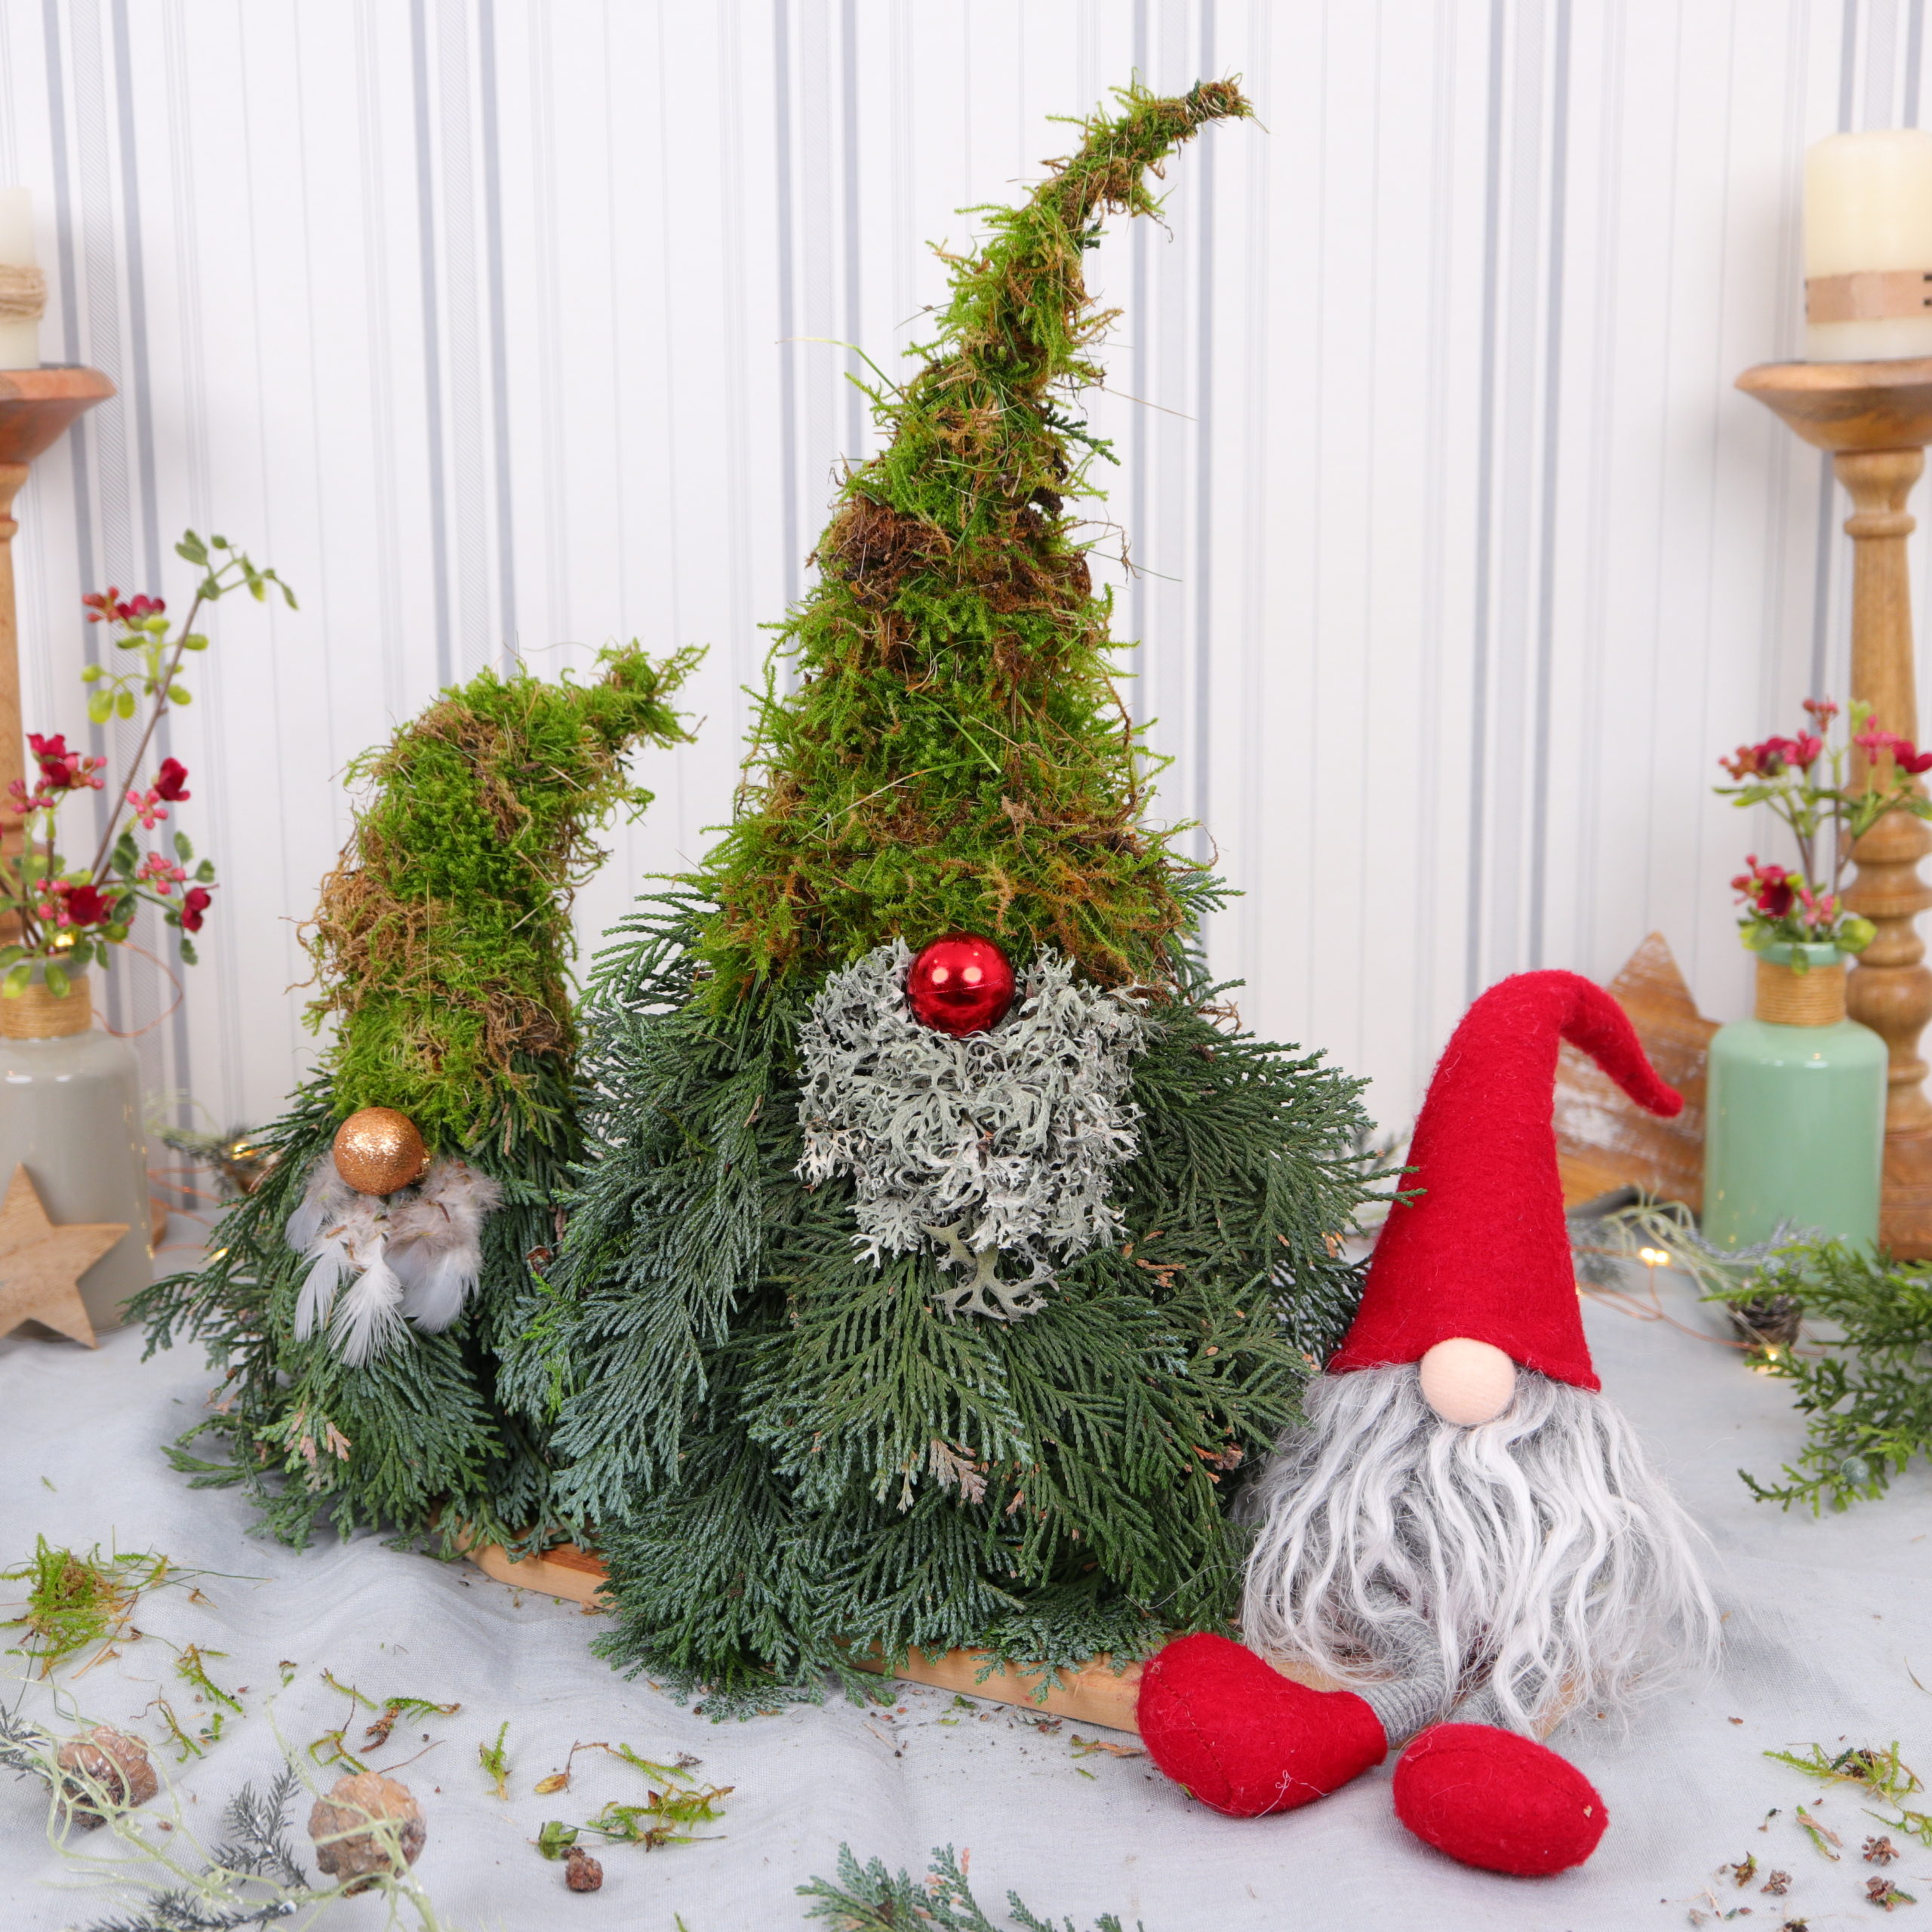
Today I’ll show you how you can easily make a Christmas gnome in just a few steps and turn an old bottle into a pretty decoration element! Gnomes are in trend again this year and enchant us as winter decorations and Christmas decorations during the cold season. Our children love these gnomes who suddenly appear in December in front of many houses. That’s why my children were super enthusiastic about the idea of making a gnome for our house entrance and helped me to collect all kinds of natural materials for it.
Maybe you would like to bring such a Christmas gnome into your house this winter as well? You can also create such a gnome very easily with the help of an empty glass bottle and the so-called rubber trick! I have already used the rubber trick for lanterns. Again, it works great for attaching branches to the bottle quickly and easily. With the following step-by-step instructions you can easily make the gnome out of twigs and moss yourself!
Tools
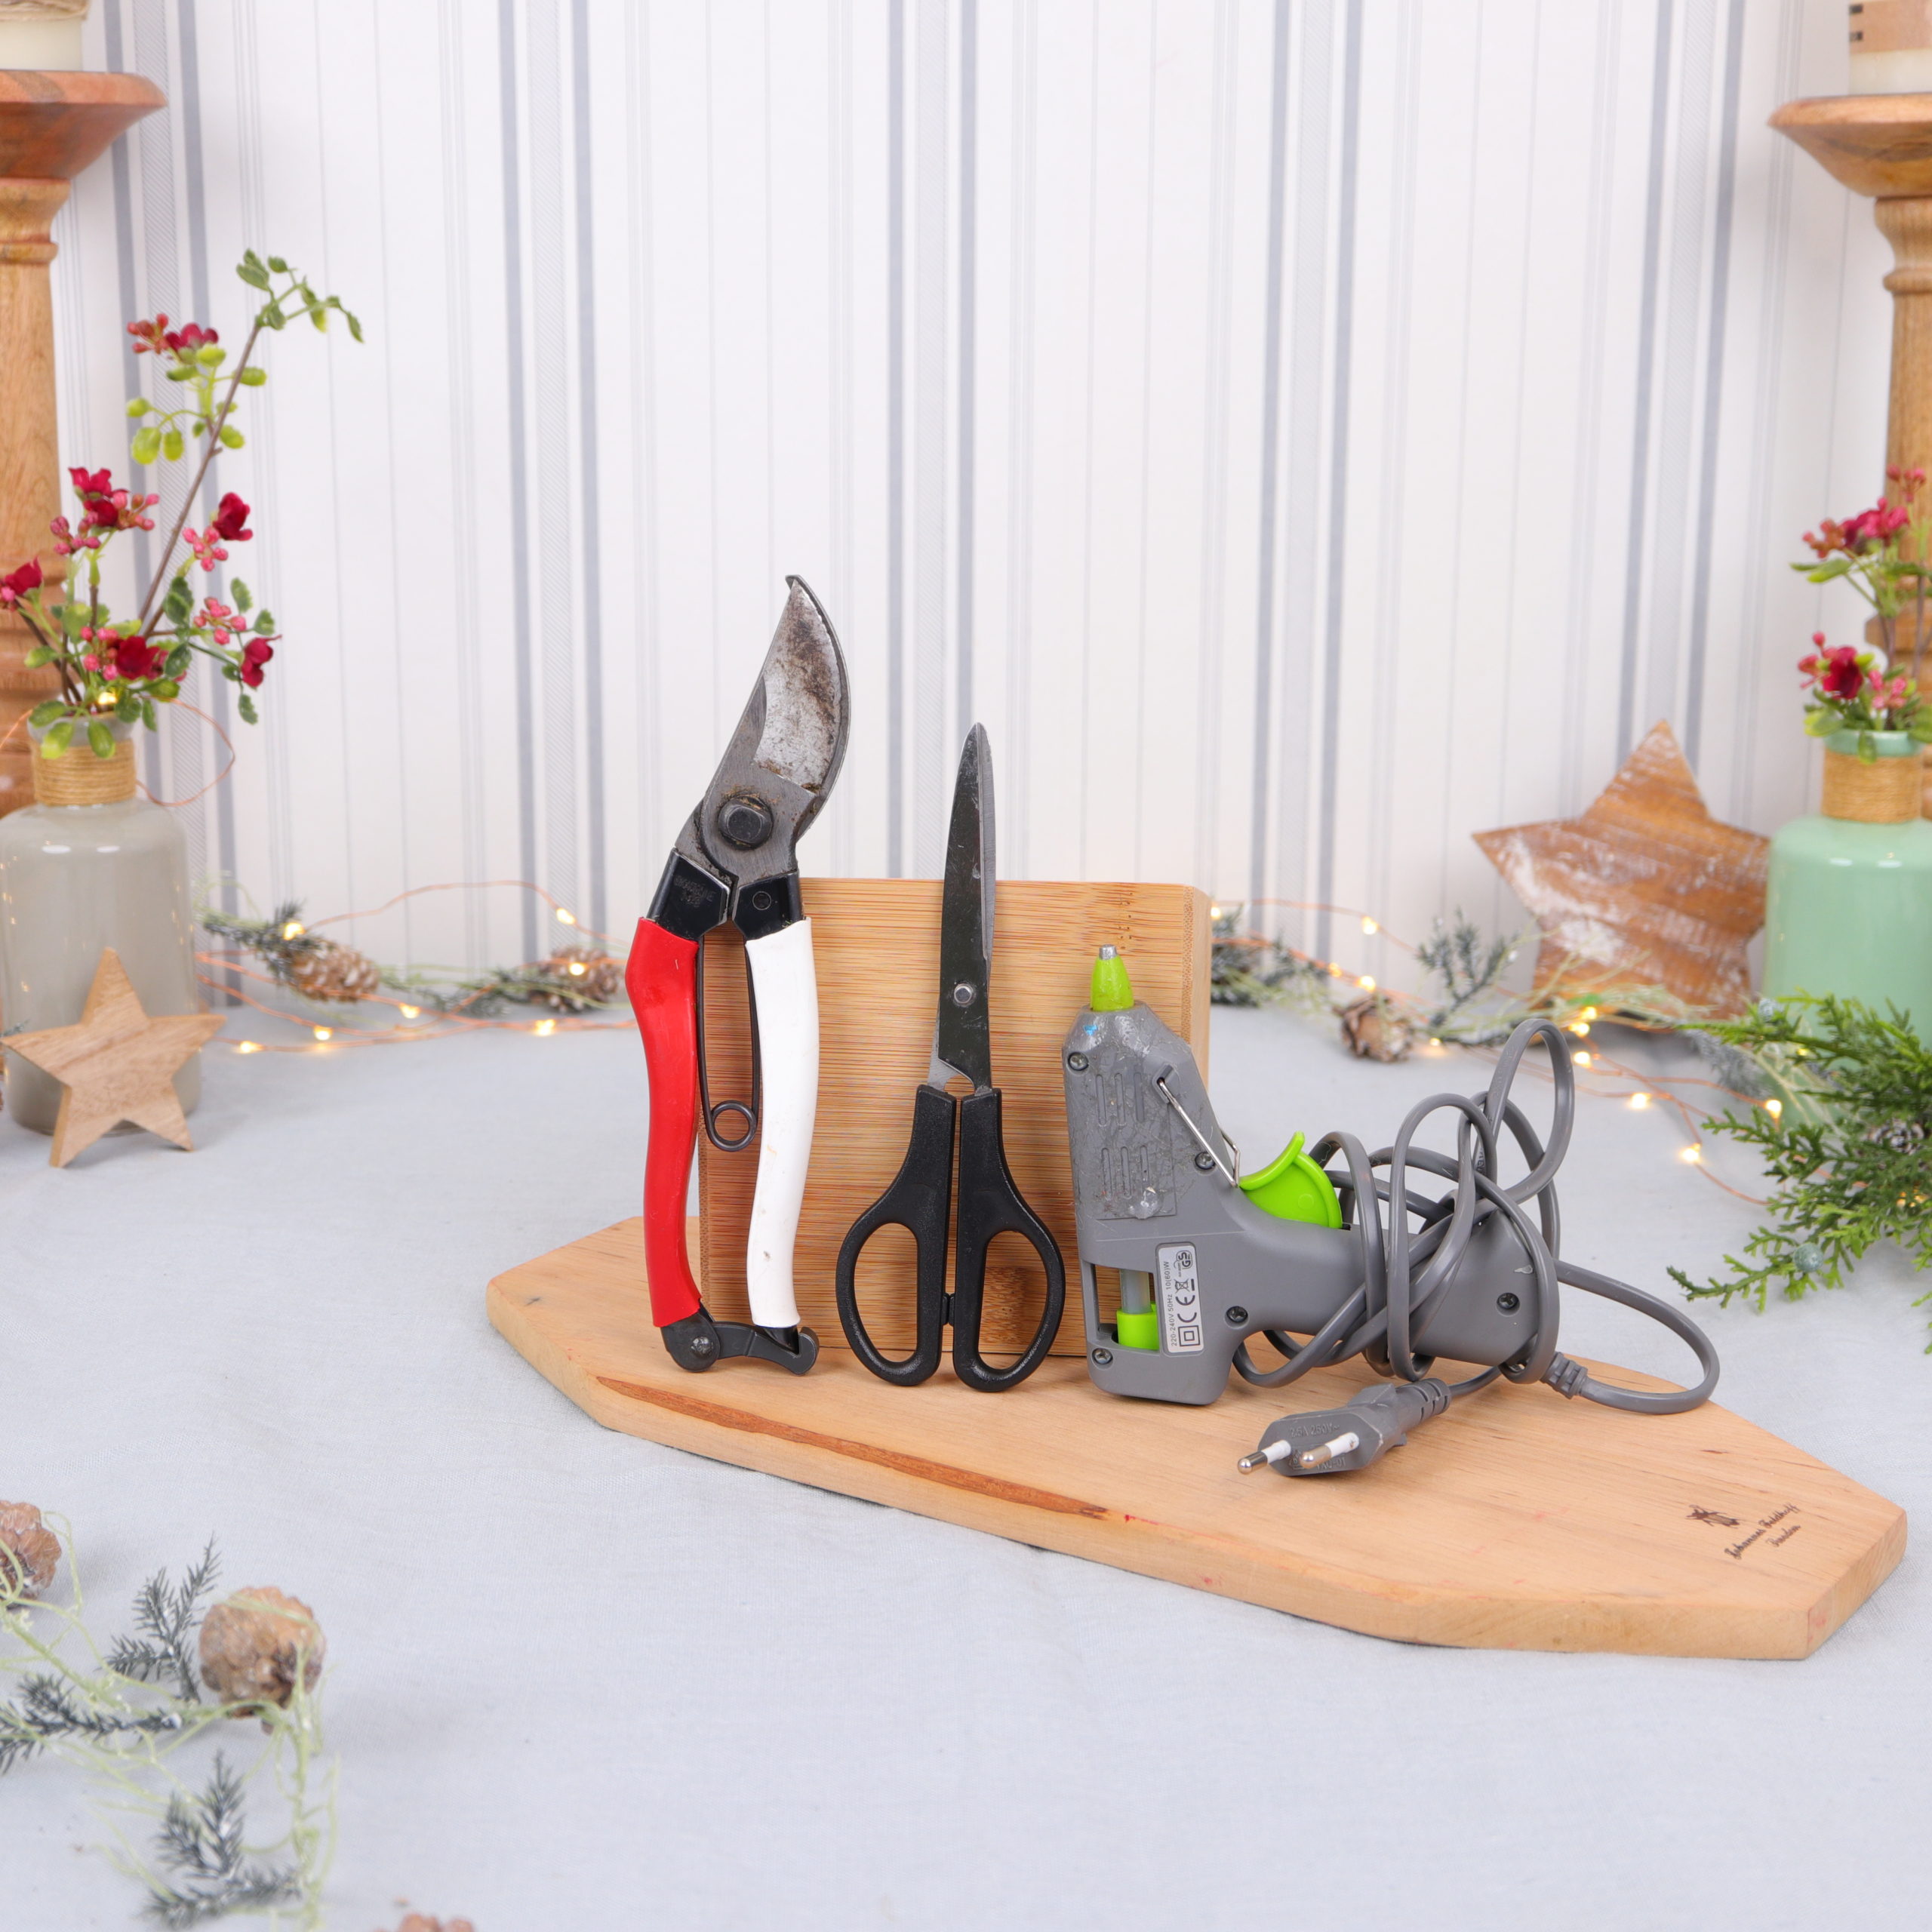
Here you can see which tools I used for the gnome. You will need pruners to trim the branches, a hot glue gun with hot glue sticks, and scissors to cut the wire.
| Tool | Search on… |
|---|---|
| Pruners | |
| I use the Japanese flower shears Okatsune 304 | |
| Hot glue gun | |
| Hot glue sticks | |
| Household scissors |
Materials
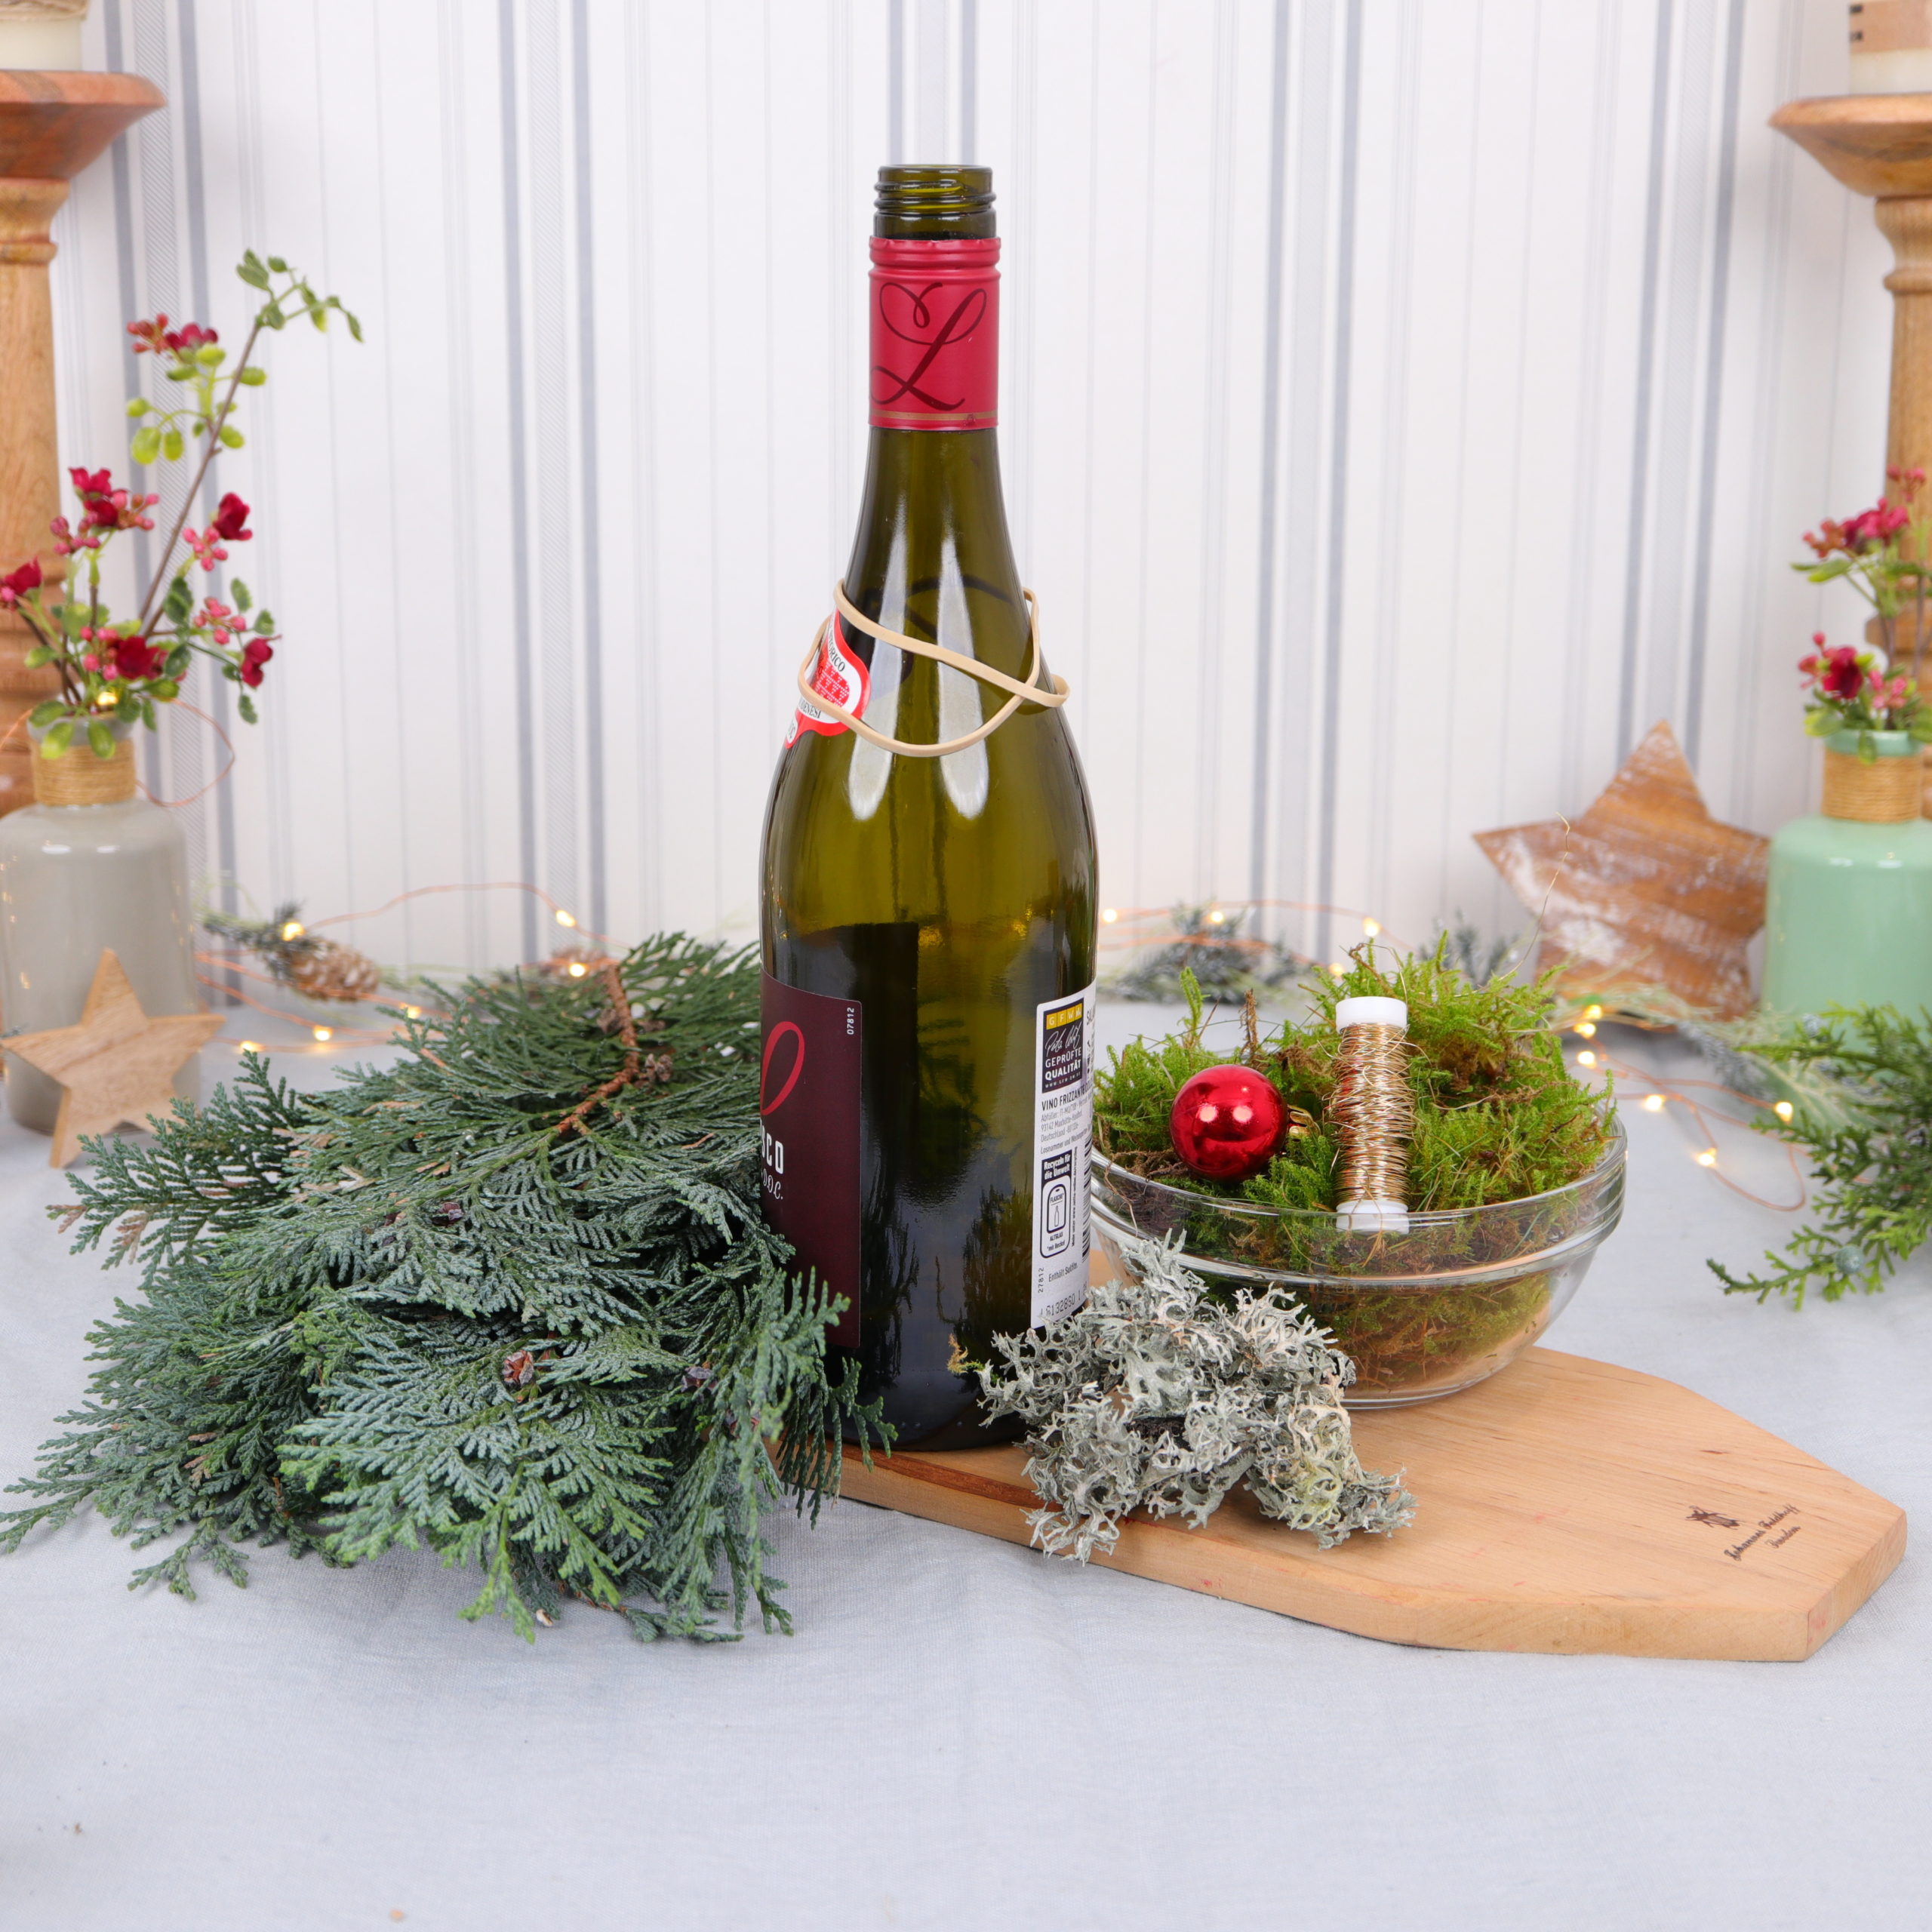
I used these materials for the Christmas gnome: an empty wine bottle, twigs (e.g. fir or cypress branches), moss, lichen, a red Christmas ball for the nose, two rubber bands and wire for crafting.
| Material | Search on |
|---|---|
| Glass bottle | |
| Branches | |
| Moss | |
| Lichen | |
| Christmas ball (red) | |
| Rubber band | |
| Wire for crafting |
Instructions | Christmas Gnomes with bottles and the rubber trick
Step 1: Attach branches to bottle with rubber band
To make the gnome, I use an empty glass bottle as the basis. This has a good dead weight and ensures that the gnome stands securely.

In the first step I wrap the rubber band around the bottle. This trick makes it easy to attach the branches to the bottle.

Then I cut the branches to the right length with my flower pruners.
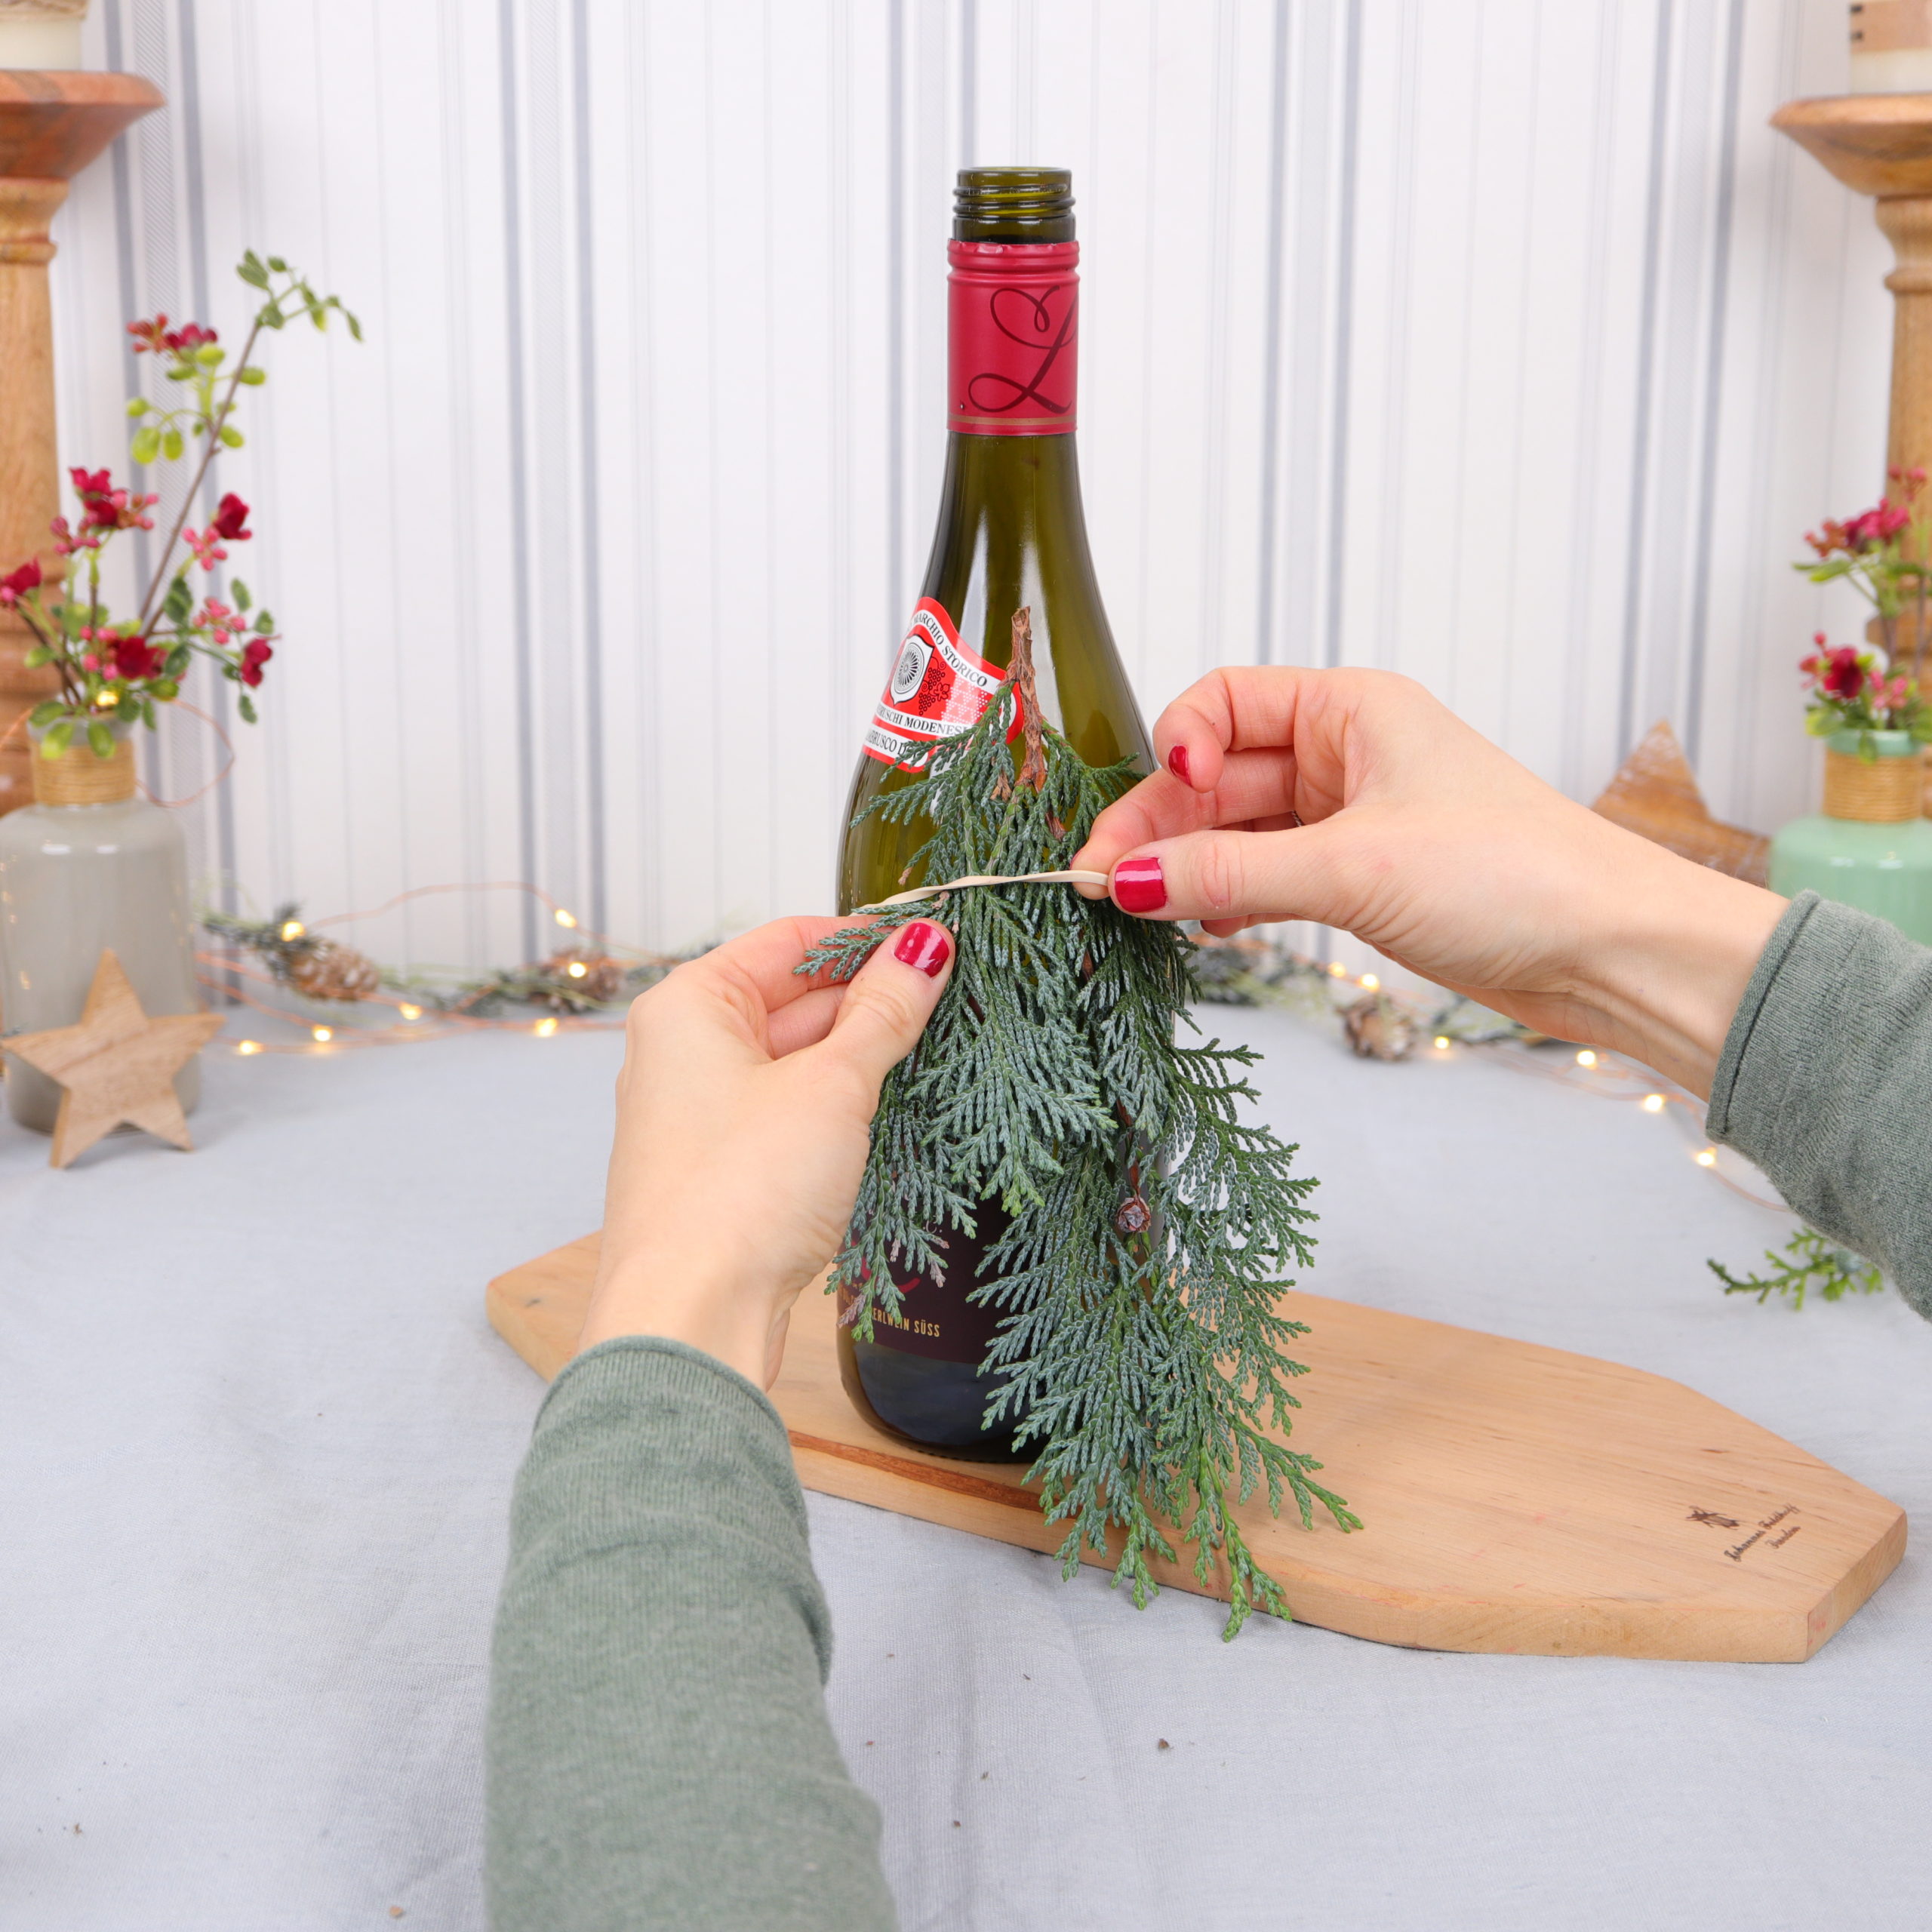
I put the branches around the bottle under the rubber band.
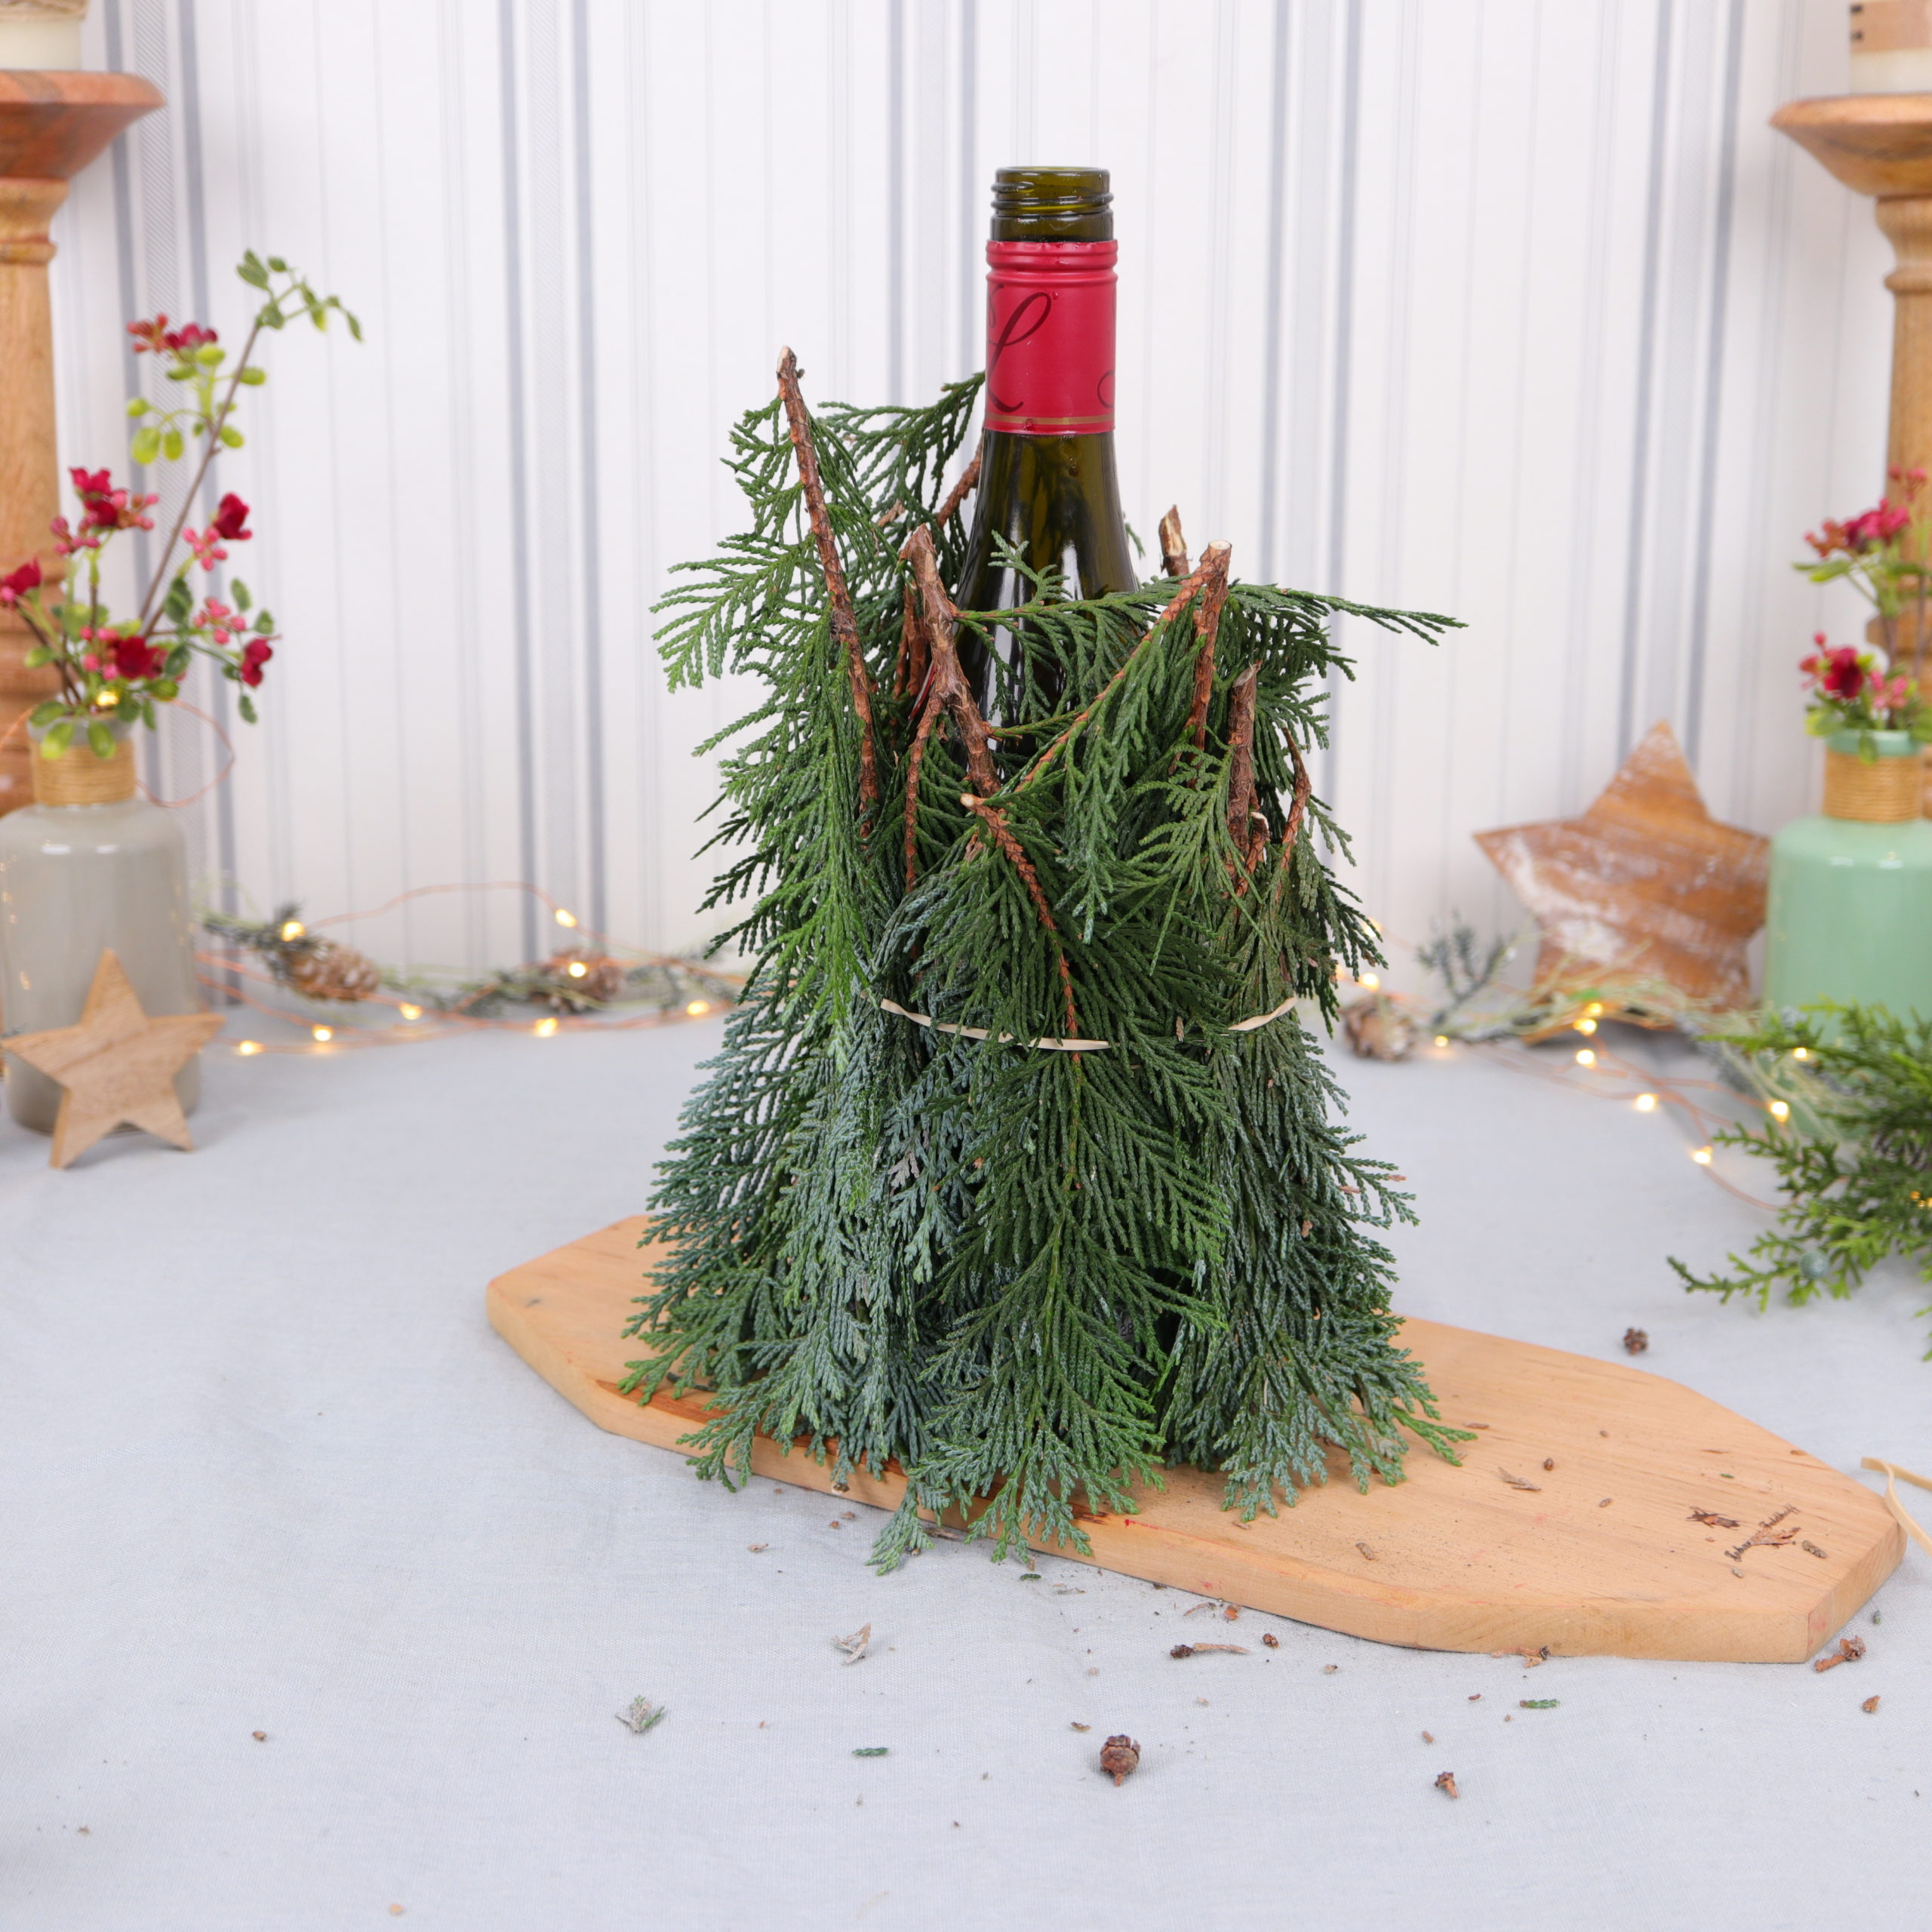
Step 2: Attach branches to bottle with a second rubber band
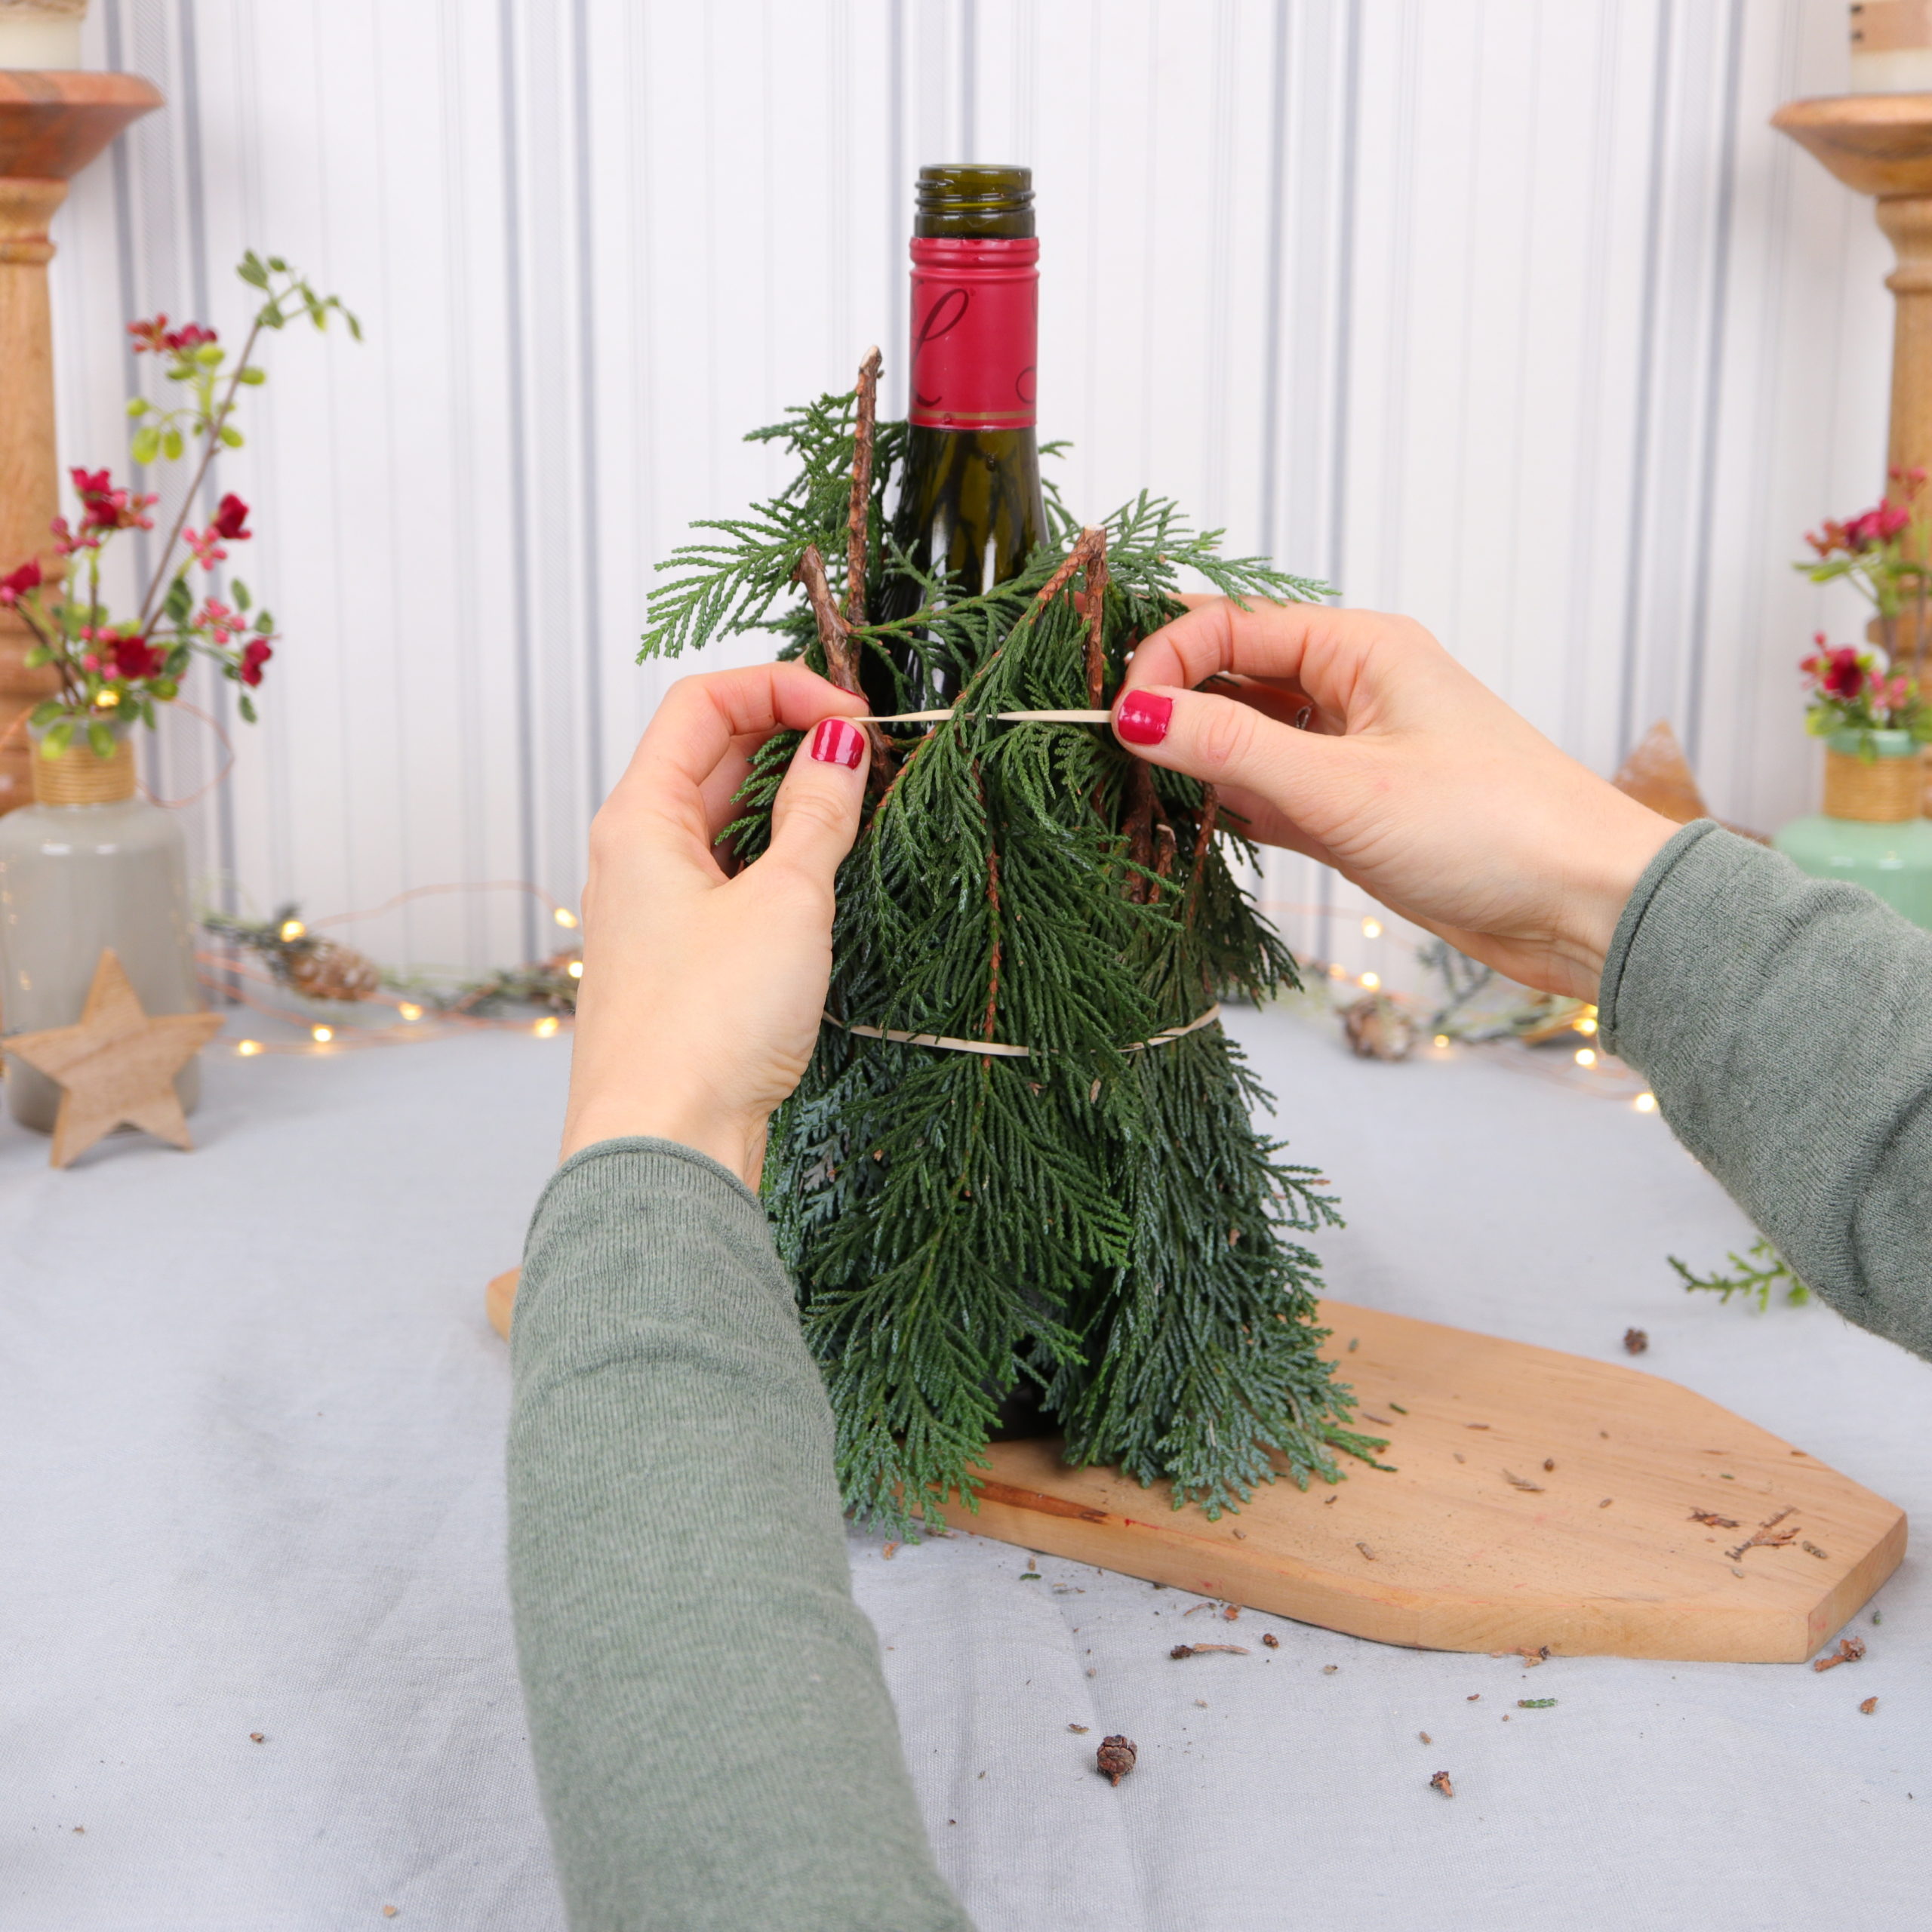
I repeat the first step with the second rubber band. I attach this to the top of the bottle.

Then I put the green branches and twigs around again under the rubber band. These also cover the first rubber band.

Step 3: Attach moss as a gnome hat
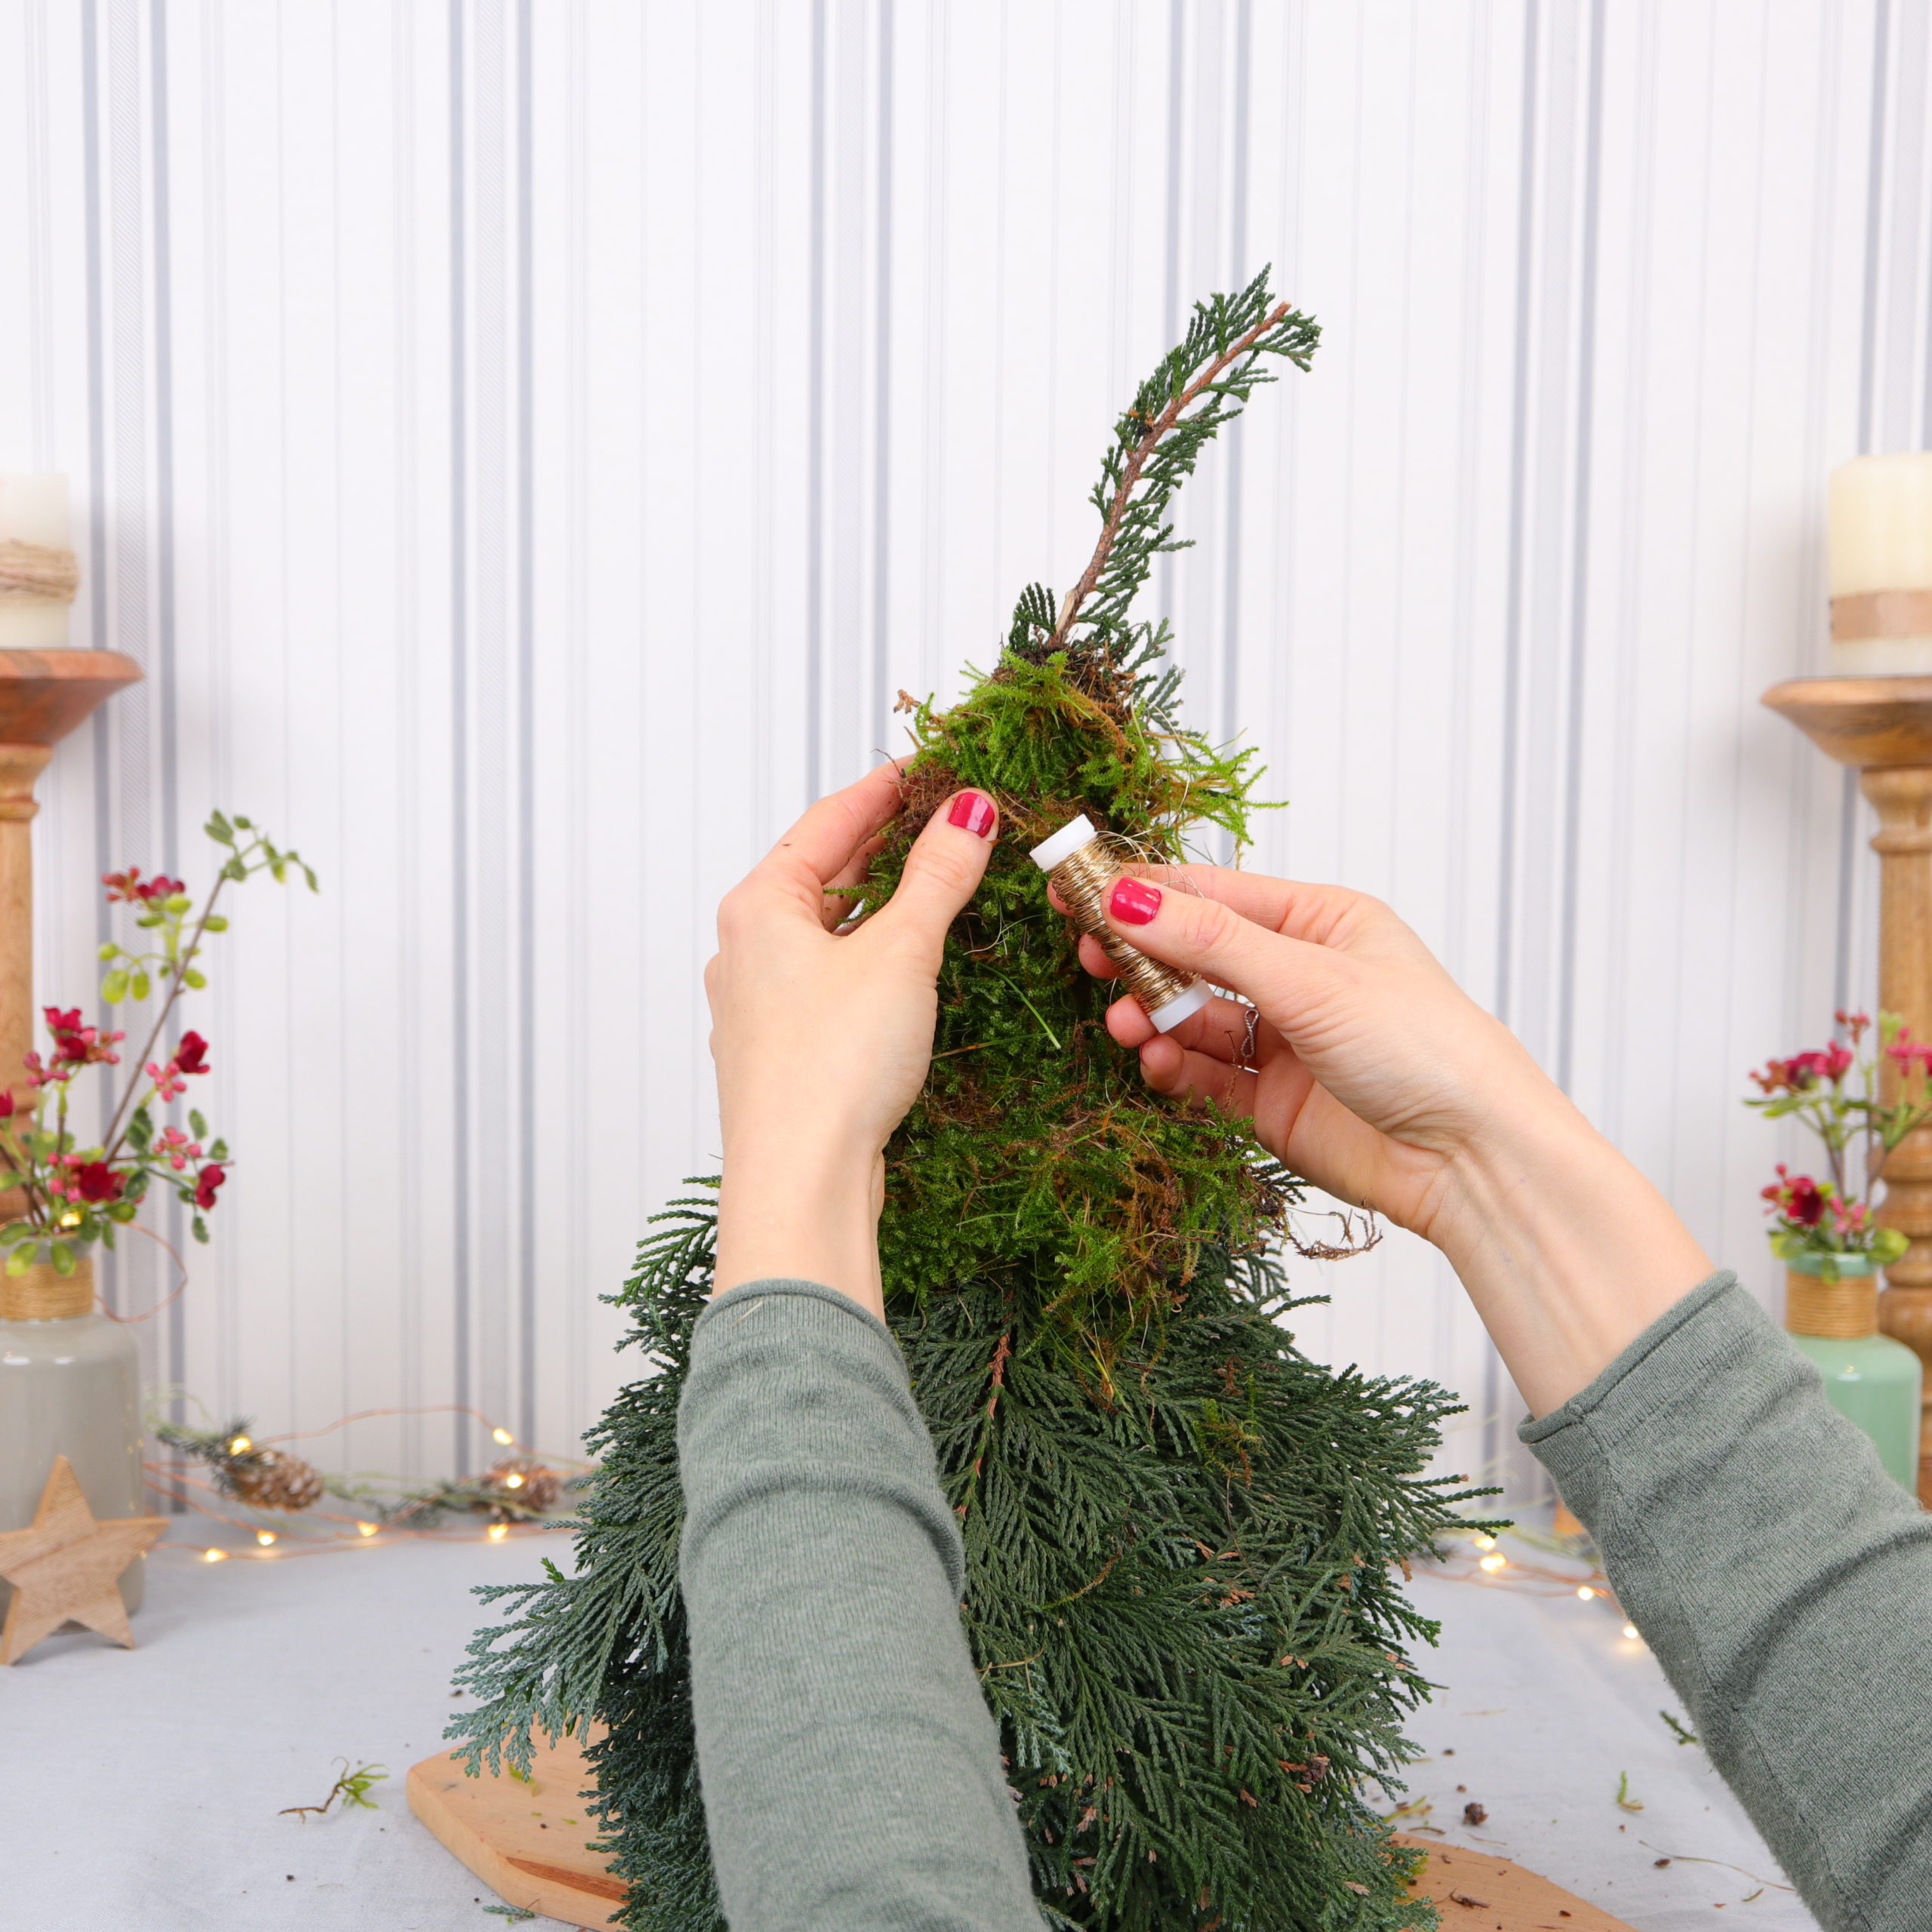
To shape the gnome hat, I use moss from our garden and wire.
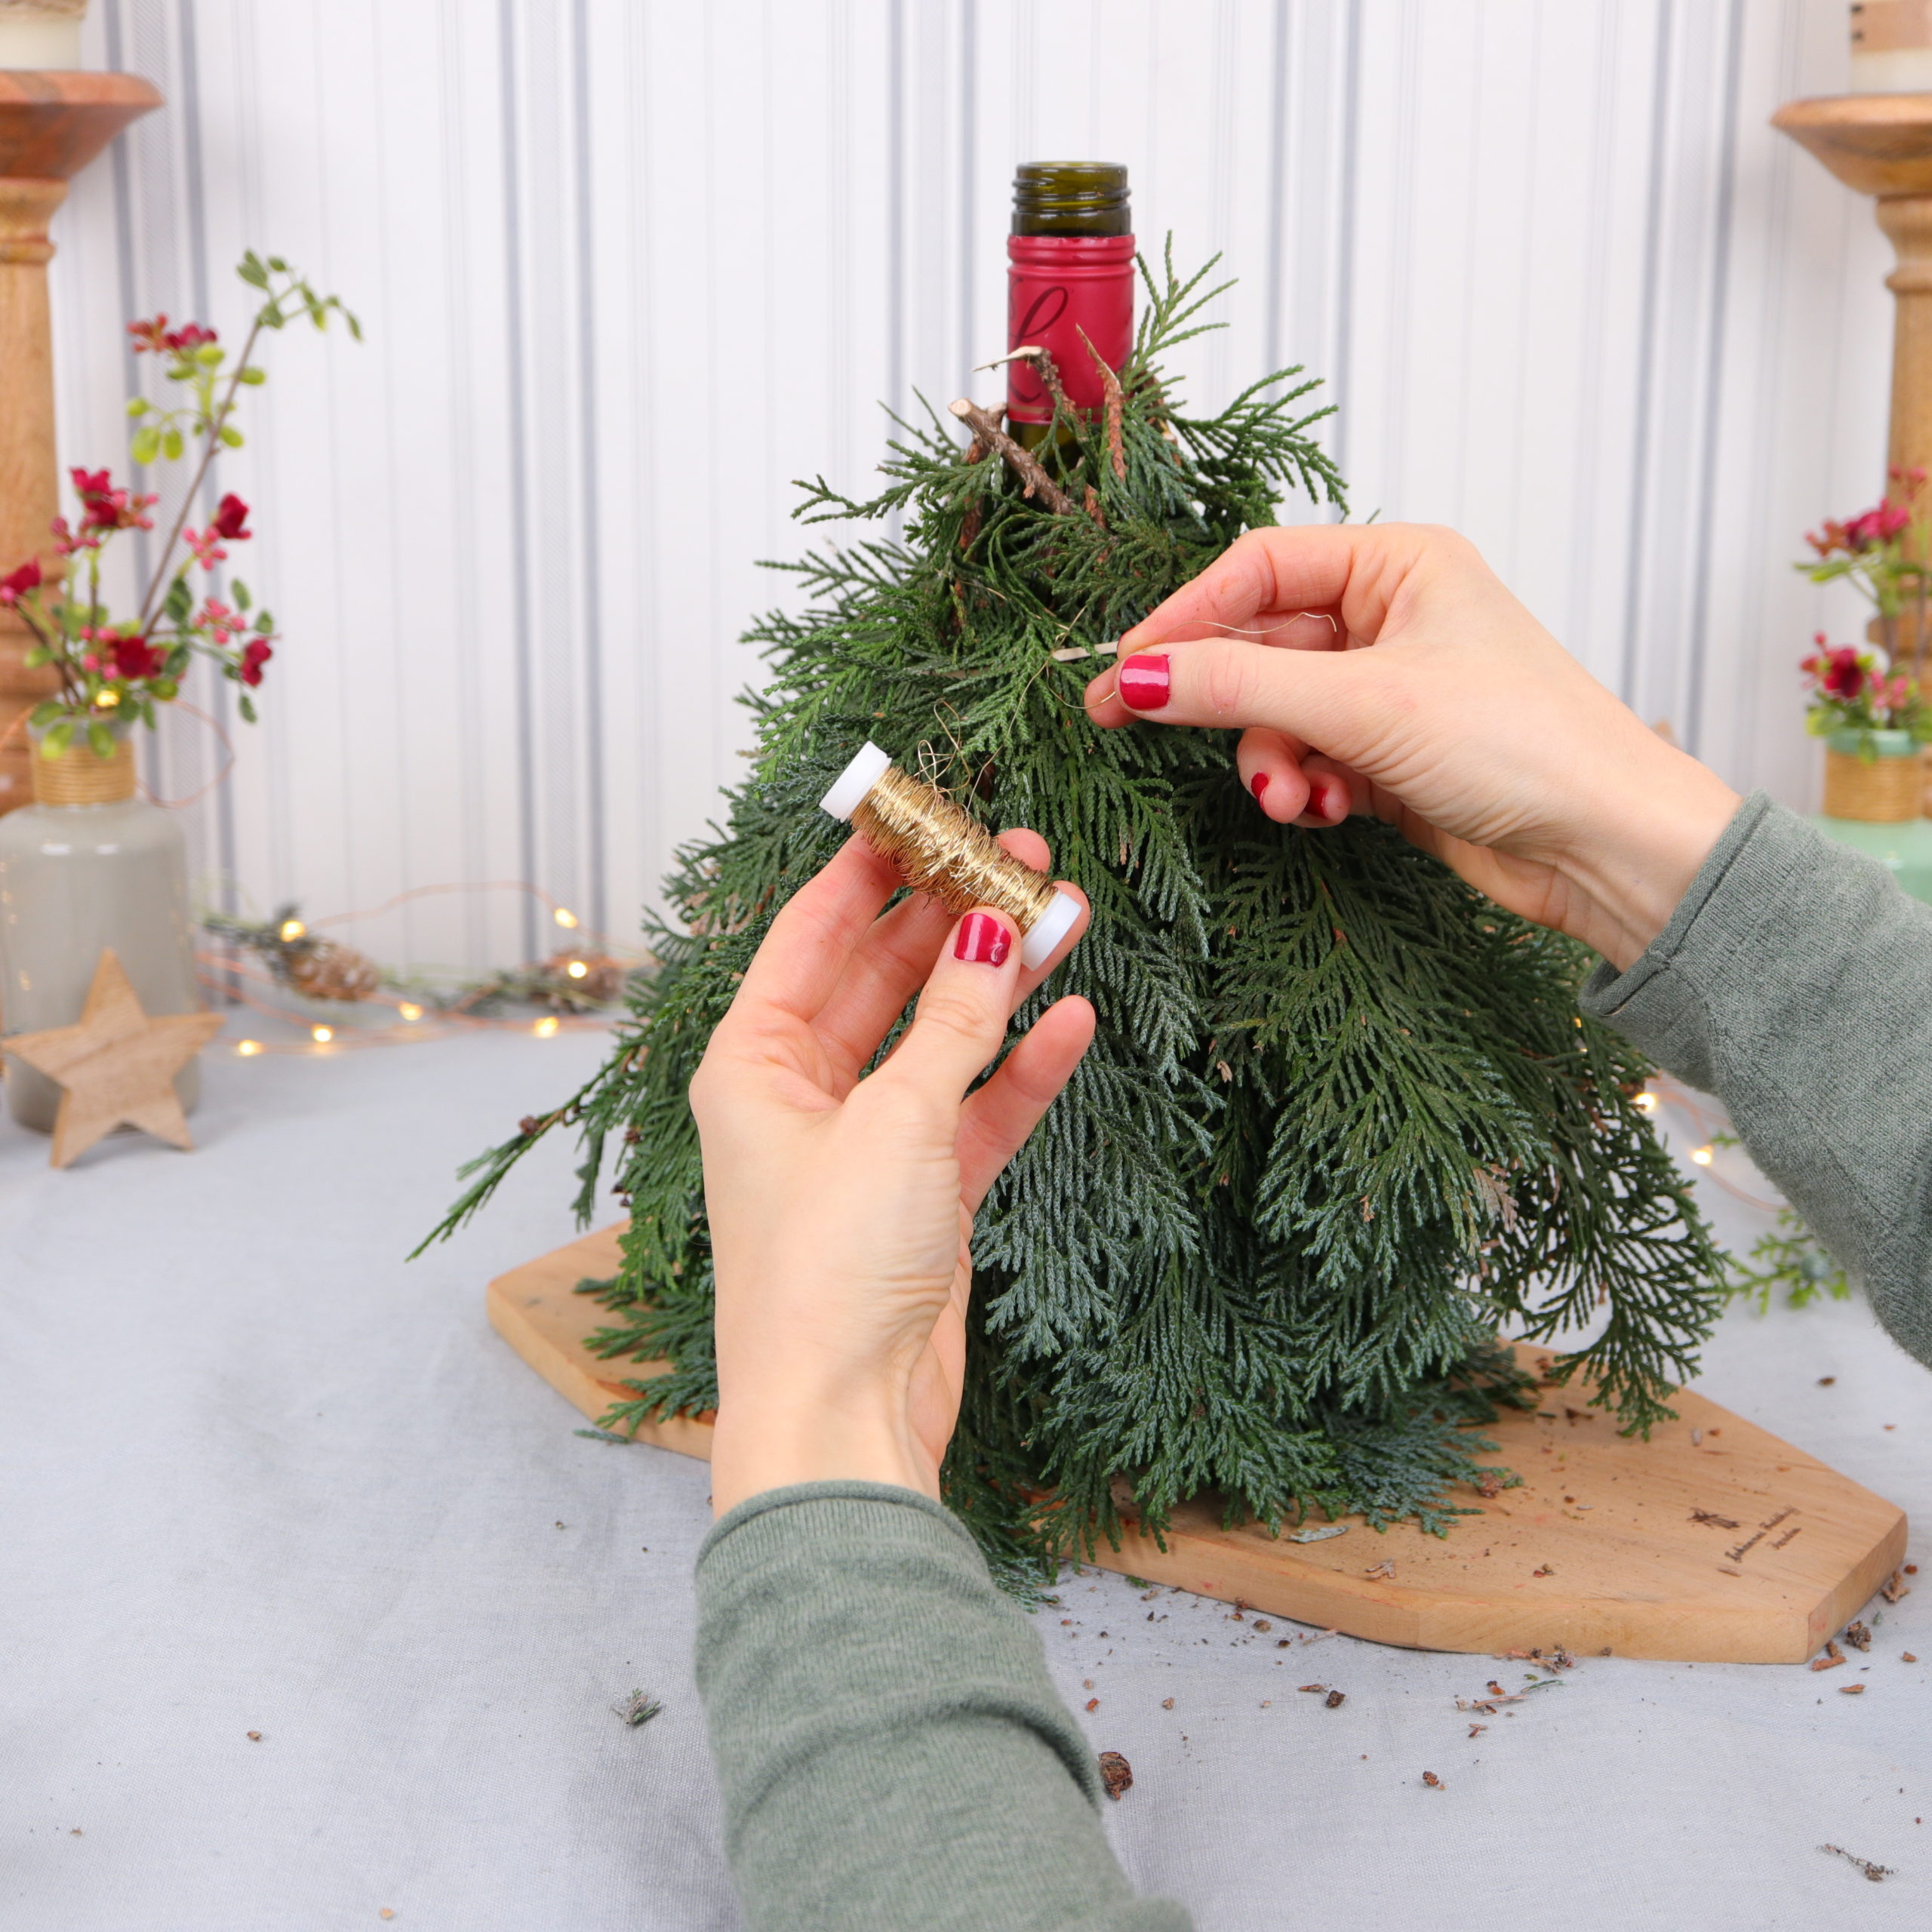
I tie the wire around the branches and twist it.
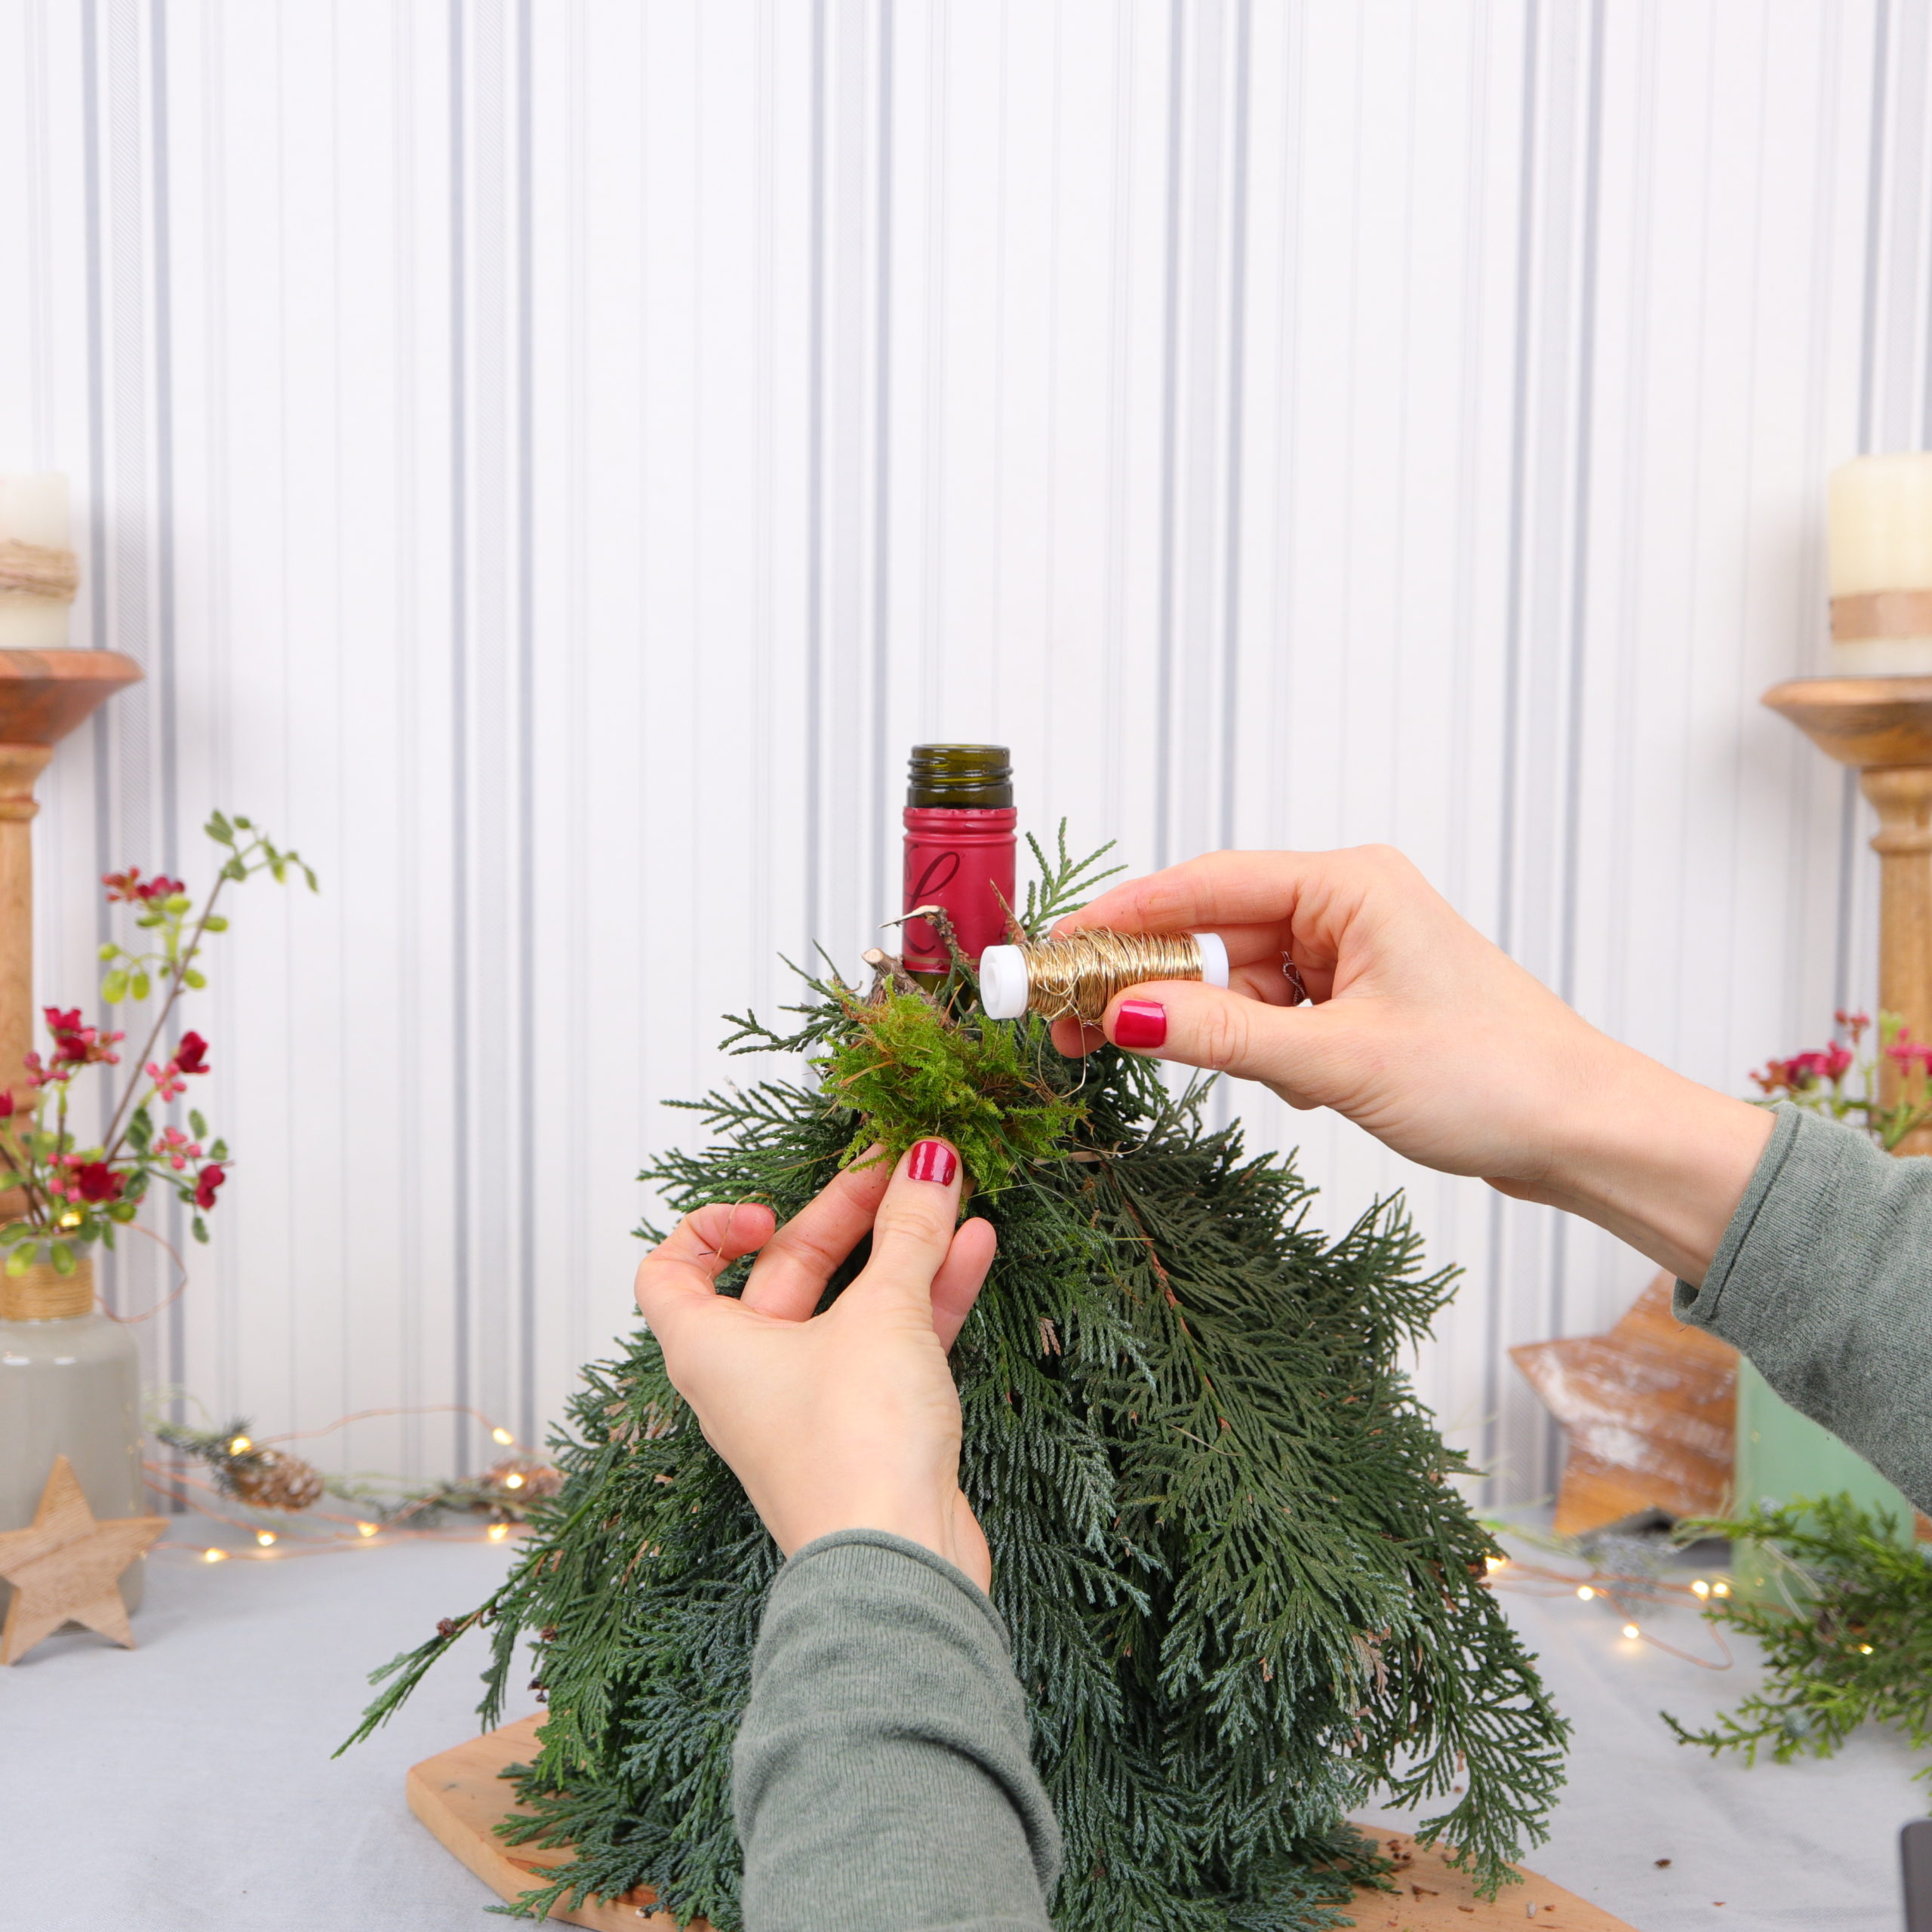
Then I put some moss on top and wrap the wire tightly around it. Now I put the next piece of moss next to it and wrap it again. I do this until I get to the end of the bottle. The moss will now cover the second rubber band.
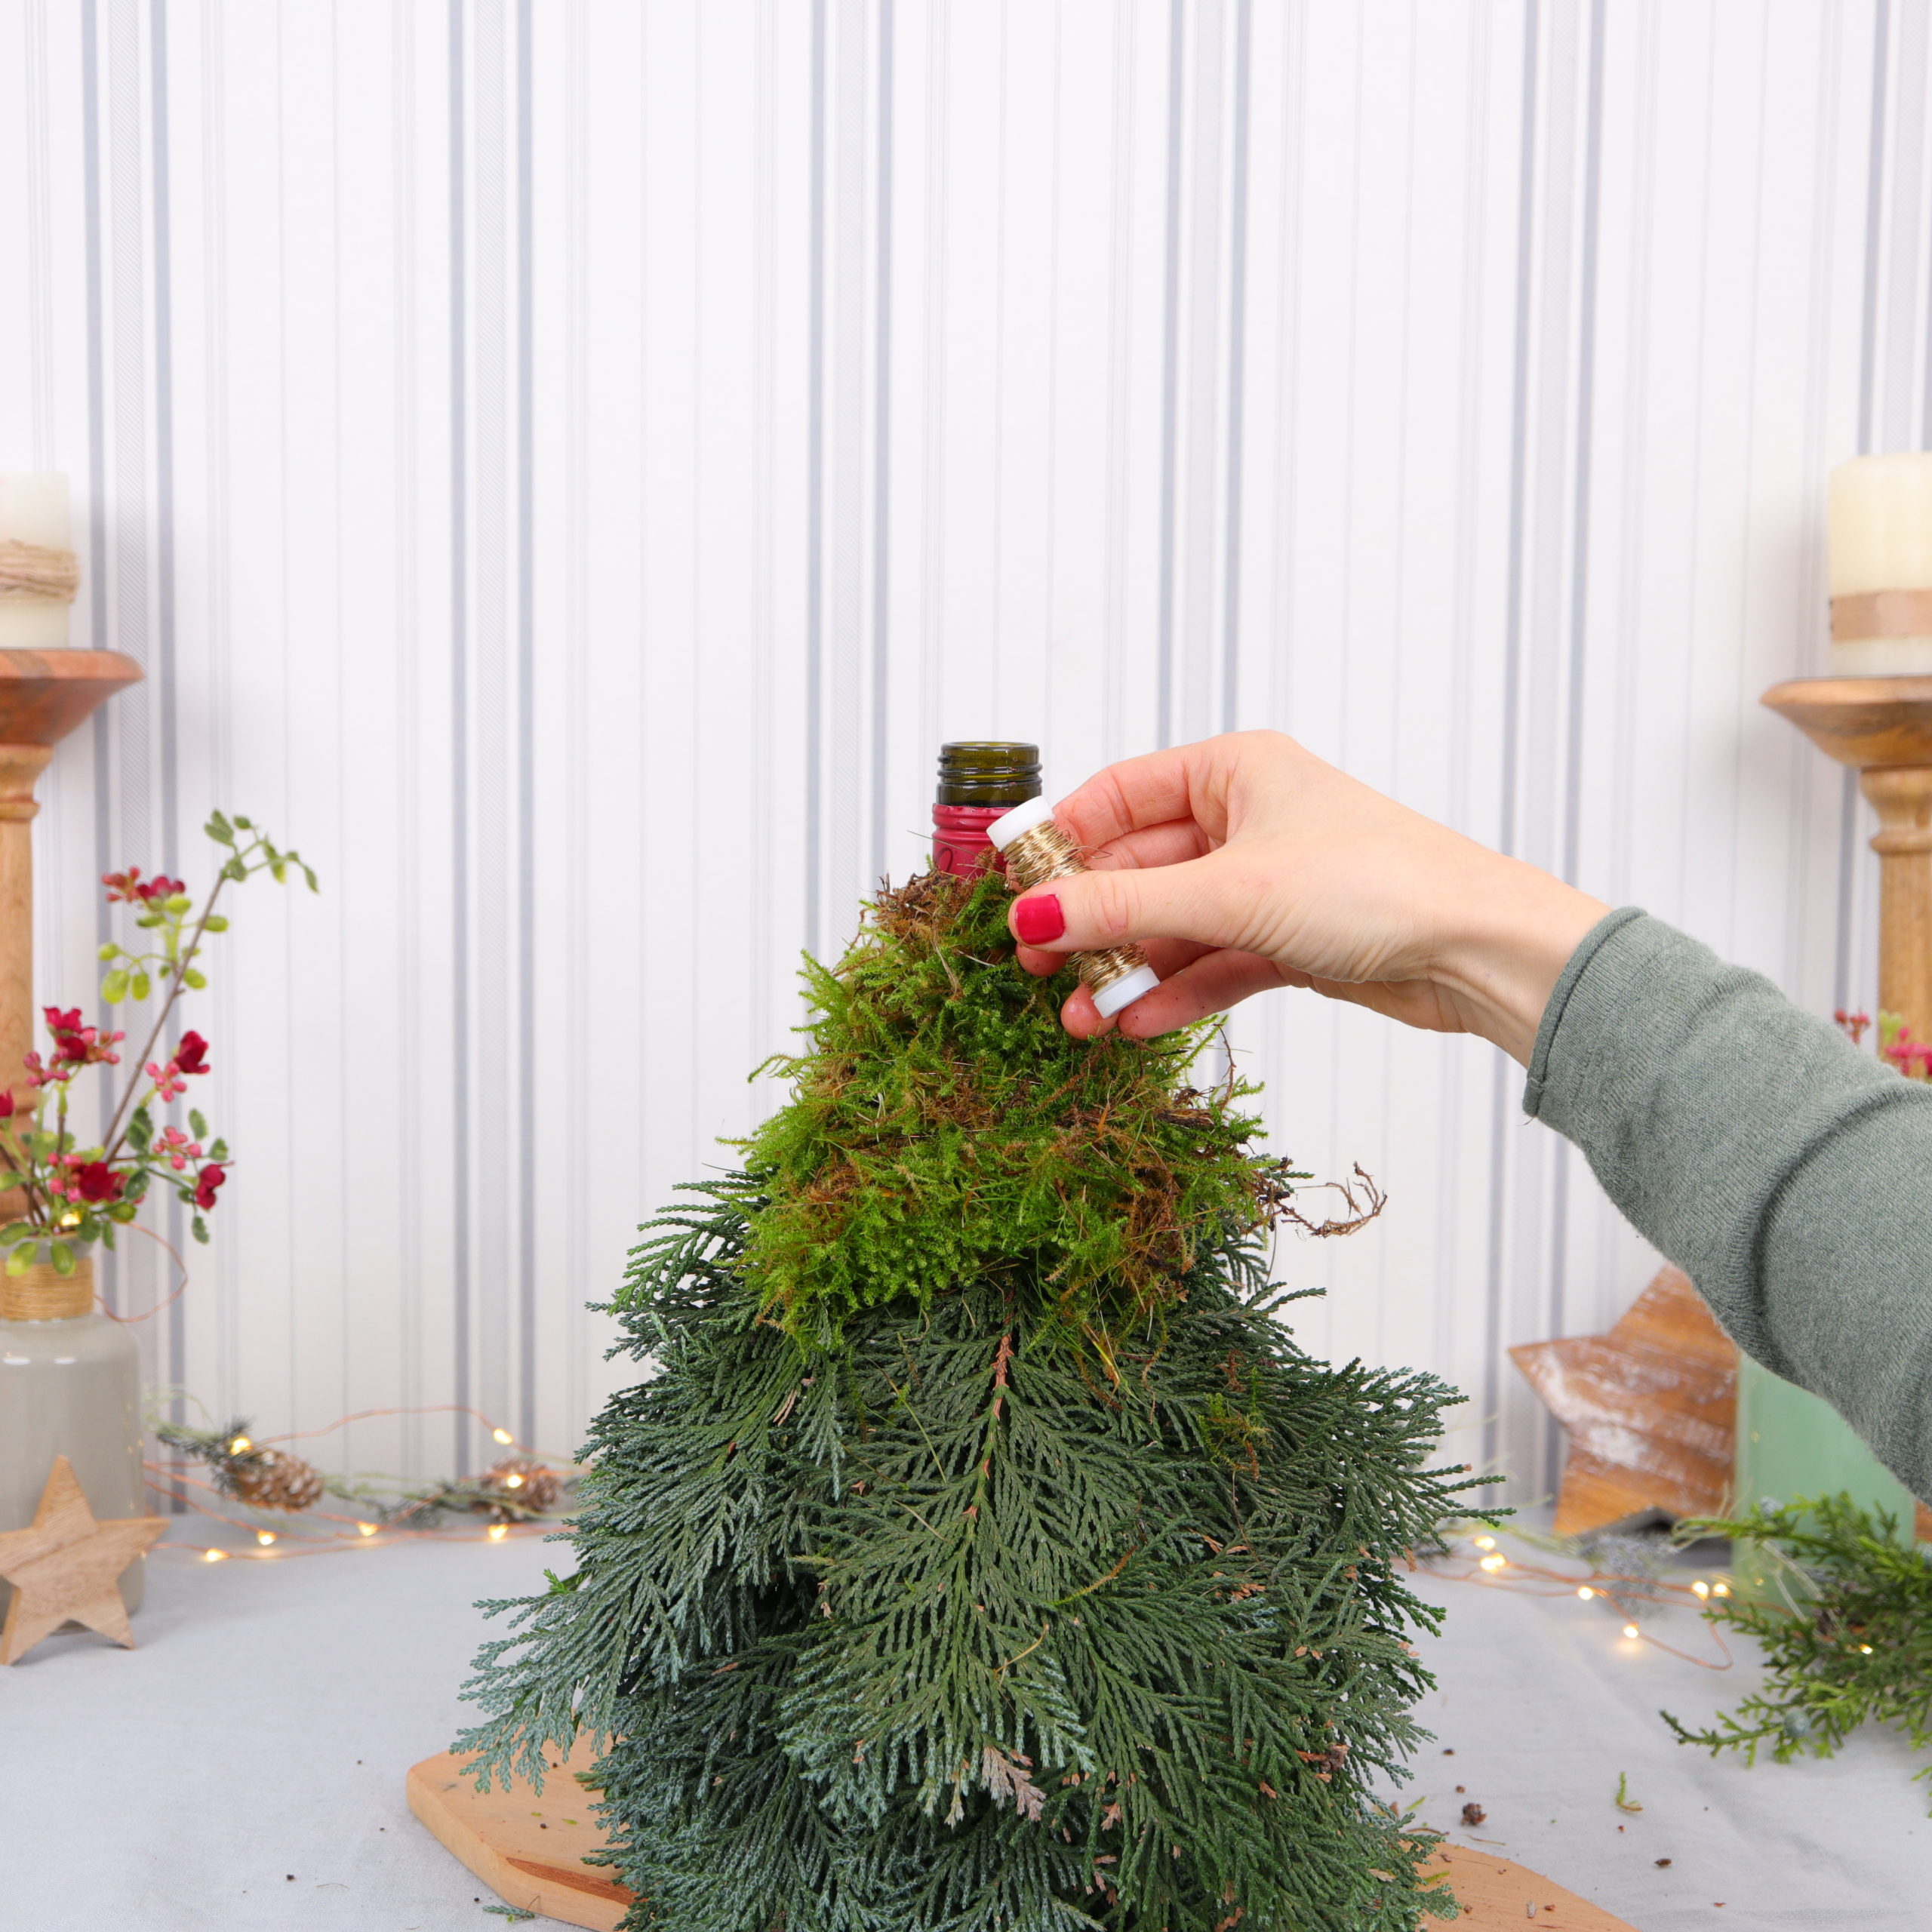
Then I stick a slightly bent branch into the opening of the bottle. The bent branch should not sink into the opening.
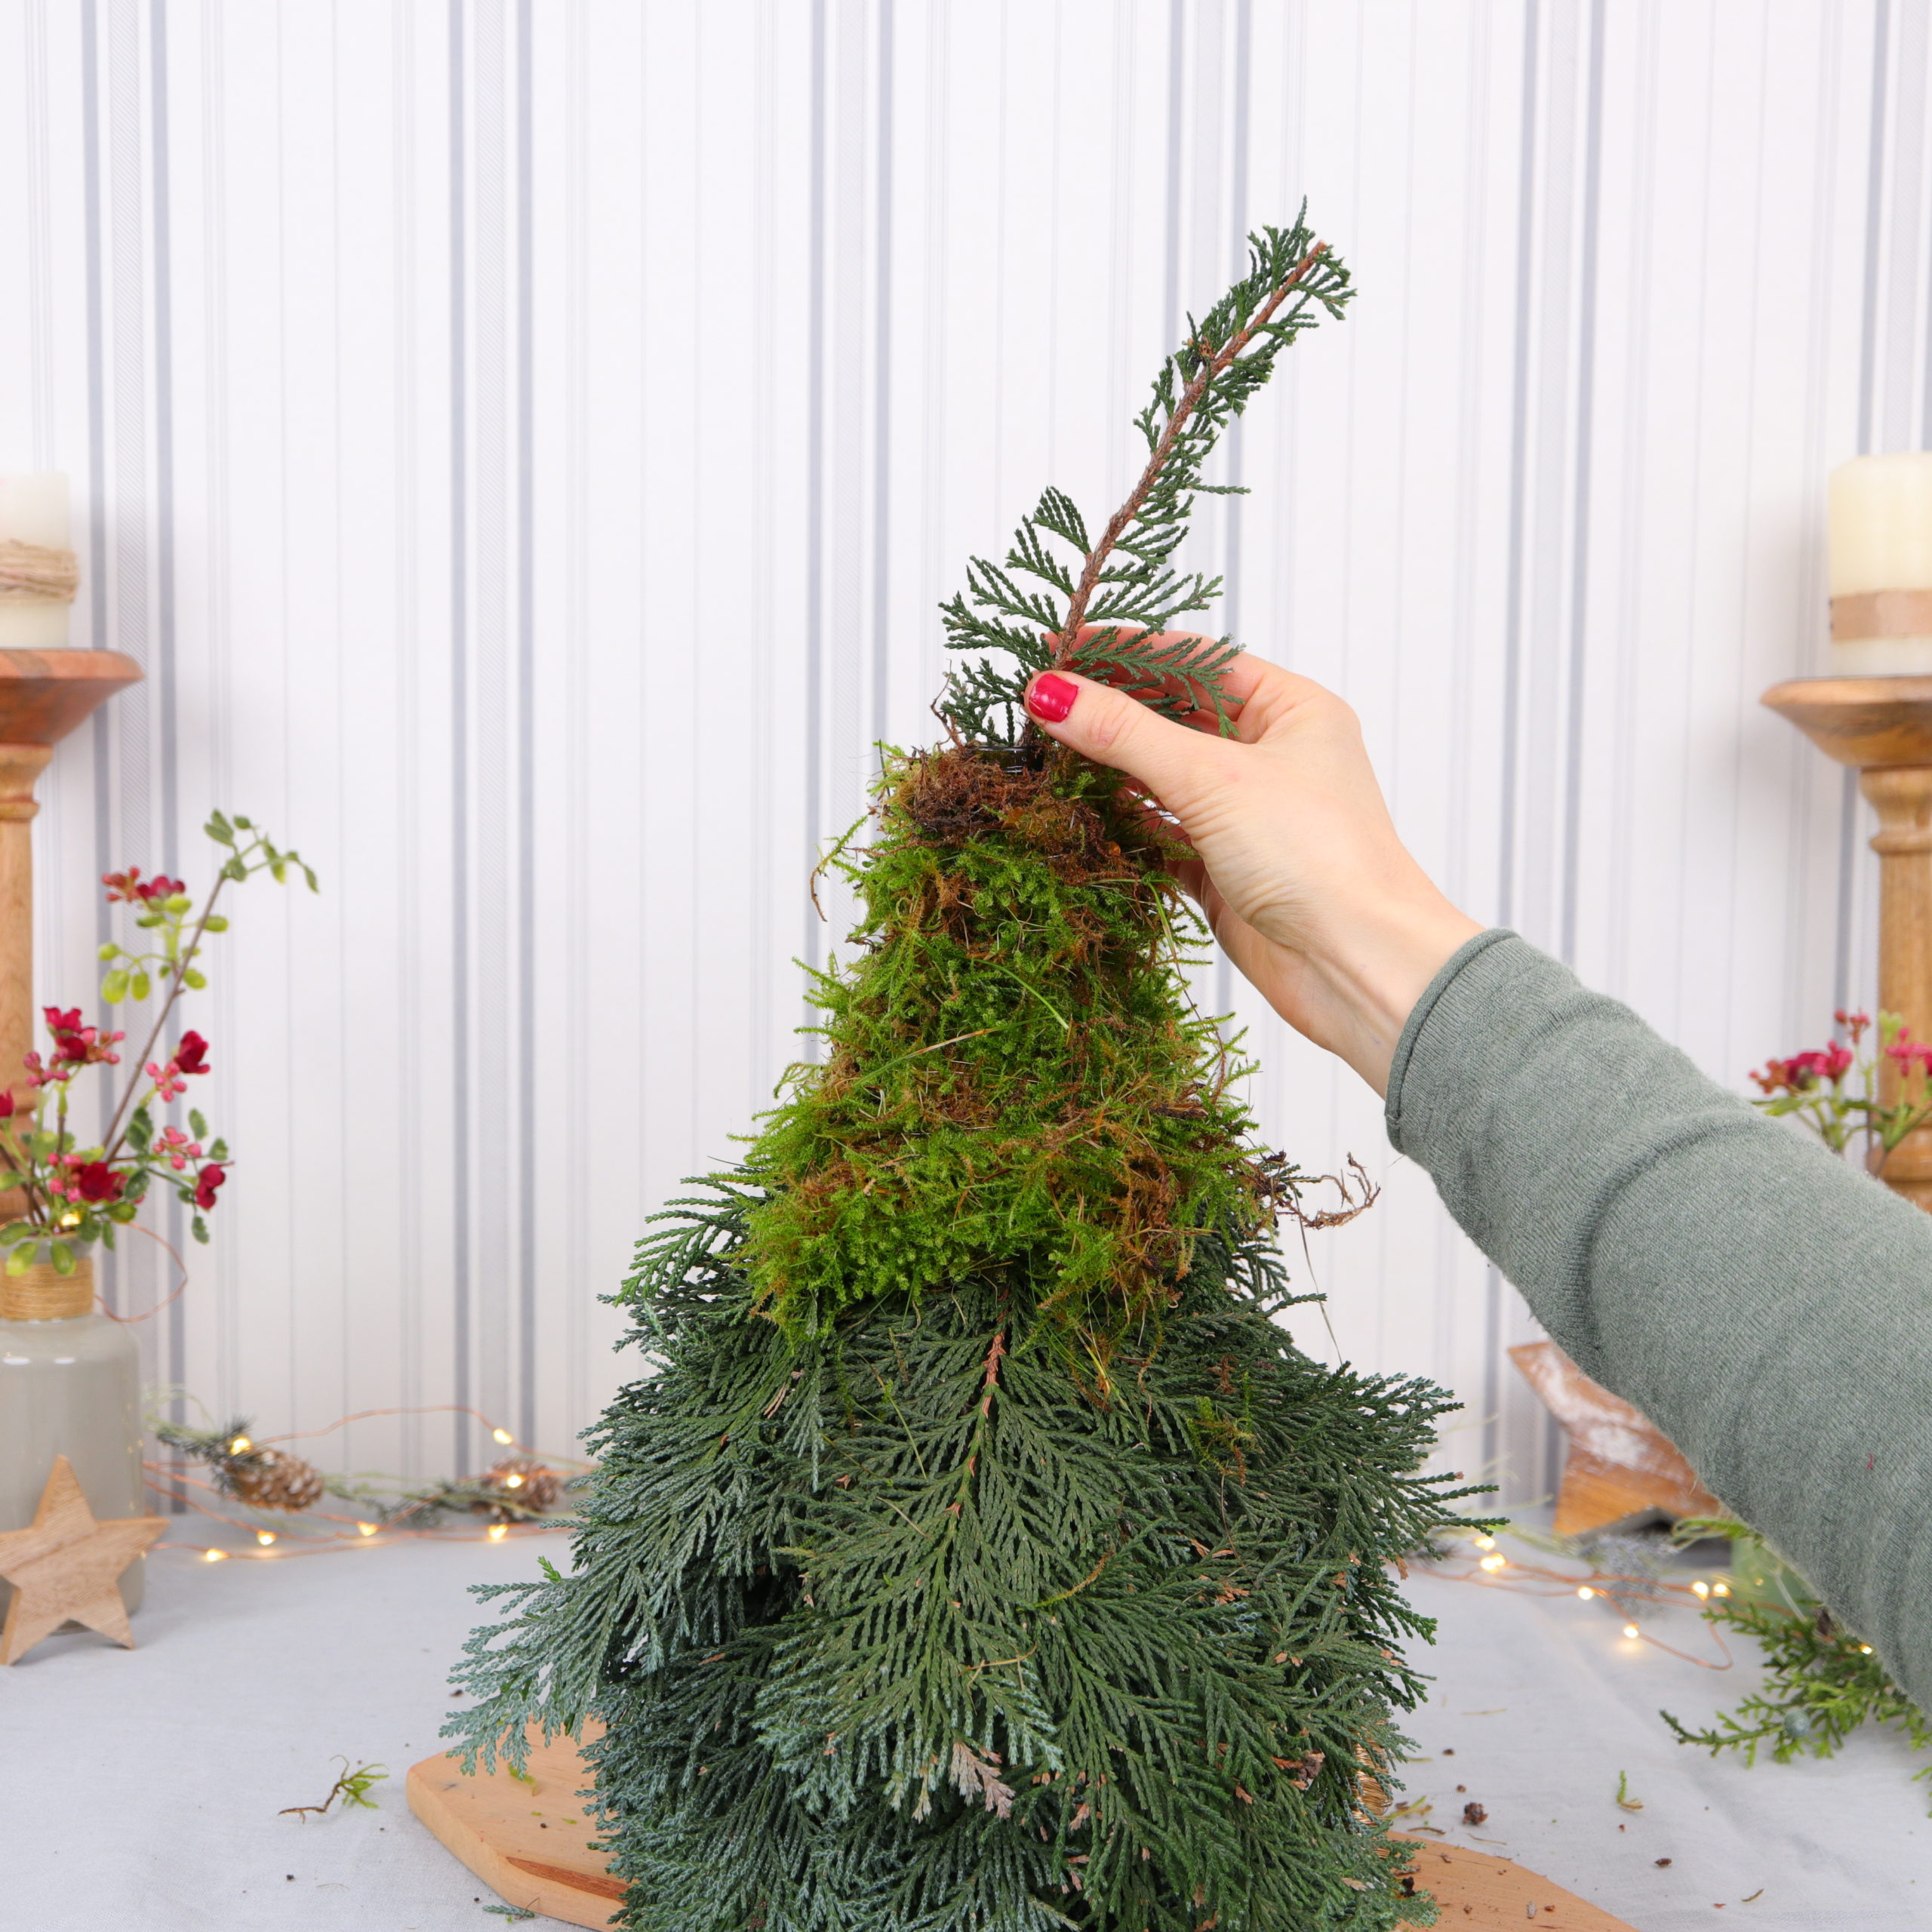
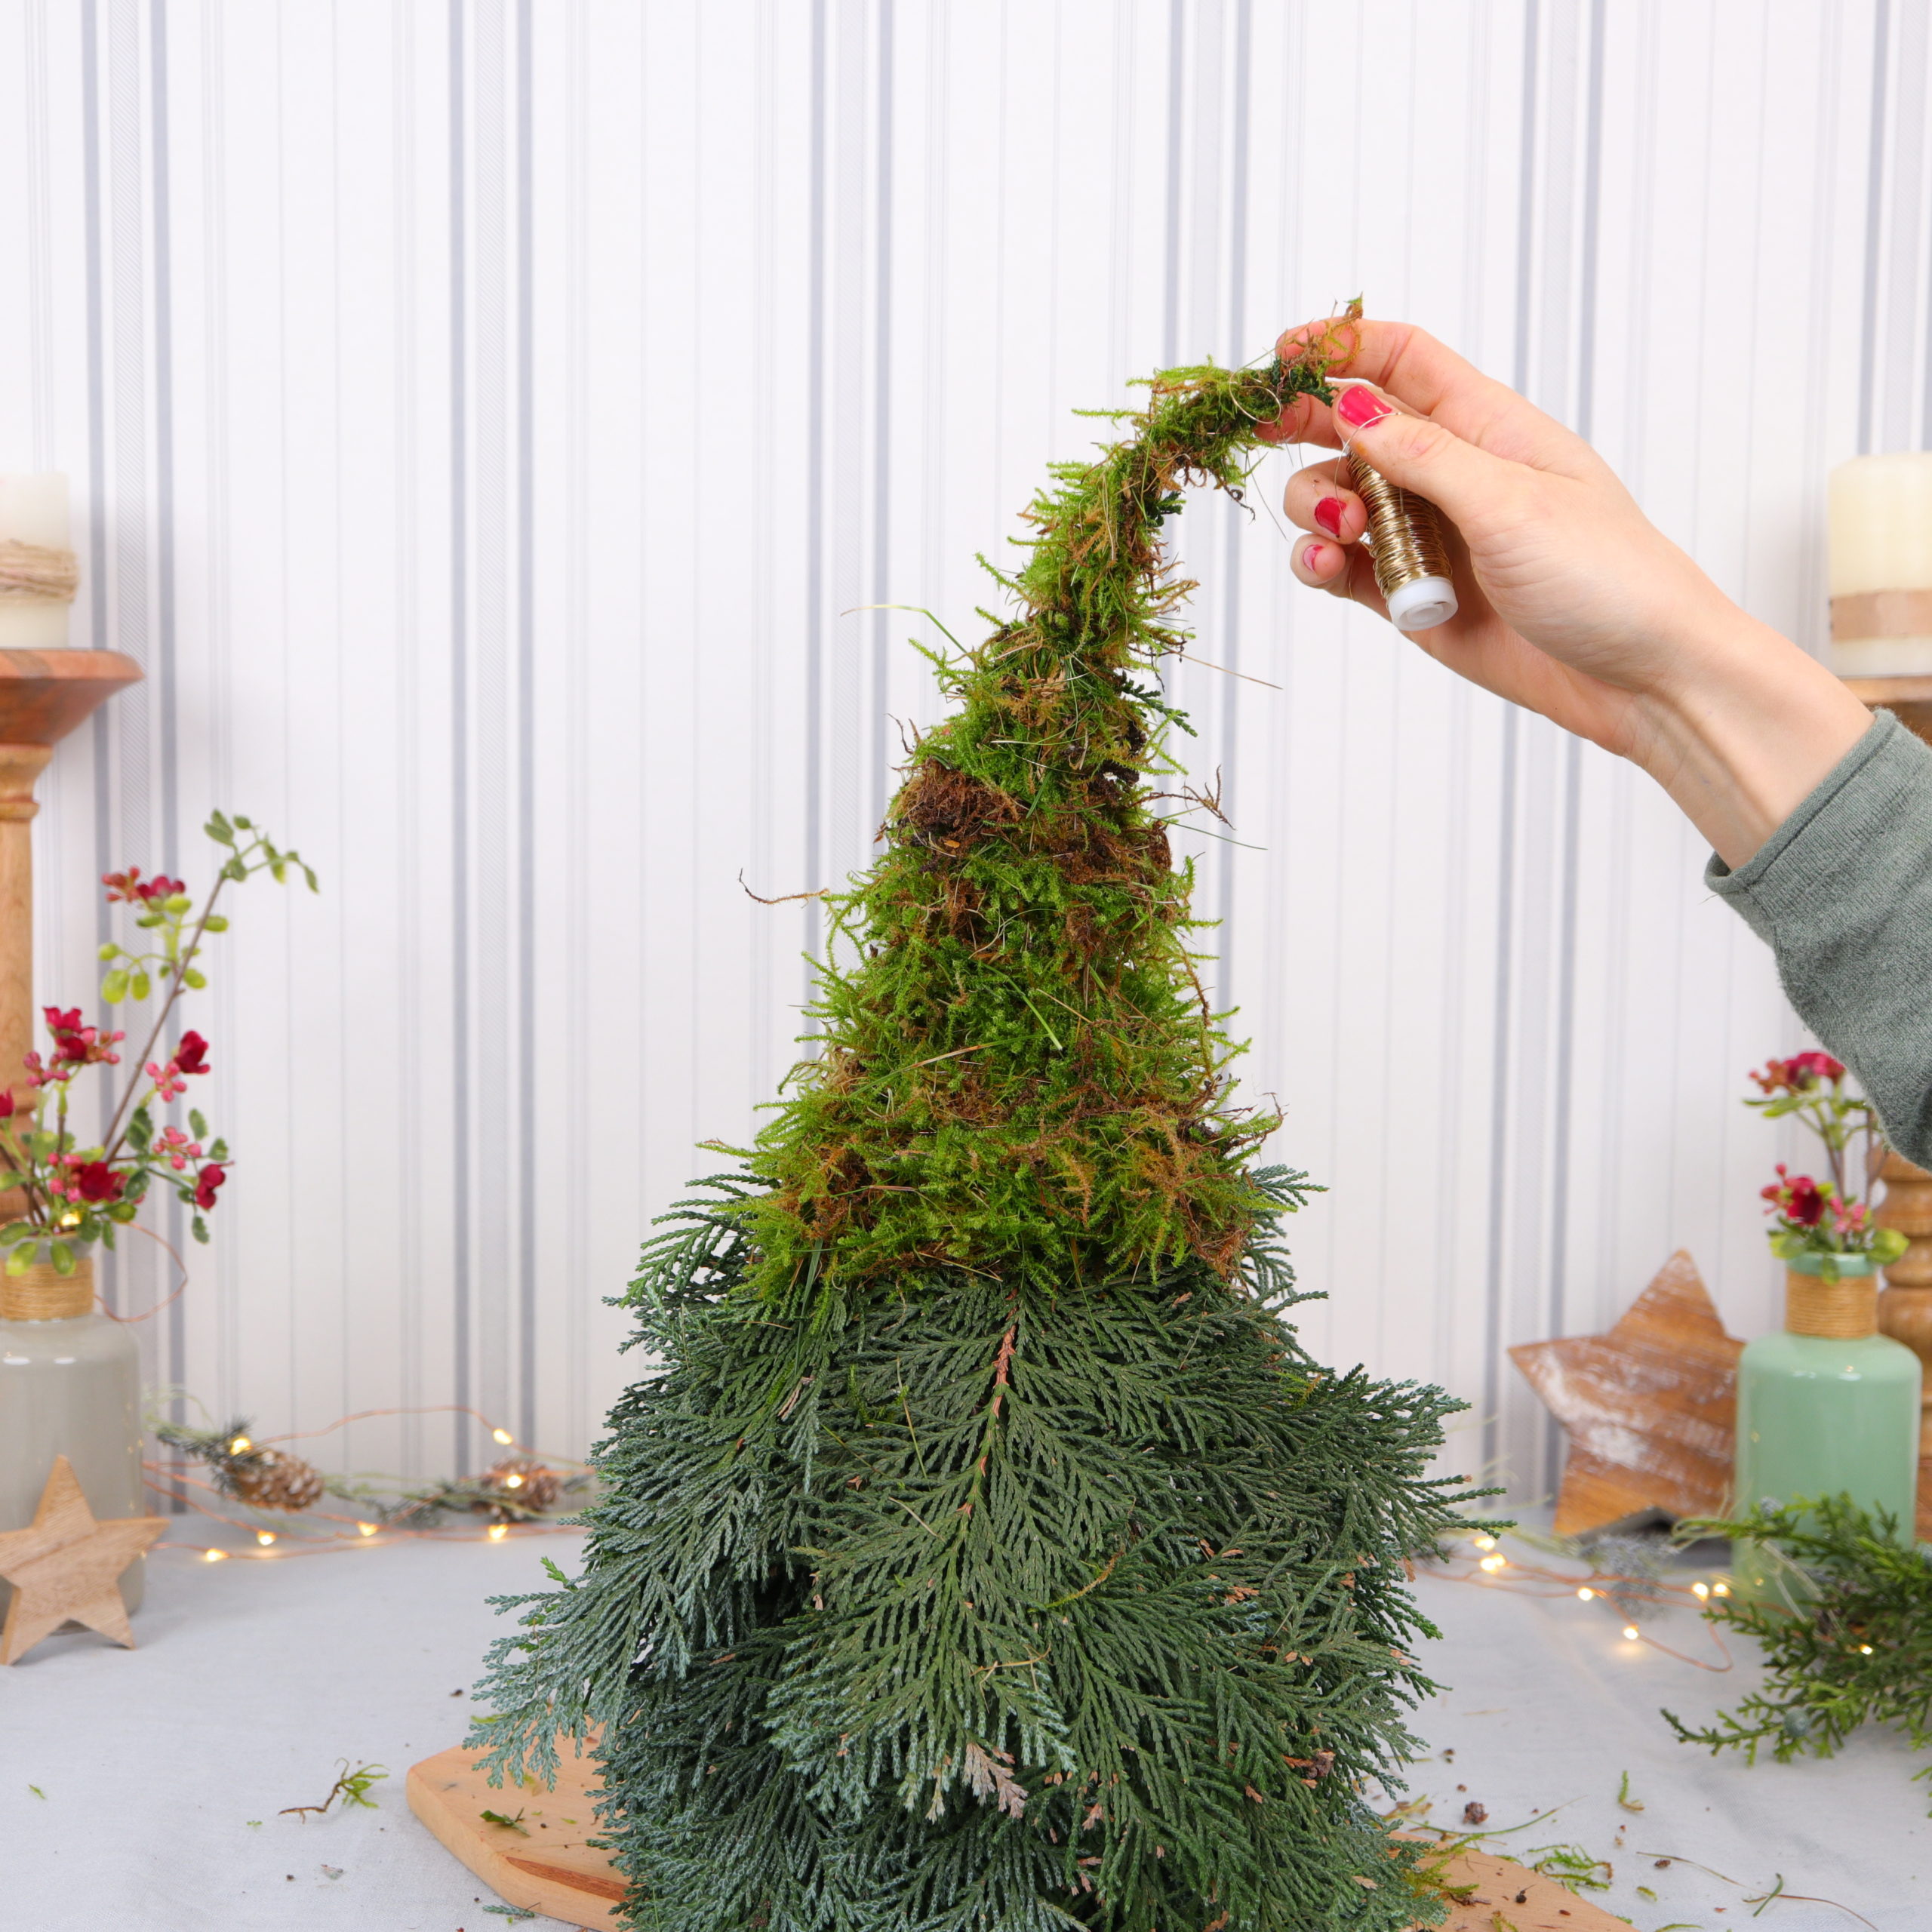
Now, I put moss around this branch again and wrap it with the wire until I have reached the end of the branch.
I cut the wire with the scissors and stuck the end into the moss.
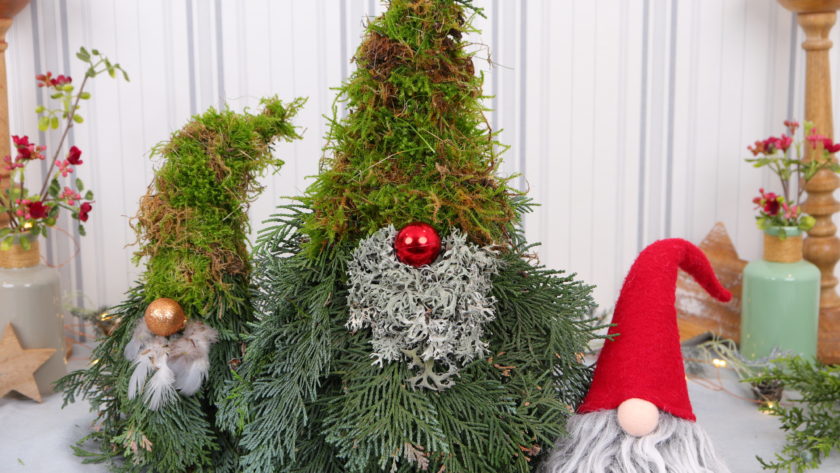
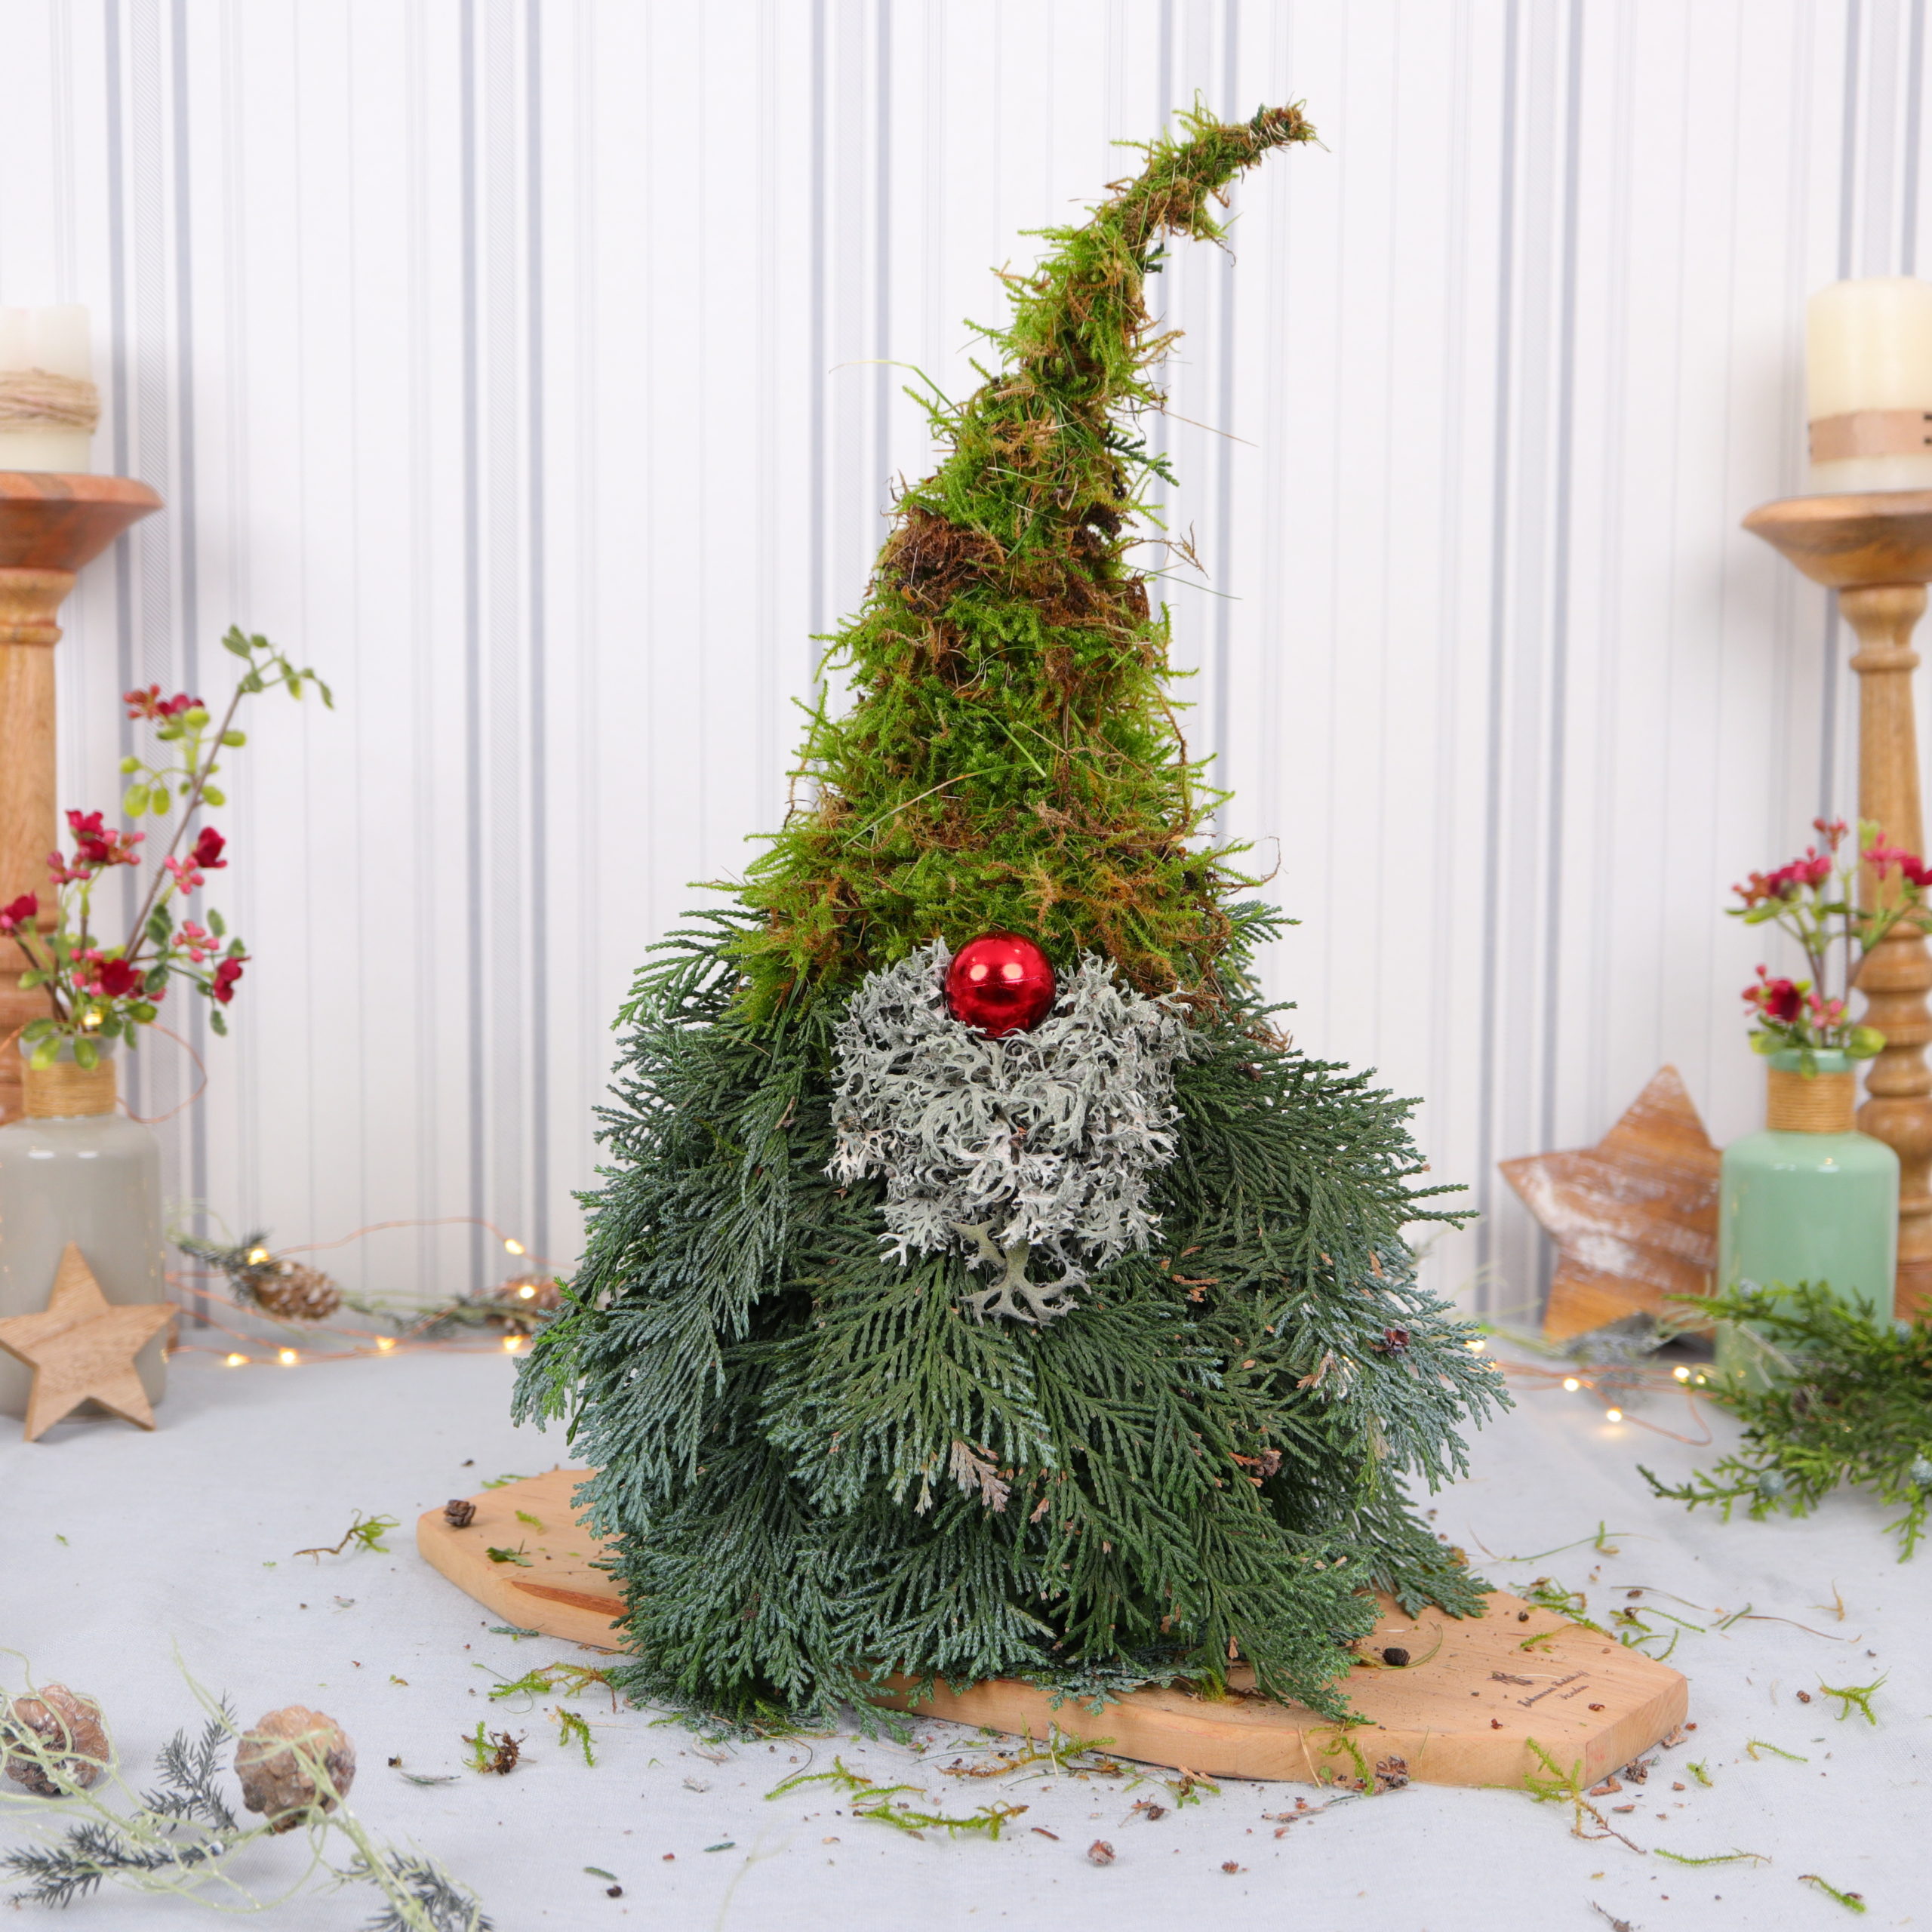
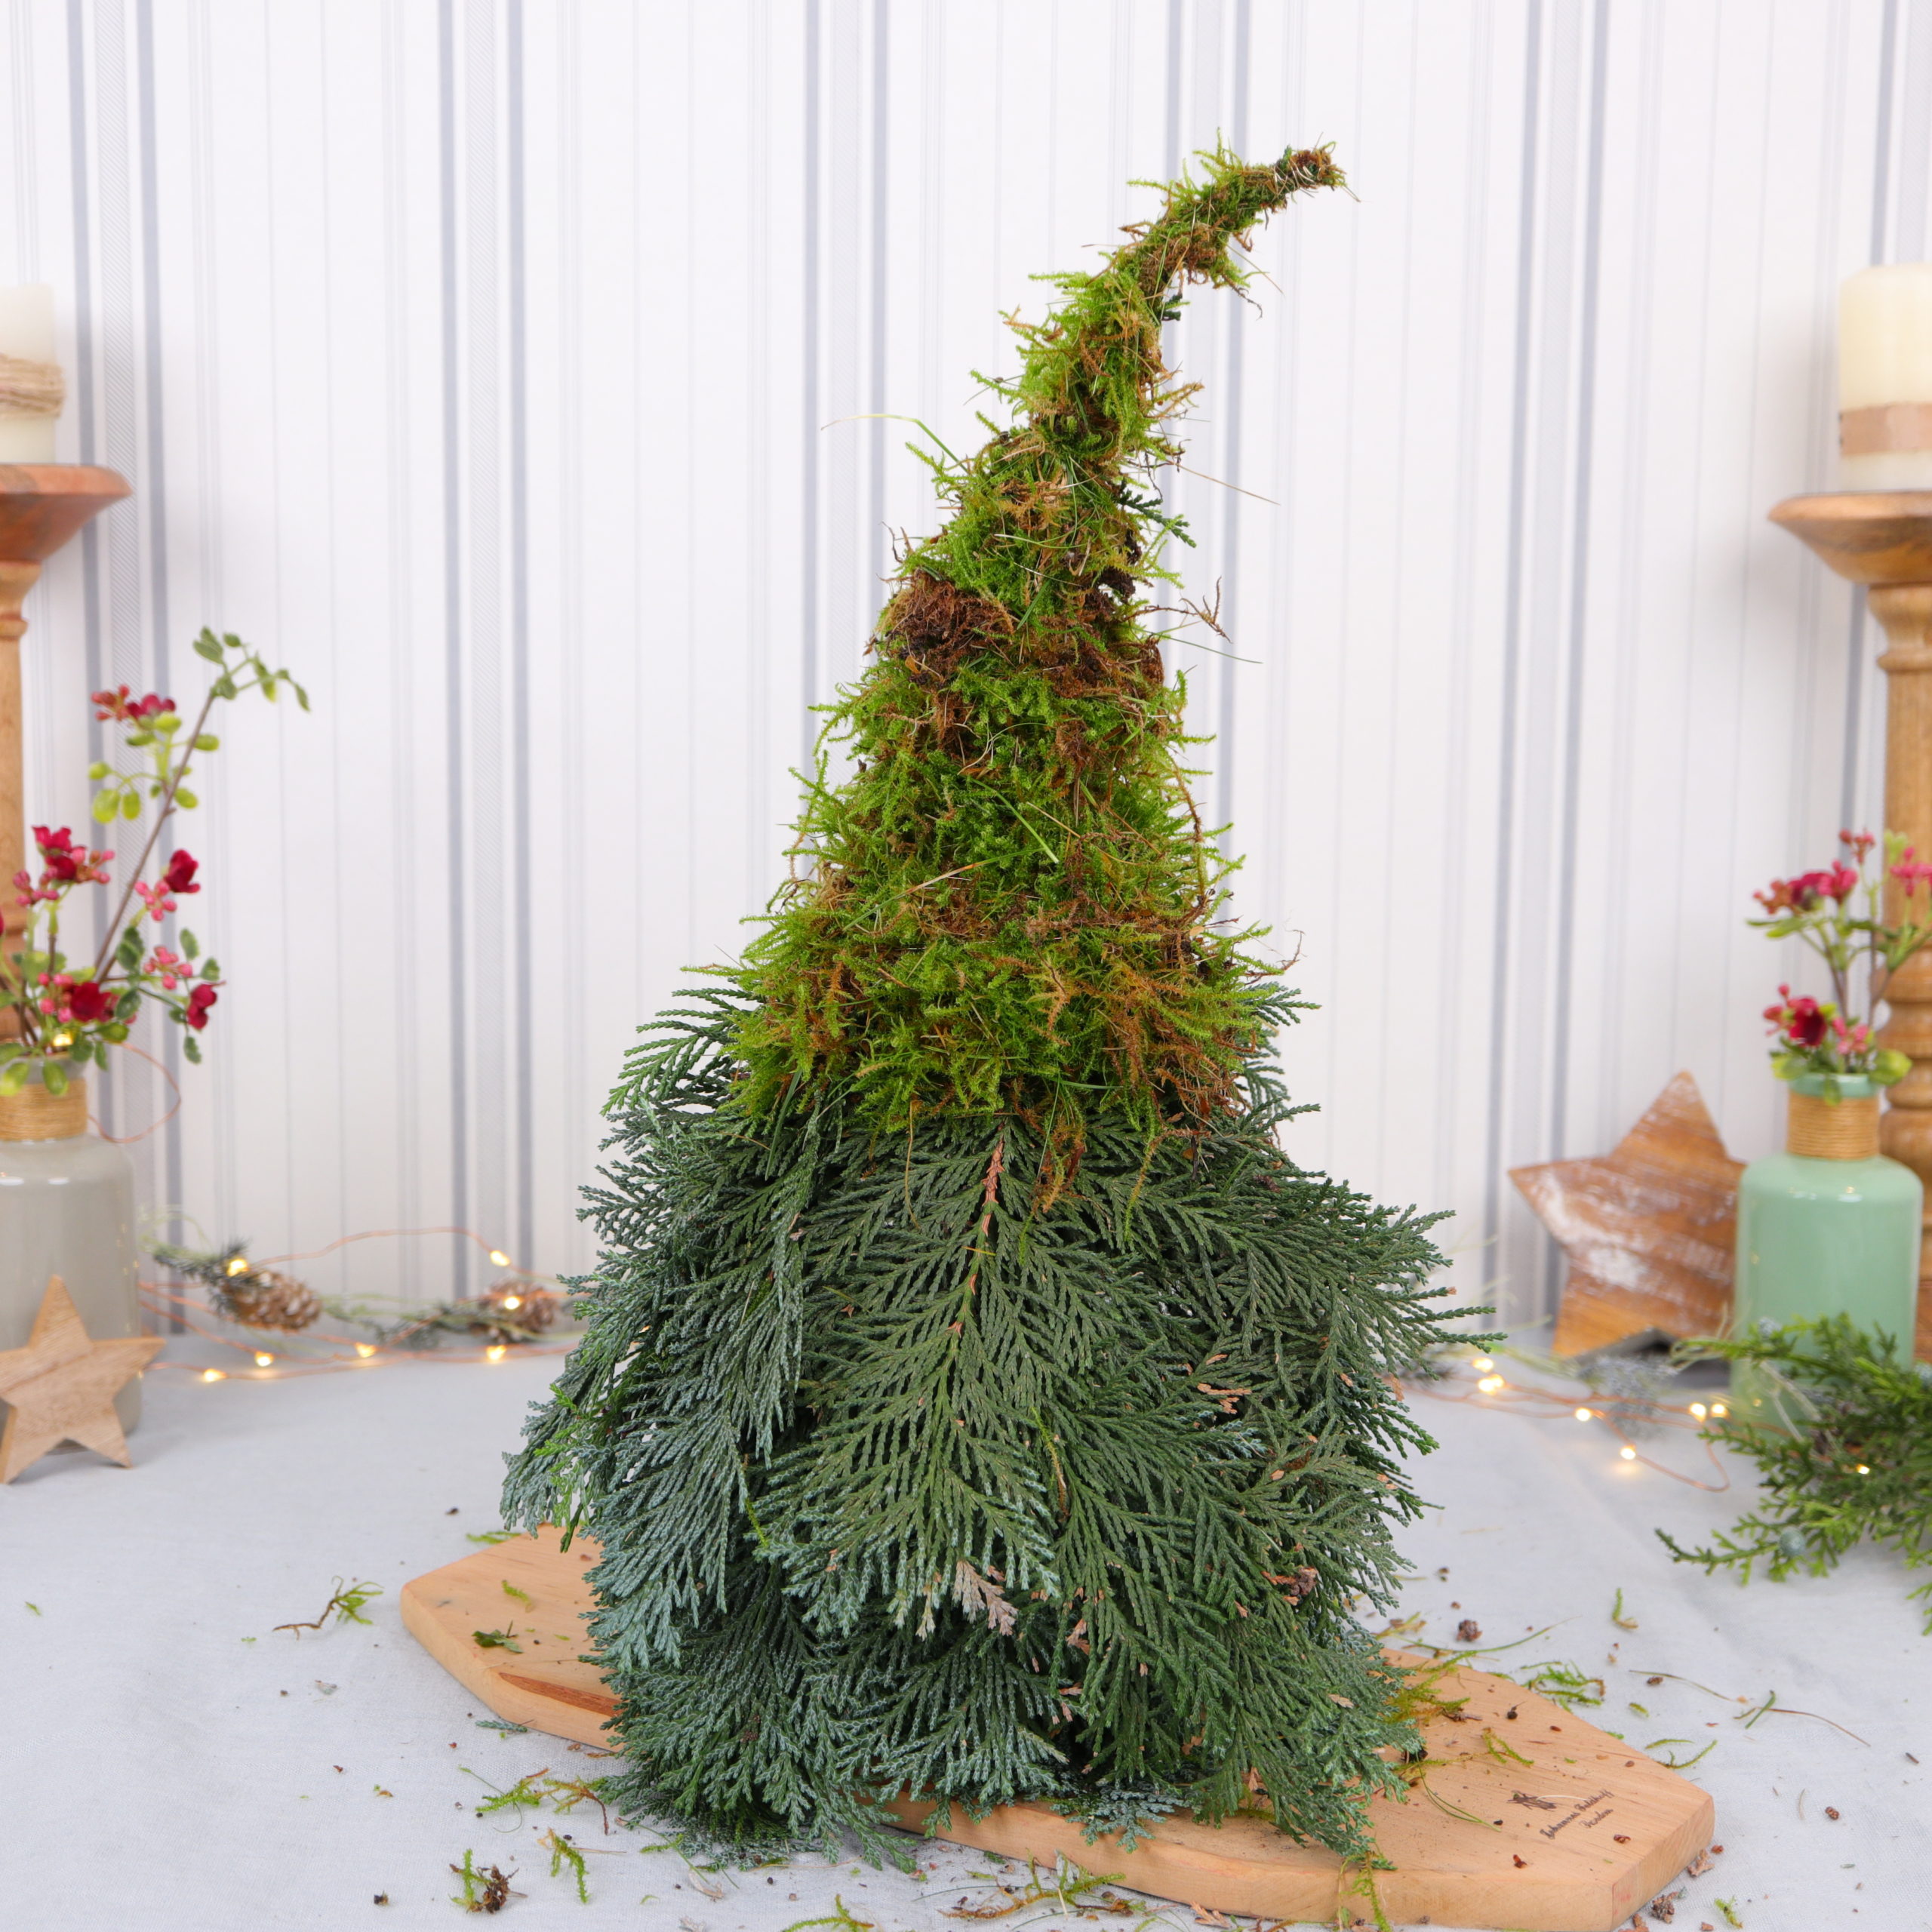
So far the gnome looks like this:
Step 4: Attach the Christmas ball as a nose
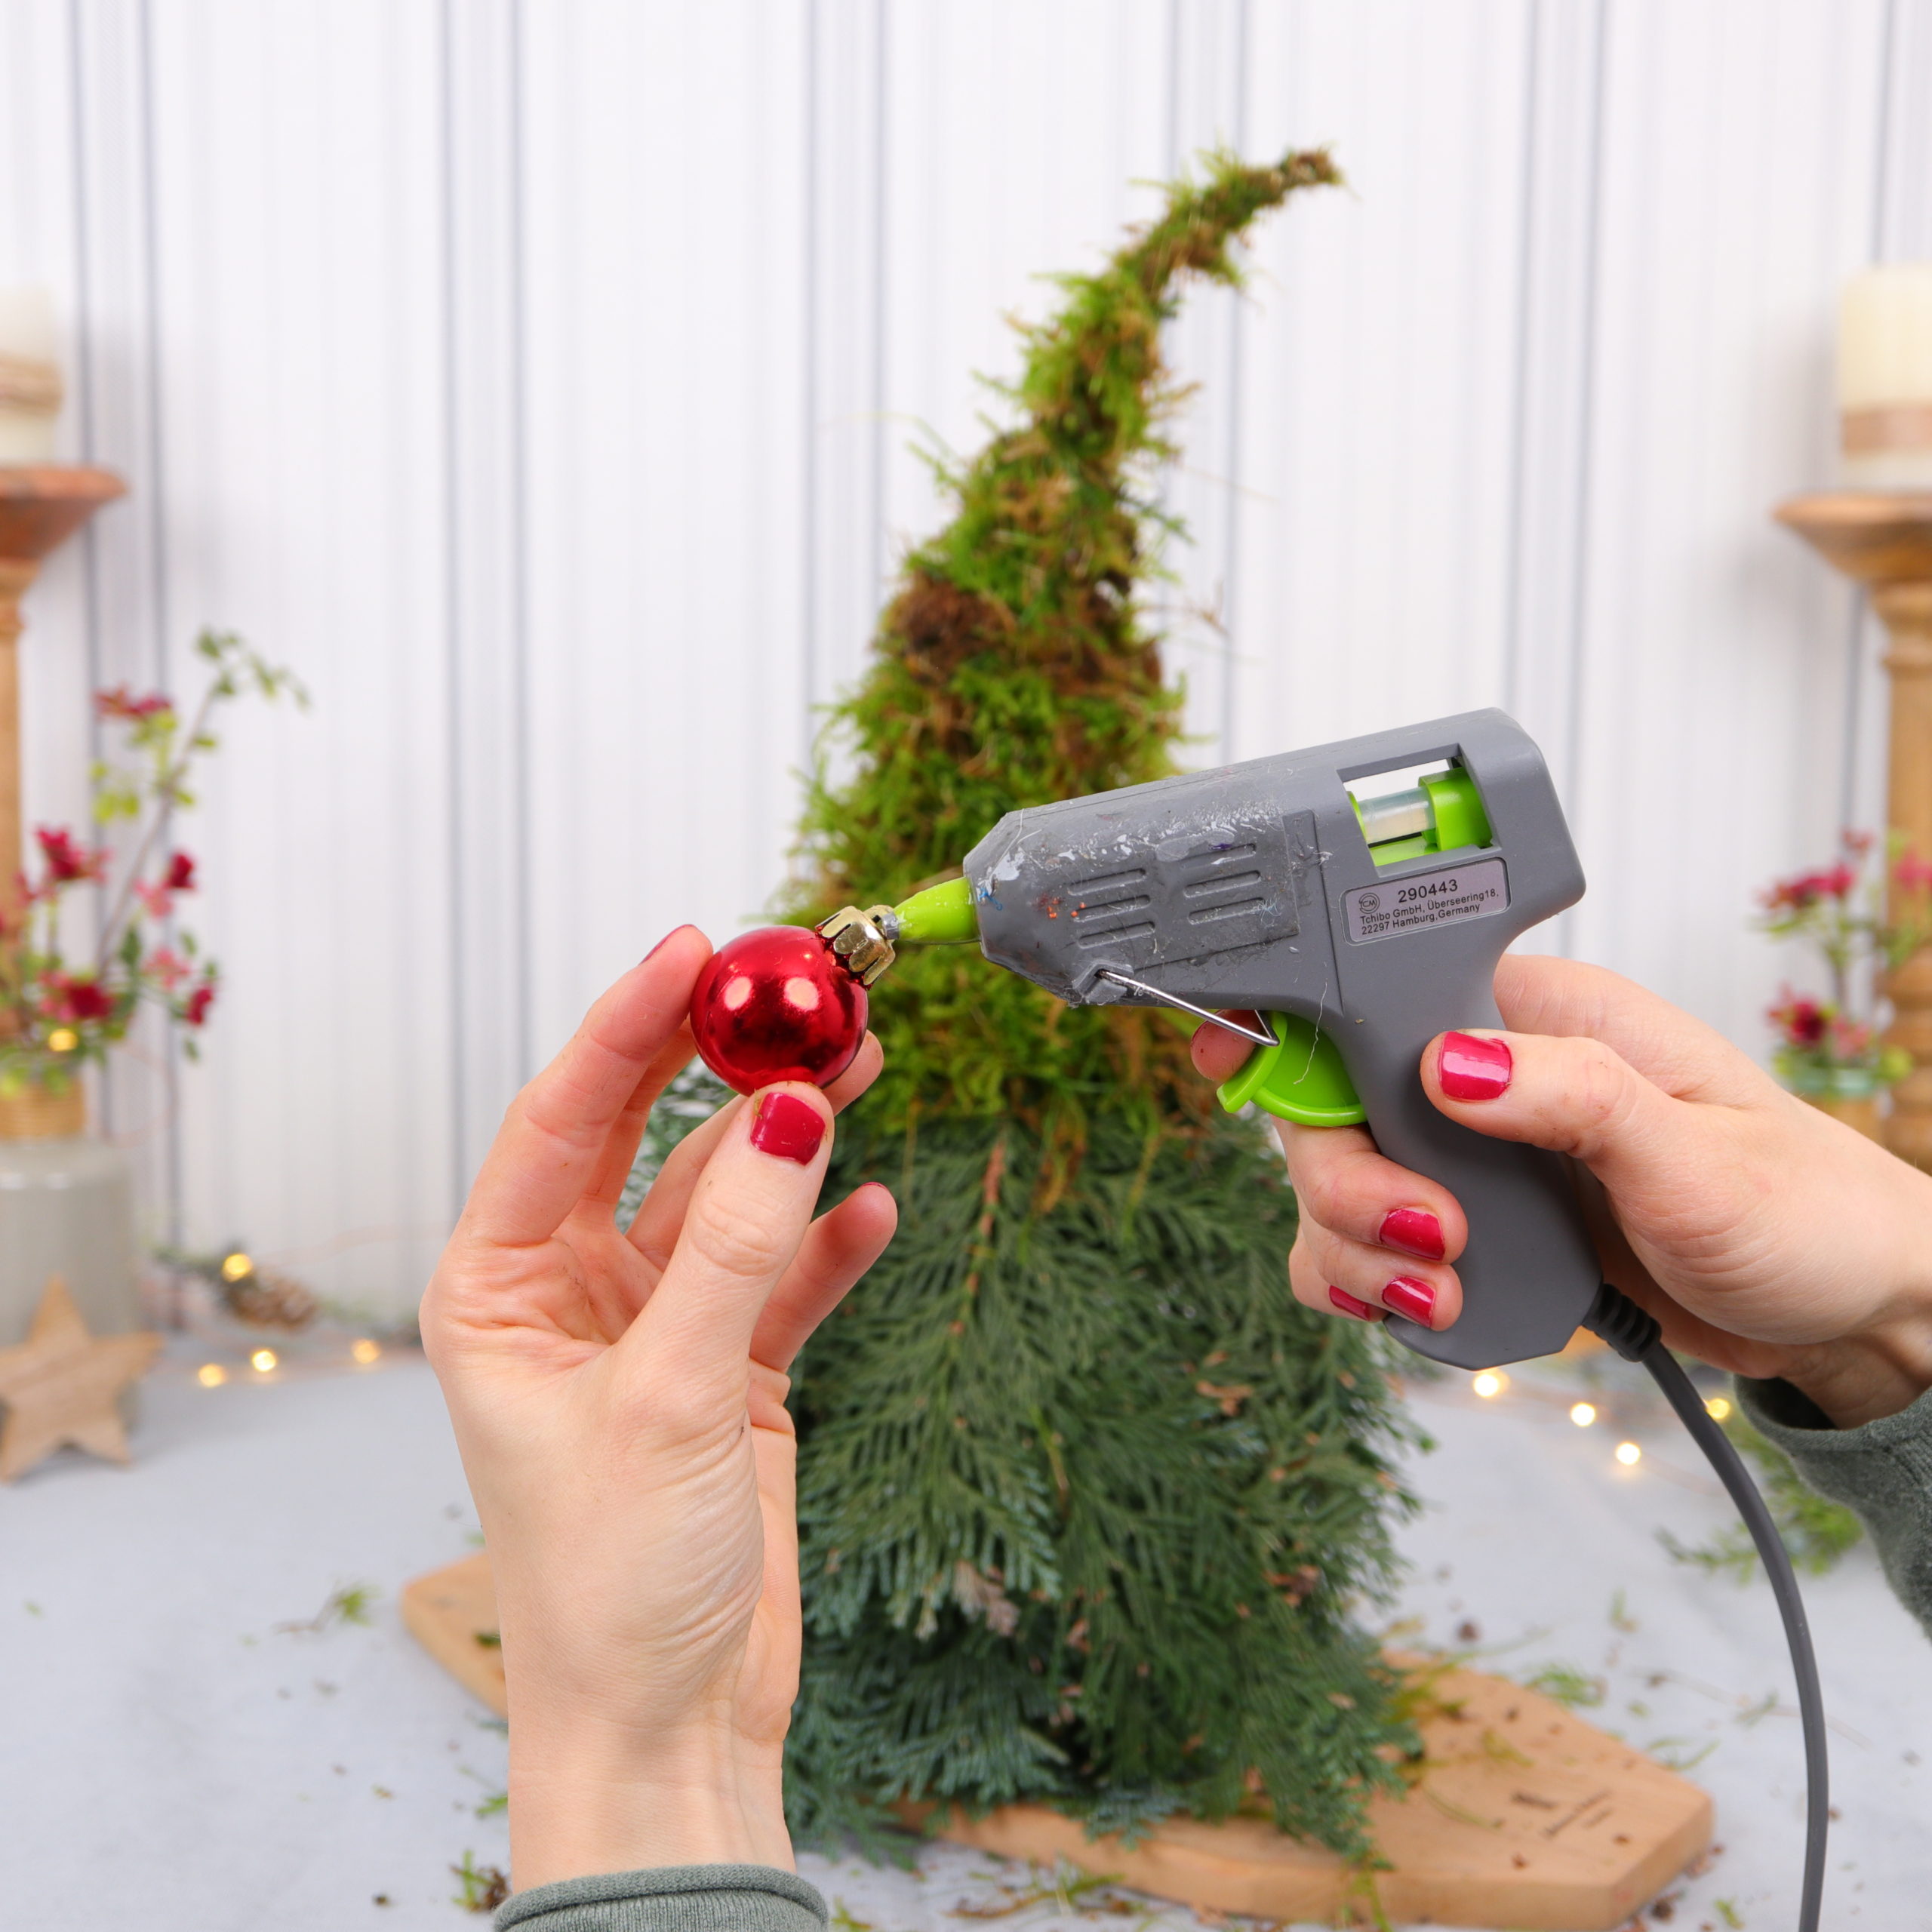
Now I take my hot glue gun and glue the red Christmas ball as a nose under the moss hat on the branches.

Step 5: Attach lichen as a beard
In the last step I take care of the gnome beard. I make this out of collected lichen that we found on the forest floor. You could also use feathers, pine cones or pampas grass as a beard, for example.

Now I simply glue the lichen pieces onto the branches with hot glue.


And the Christmas gnome made of natural materials is ready! I hope you had as much fun with this DIY as I did and that you enjoy looking at the winter decorations!