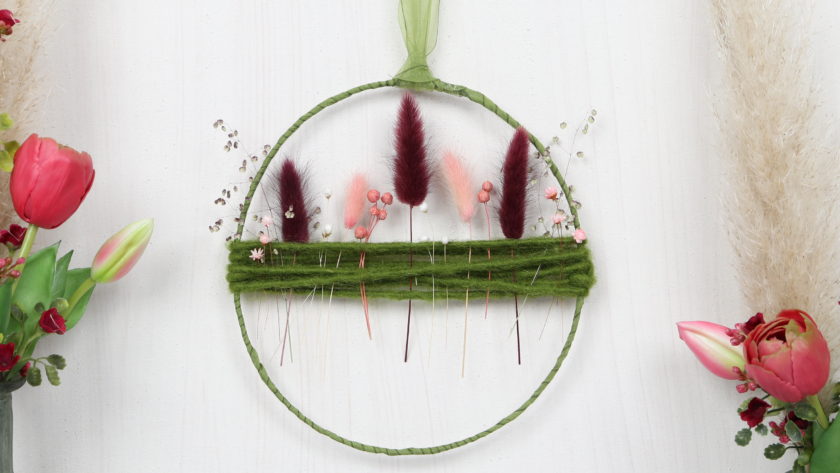
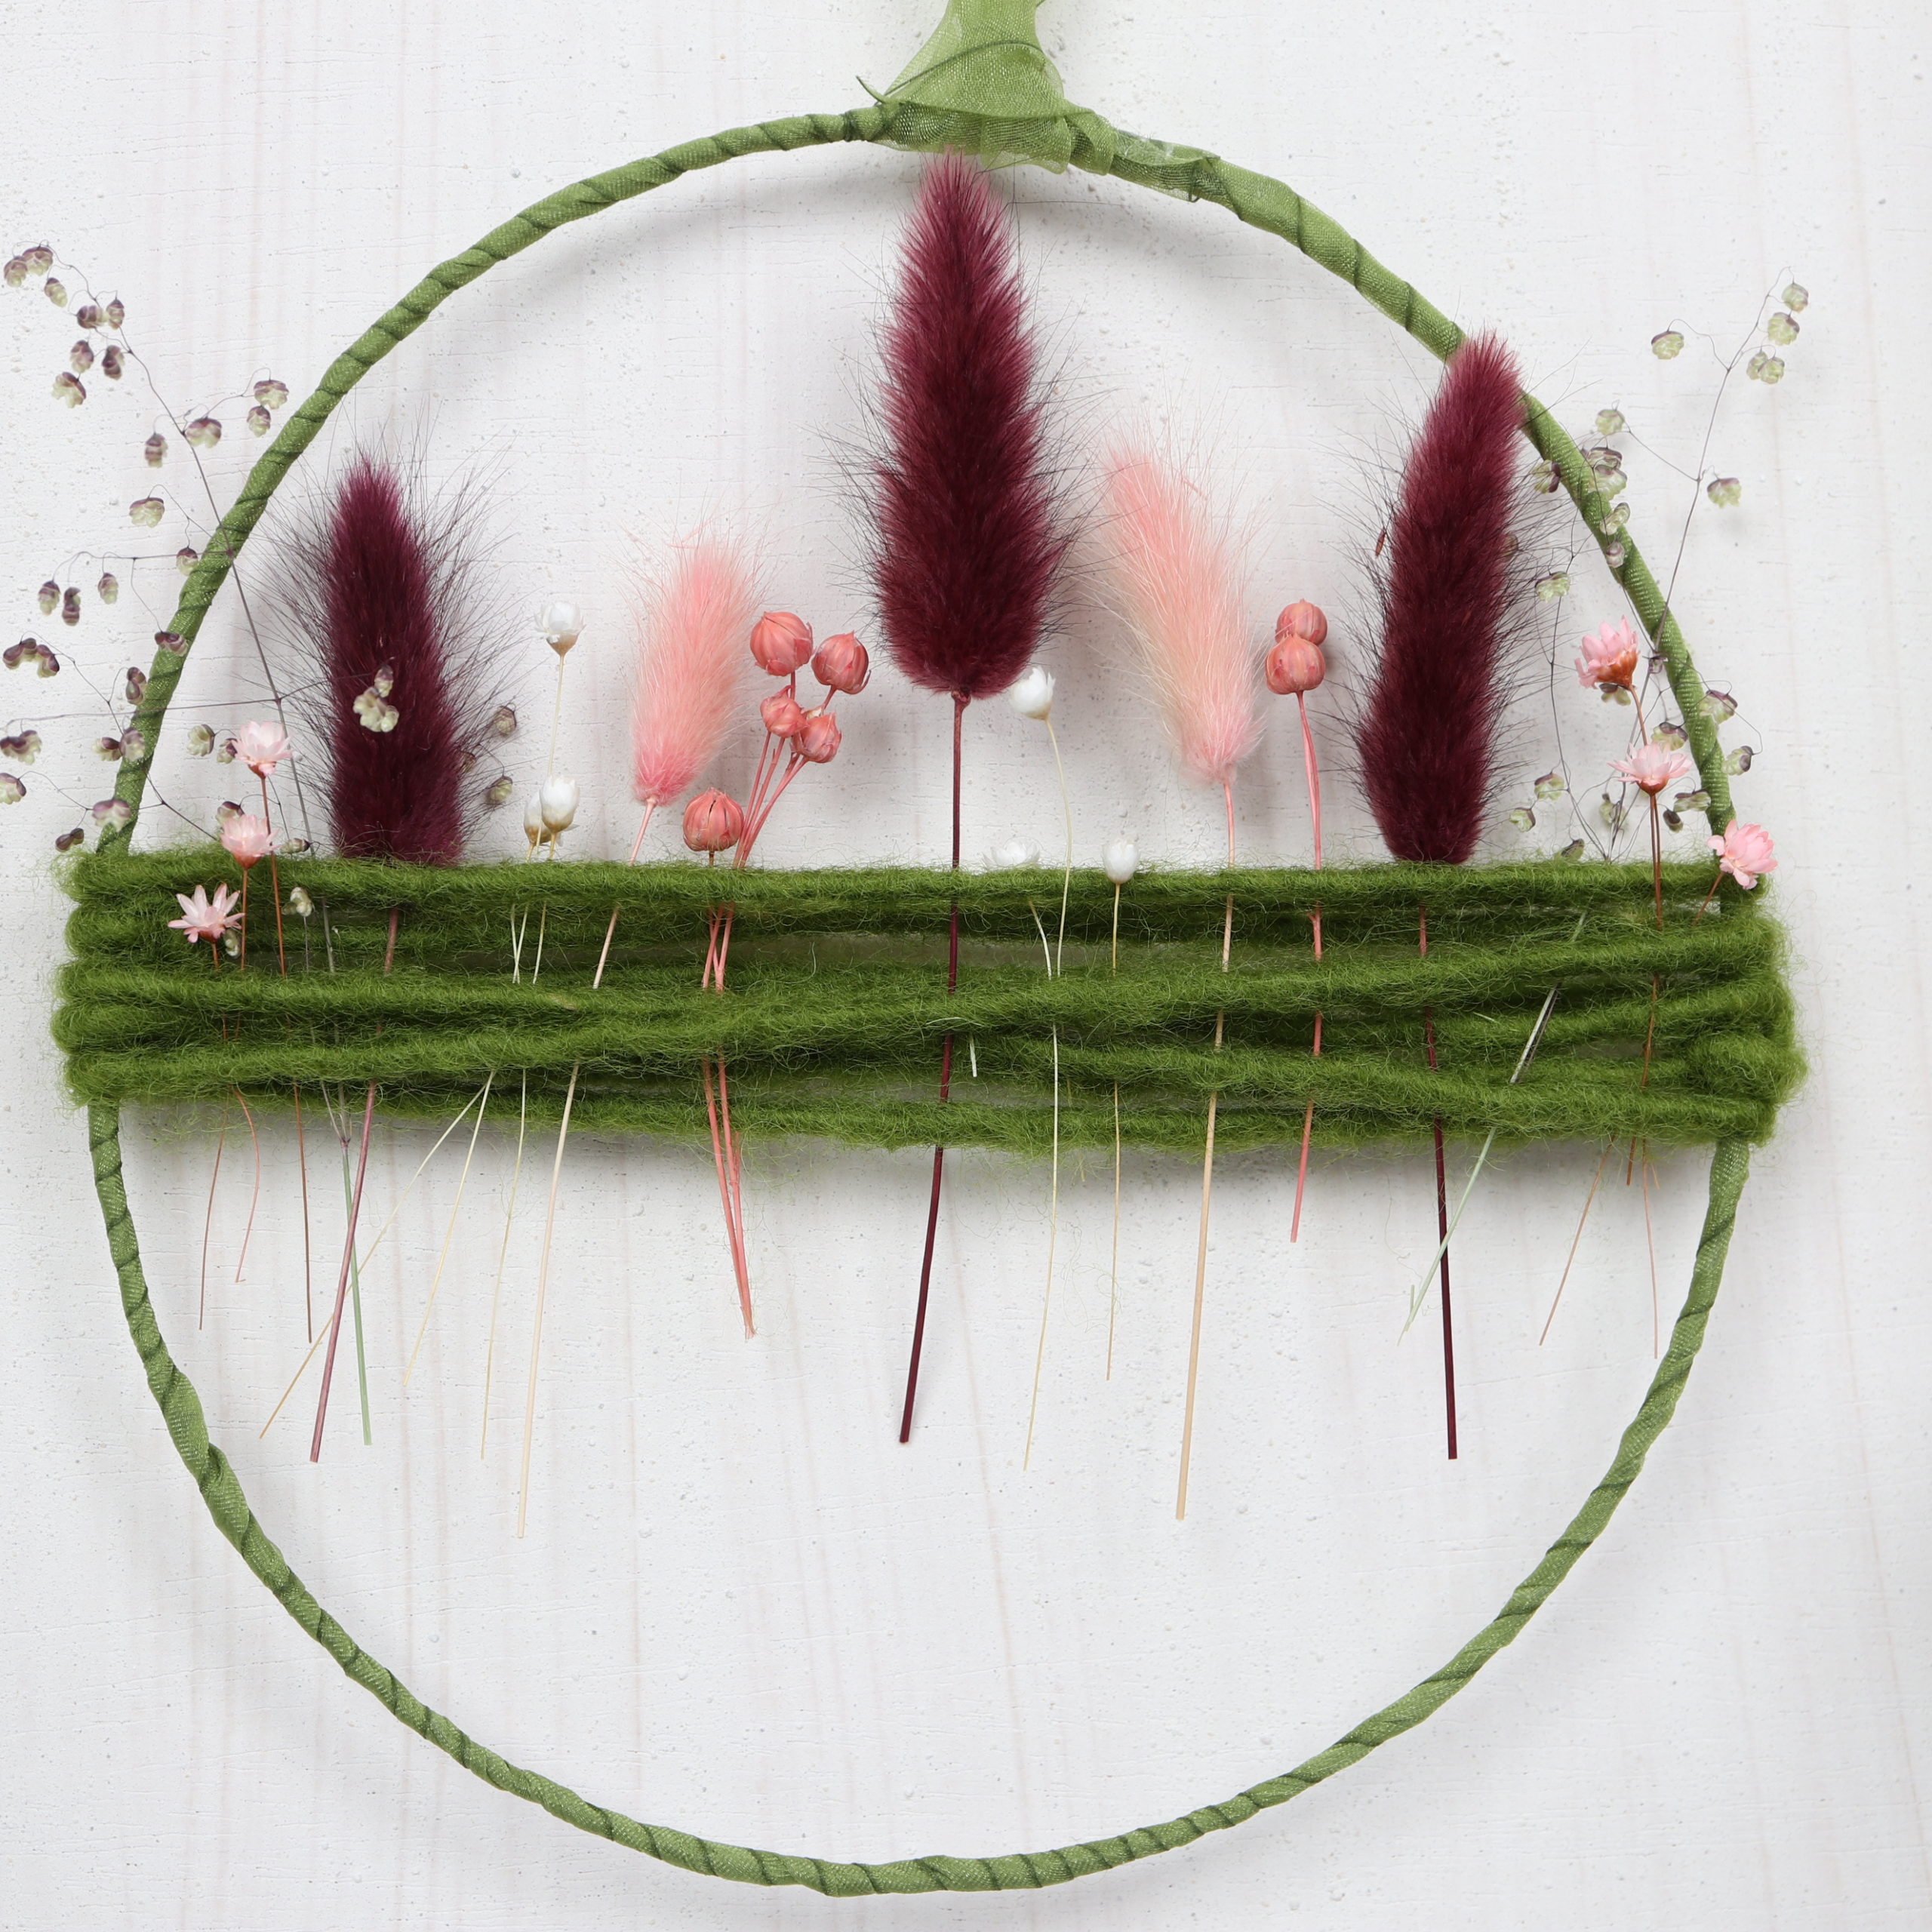
With today’s DIY I show you how to create a beautiful hanging decoration from a metal ring and dried flowers. The flower ring can quickly and easily made by wrapping the metal ring with an organza ribbon and a wool cord. The dried flowers are then just stuck between the cord.
The ring with flower decoration beautifies windows, doors or walls and is also great as a gift idea. With the following step by step instructions, you can easily make the metal ring with dried flowers yourself! For this you need the following tools and materials:
Tools
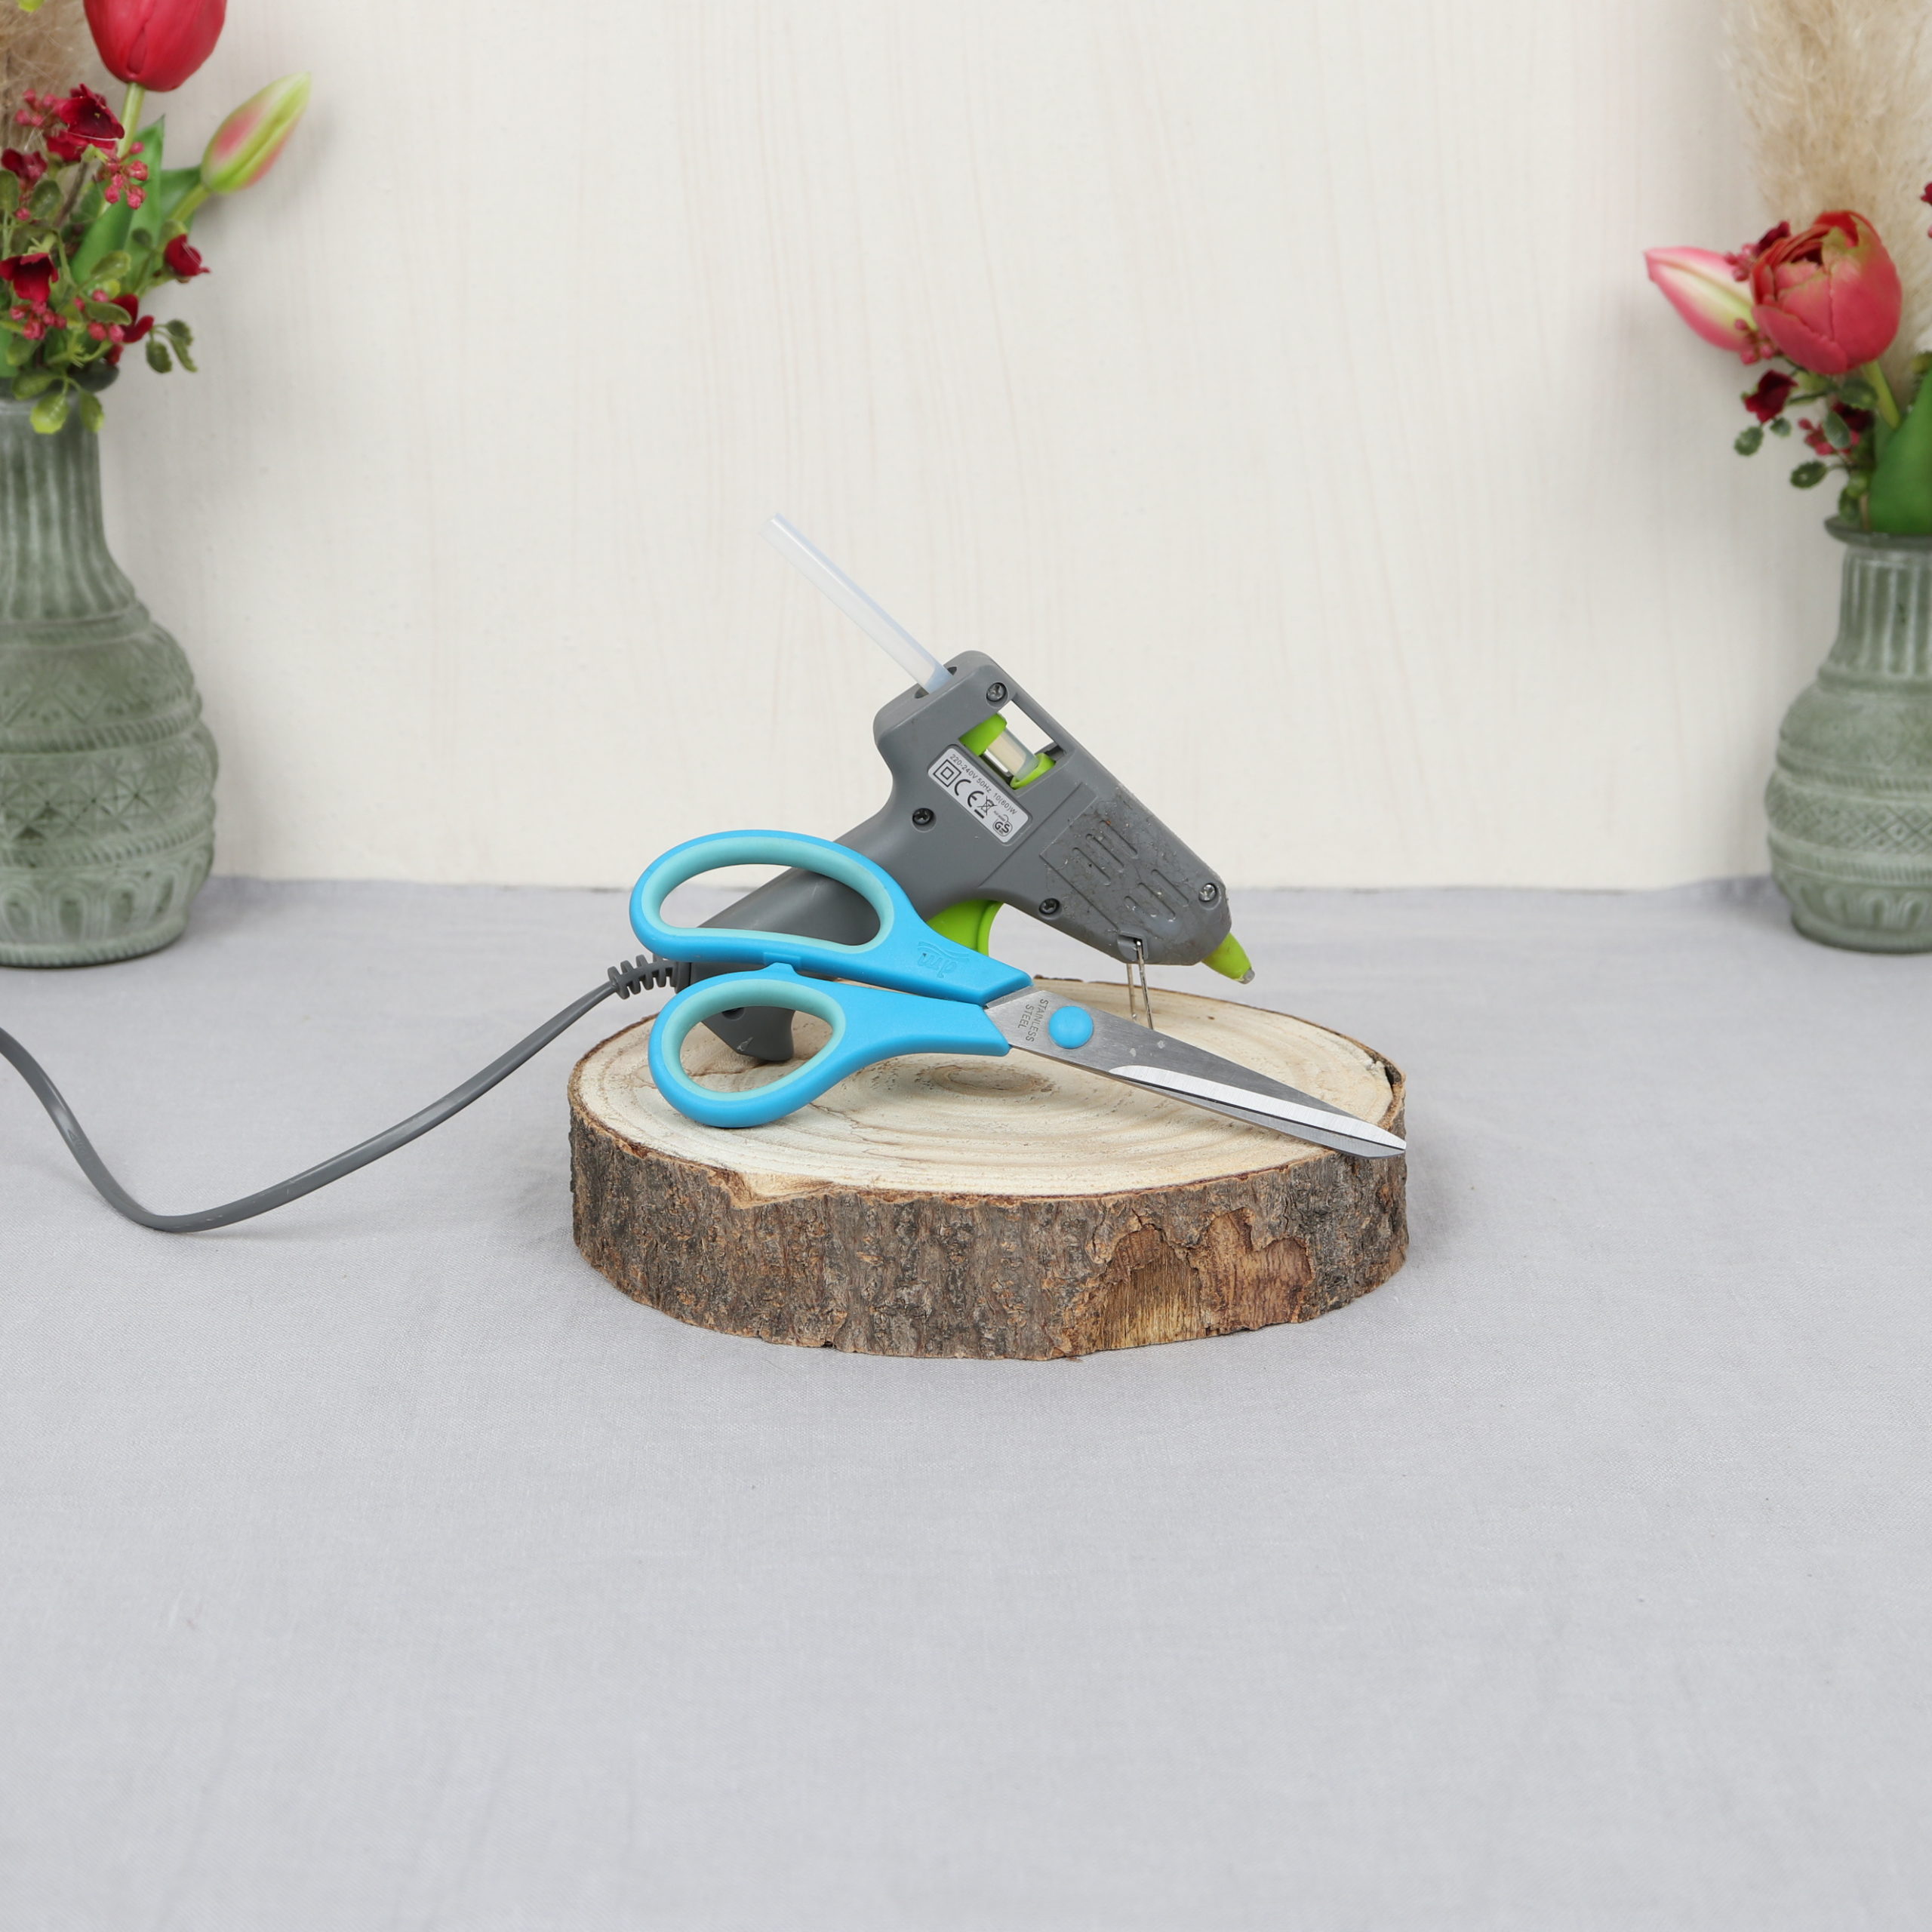
Here you can see what tools I used for the metal ring with dried flowers. You need a hot glue gun with hot glue sticks and scissors.
Materials
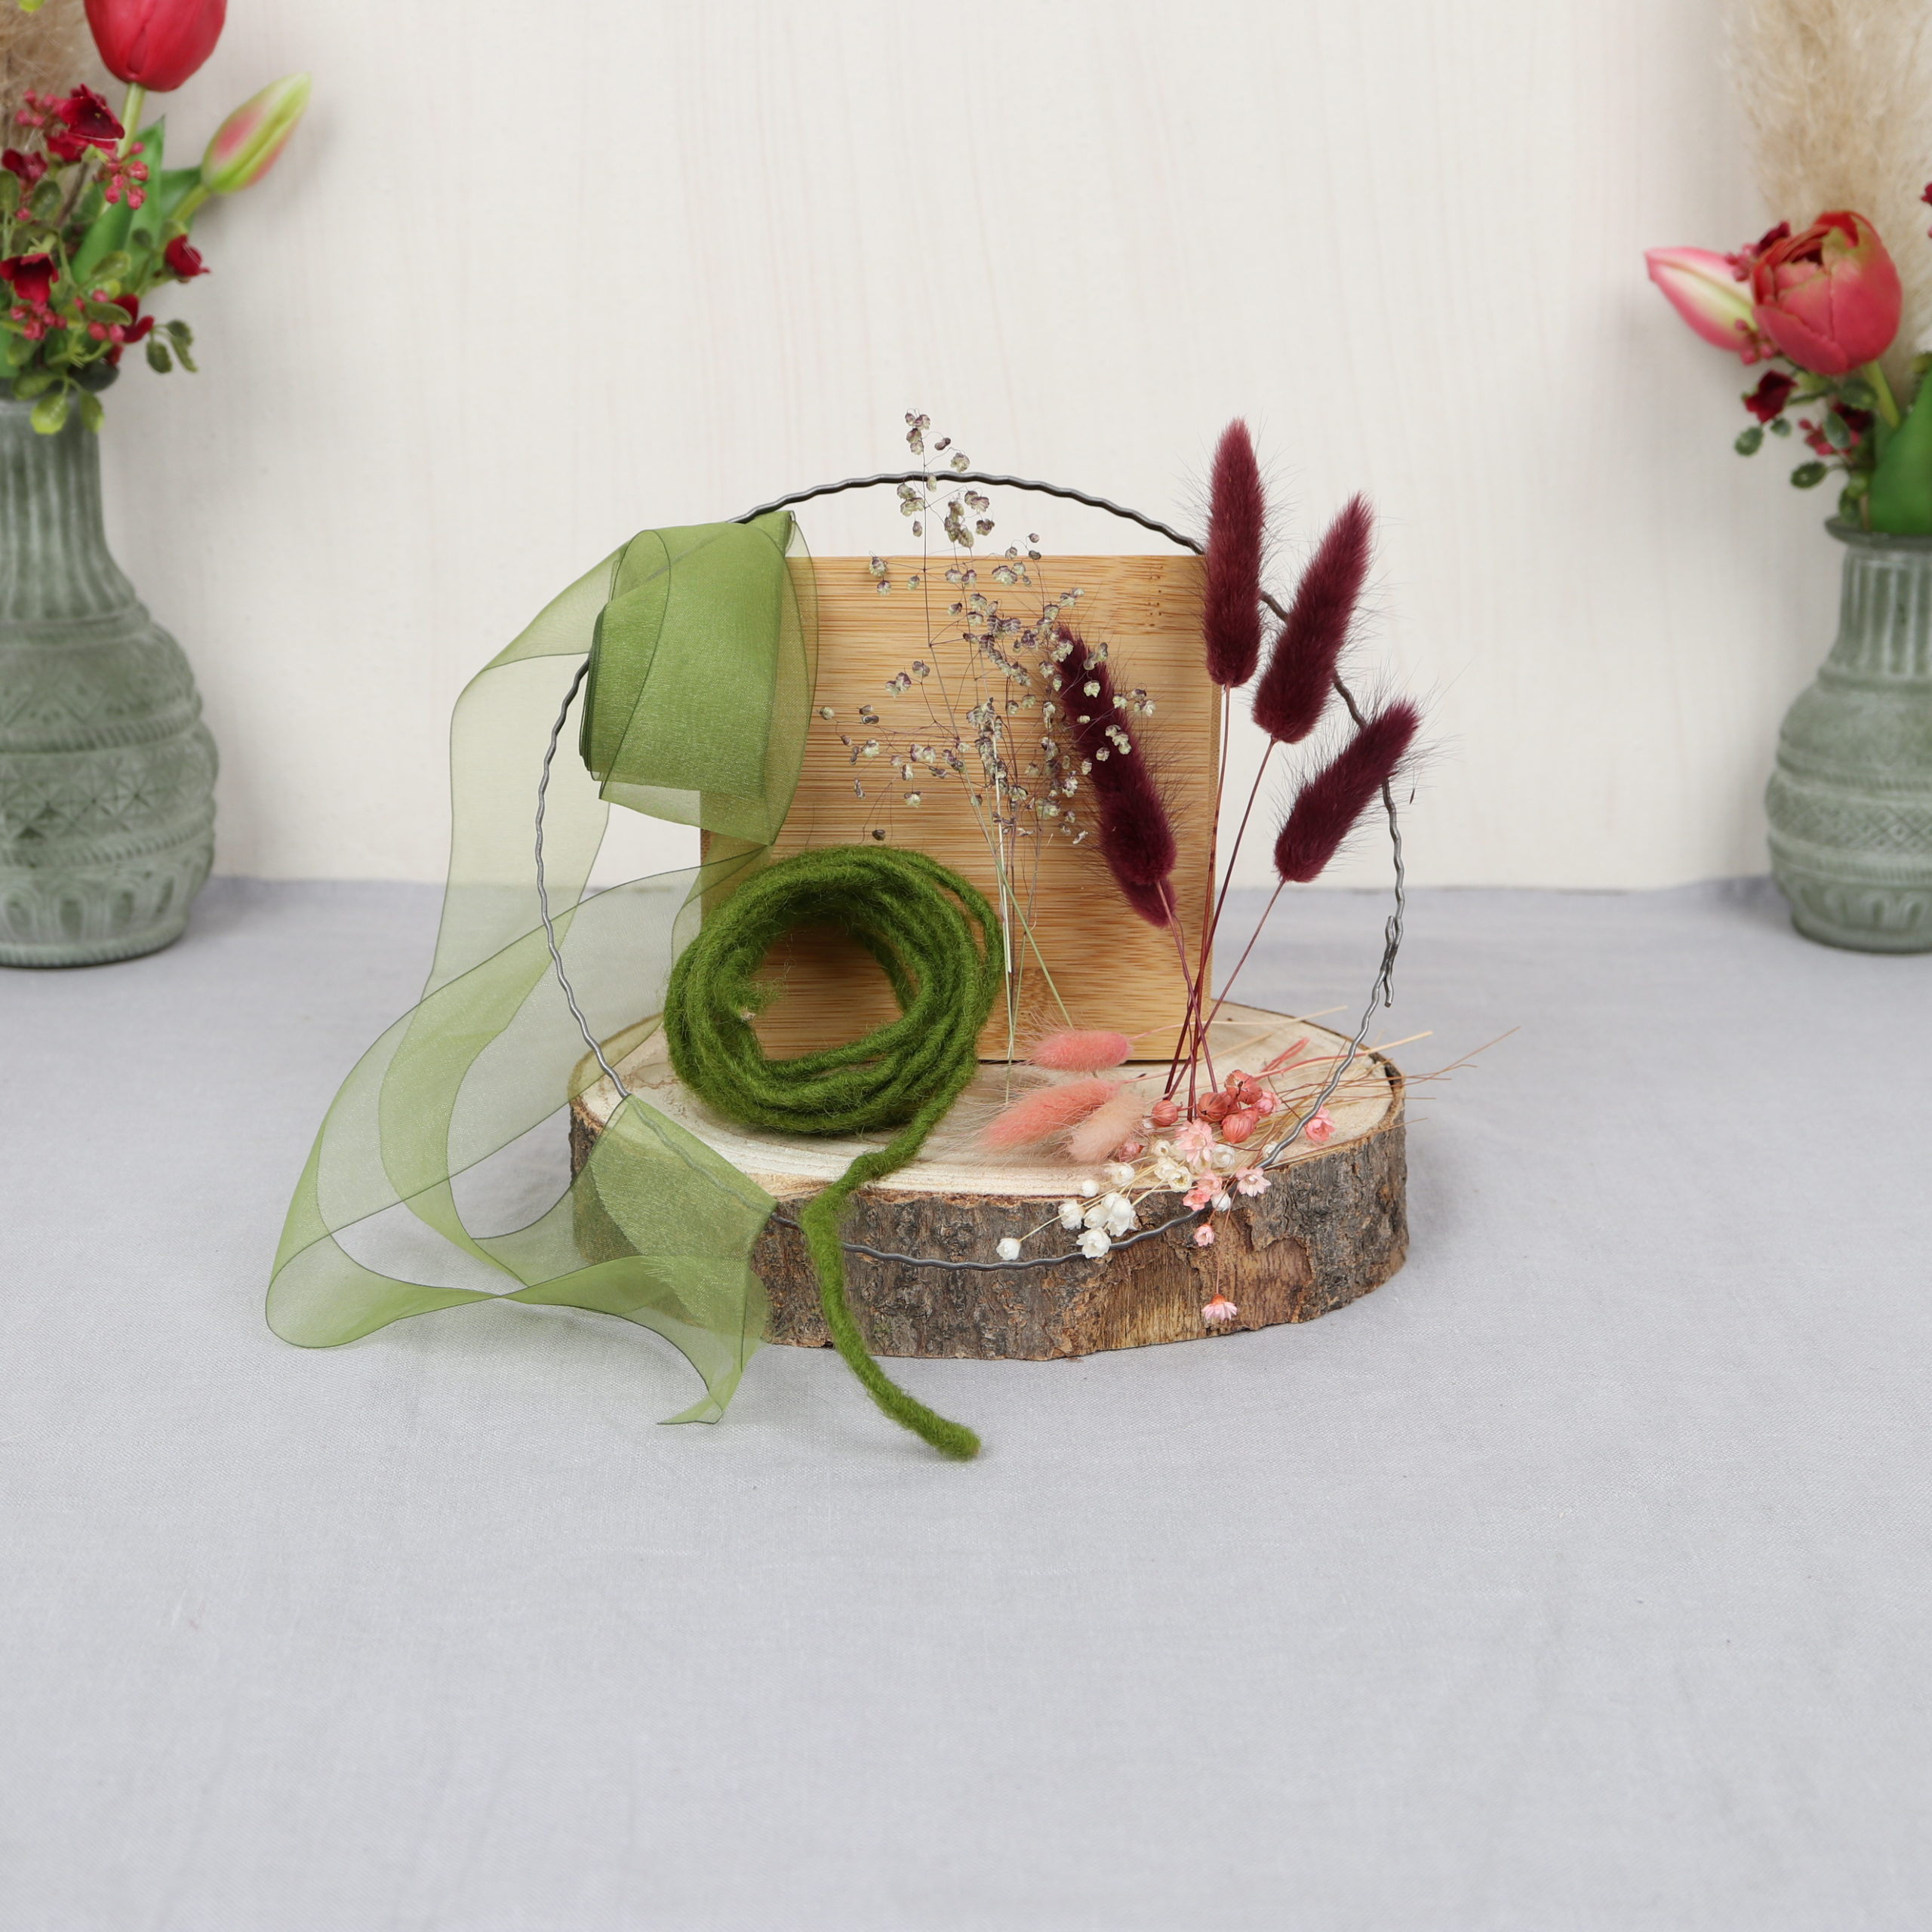
I used these materials for the flower ring: a metal ring (my ring has a diameter of 20 cm), organza ribbon in olive green, a wool cord in olive green and dried flowers. Among other things, for this DIY I used dried phalaris and shaking-grass which I picked in the meadow.
Guide| Metal ring with dried flowers
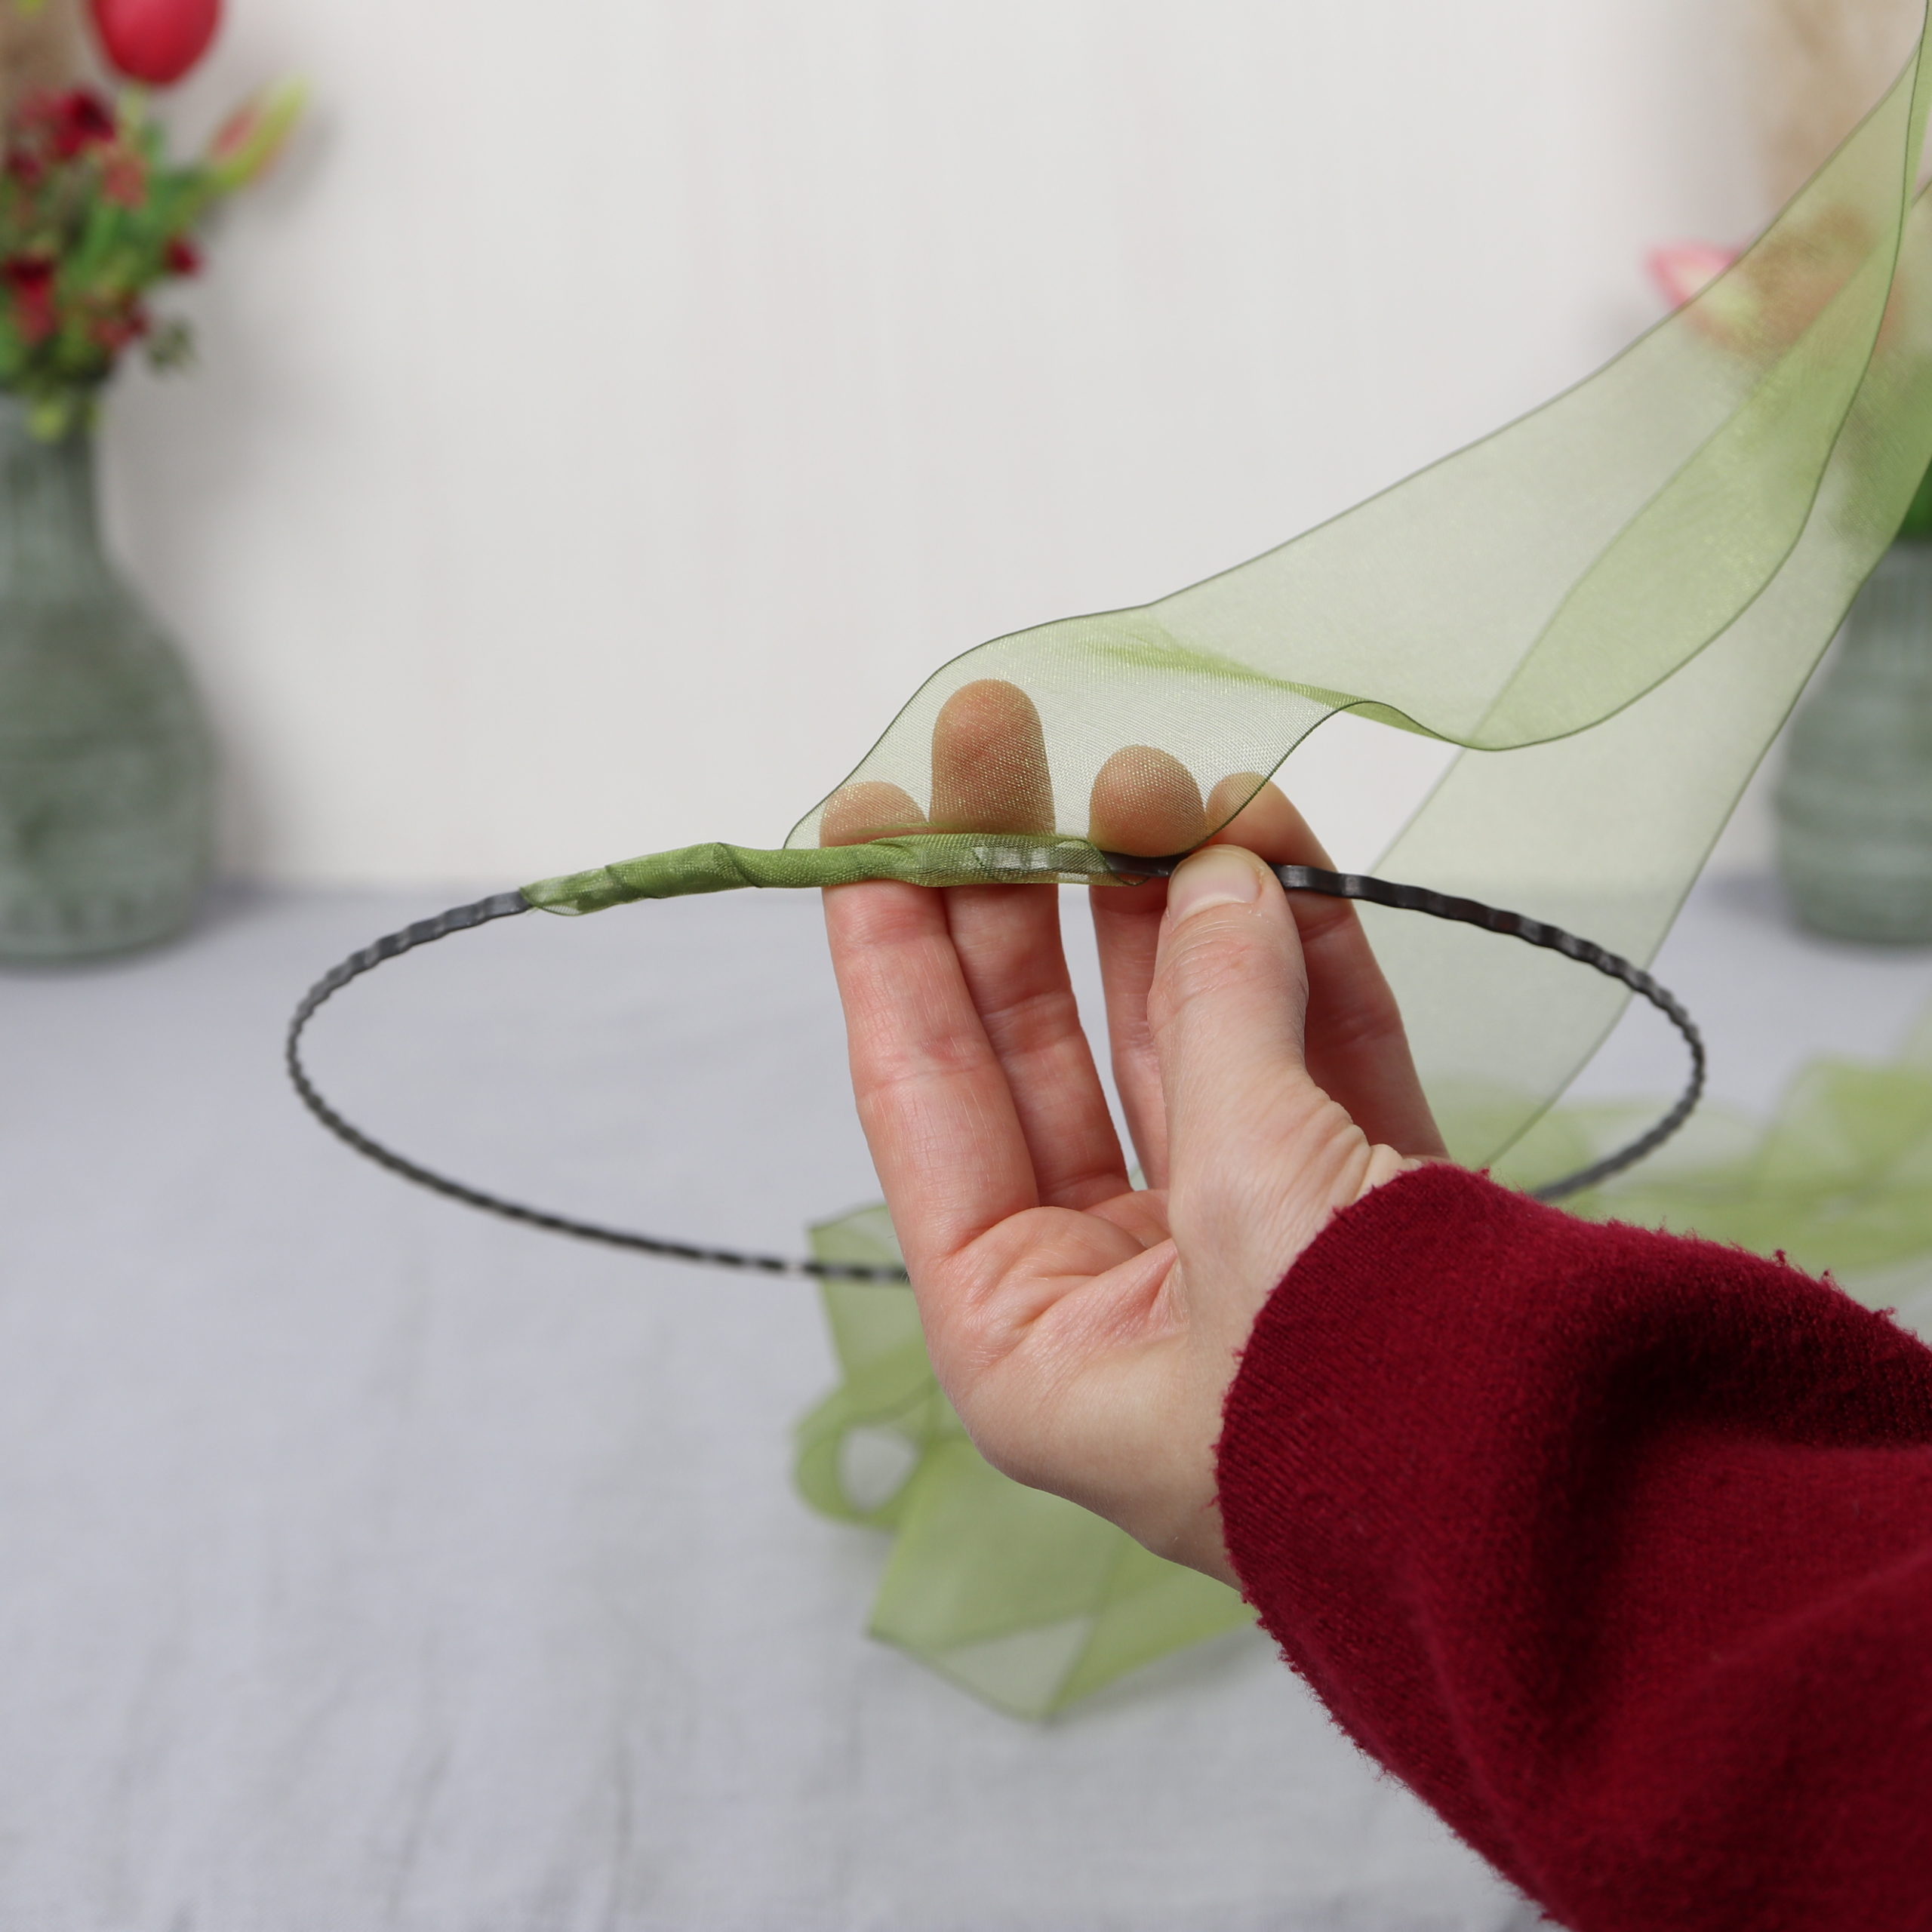
Step 1: Wrap ring with organza ribbon
In the first step, I wrap my ring with olive green organza ribbon. If you have a nice smooth ring that you like, you can skip this step. I wanted to hide the waves of my ring with the organza ribbon.

For this, I use my hot glue gun and glue the beginning of the ribbon to the ring.
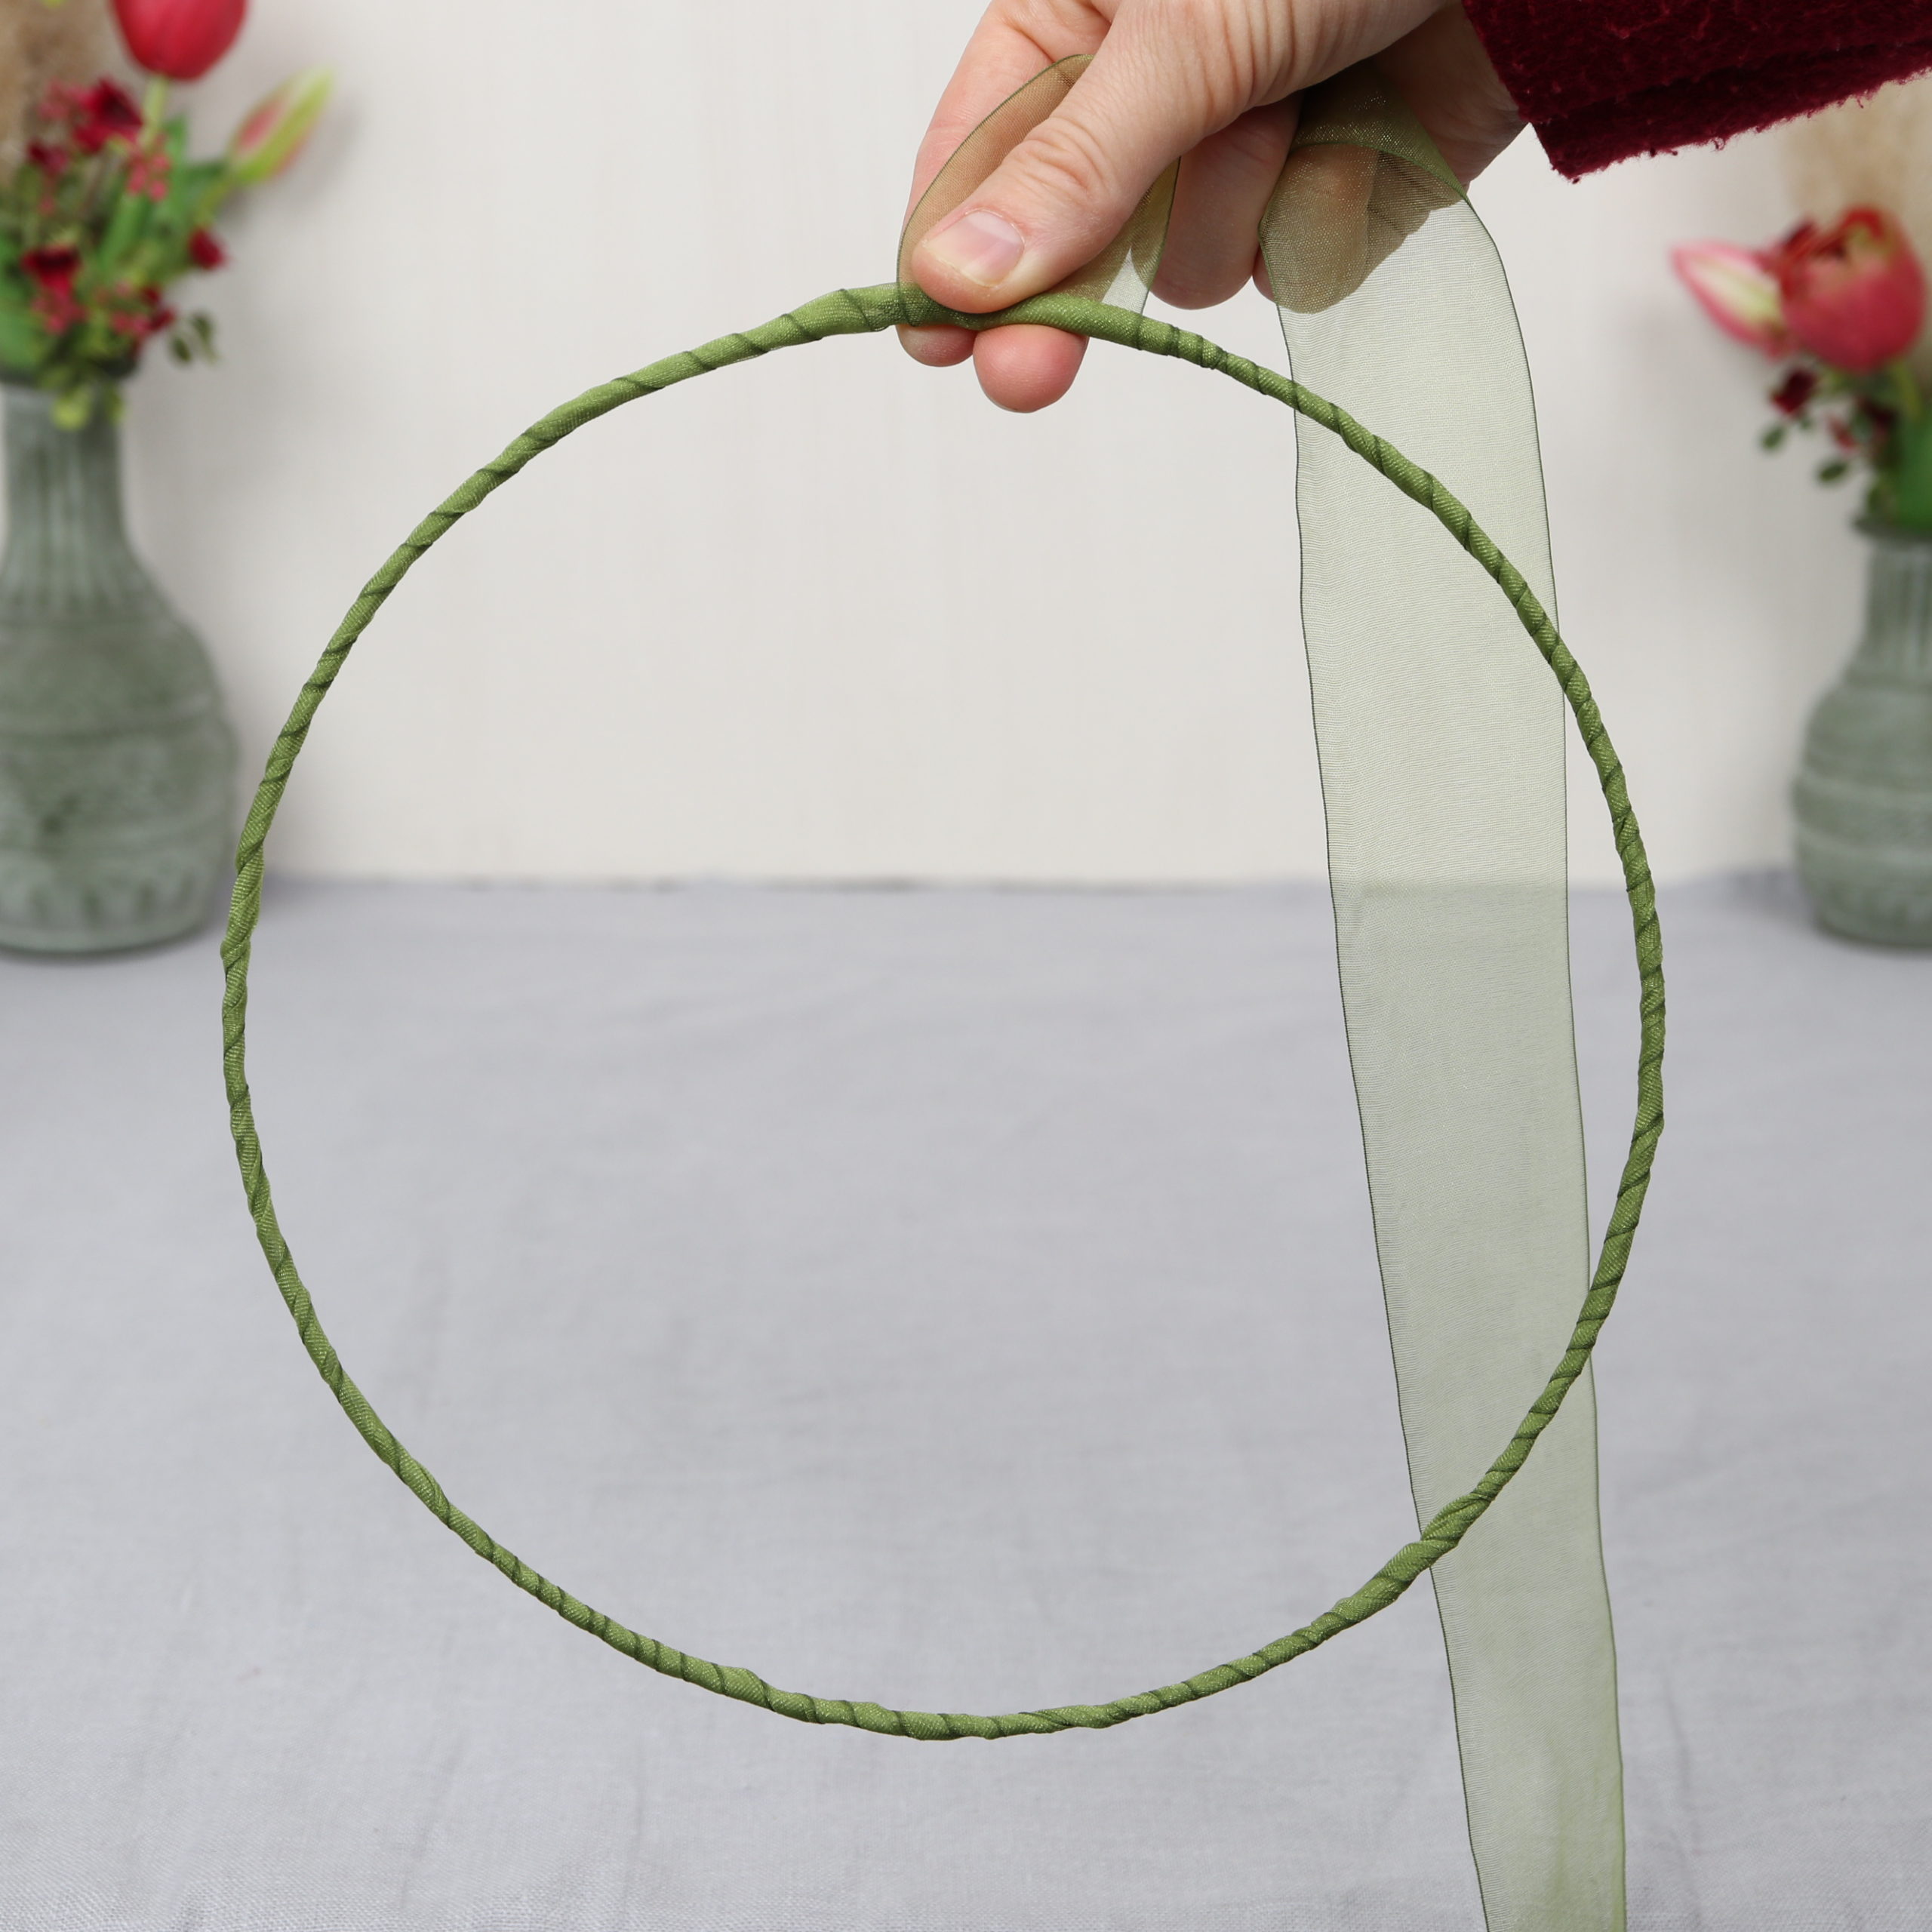
Then I wrap the entire ring with the ribbon.
Once I have everything wrapped, I cut the organza ribbon with the scissors.
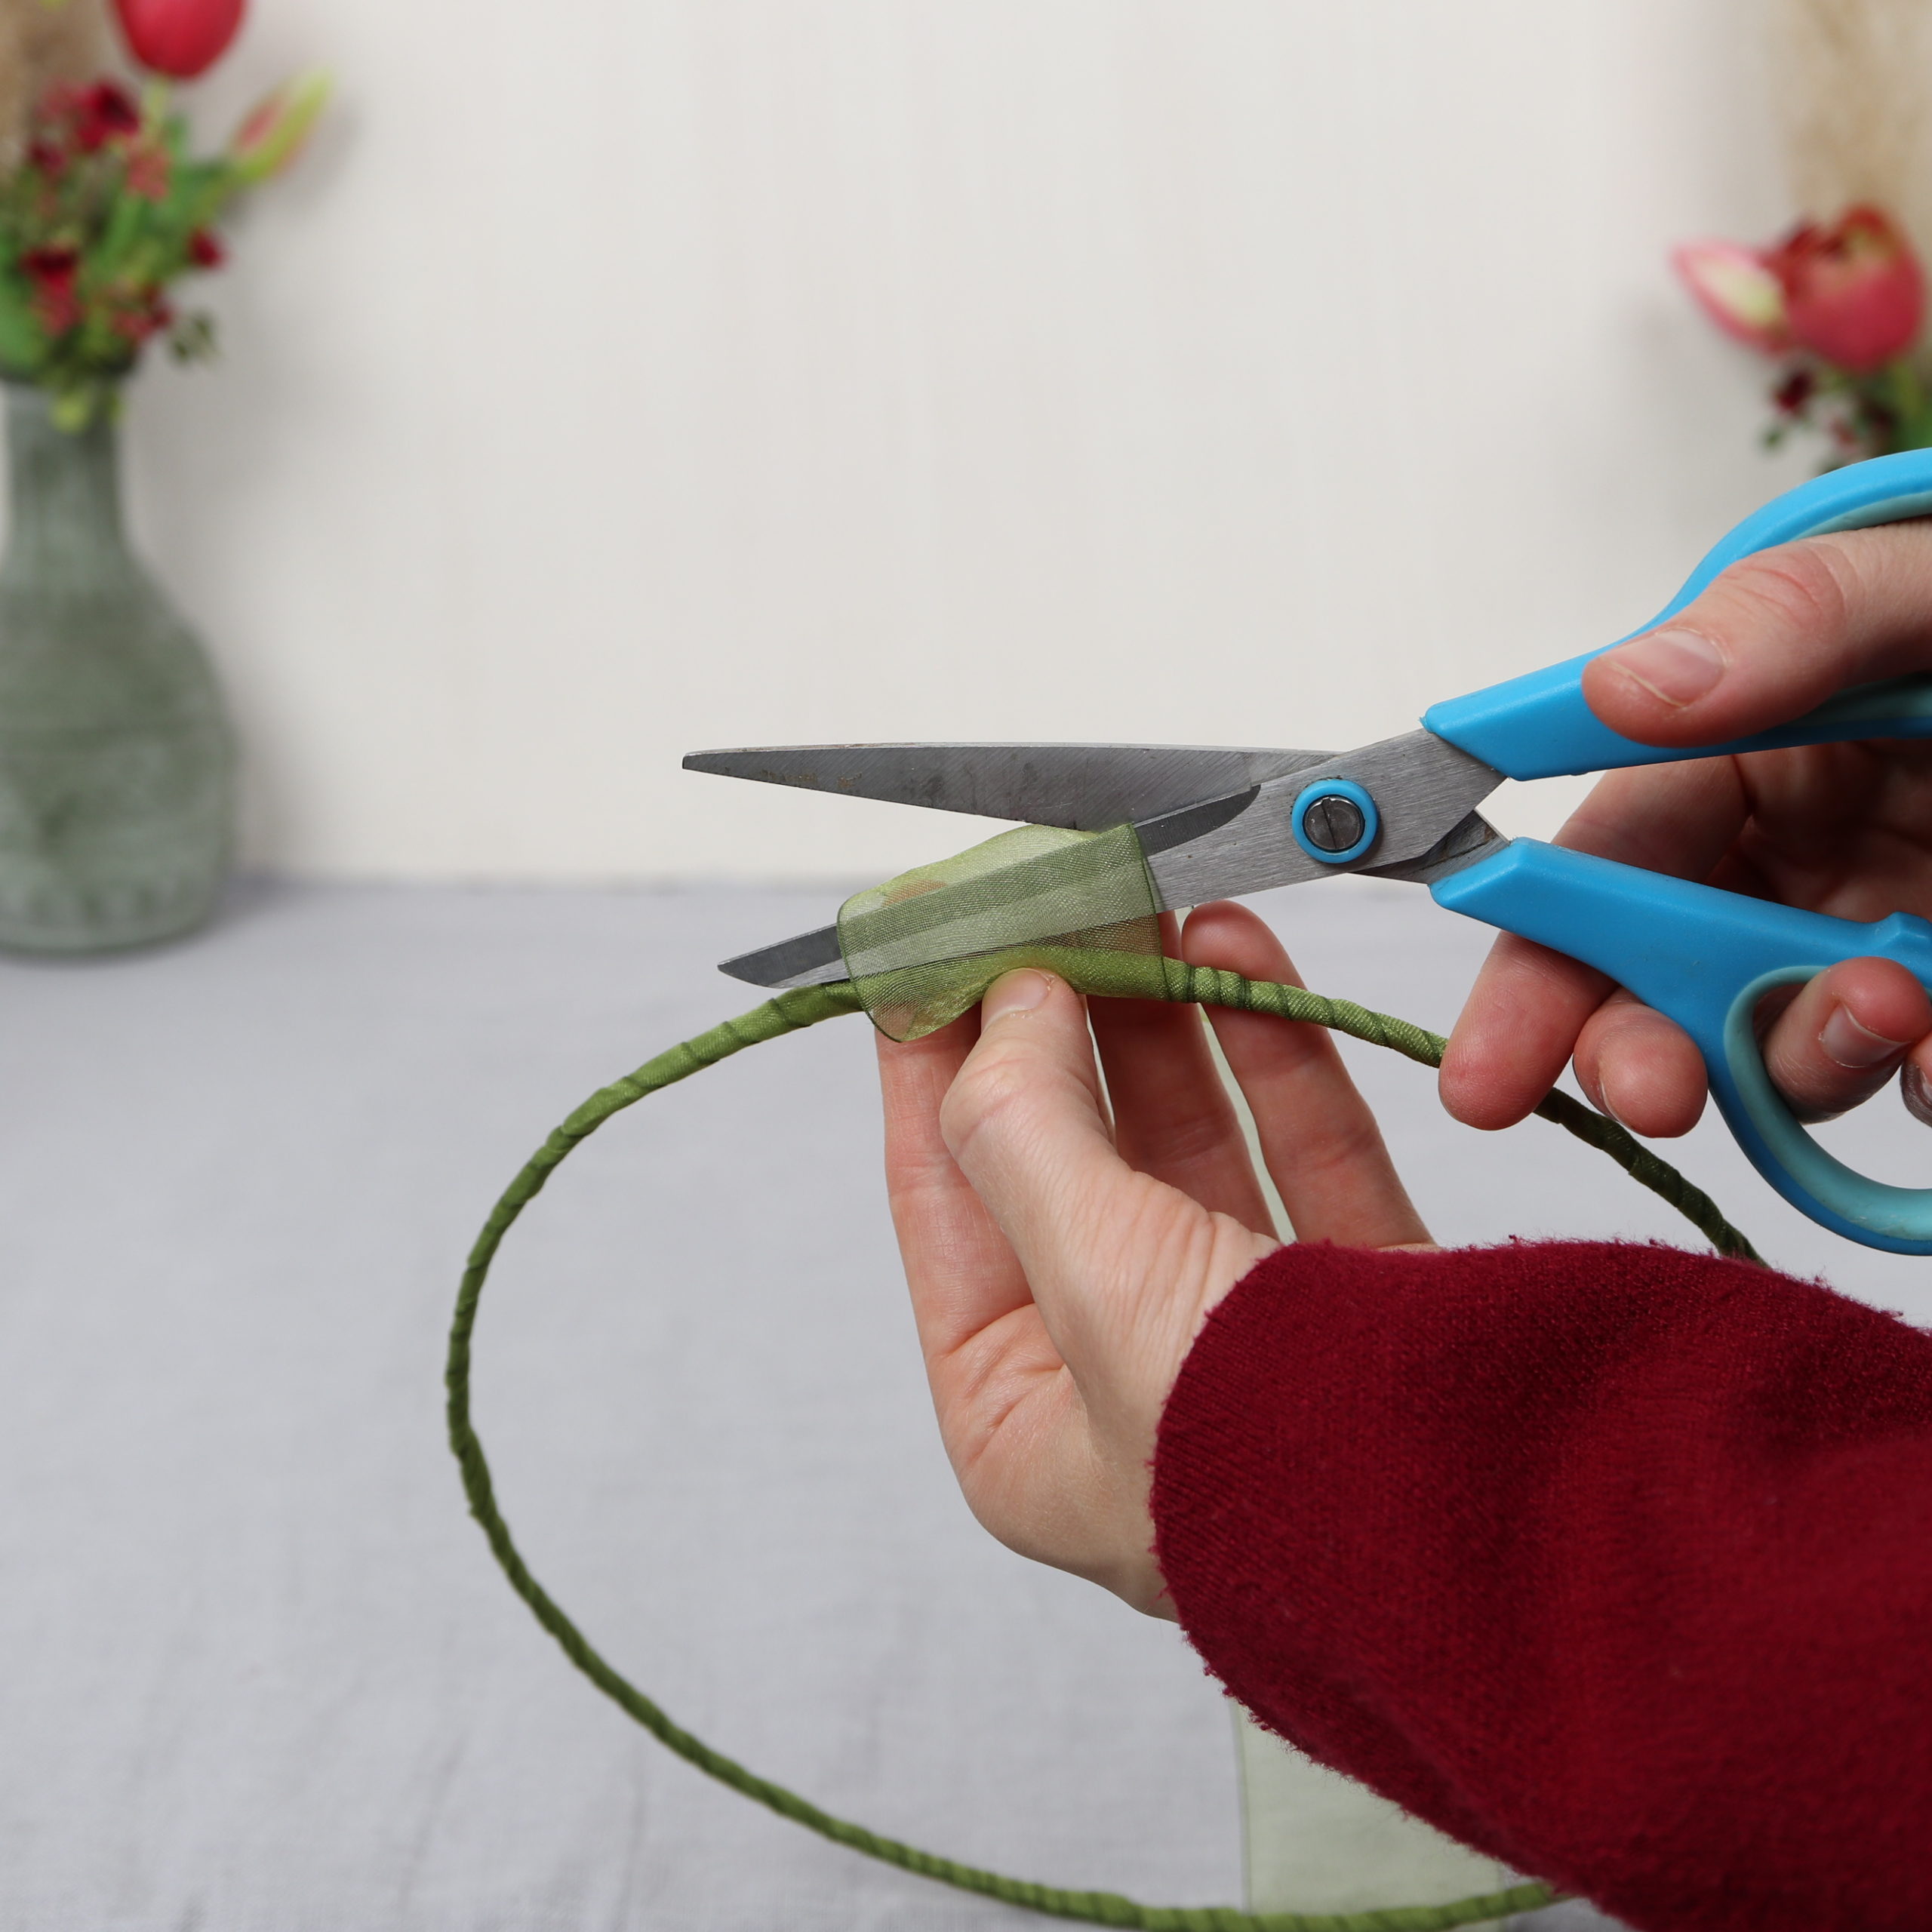
Then I glue the ribbon’s end to the ring with the hot glue gun.
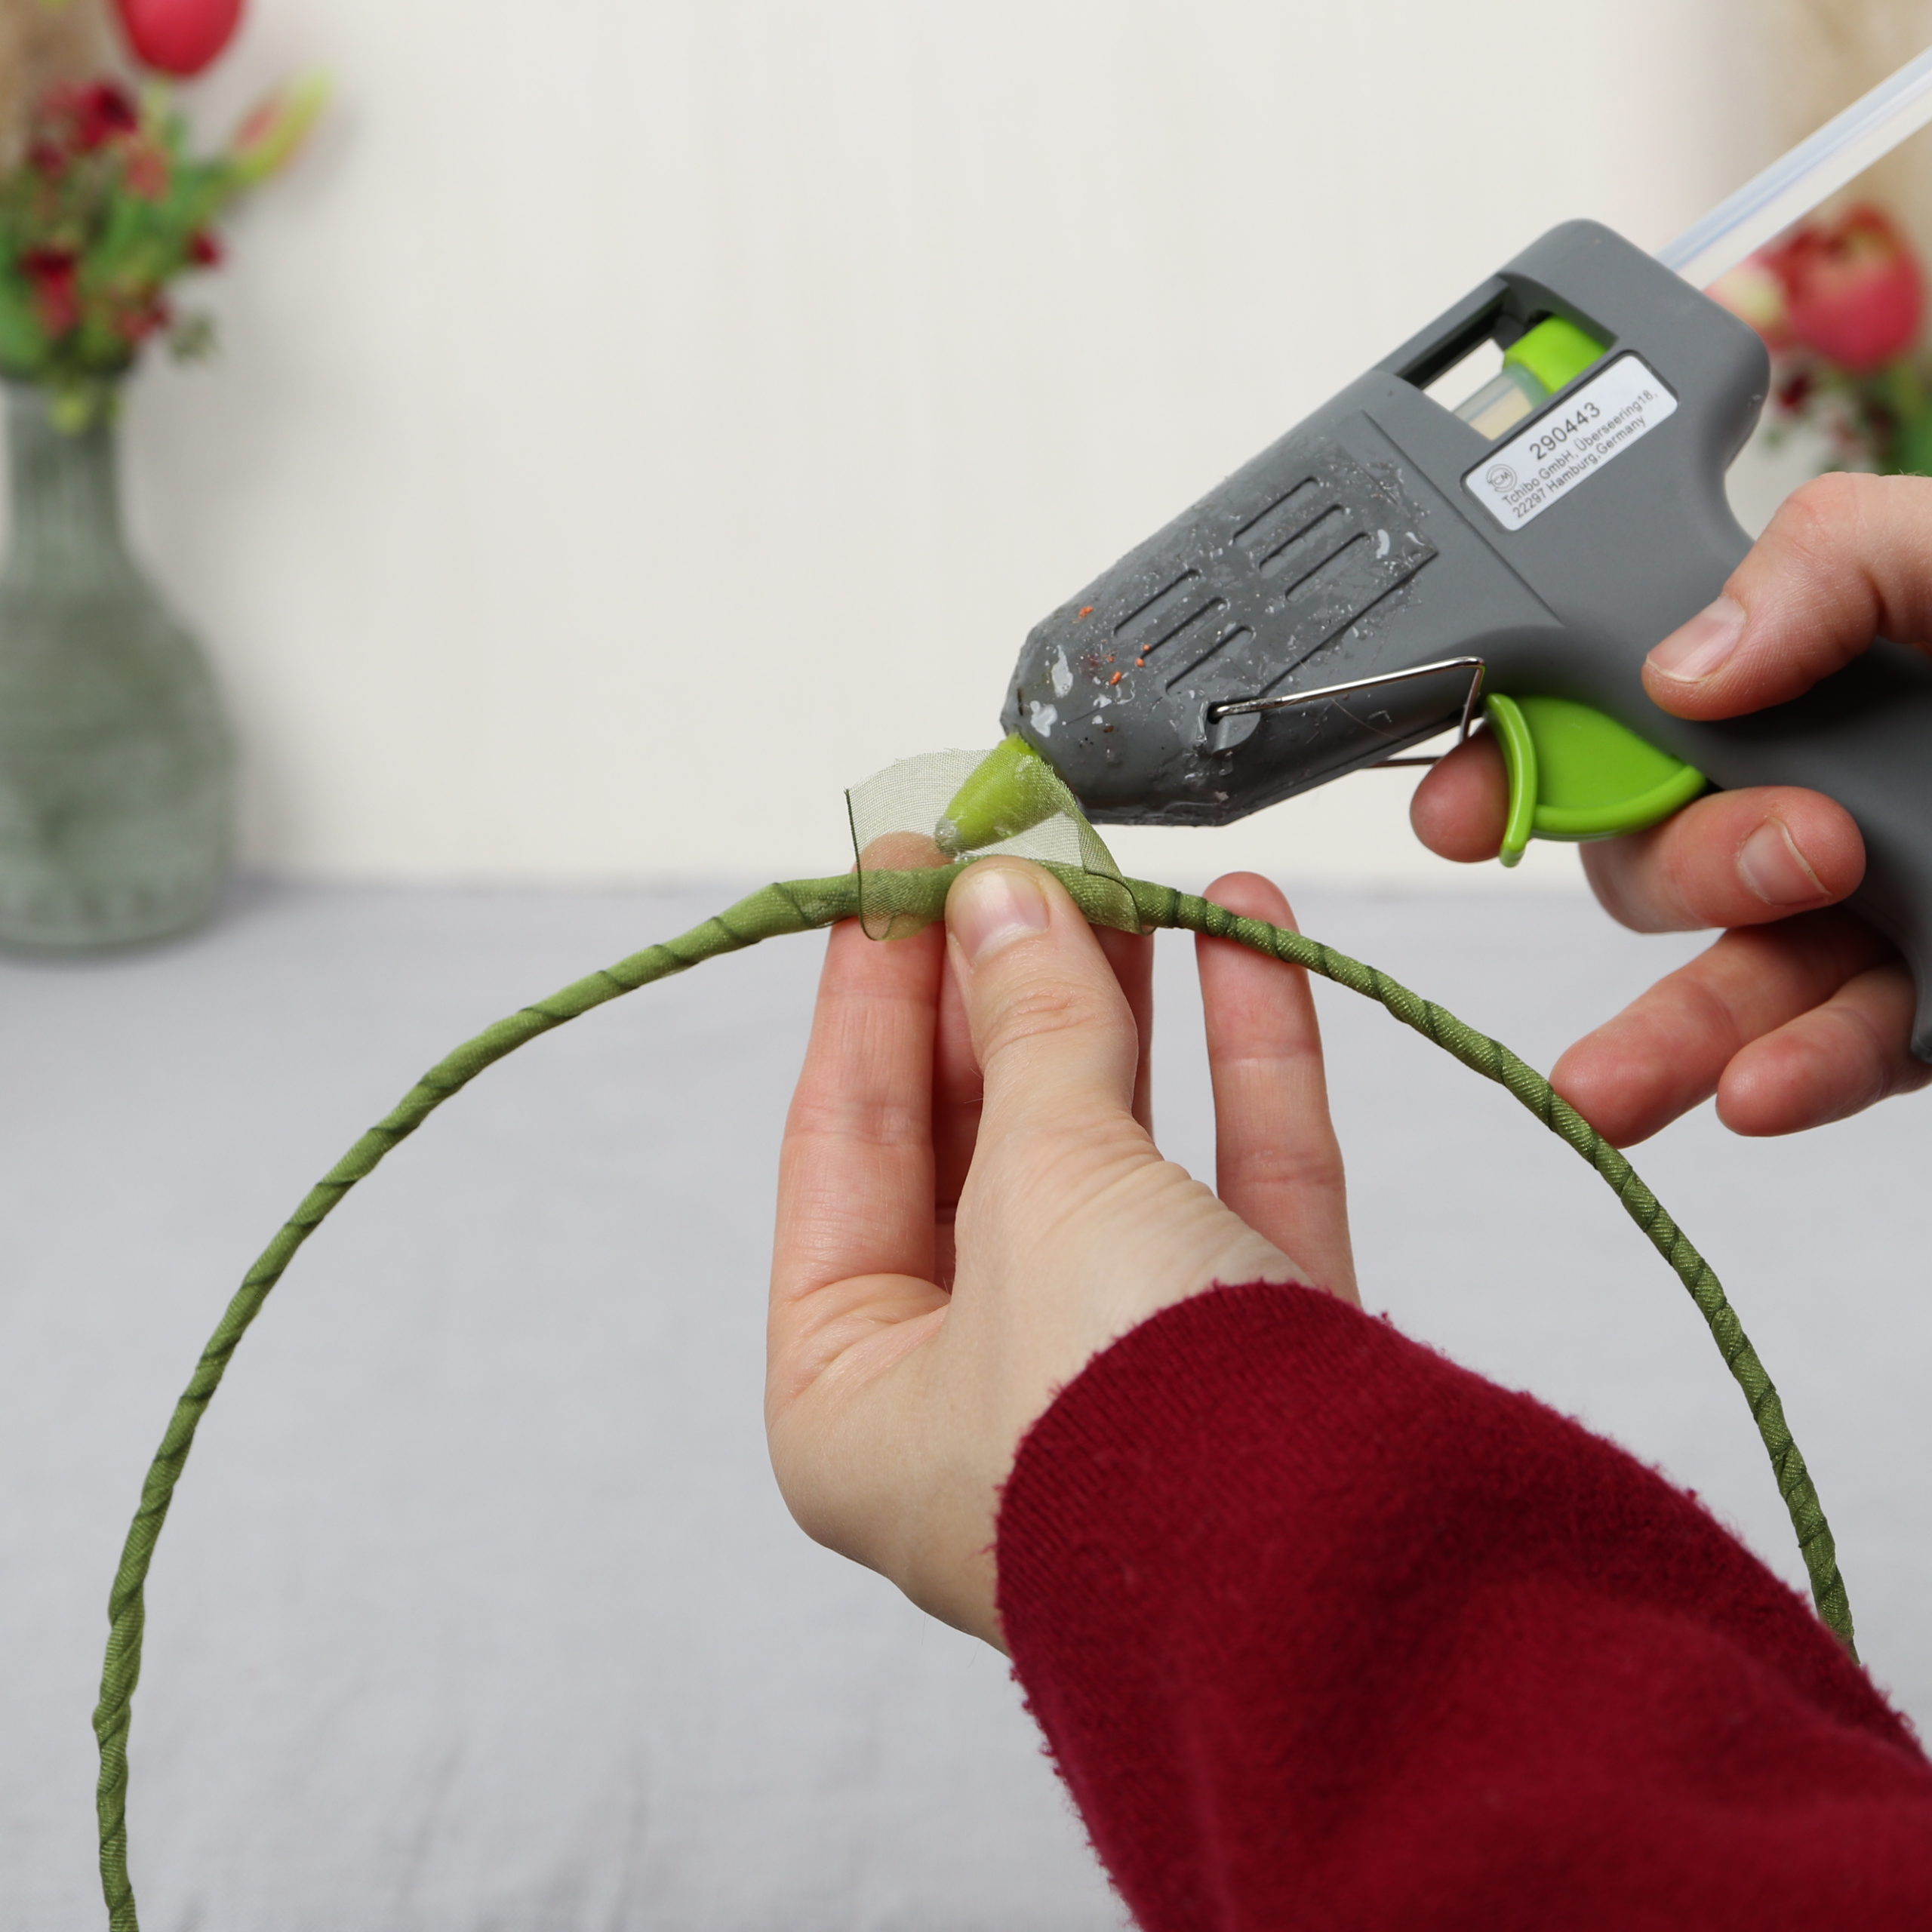
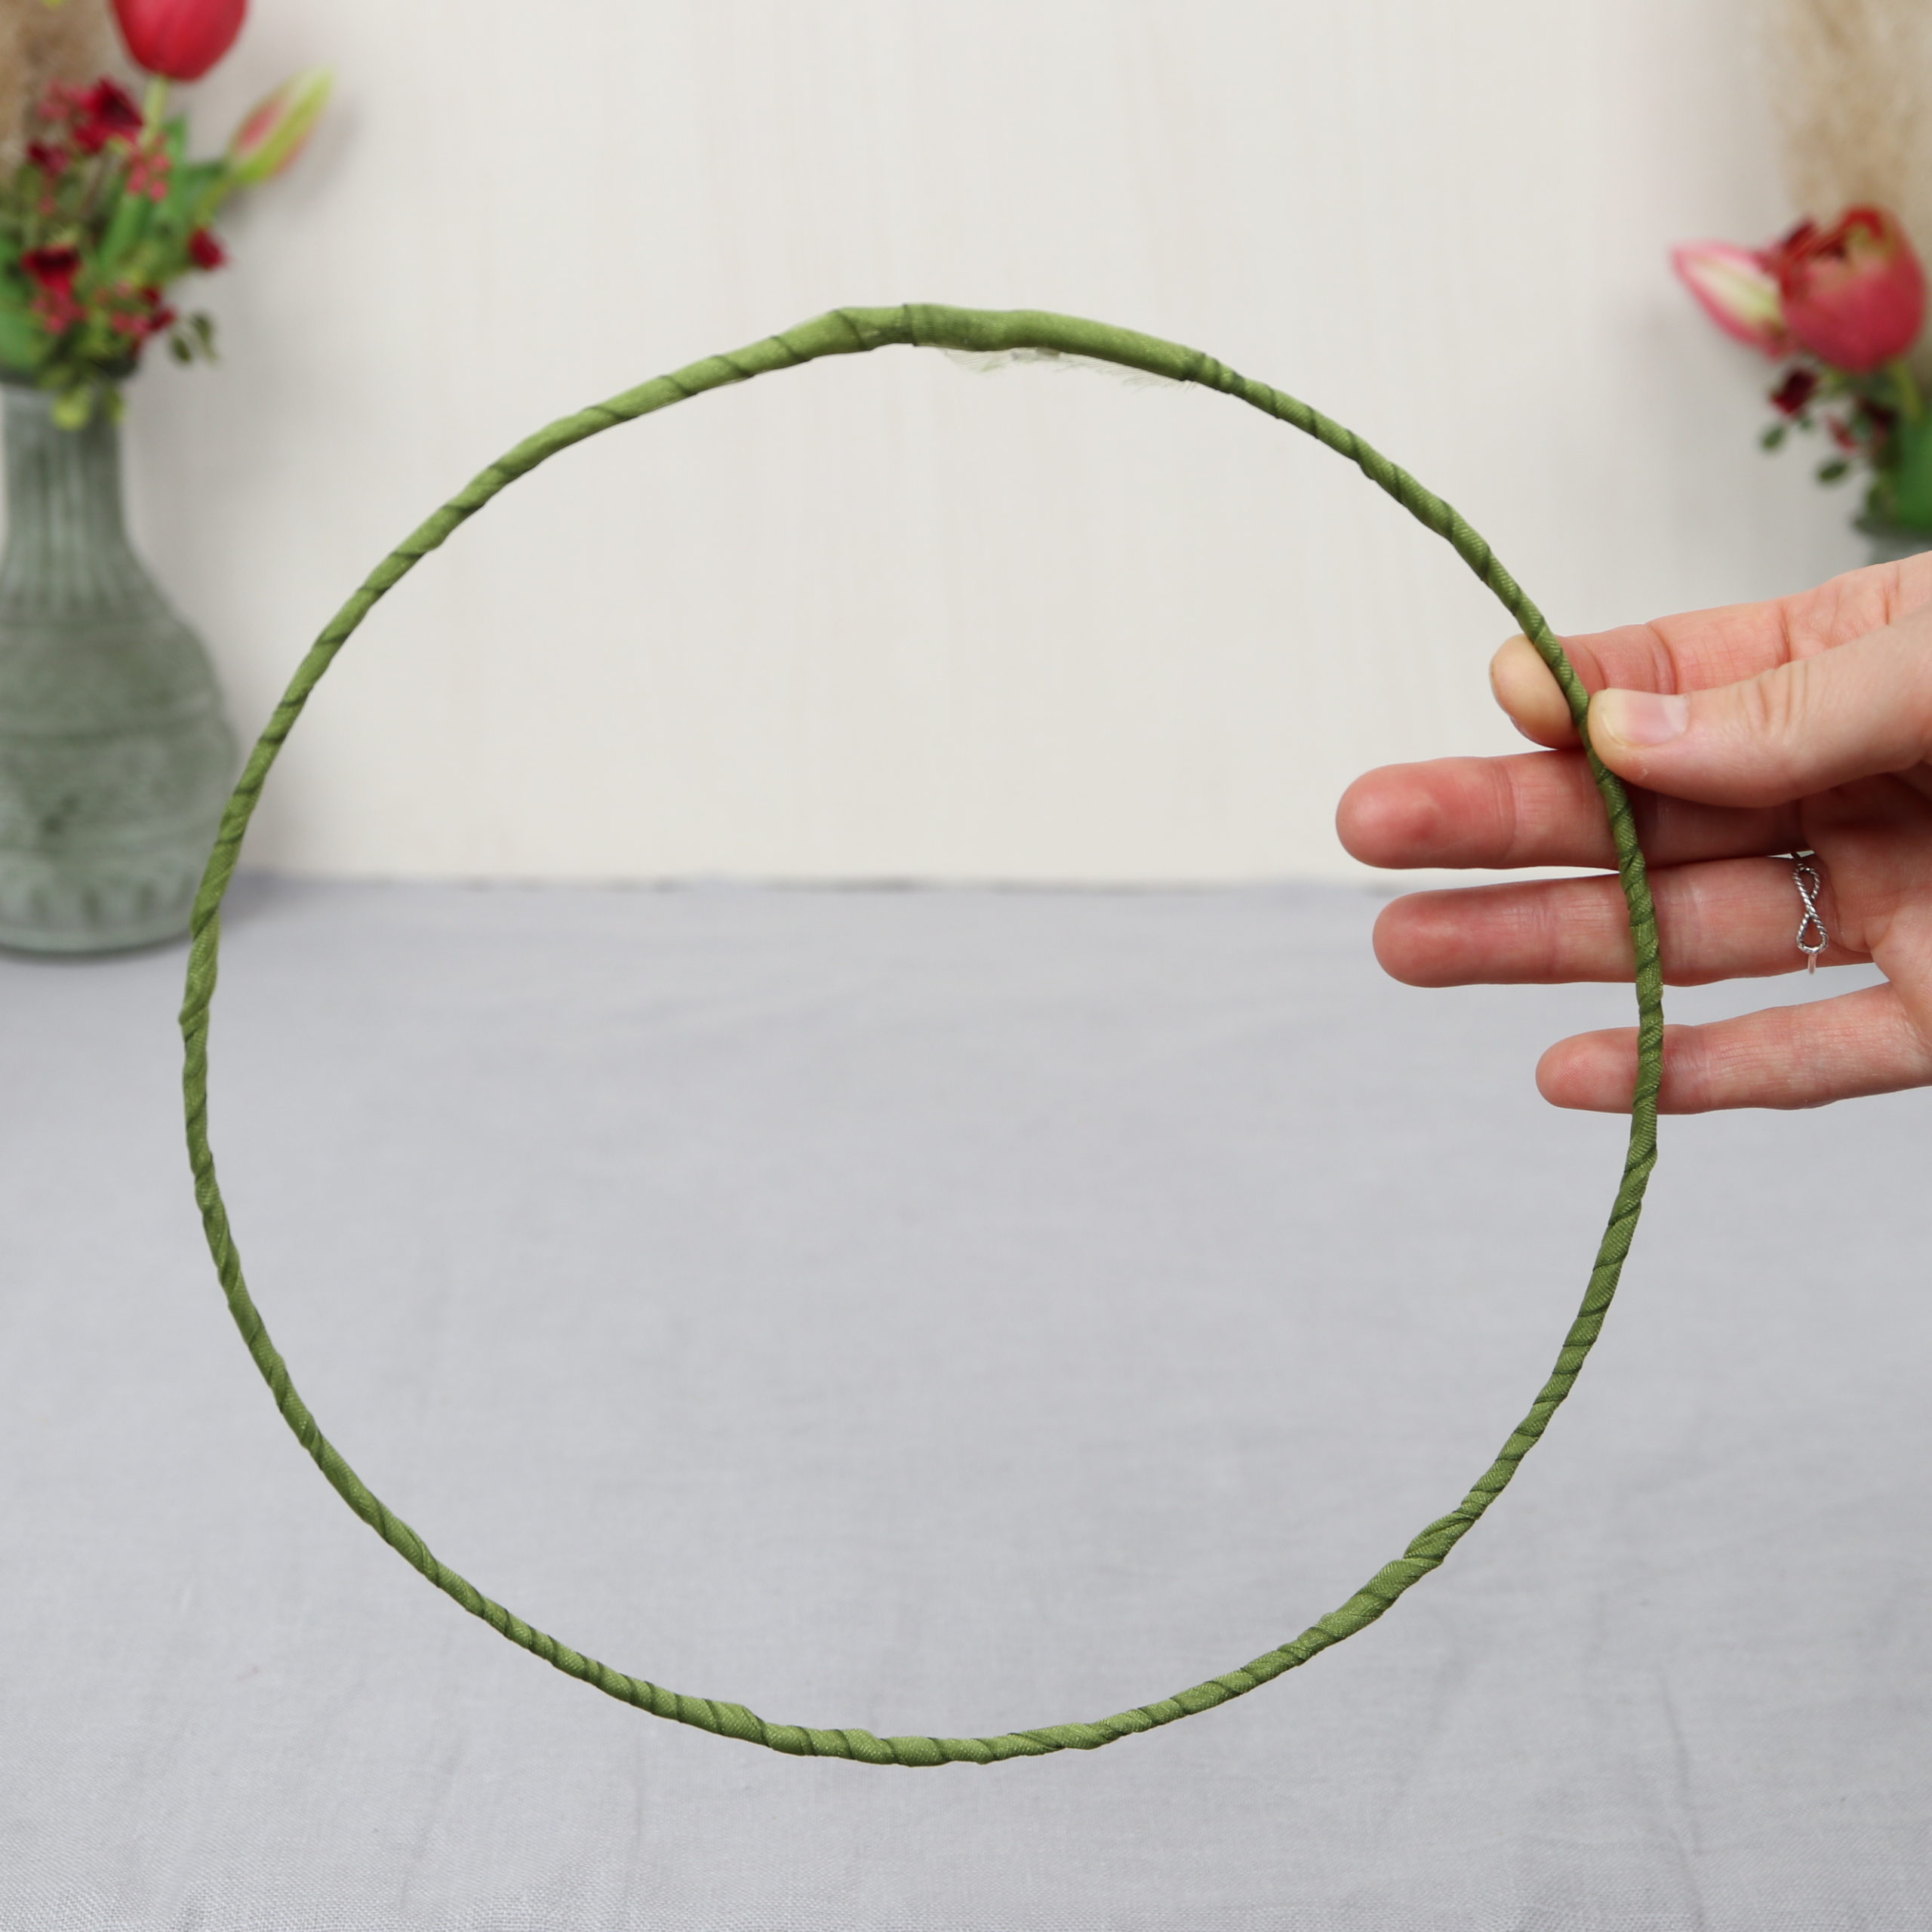
The result of step 1 then looks like this:
Step 2: Attach mounting
In the second step, I make the mounting piece for the ring.

To do this, I use a piece of the olive green organza ribbon, fold it in half and place the resulting loop over the ring.
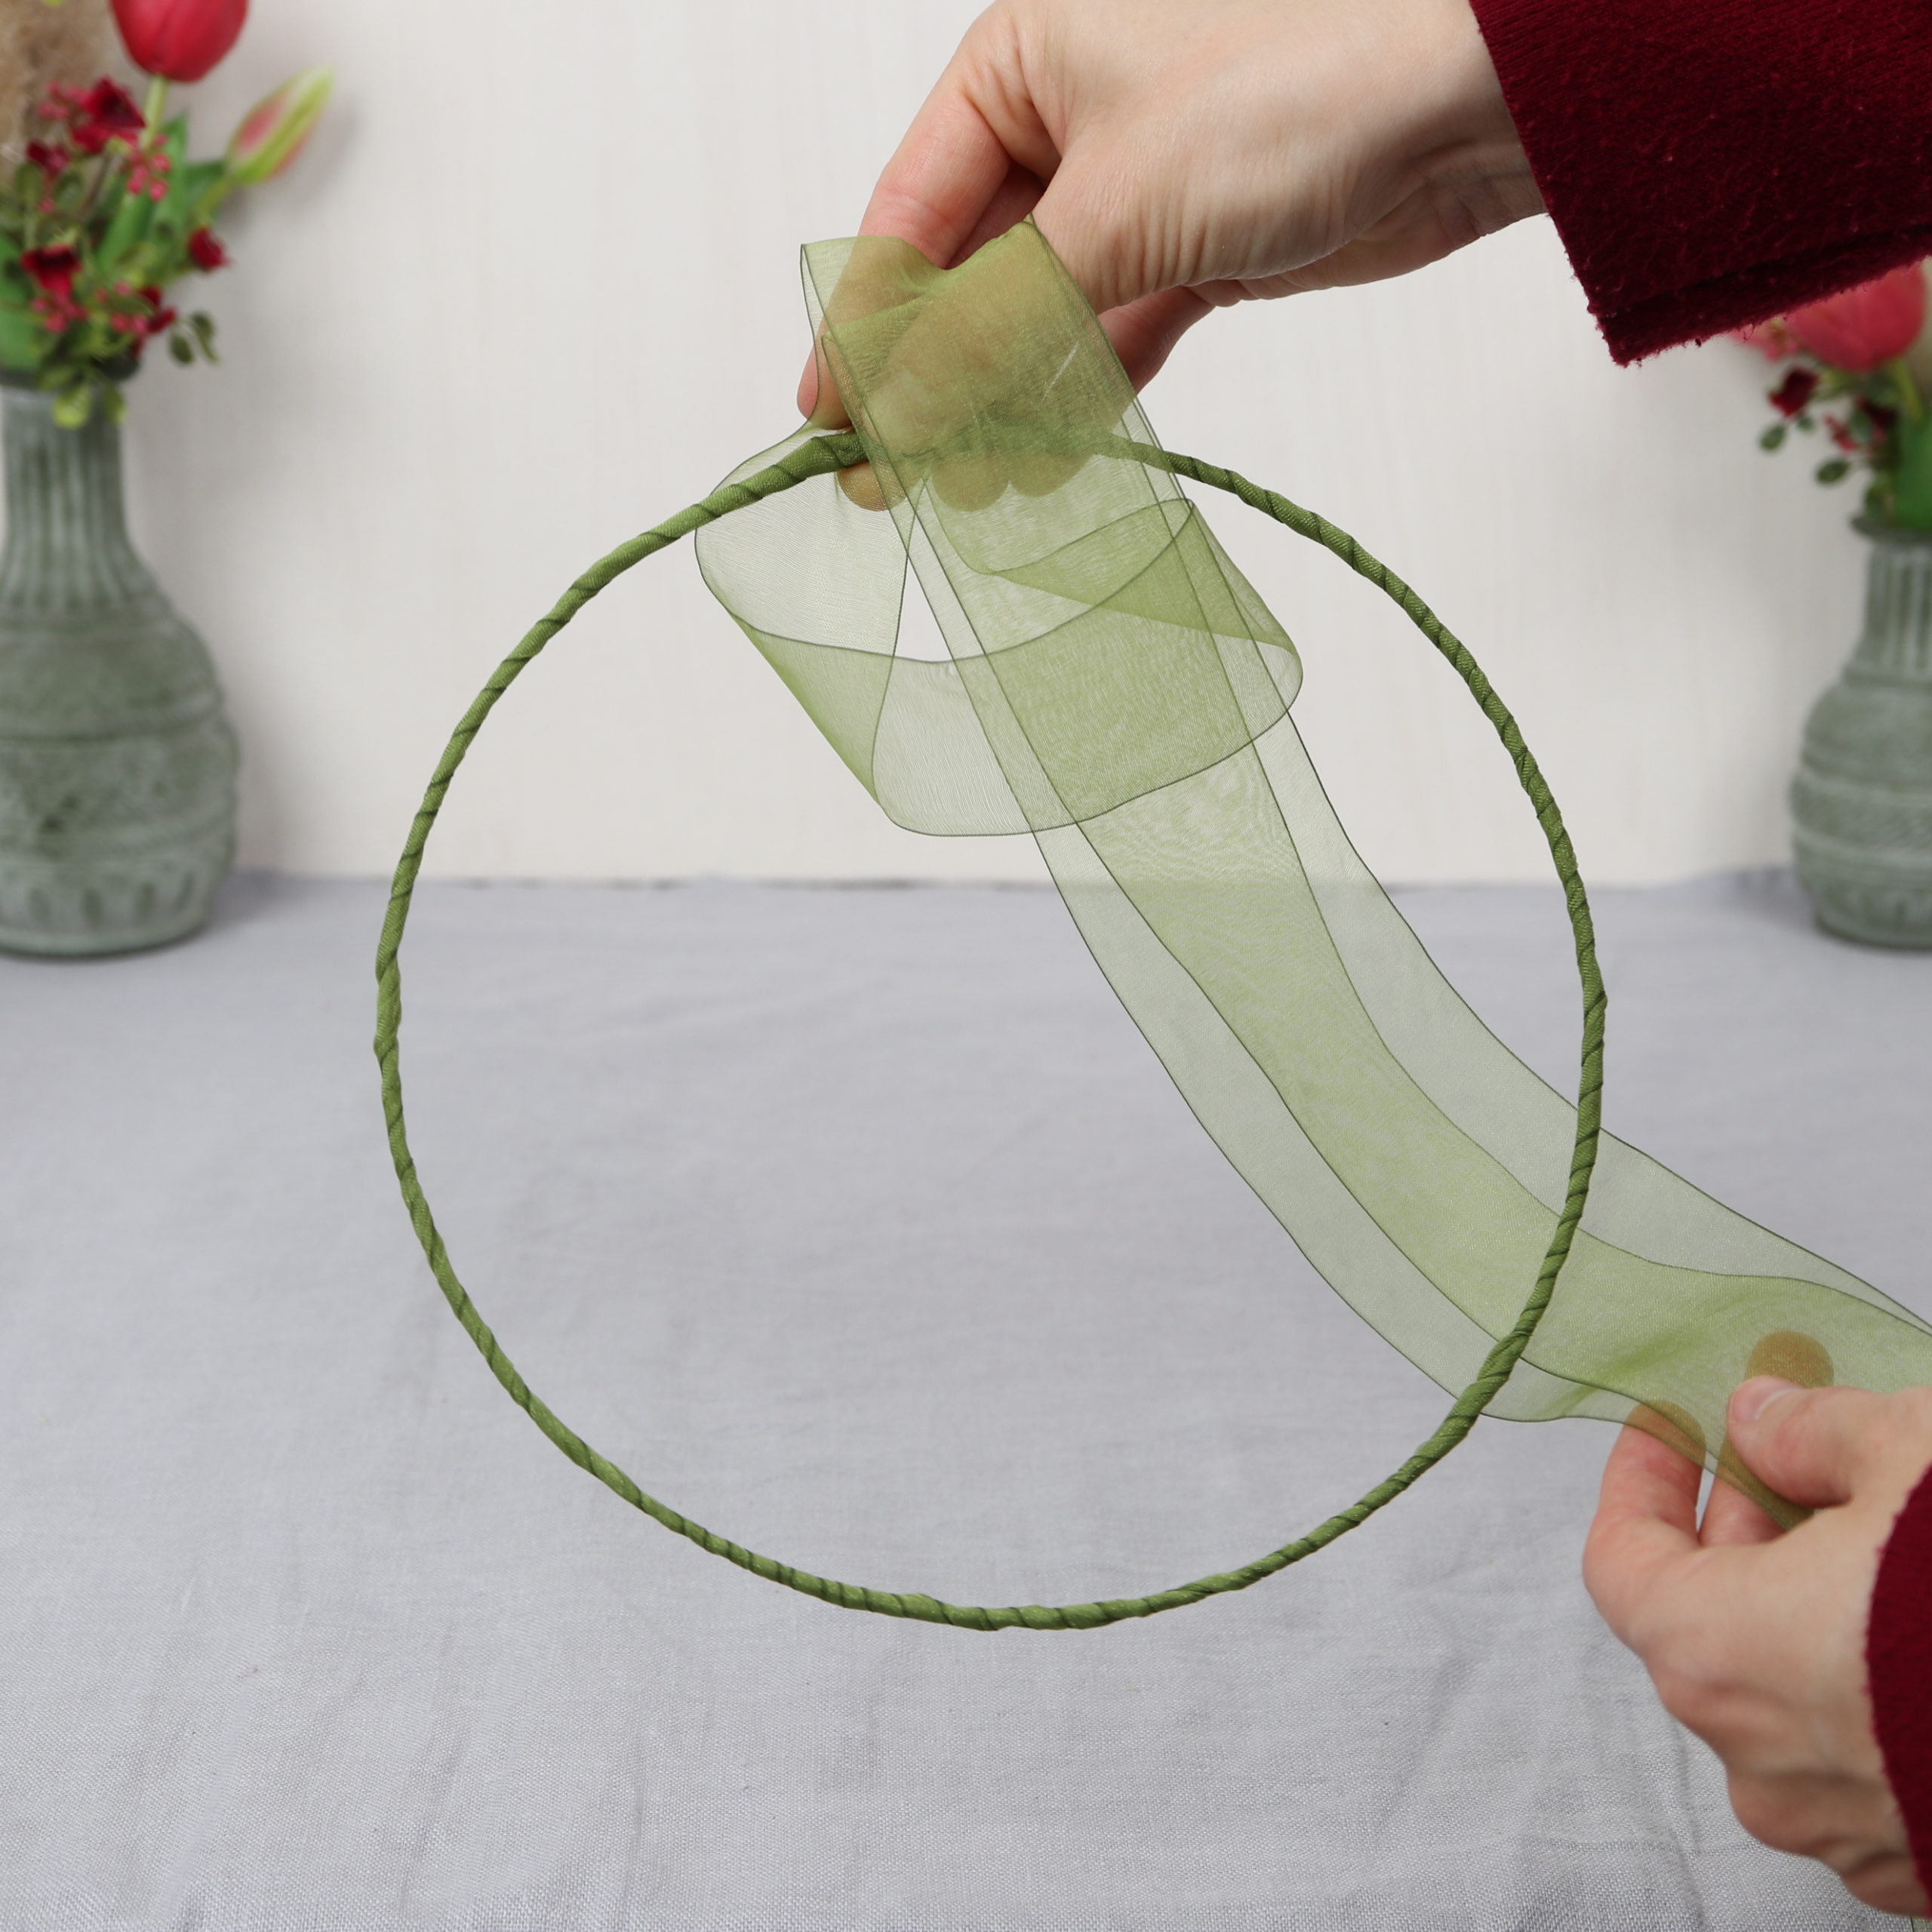
Then I wrap the ends of the ribbon around the ring and pull them through the loop.
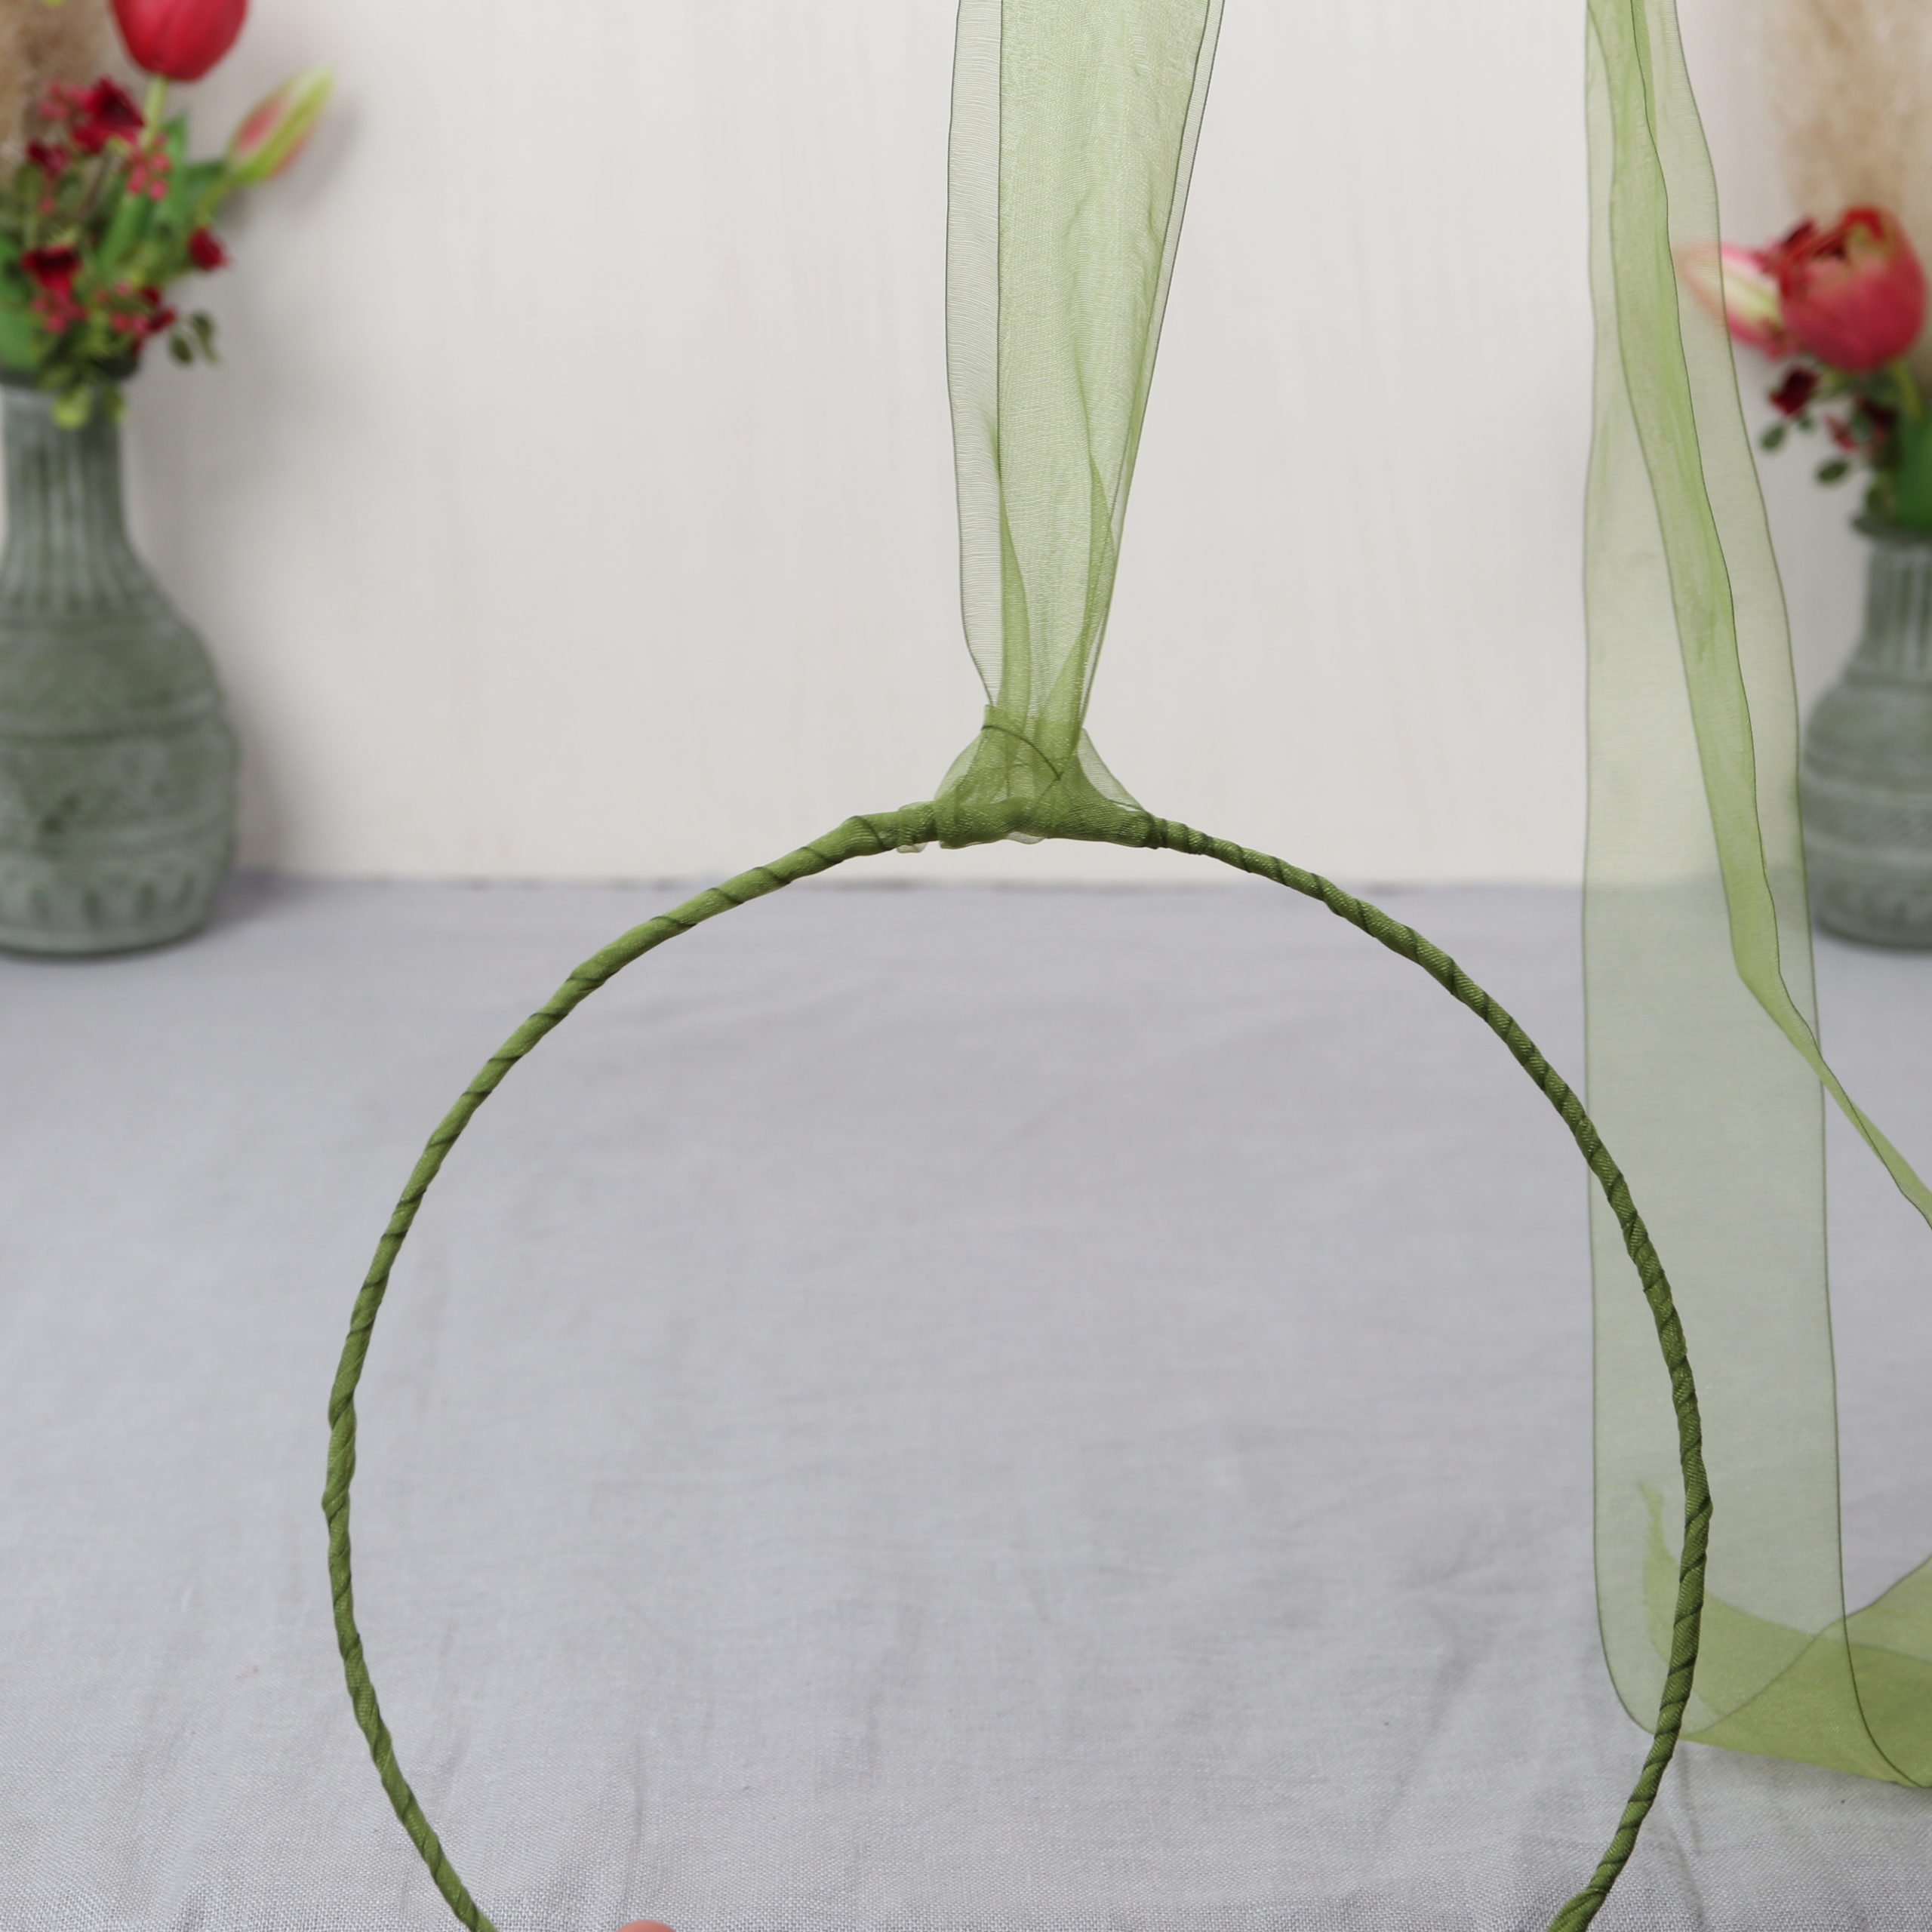
I close the ends with a knot.
Step 3: Attach wool cord
The third step is to wrap the olive green wool cord around the center of the ring.

To do this, I knot the beginning of the cord to the ring and then wrap it around the ring several times.
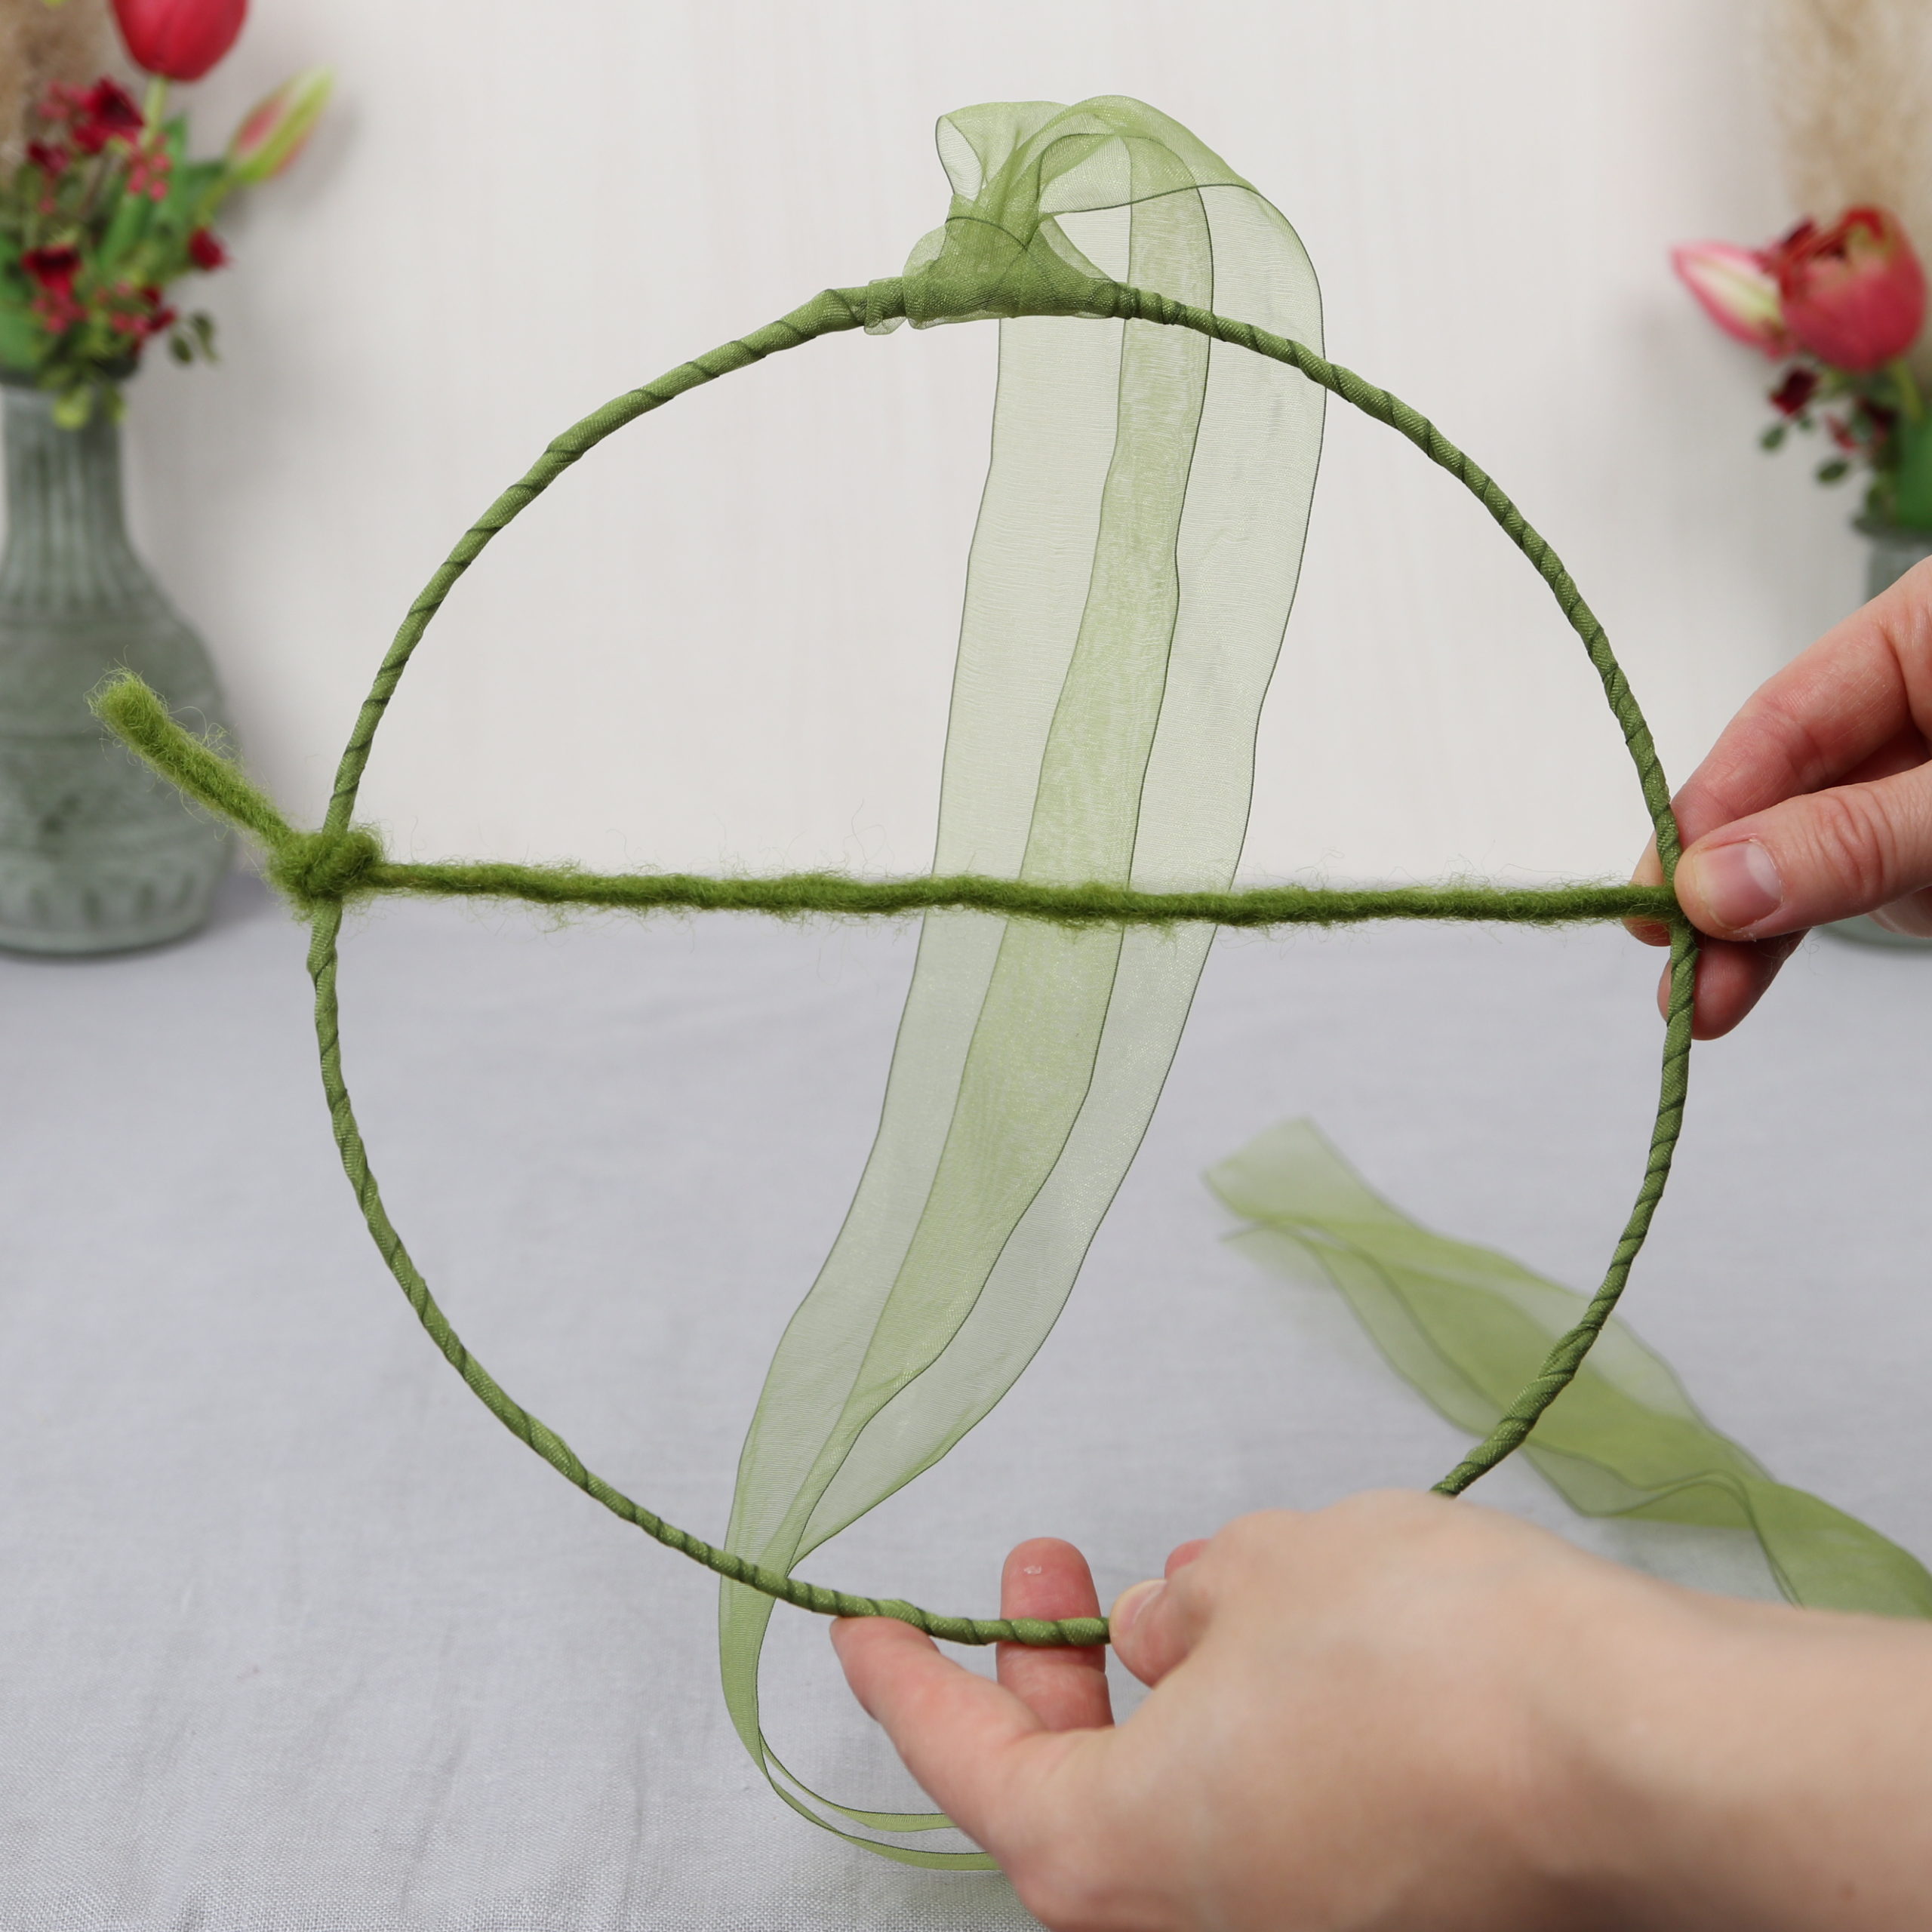
The wool cord should not sag. It should be tight enough to give support to the flower stems.
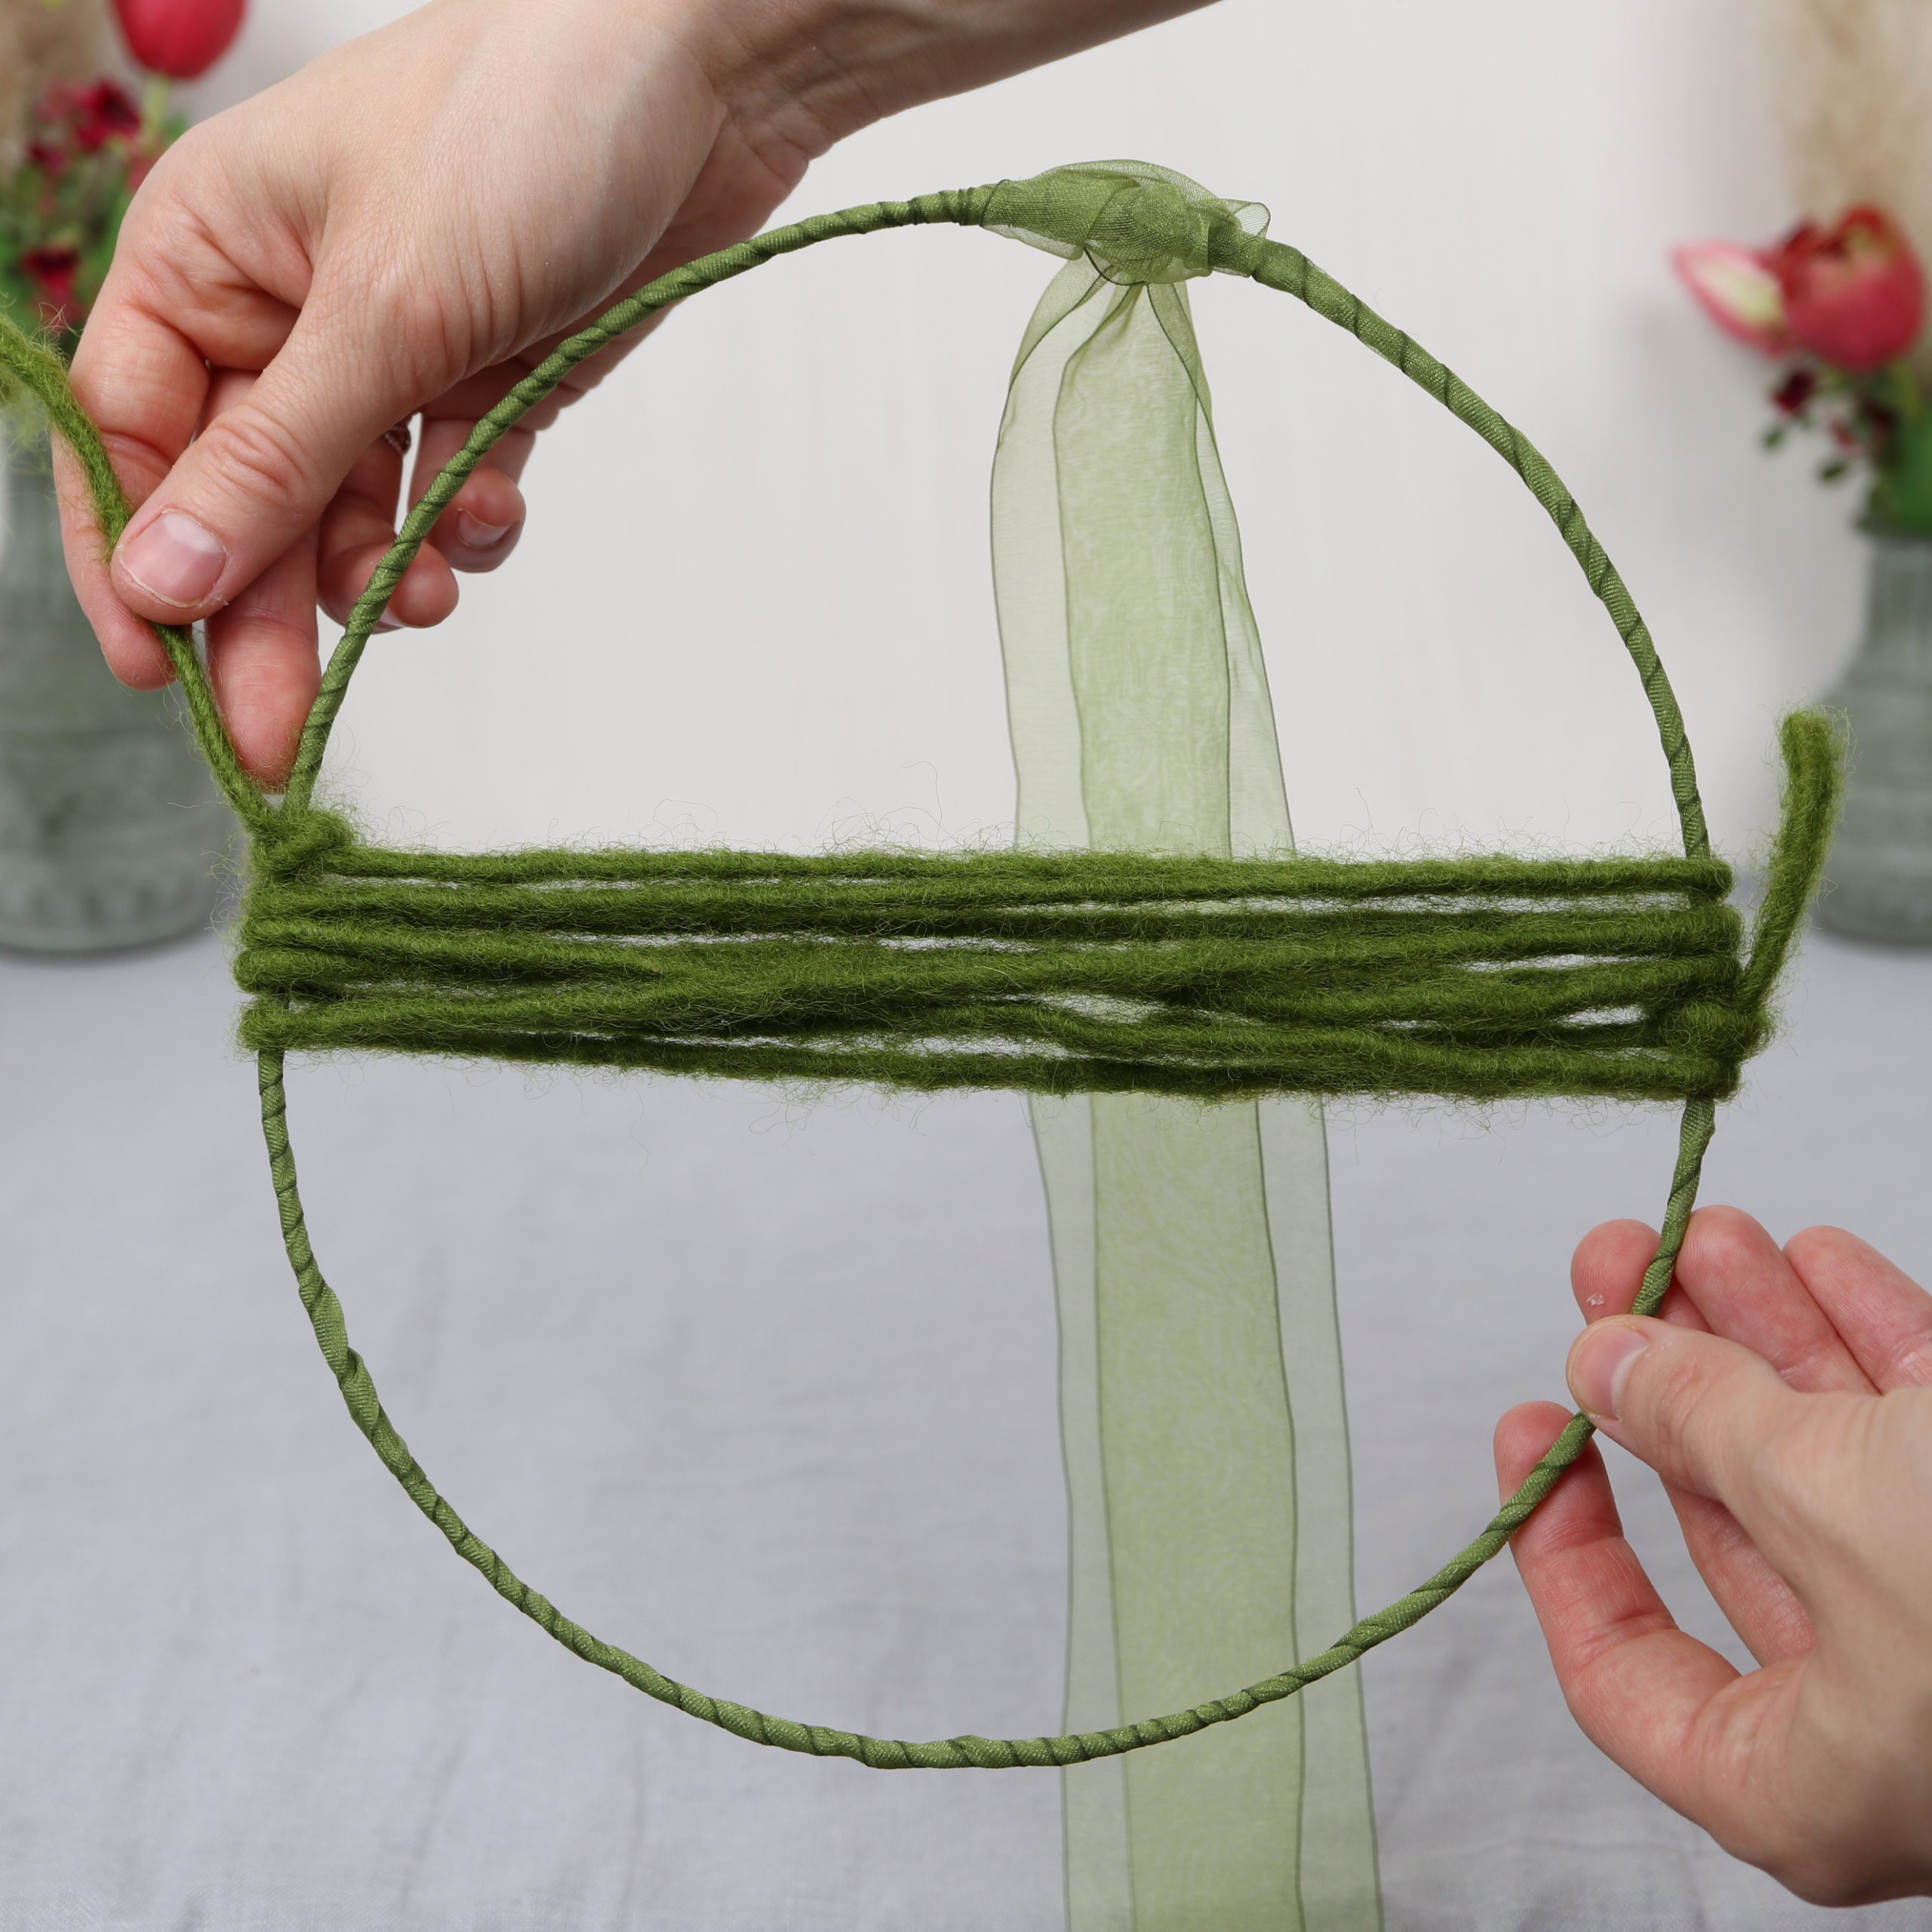
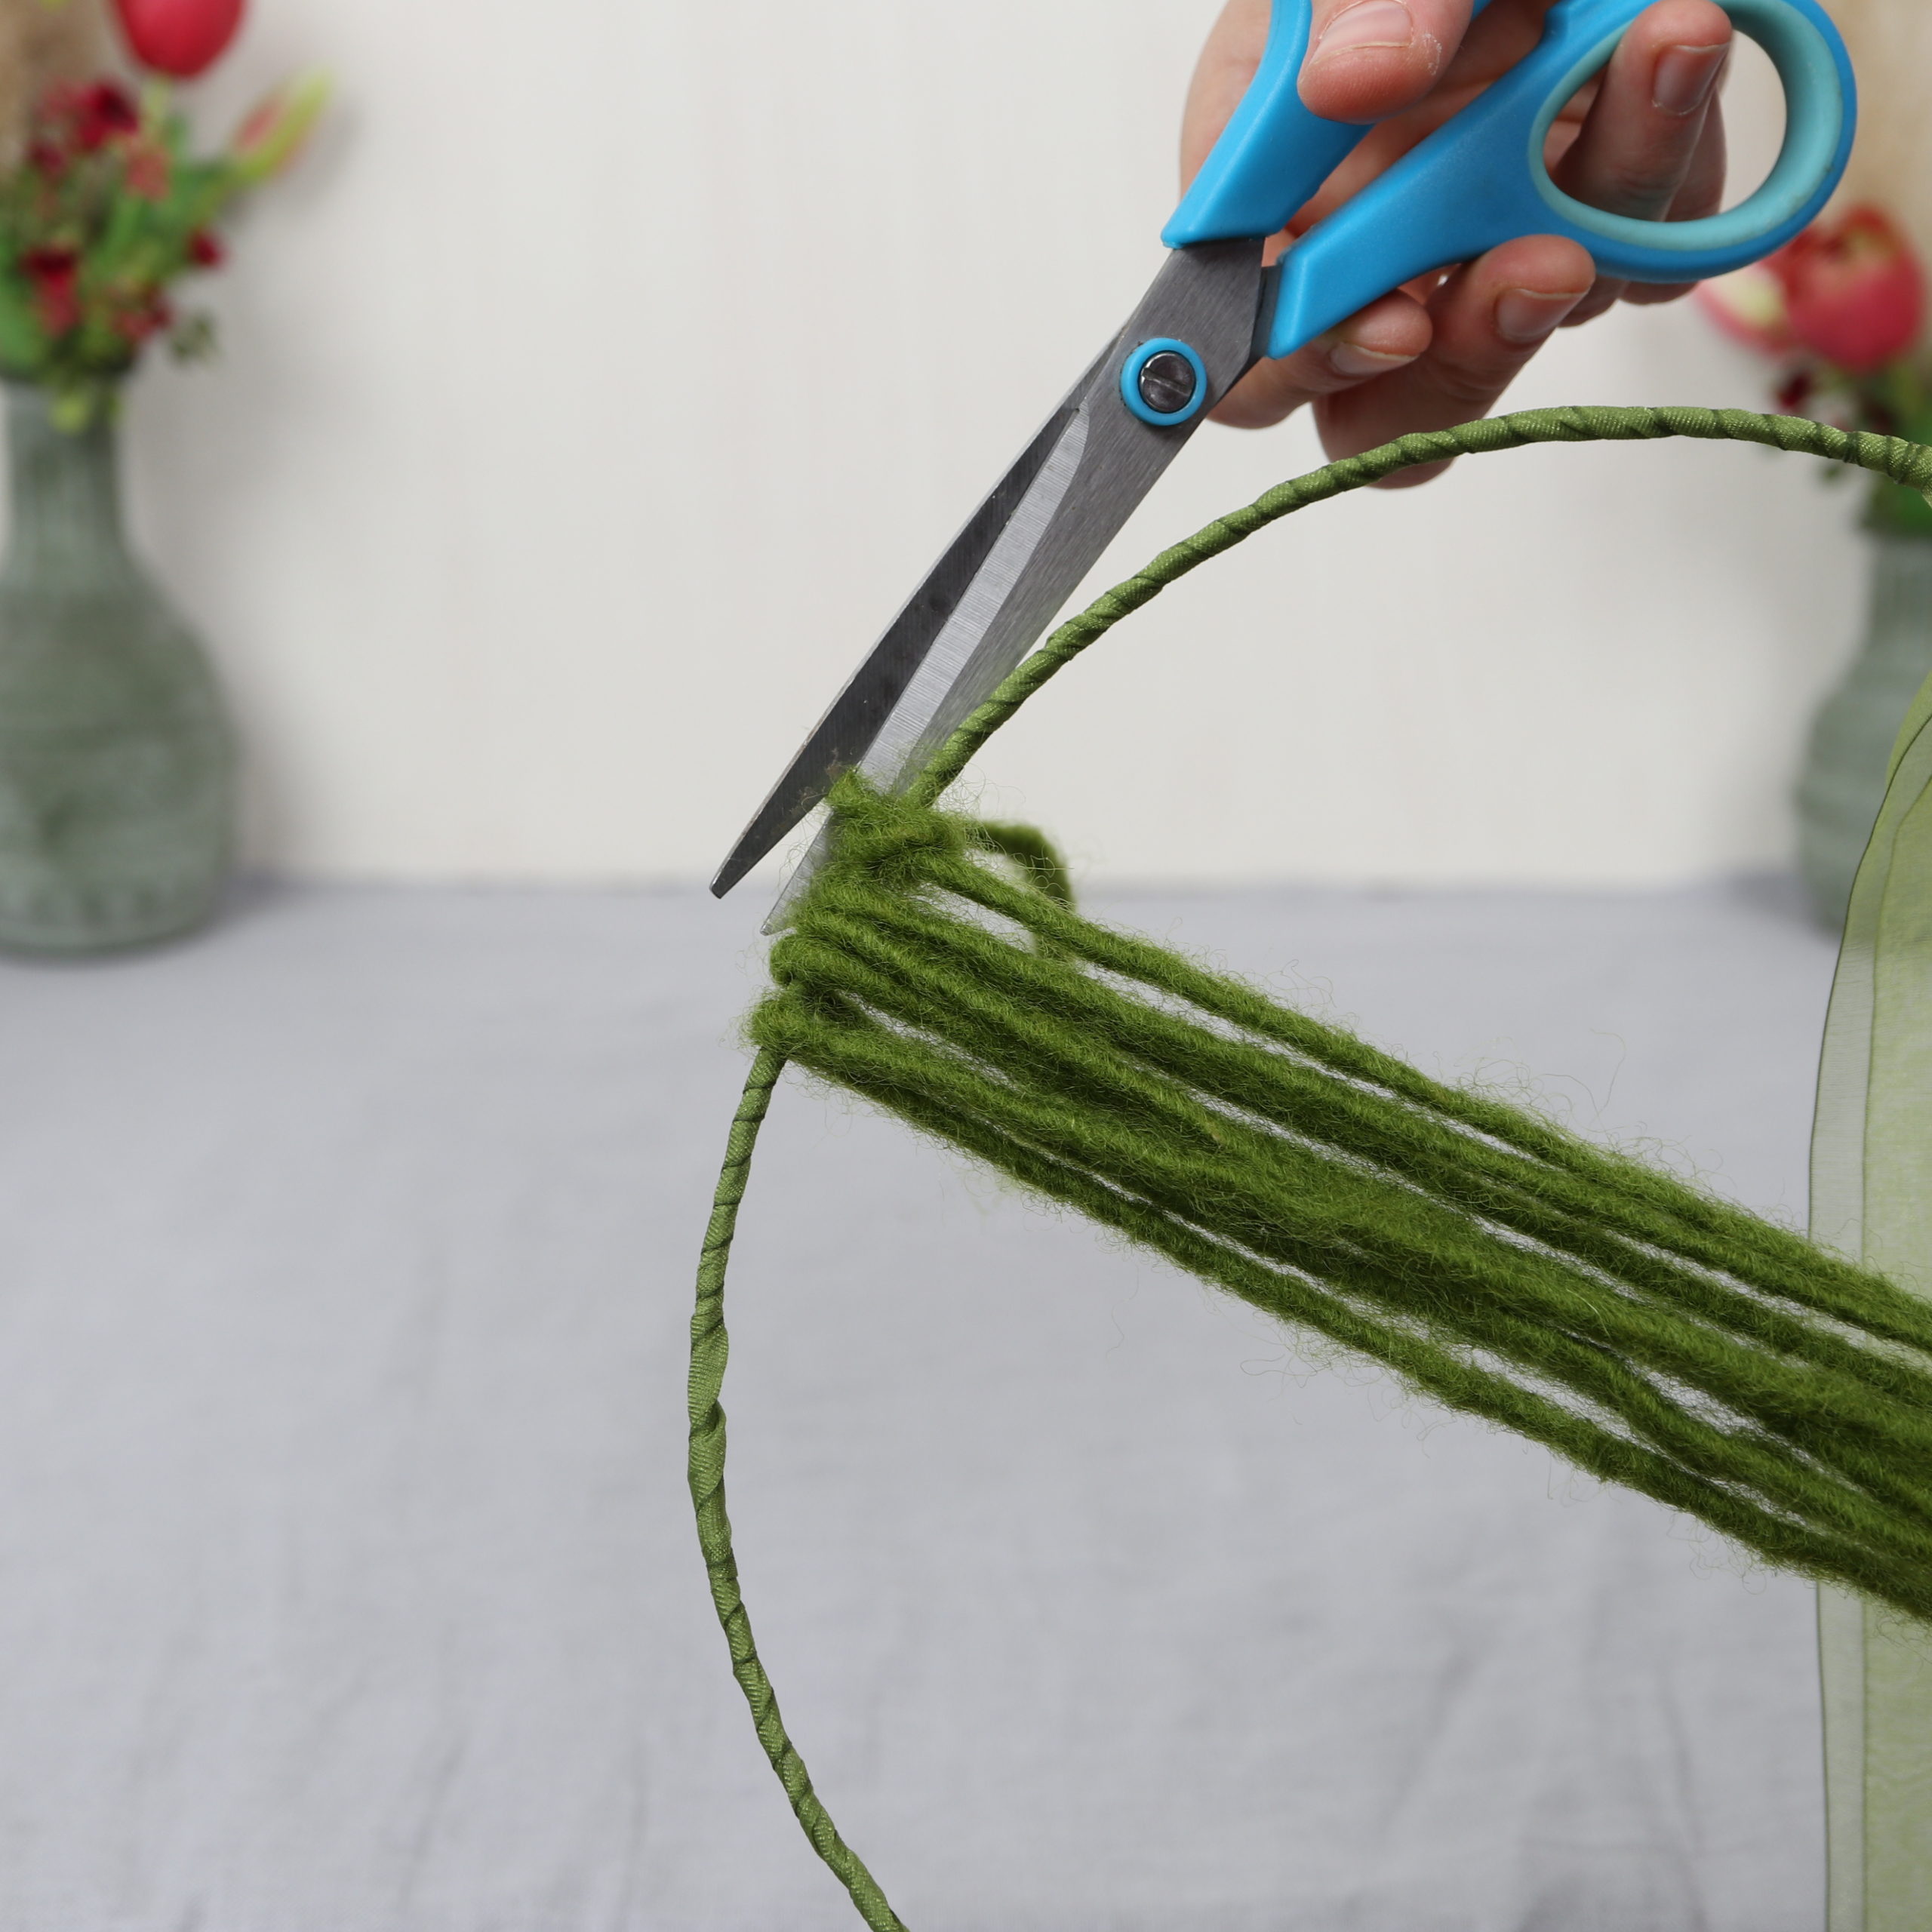
I knot the end of the wool string to the ring again. I cut off the protruding ends with the scissors.
The result of step 3 then looks like this:

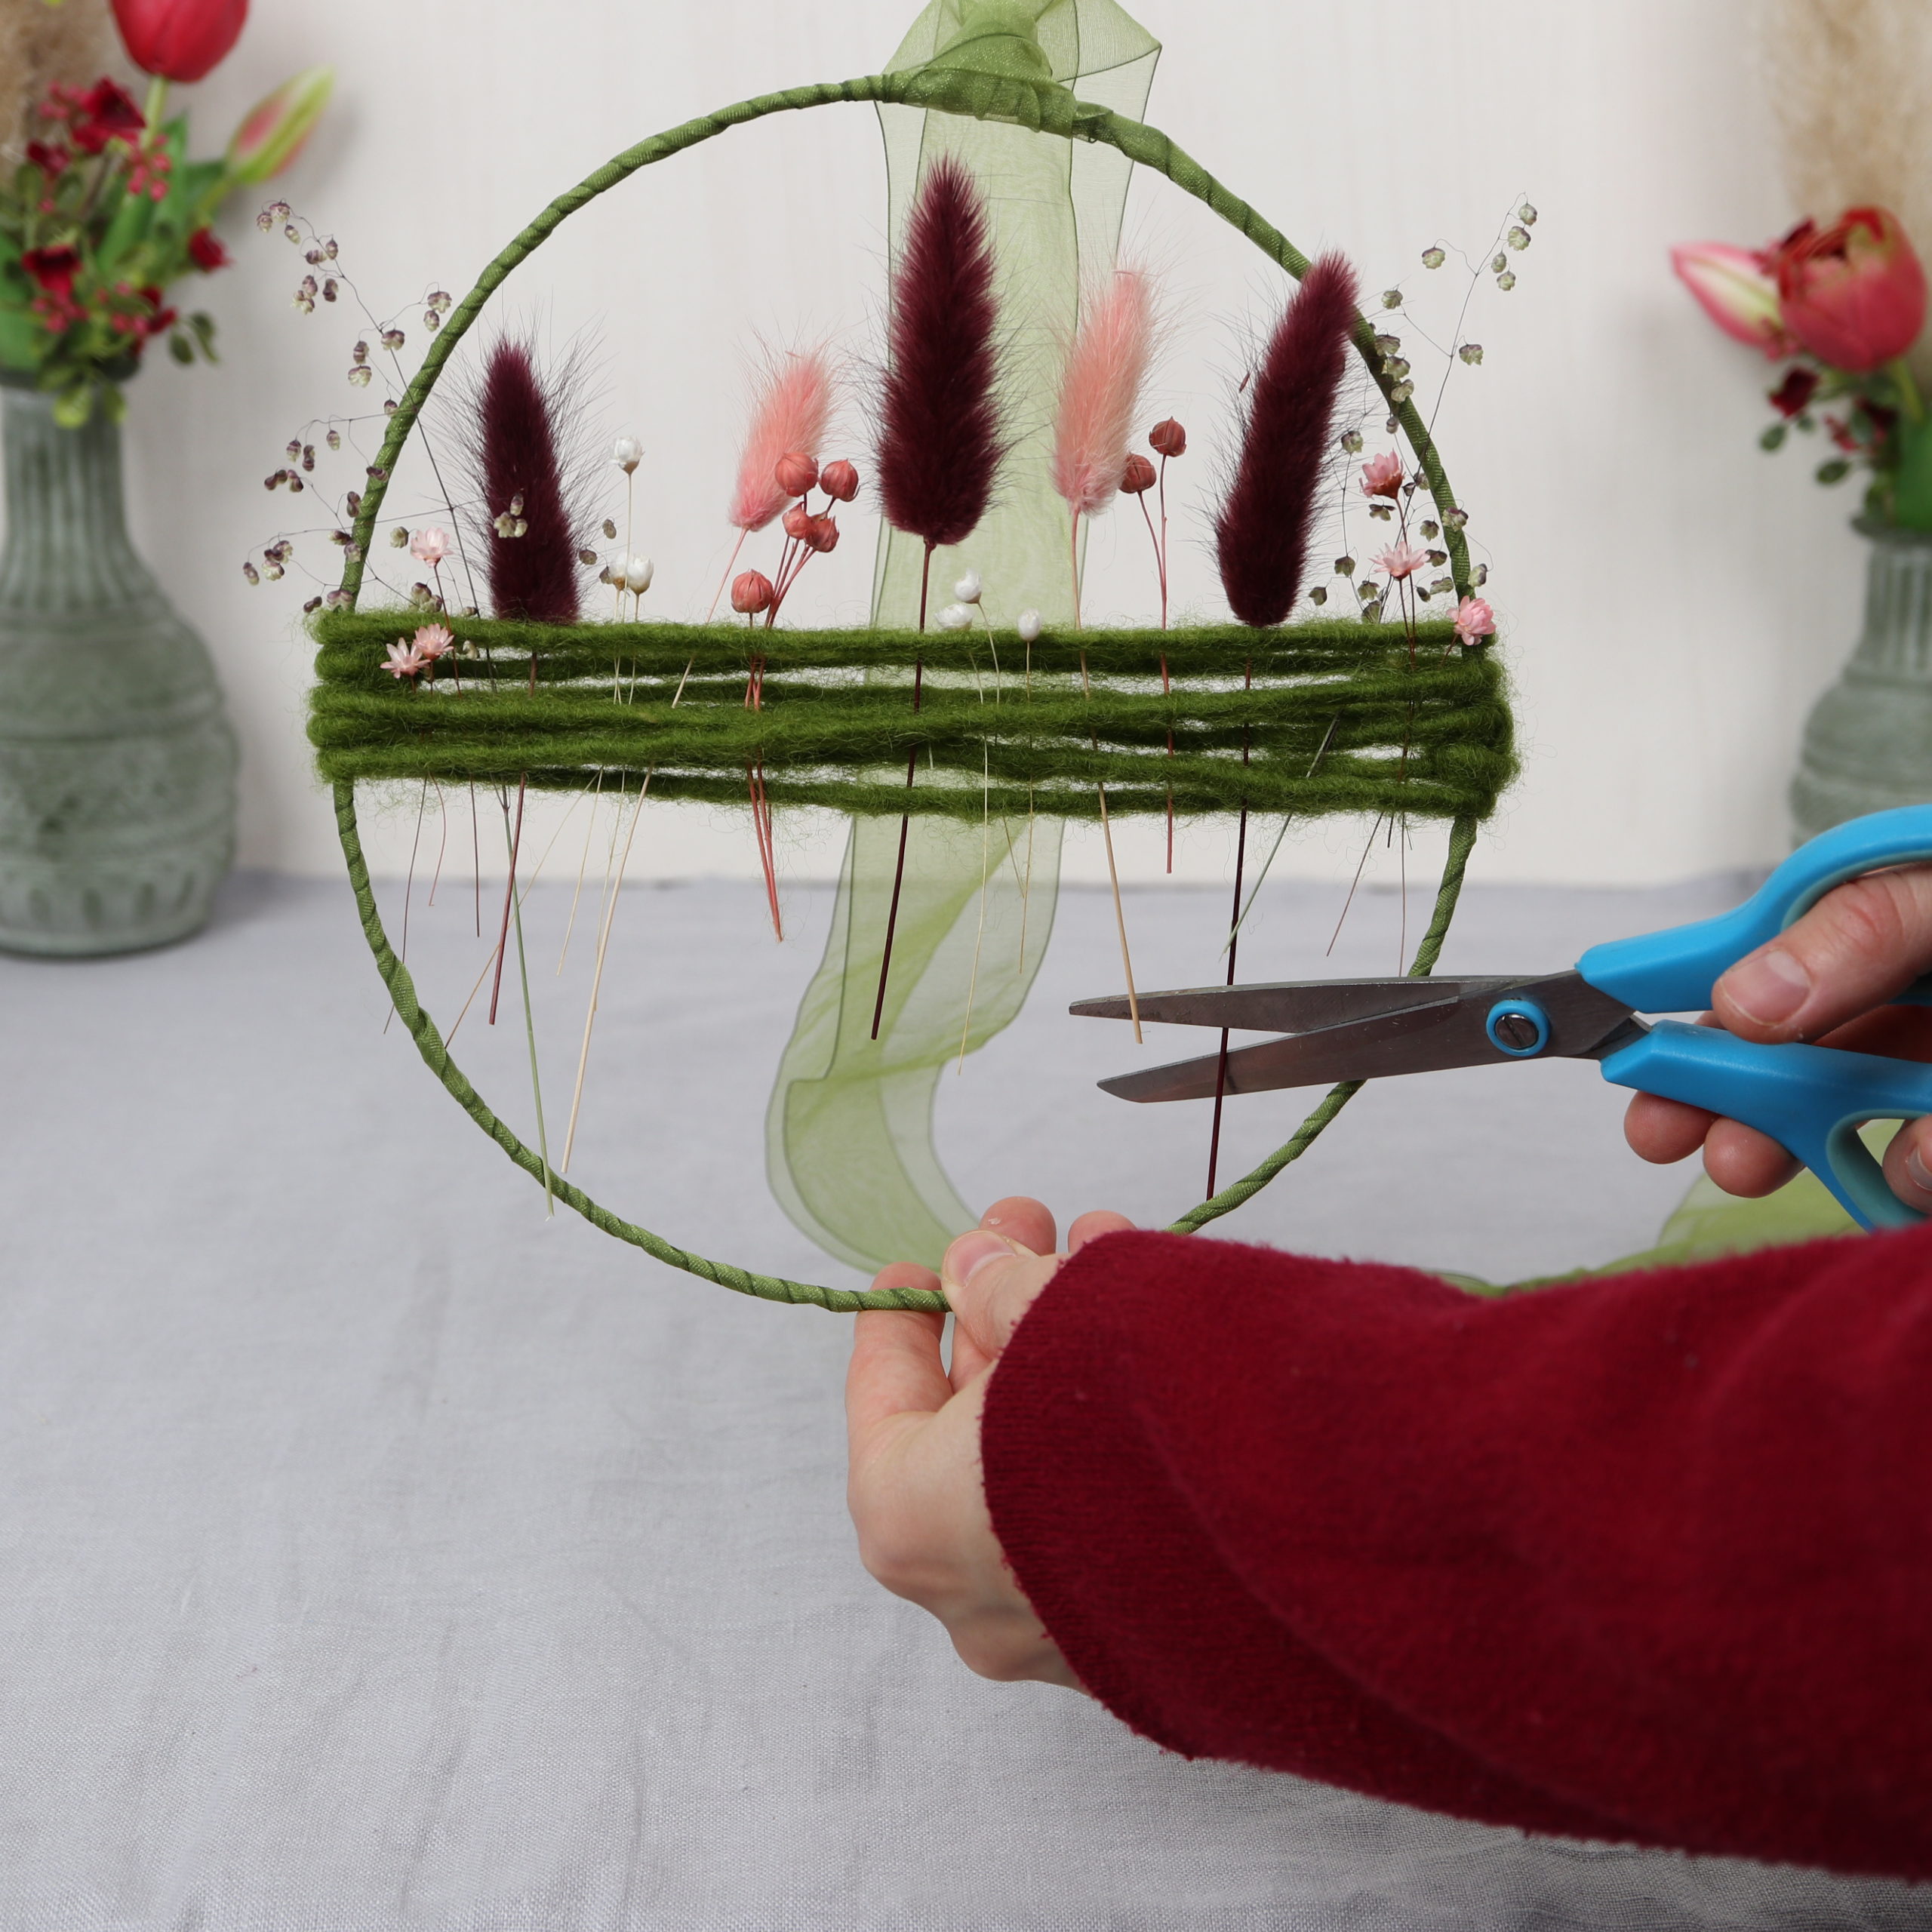
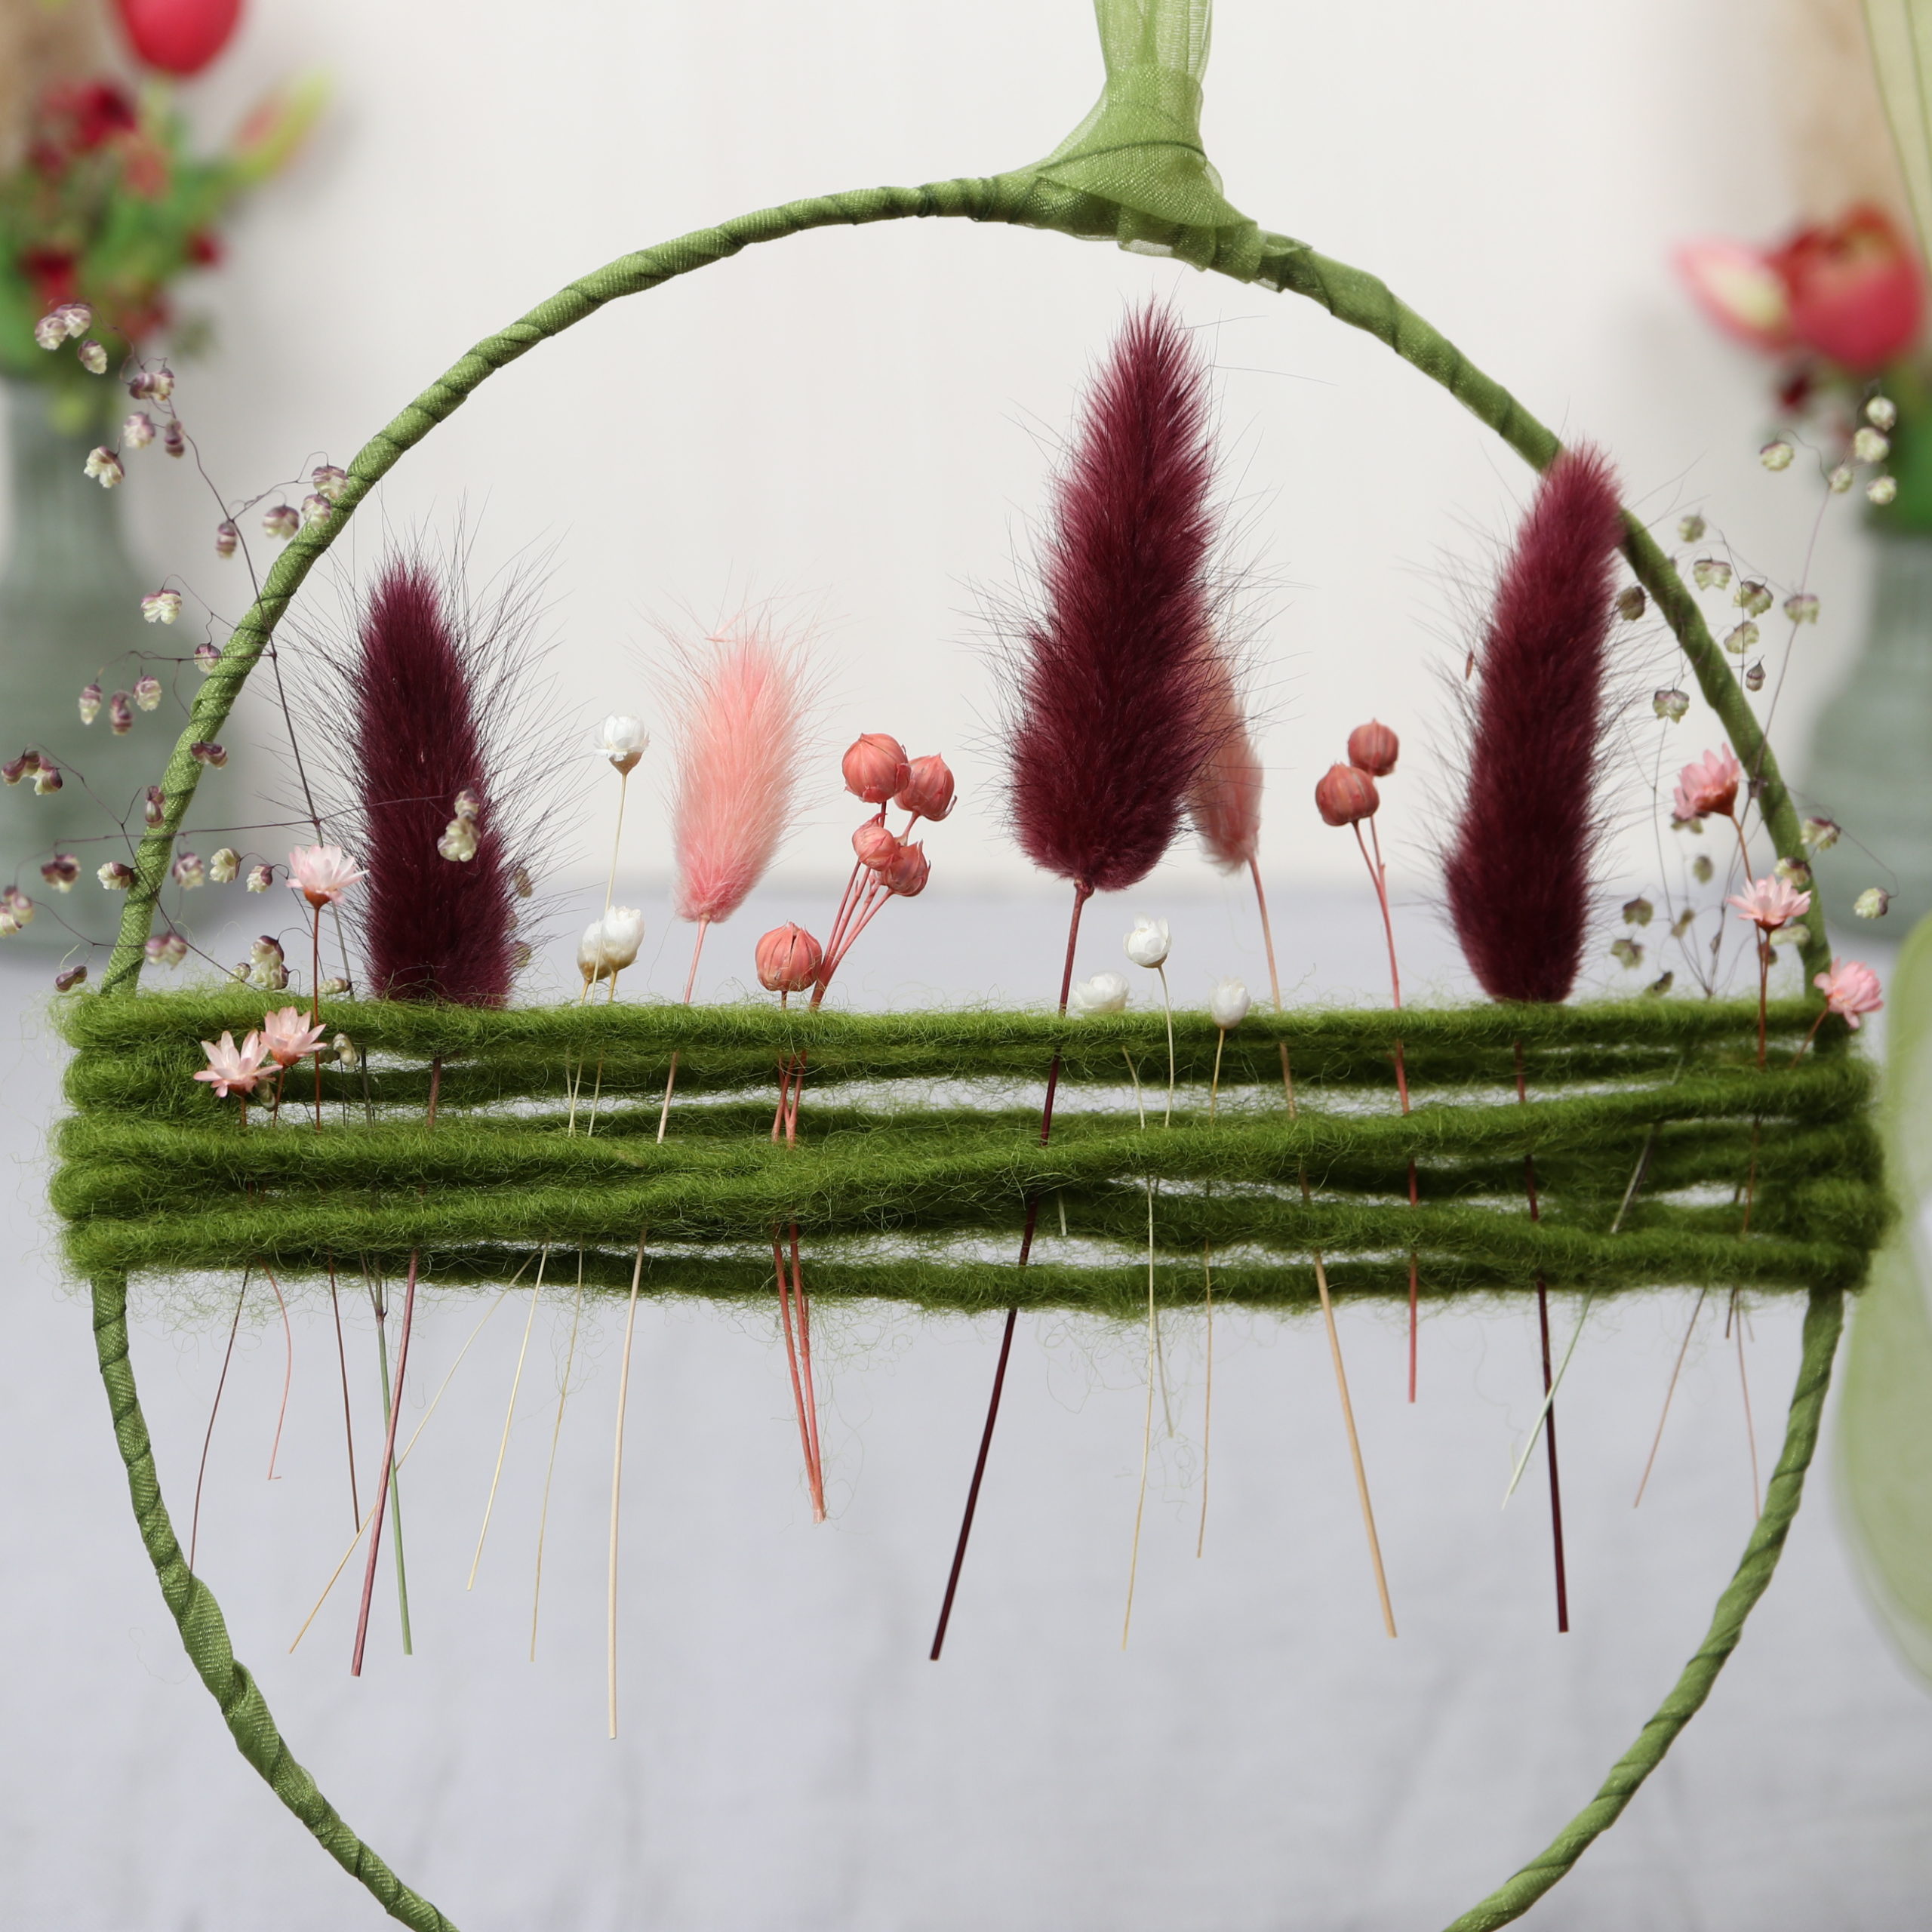
Step 4: Insert dried flowers
In the final step, I simply tuck the dried flowers and grasses between the woolen string.

To make the flower stems hold well, I weave them between the woolen cord (sticking them once over and once under the cord).
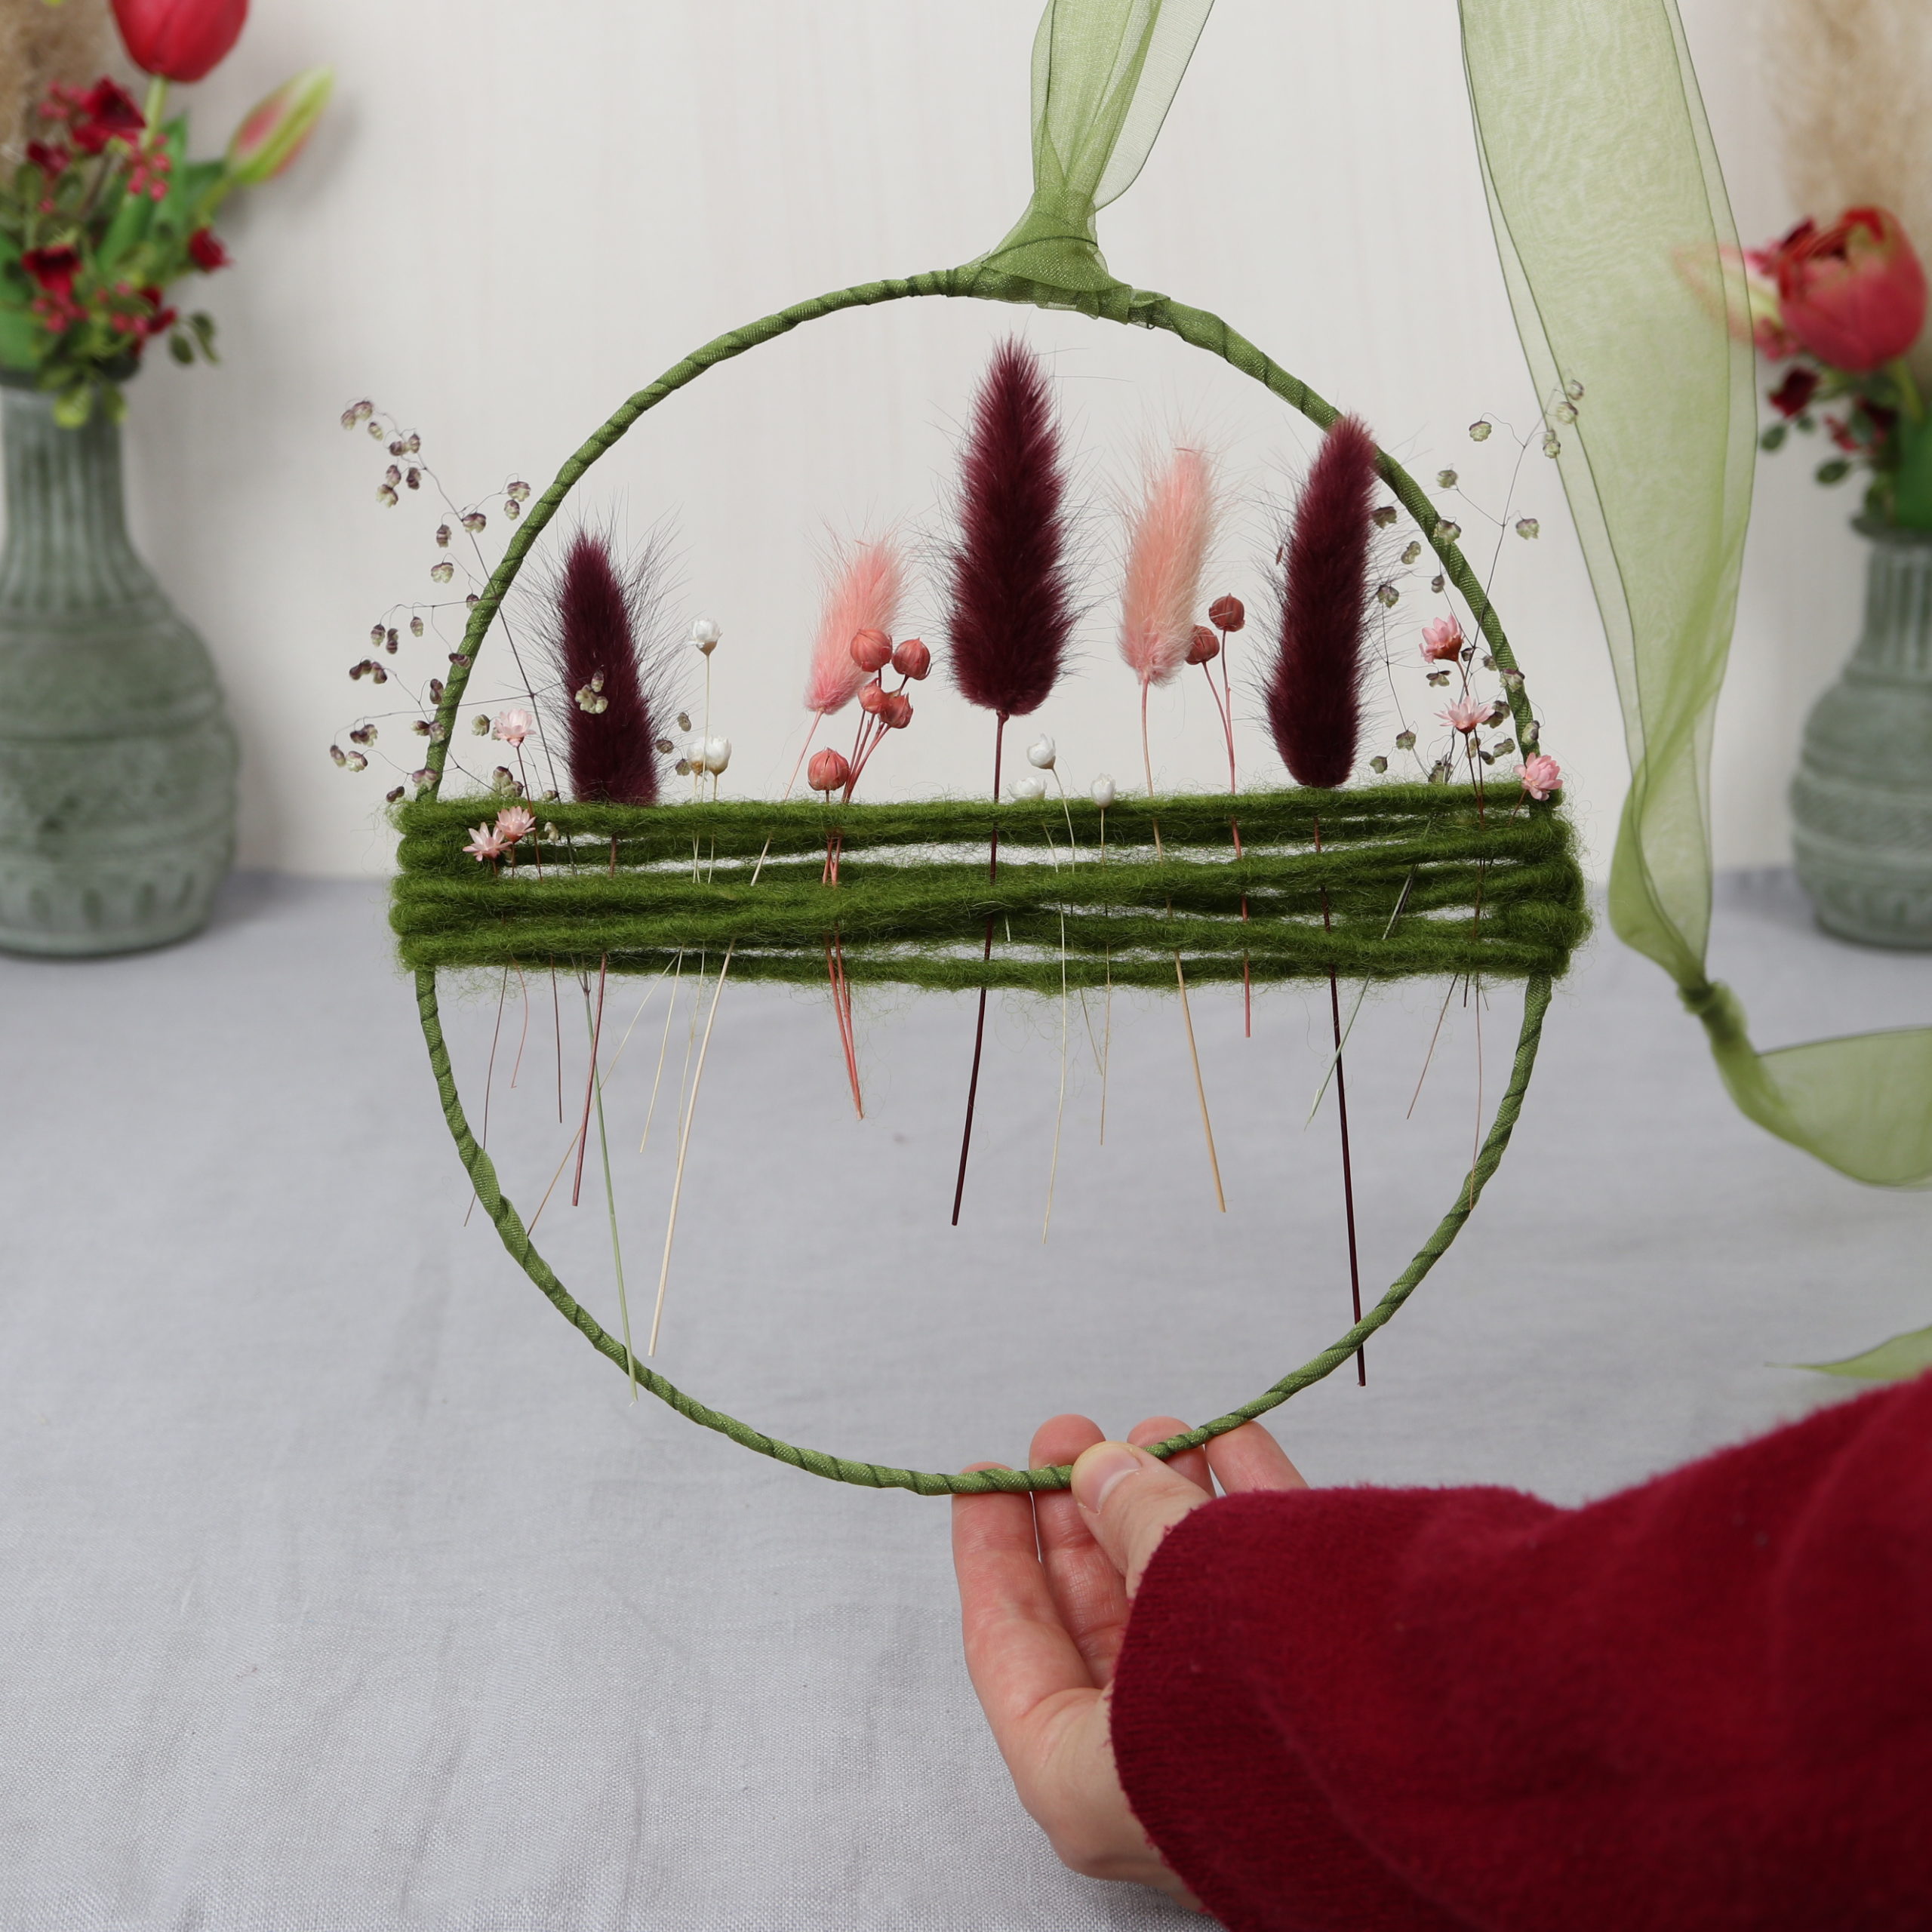
Finally, I cut the stems evenly with the scissors.
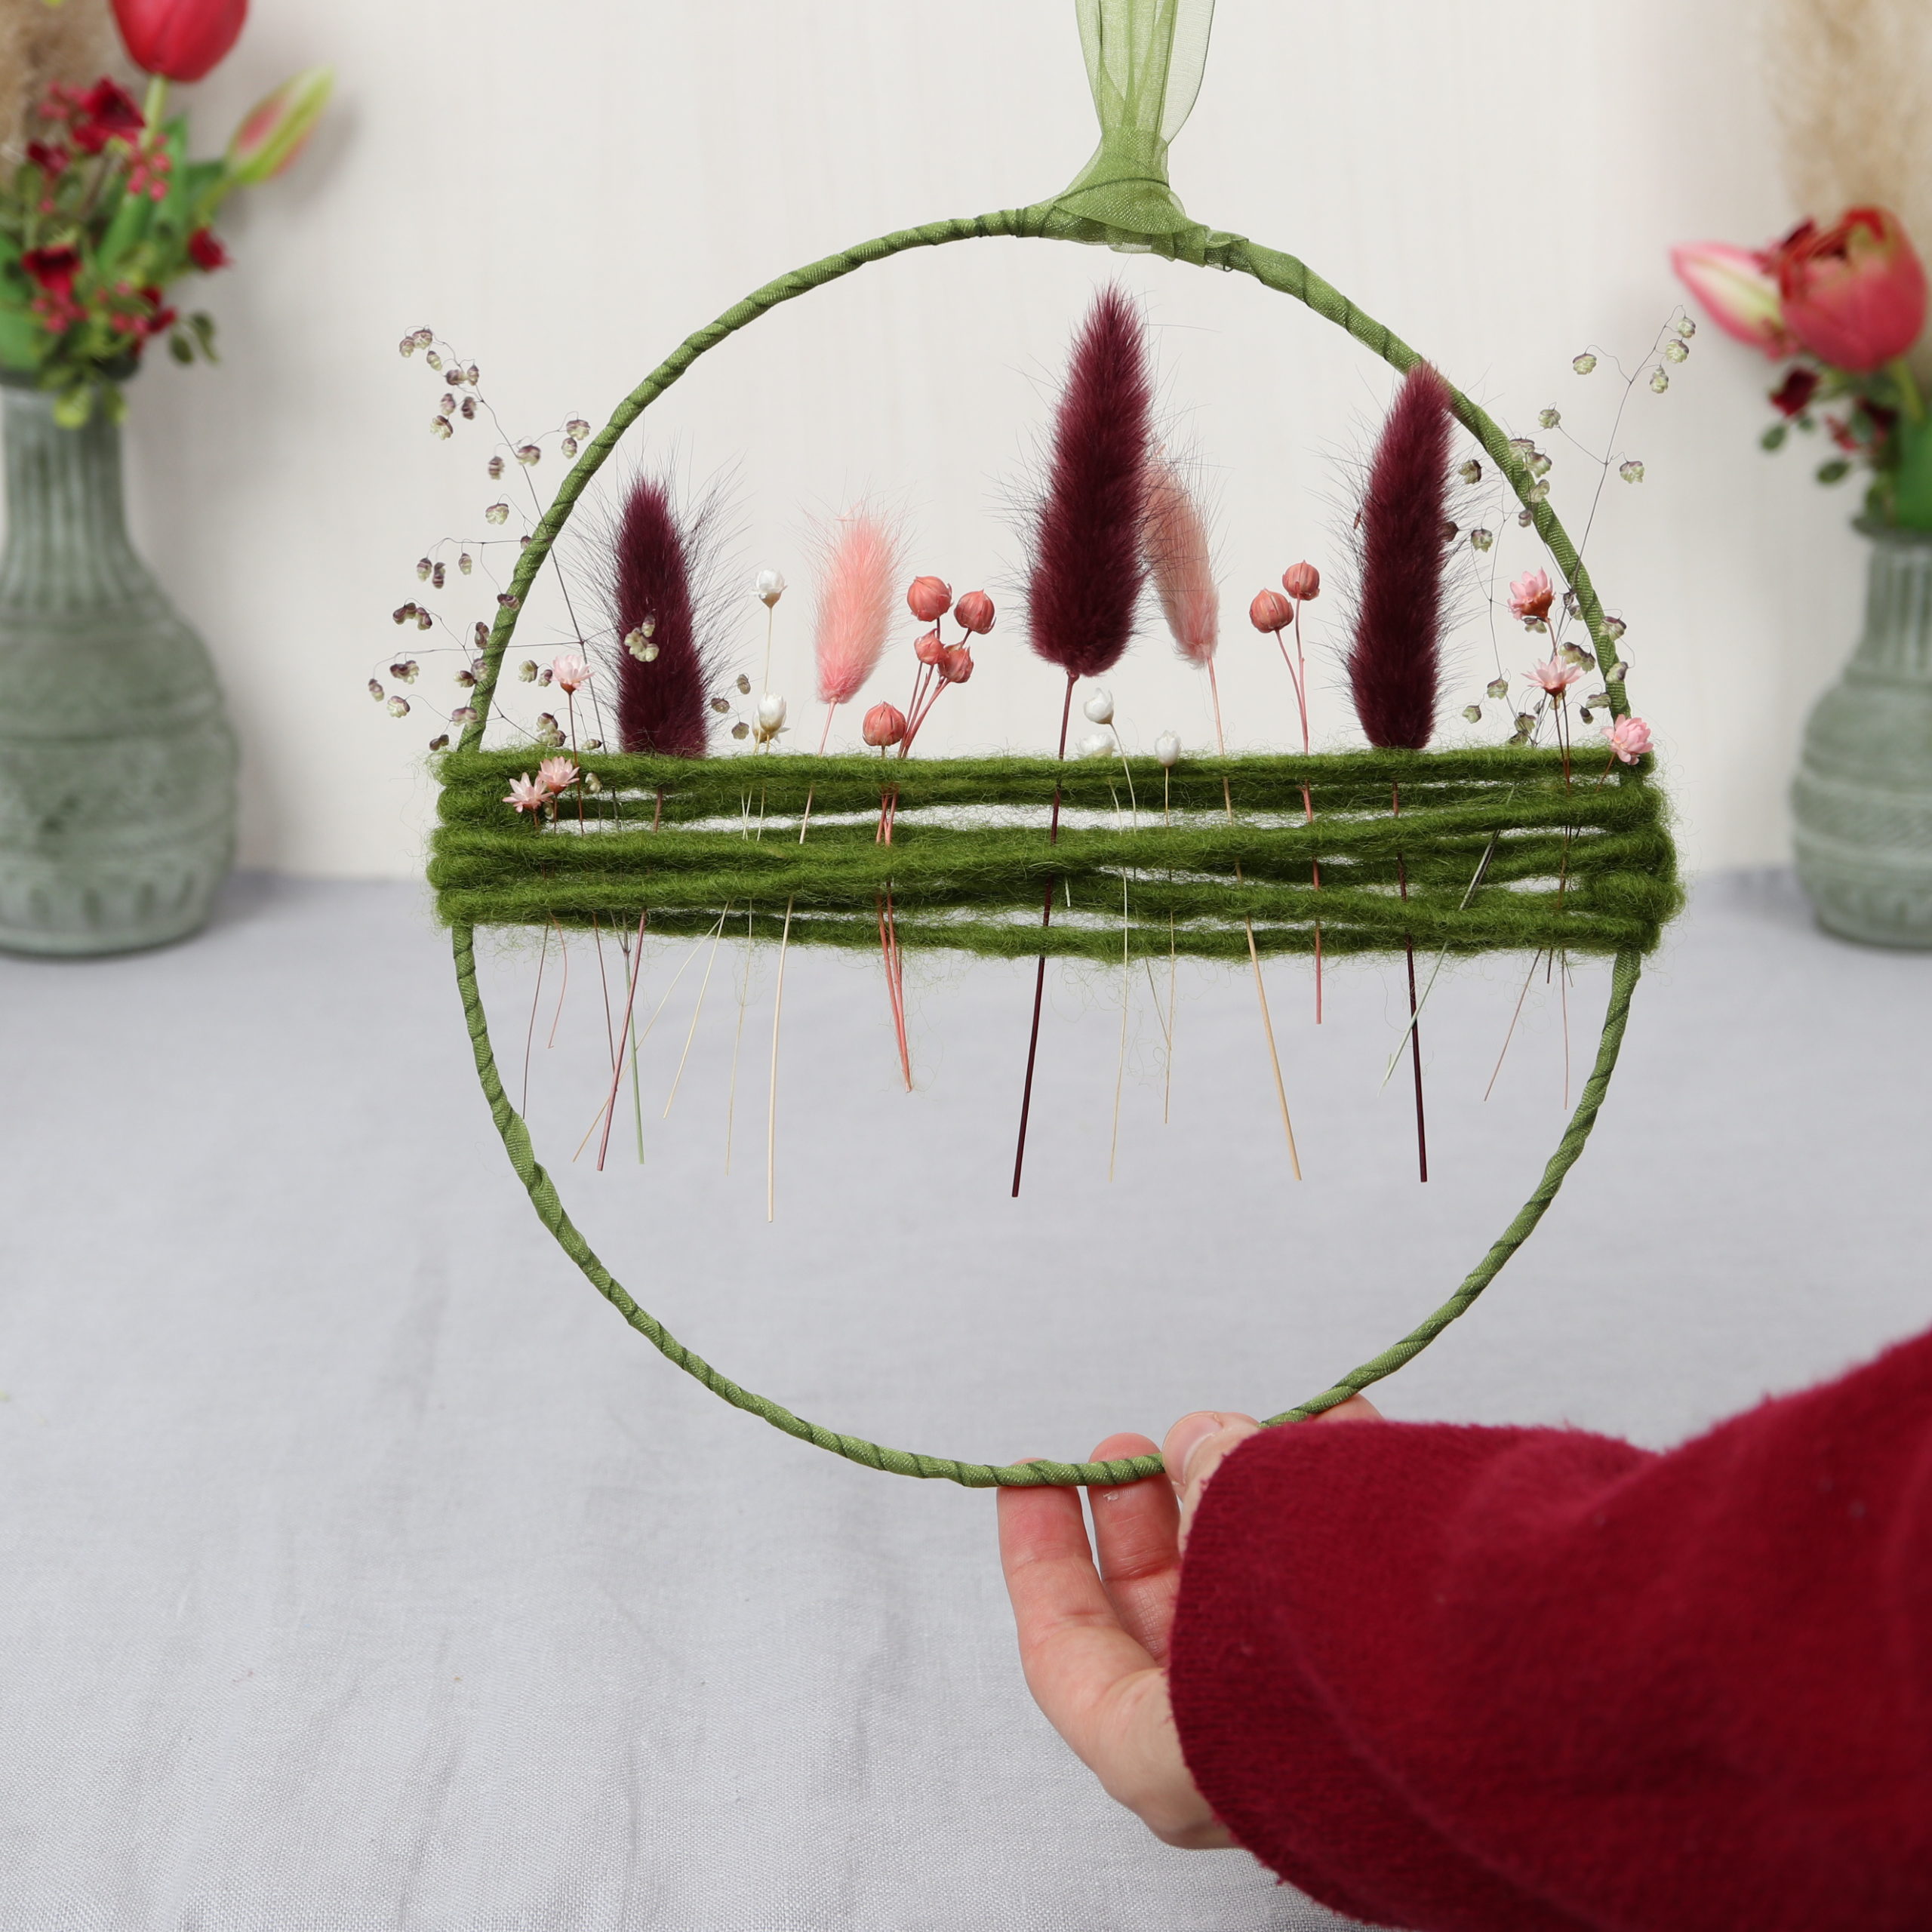
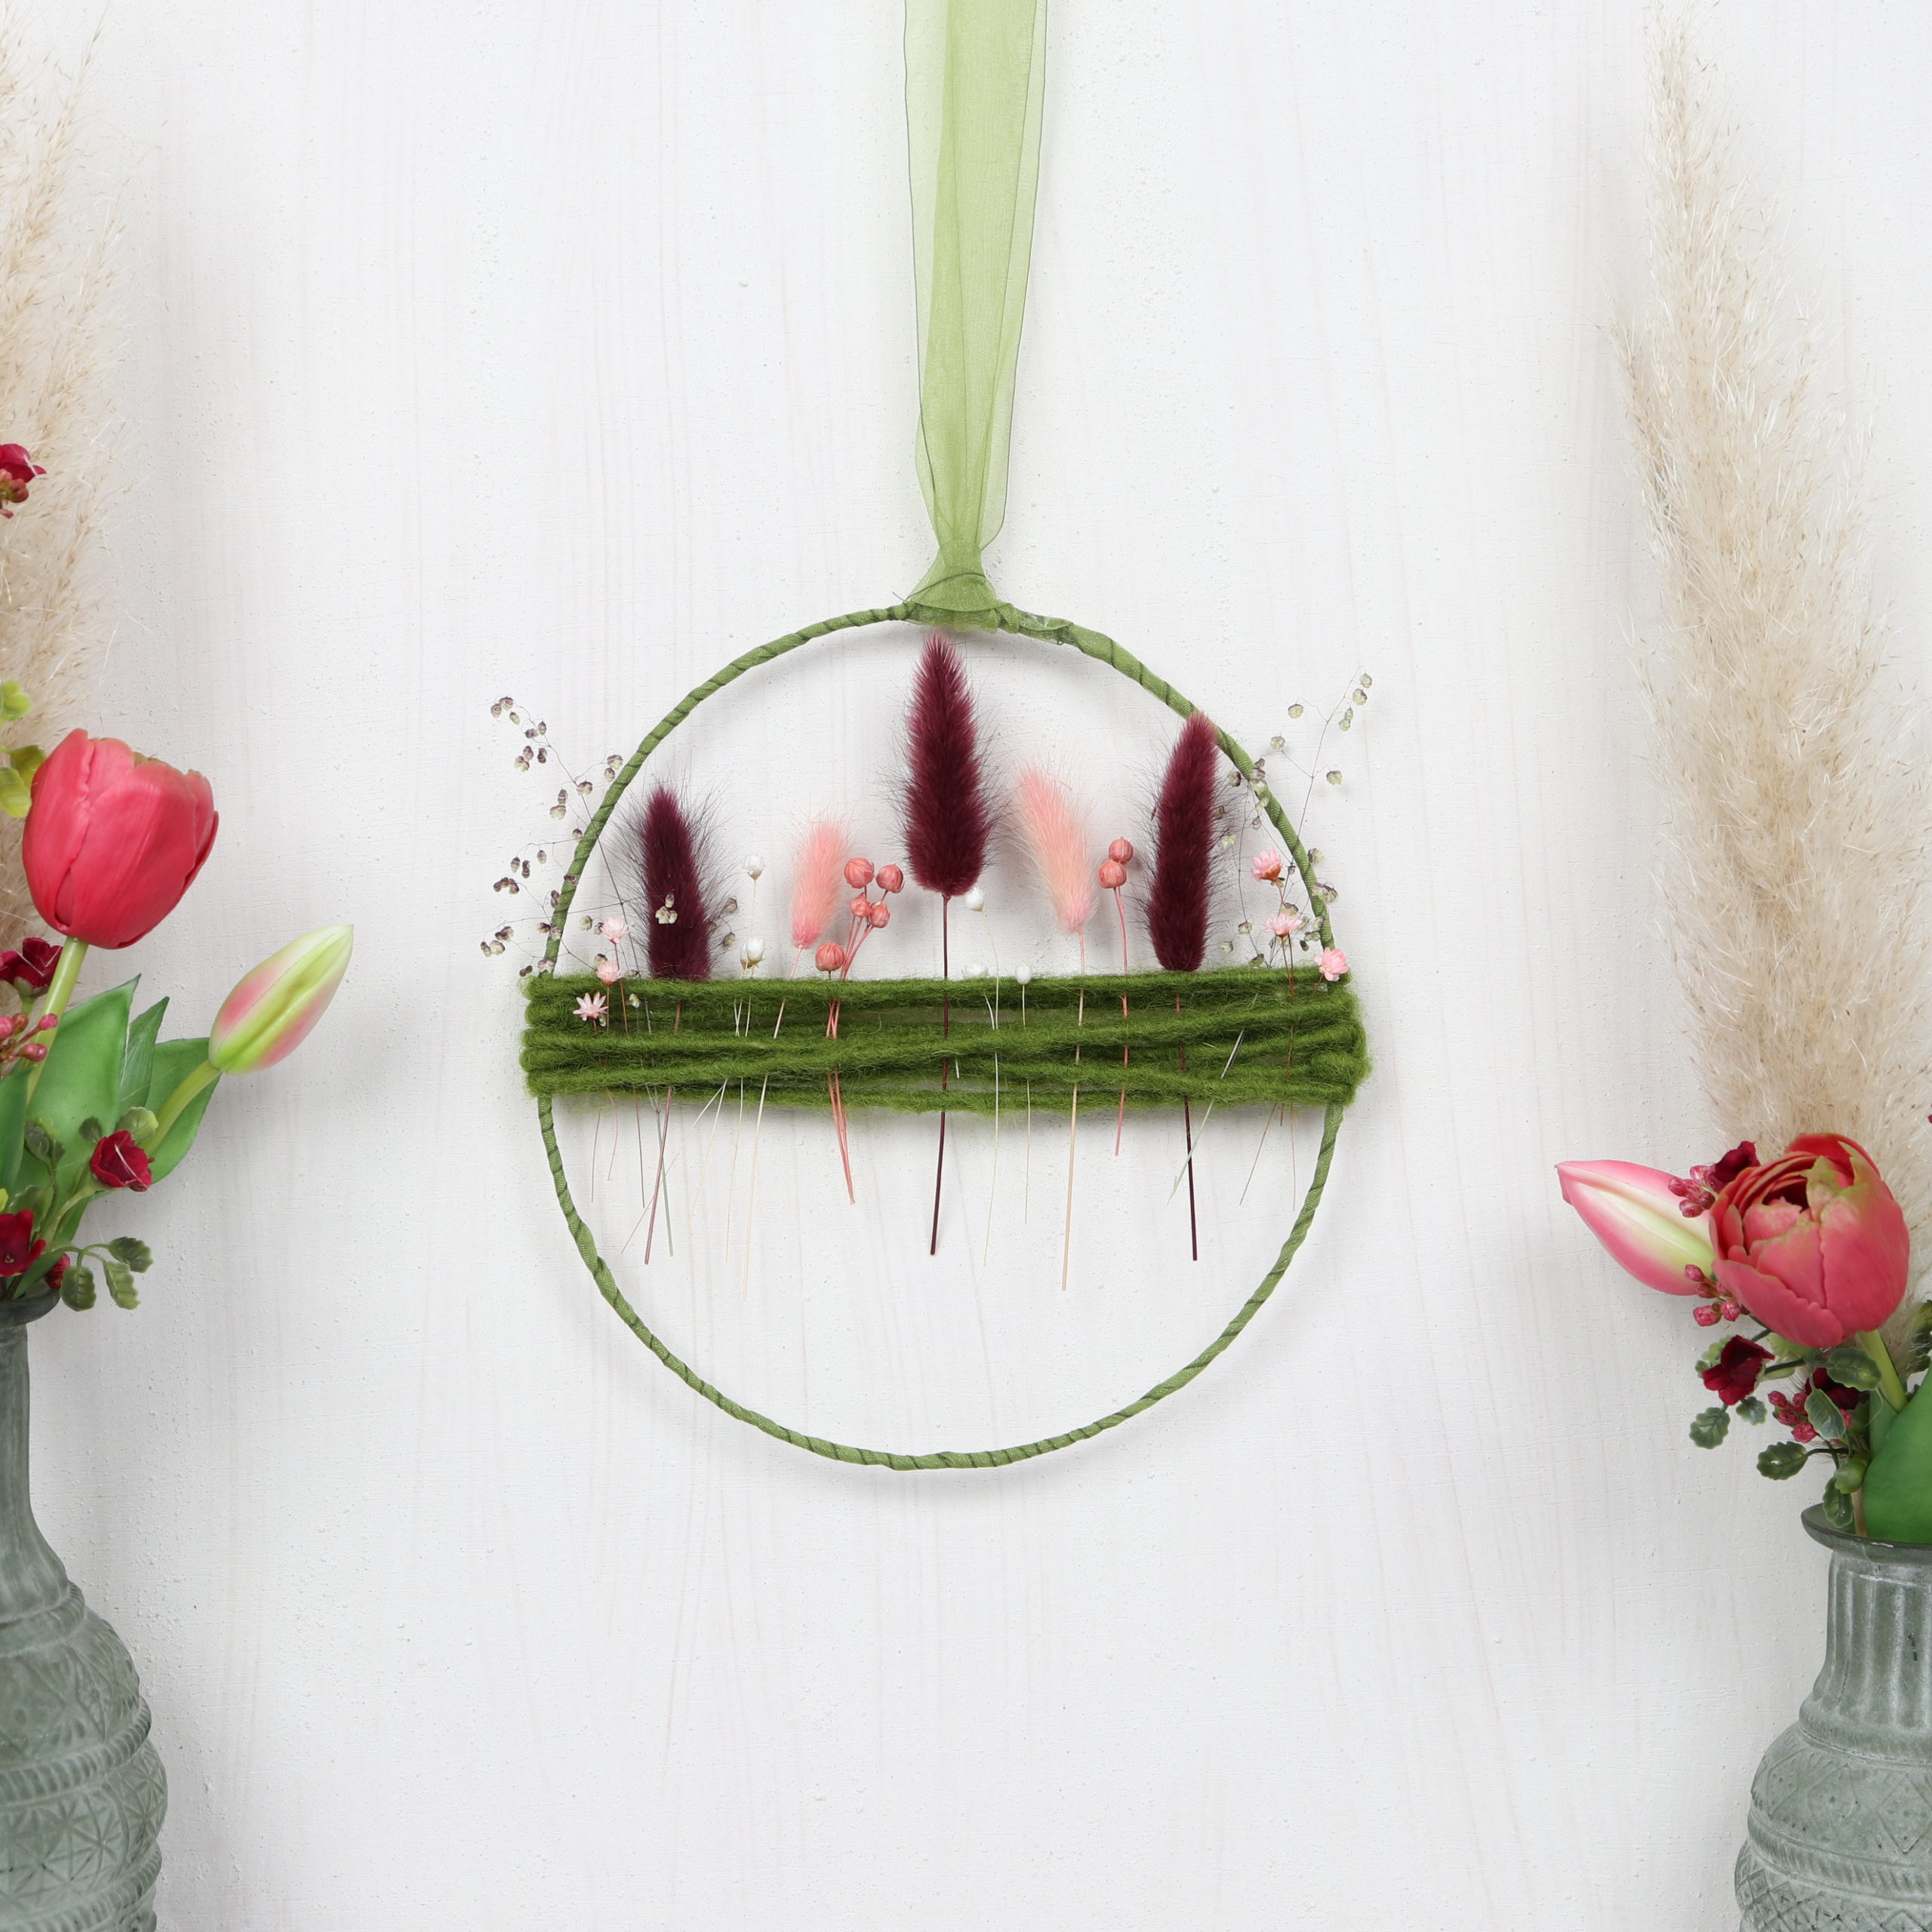
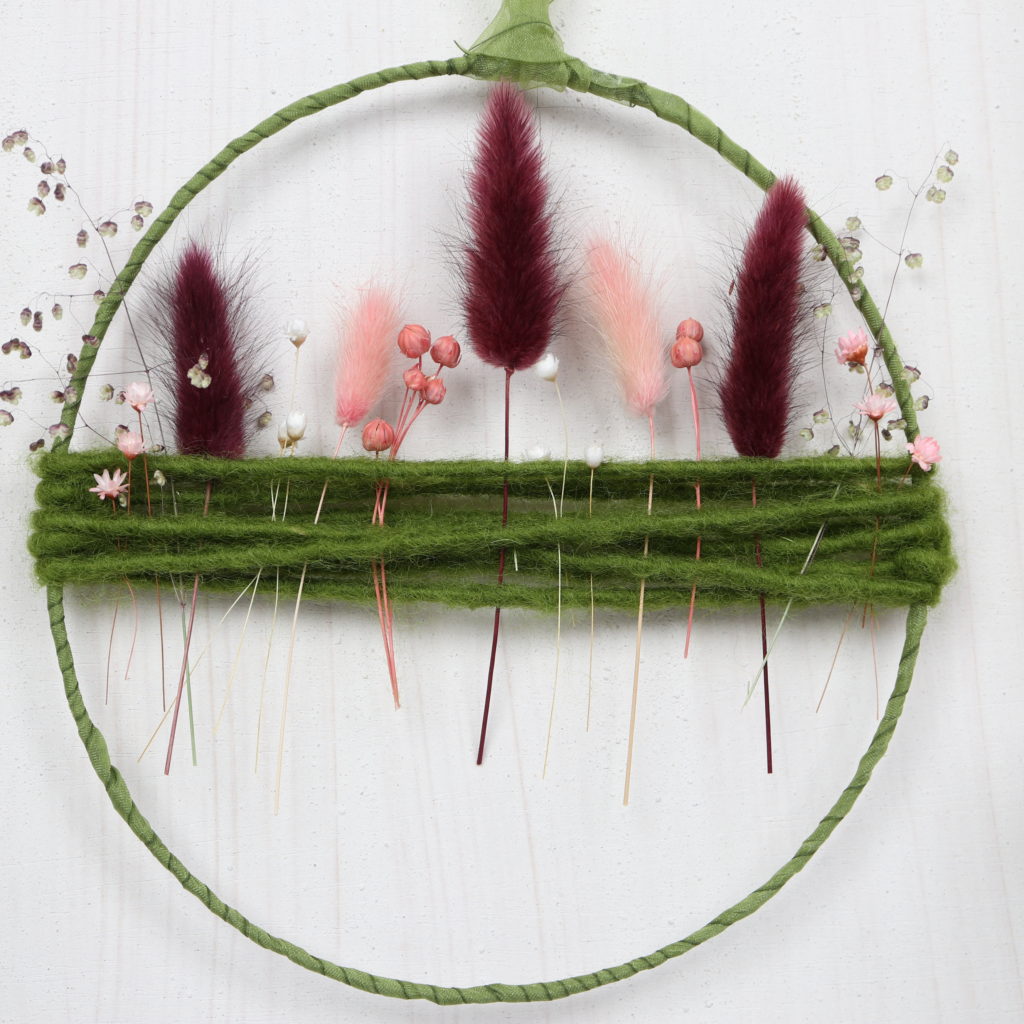
And ready is the metal ring with dried flowers! I hope you enjoyed this DIY as much as I did and you like the sight of the flower ring!
If you’re looking for more DIY ideas with dried flowers, feel free to check here: