Some time ago, I thought about combining Holly (Ilex) with something else. On my last shopping trip, I found some nice Baby’s Breath. So the idea of this DIY guide is to show how Holly can be combined with Baby’s Breath to decorate a lantern in Scandinavian style.
Tools
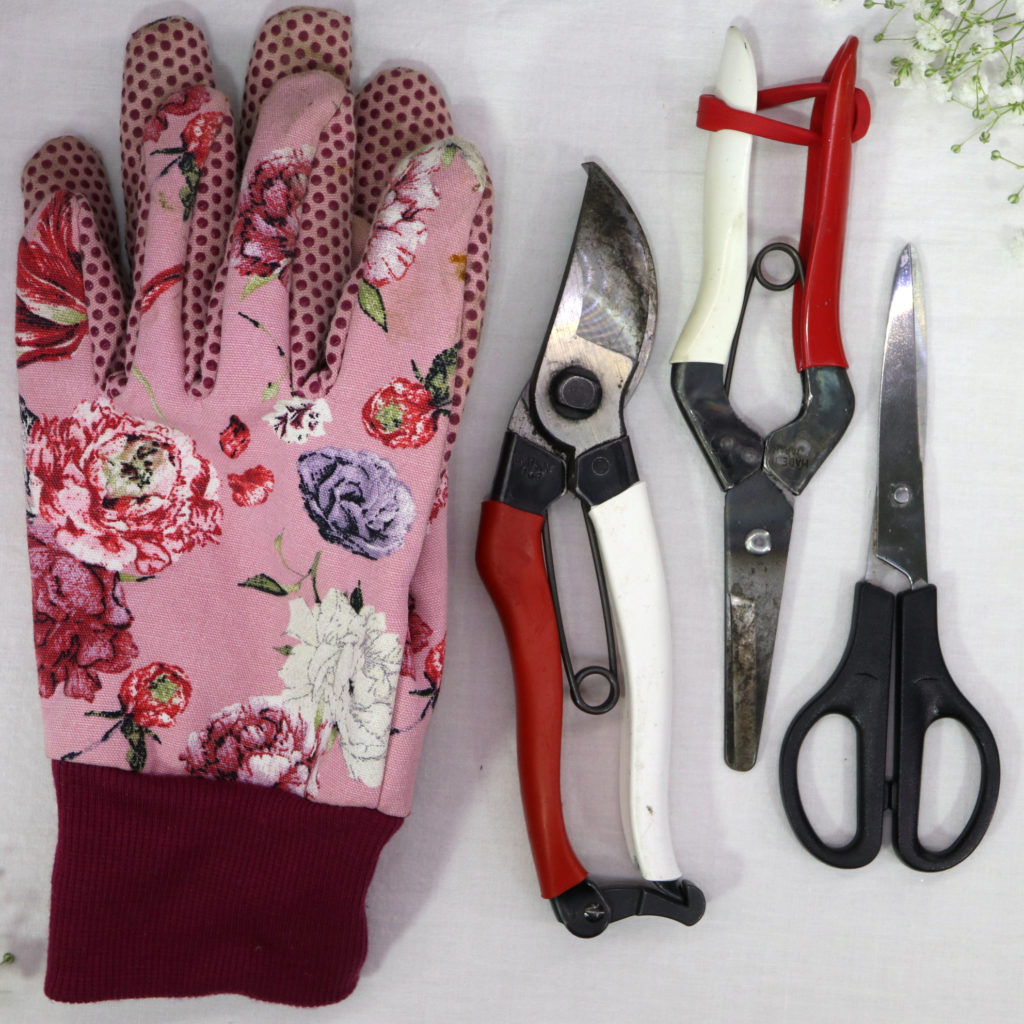
These tools are used in this DIY: Harvest shears, household scissors, and gardening gloves.
| Werkzeug | Suche auf |
|---|---|
| Harvest shears | |
| I use the Japanese harvest shears Okatsune 304 | |
| Household scissors | |
| Gardening gloves |
Materials
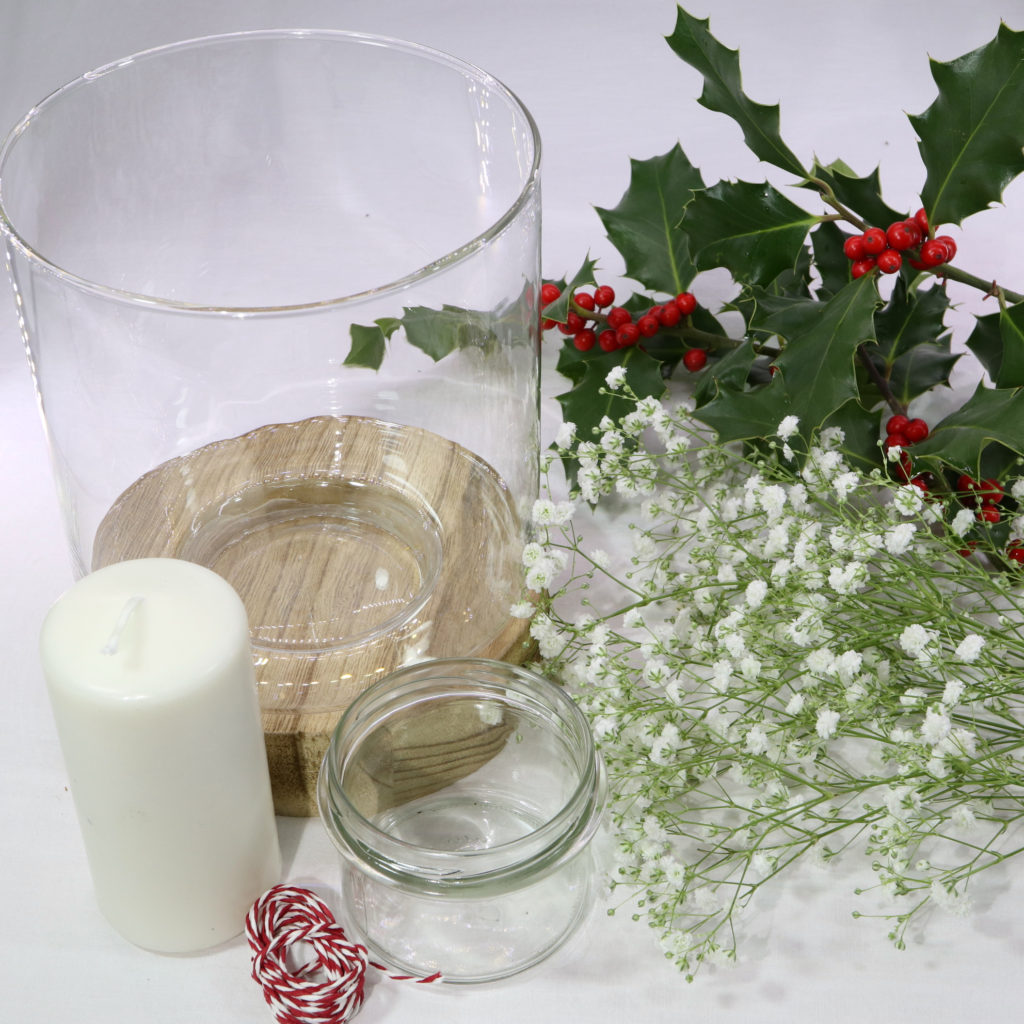
These are the material that I used: Wood & glass lantern, candle jar, white candle, baker’s twine, Holly and Baby’s Breath.
| Material | Search on… |
|---|---|
| Lantern (wood & glass) | |
| Candle jar | |
| Candle (white) | |
| Baker’s twine (red/white) | |
| Holly twigs | |
| Baby’s breath |
Guide
Step 1: Insert candle jar into lantern
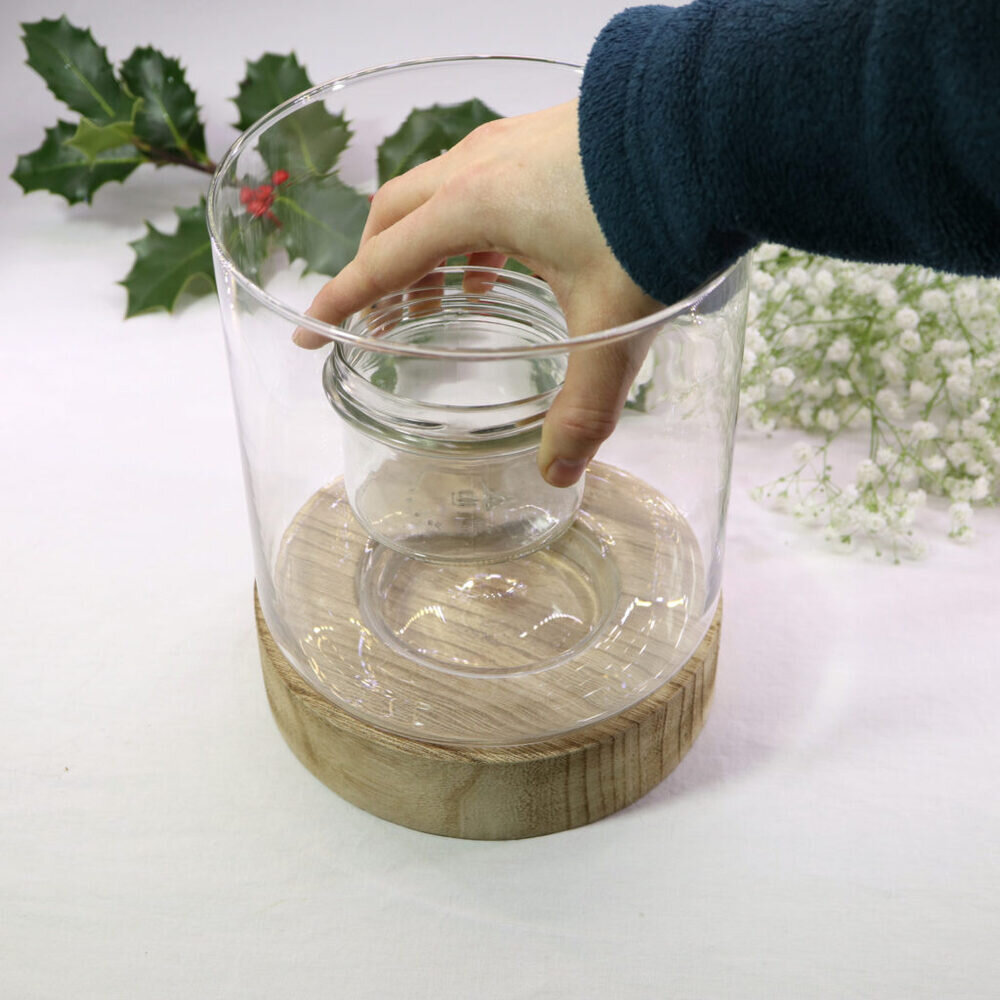
The first step is to insert the smaller candle jar into the lantern. There are many different kind of candle jars and lantern. Just use the ones you like most. I decided on some plain glass lantern. The idea of the inner candle jar is to prevent that the (later added) twigs catch fire.
Step 2: Insert candle

Next, the candle is placed into the inner candle jar.
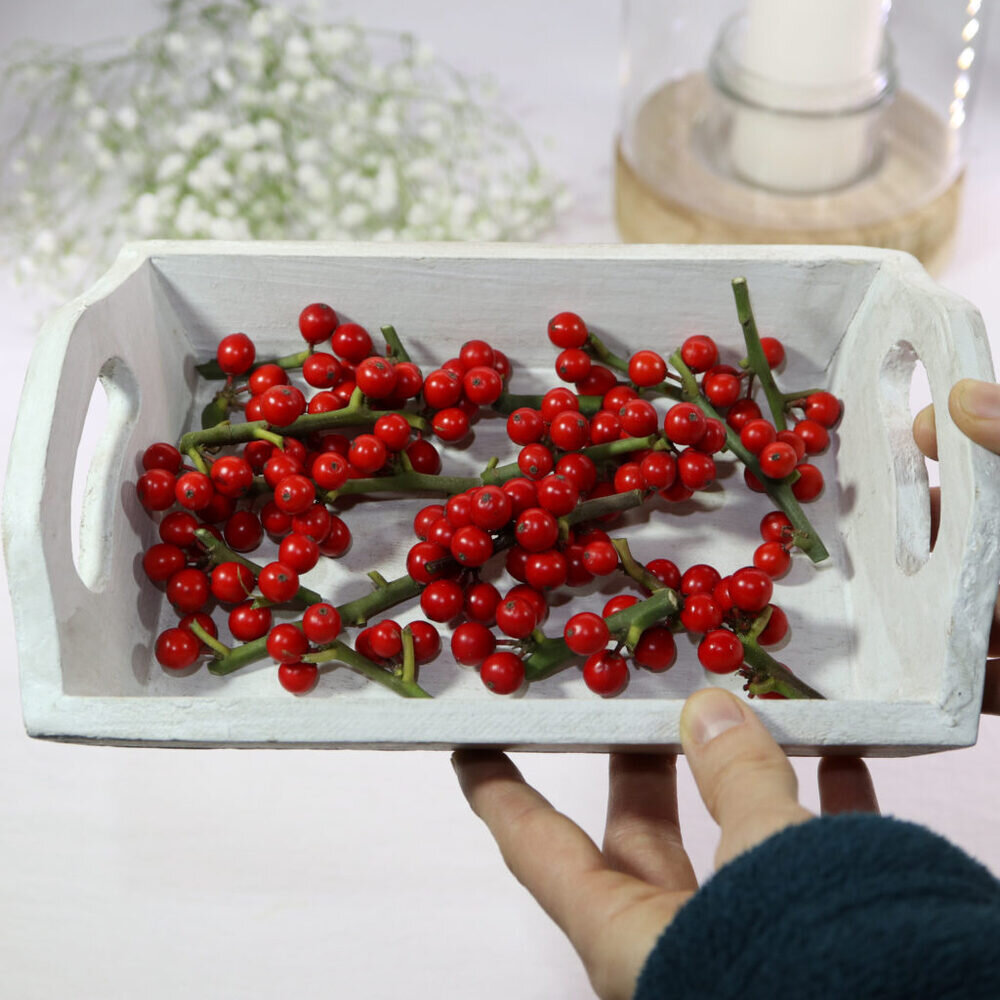
Step 3: Cut Holly twigs
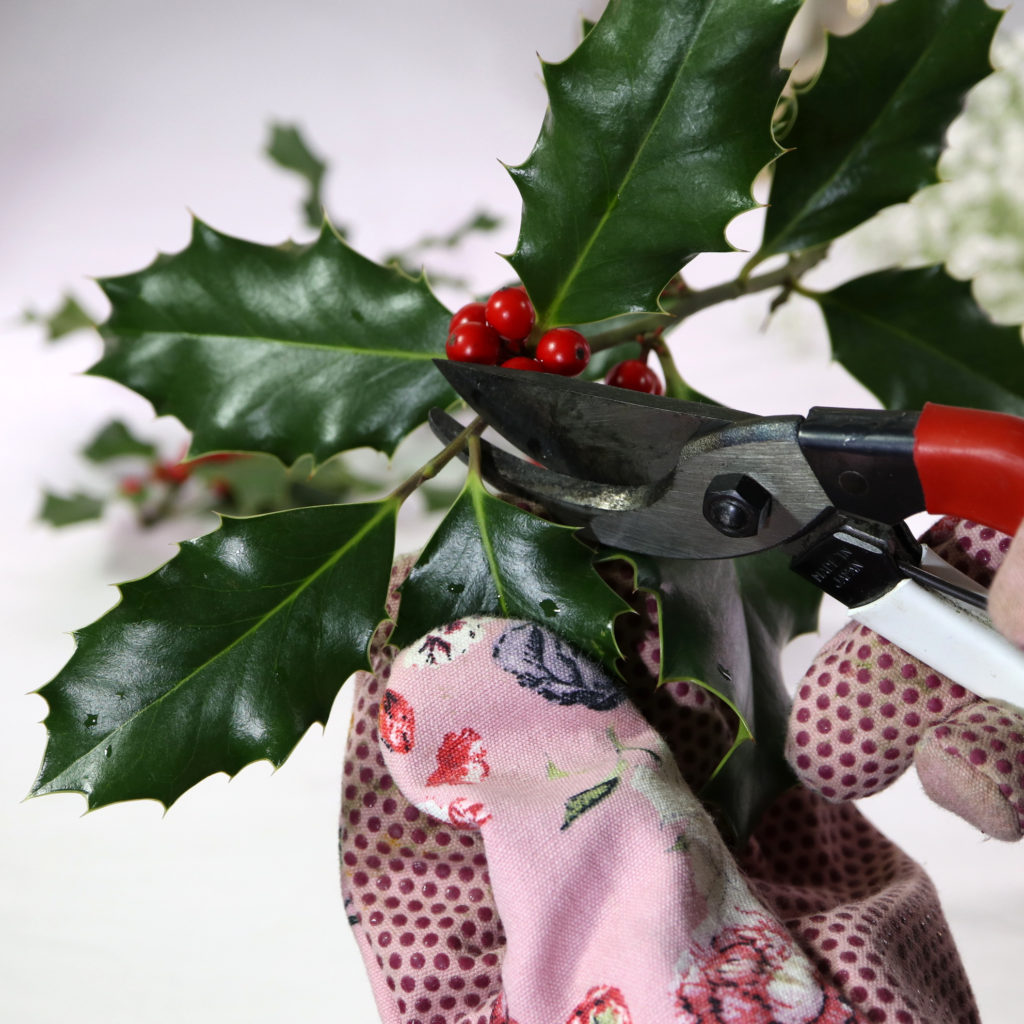
Next, use the harvest shears to cut the Holly twigs to the right length. I decided to use only the red berries for my DIY. Holly is very spiky, therefore I recommend to put some gardening gloves on when cutting.
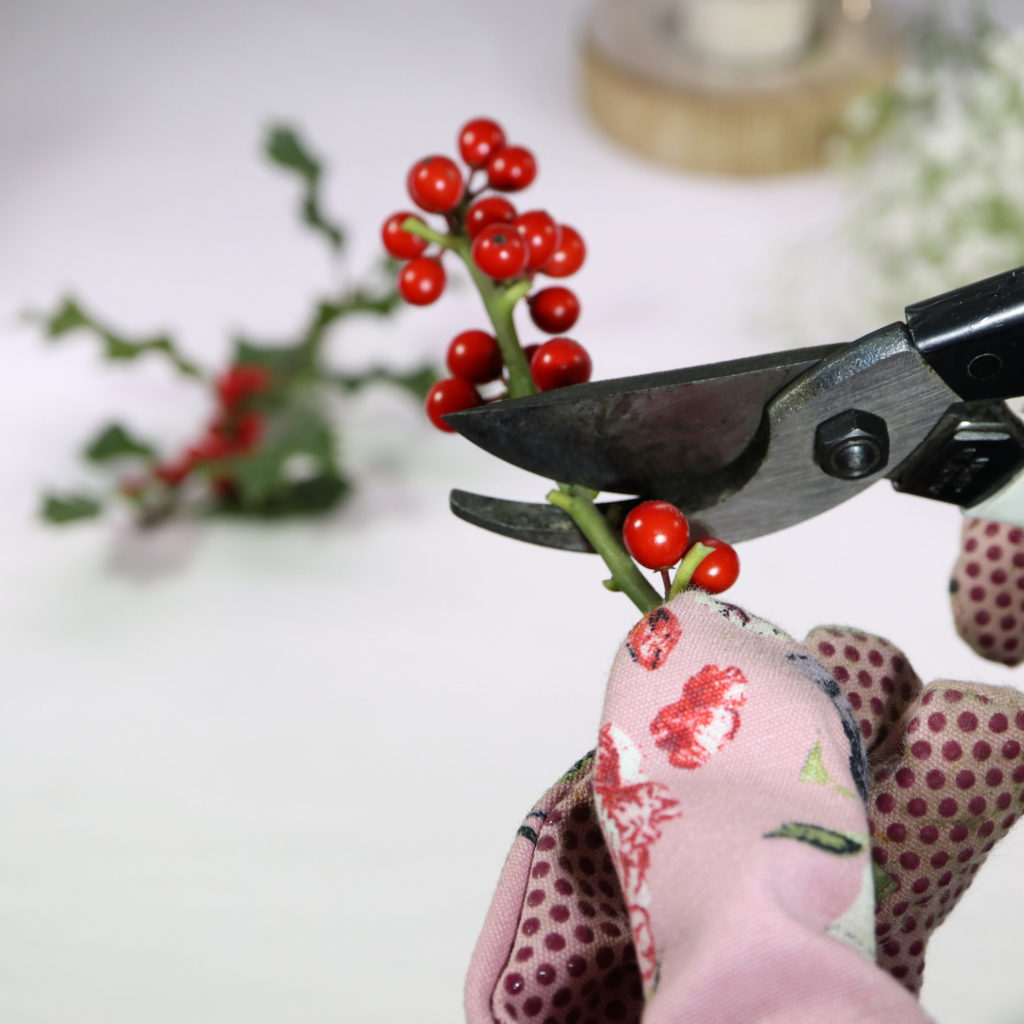
Here, I cut the twigs.
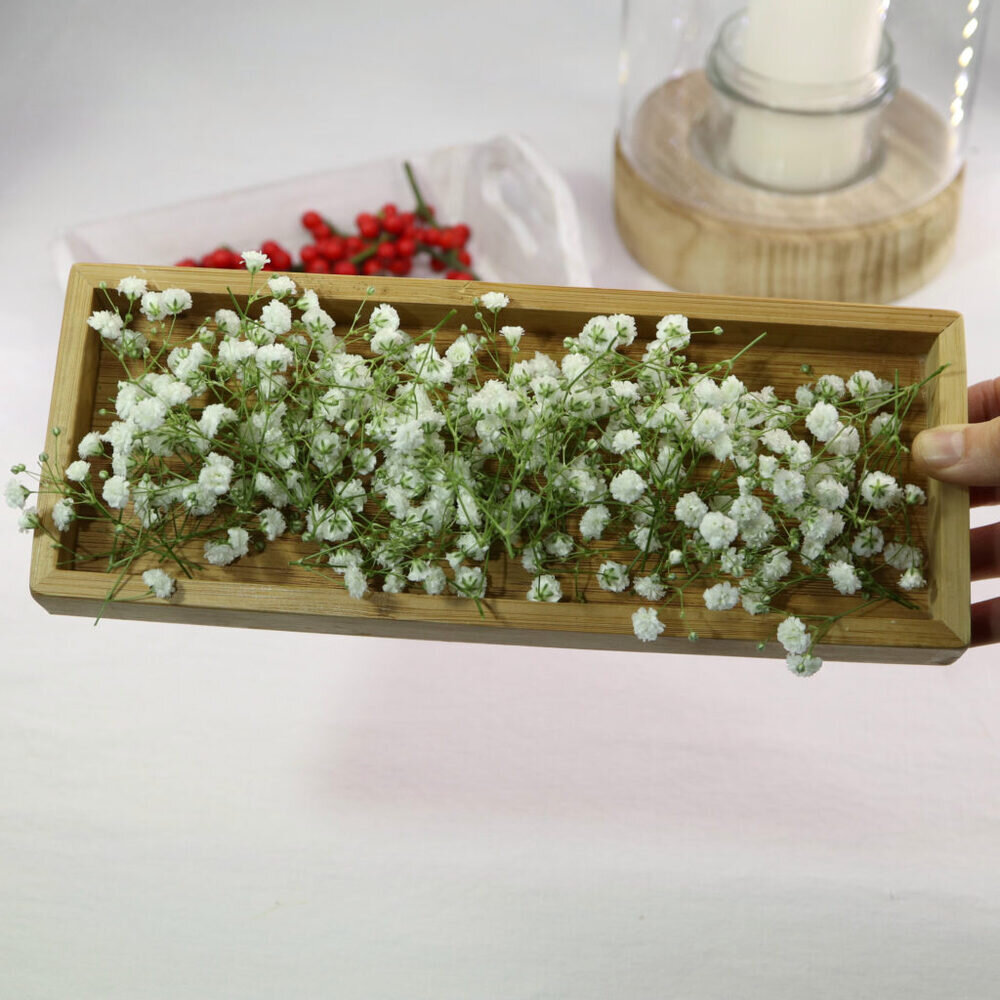
Step 4: Cut the Baby’s Breath

Next, the Baby’s Breath is cut in order to have some smaller sprigs.
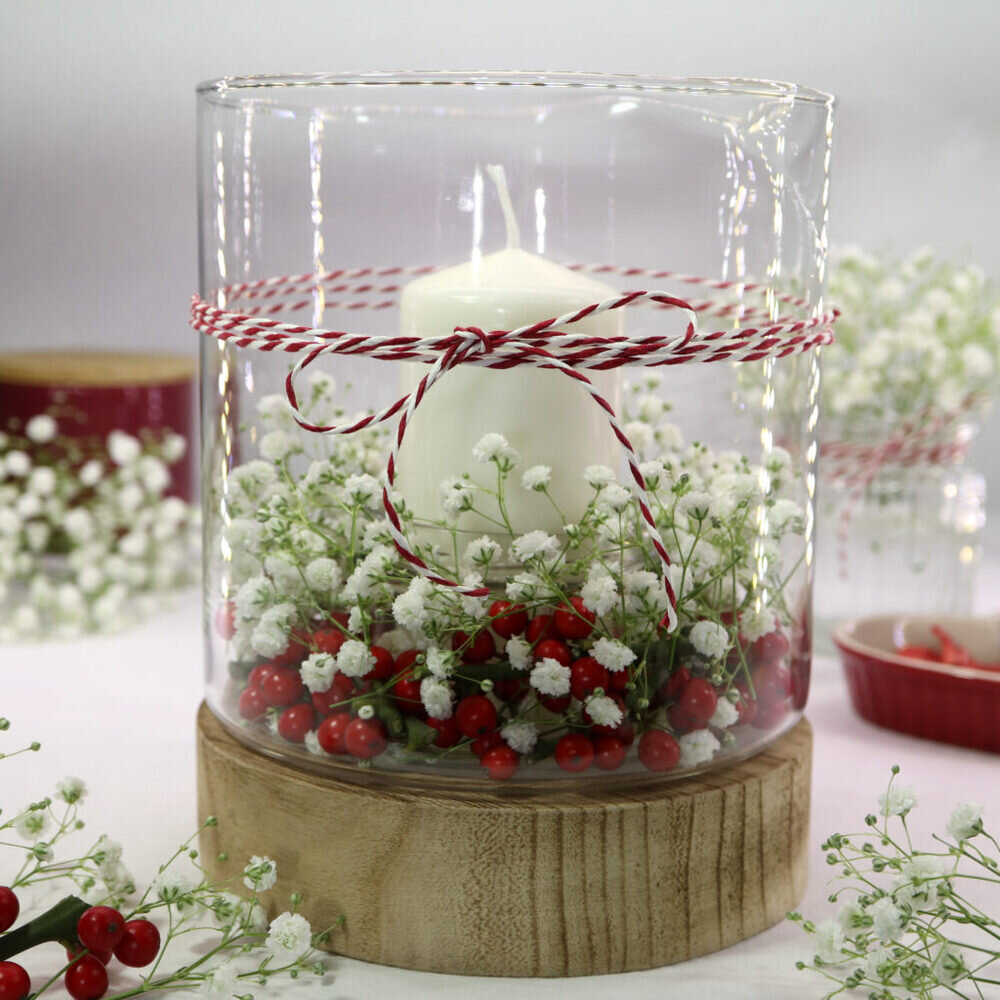
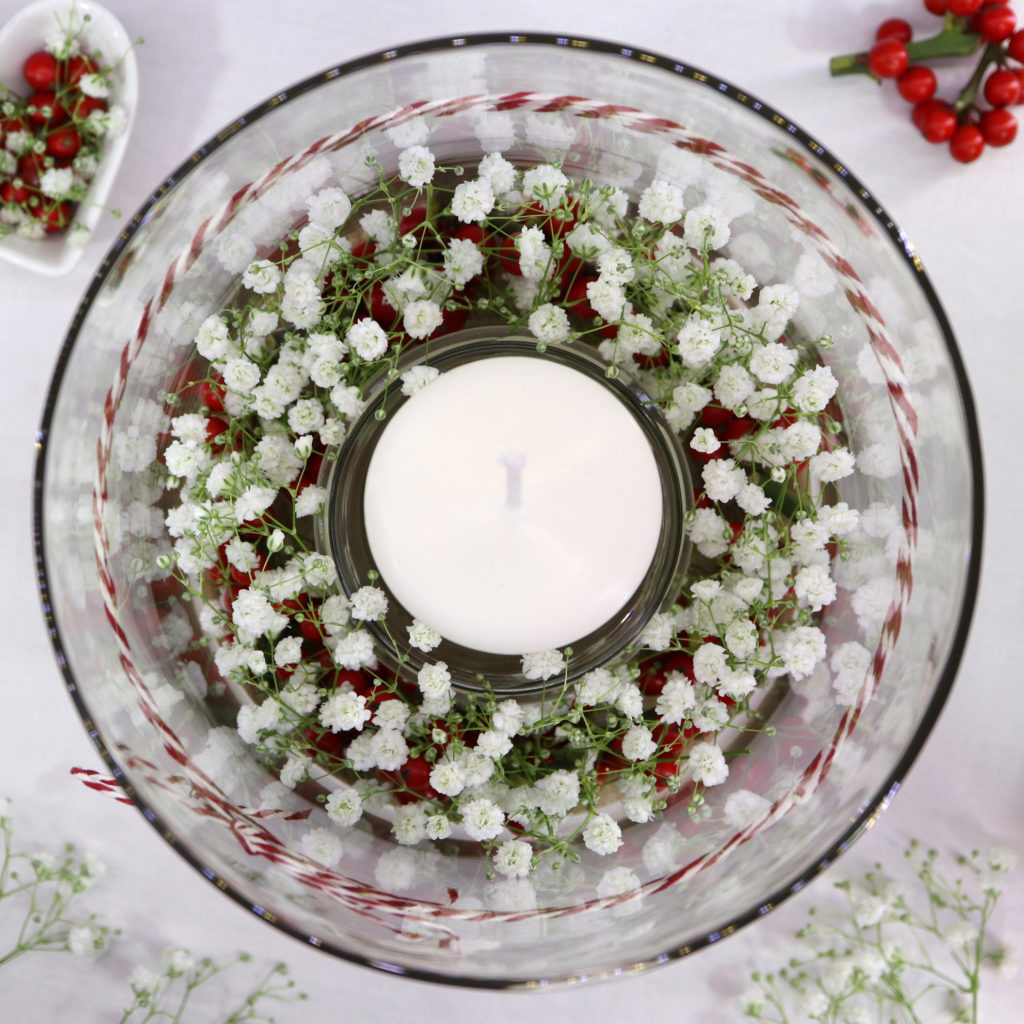
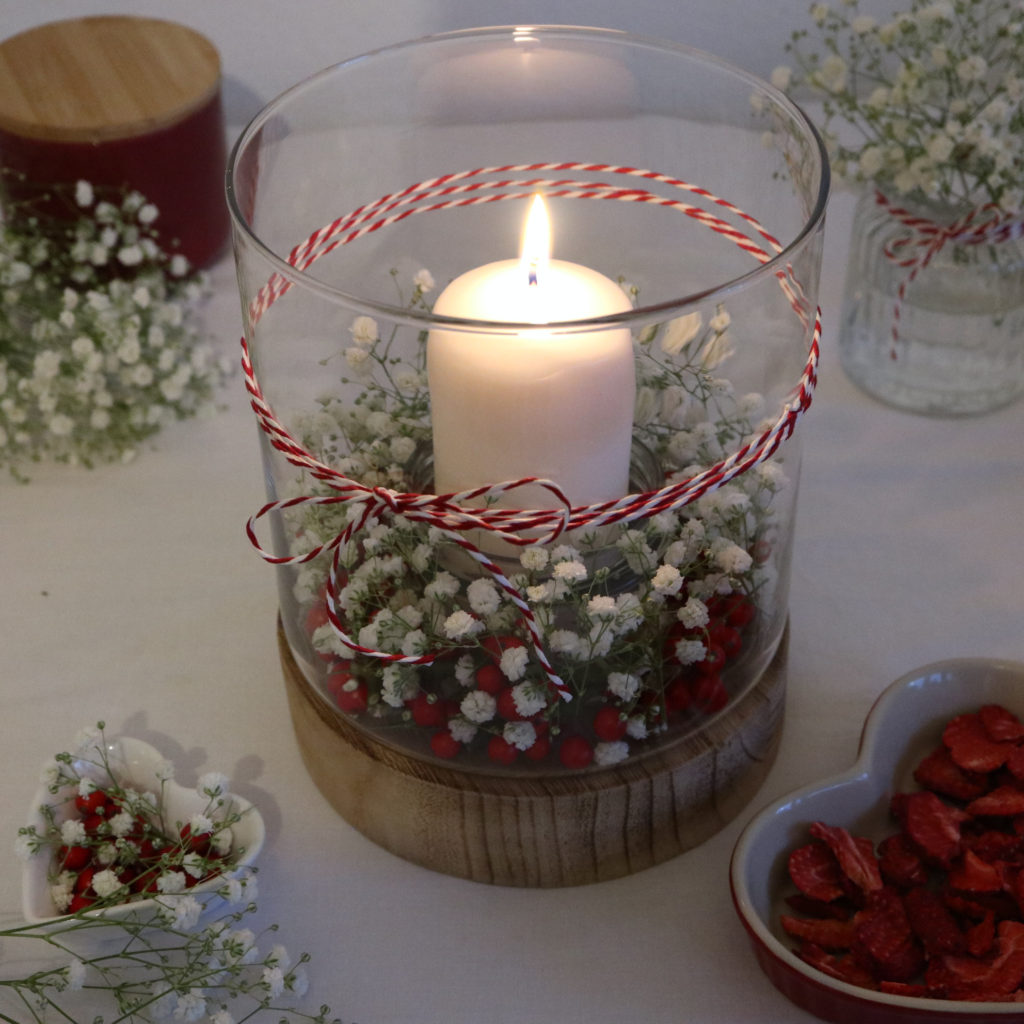
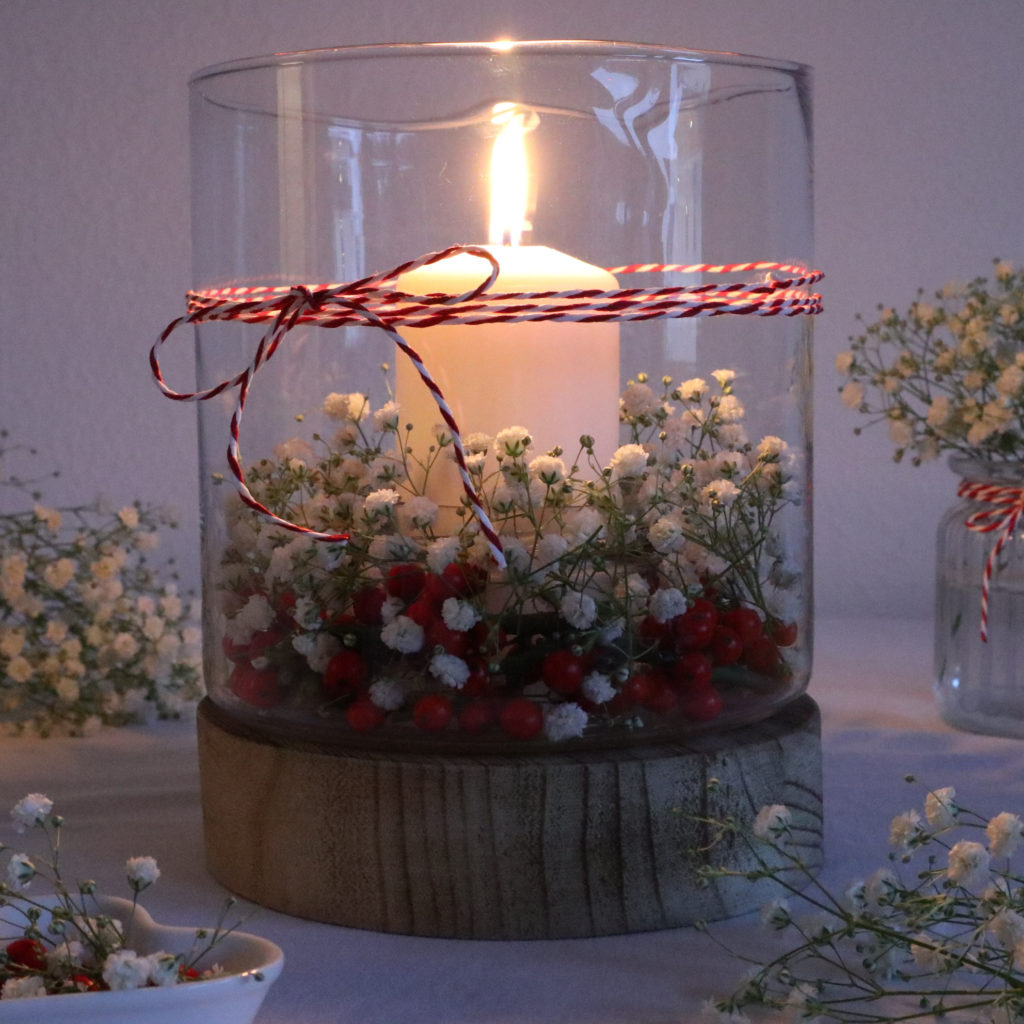
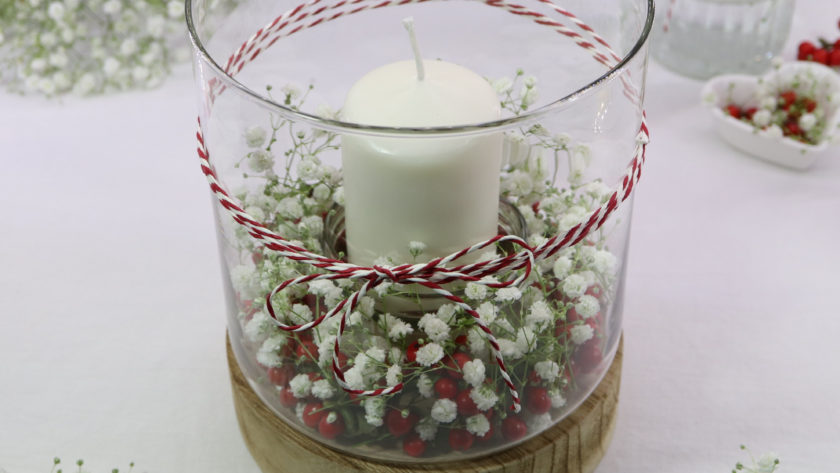
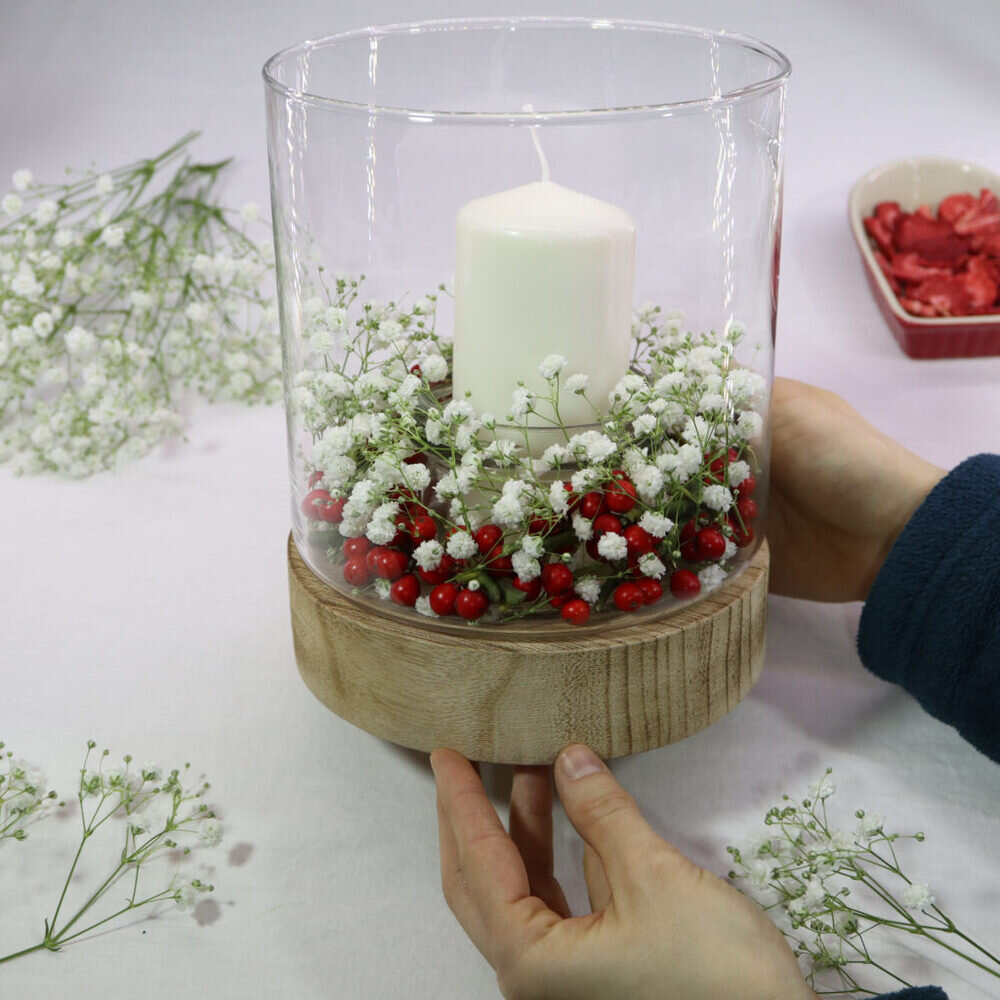
Step 5: Decorate the lantern
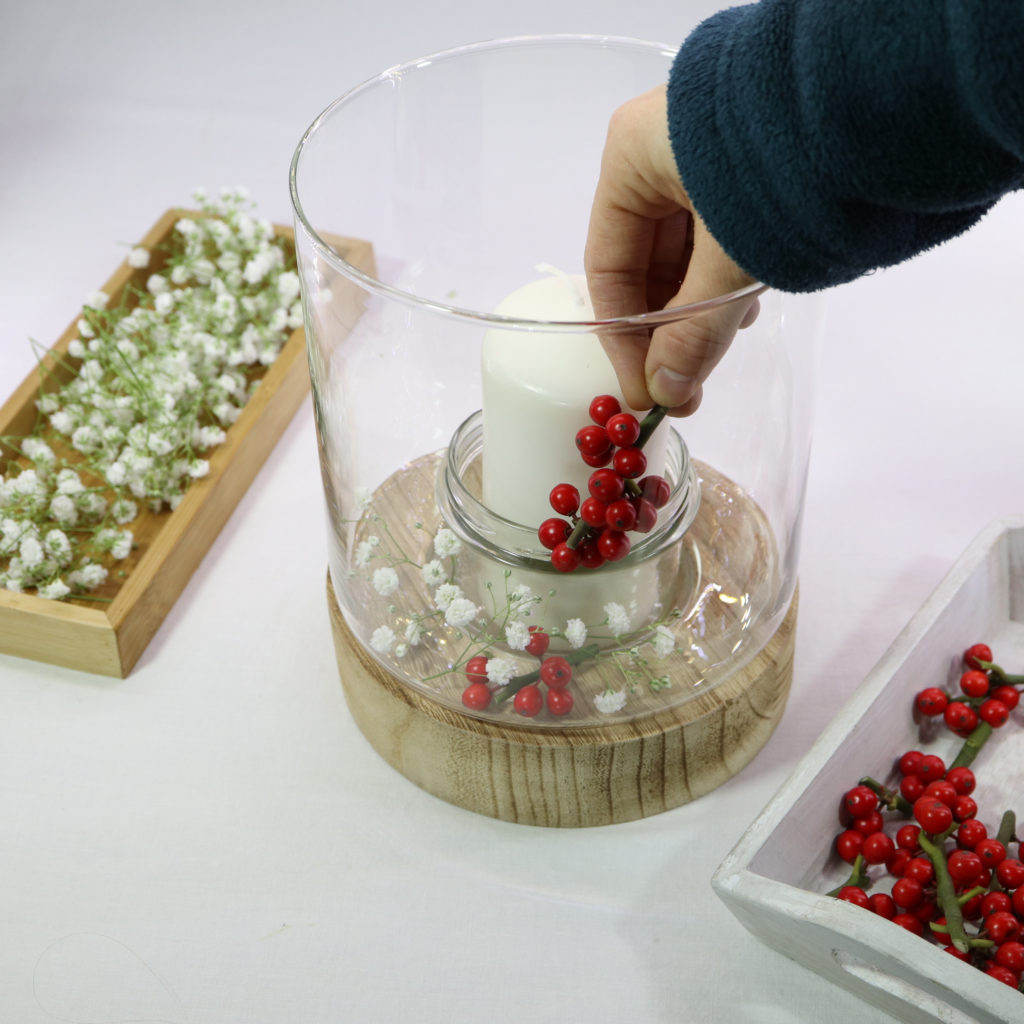
Now, the Holly and Baby’s Breaths sprigs are placed into the lantern. Take care that the sprigs do not catch fire from the candle.
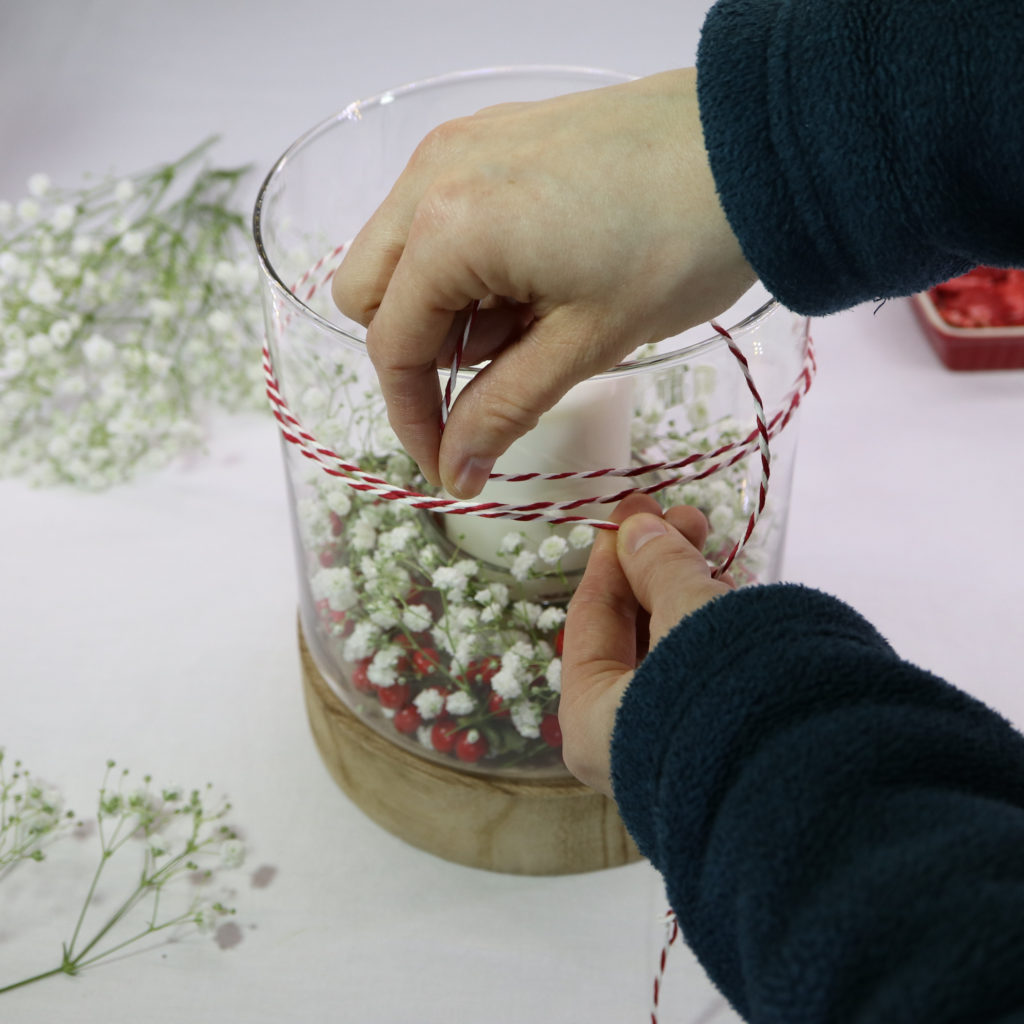
Step 6: Baker’s twine
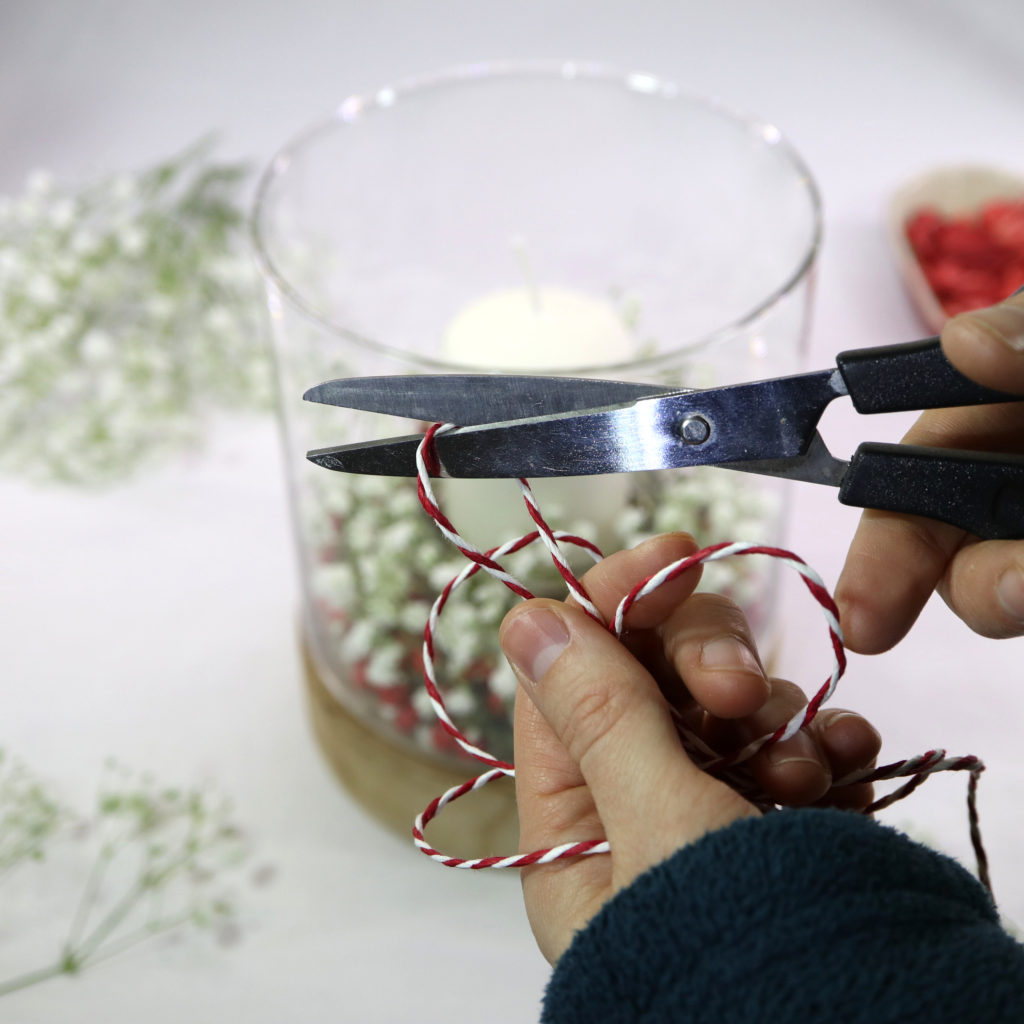
The last step is to tie the baker’s twine around the lantern glass. I tied it around the glass multiple times.
And you’re done! I hope you enjoyed making this DIY!