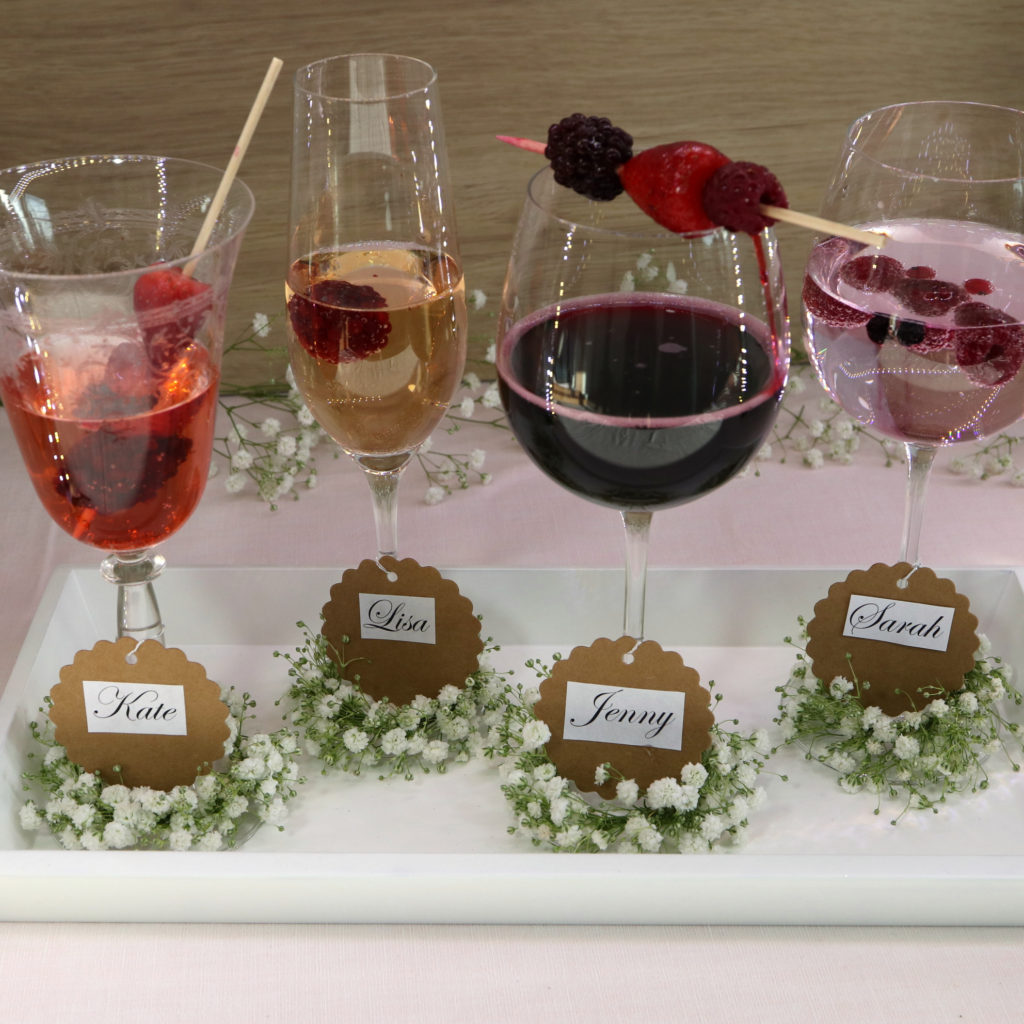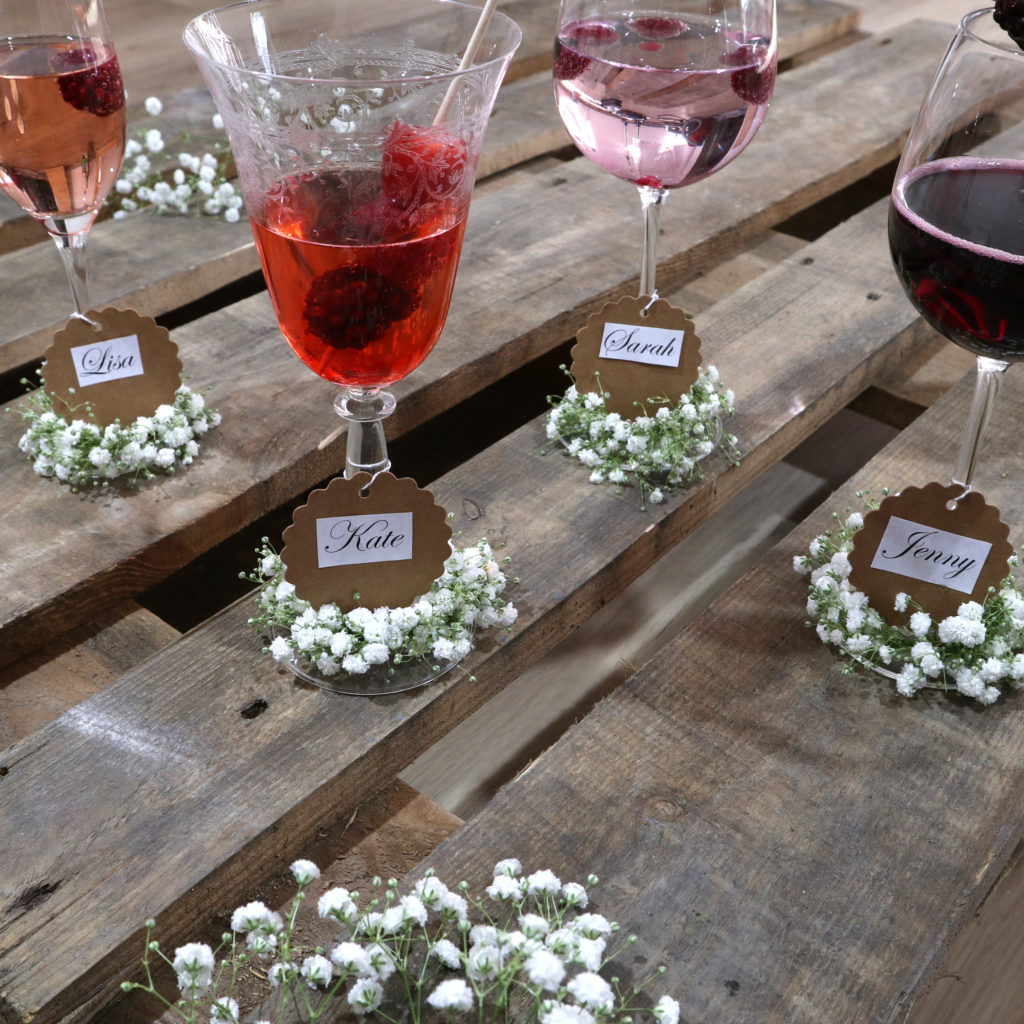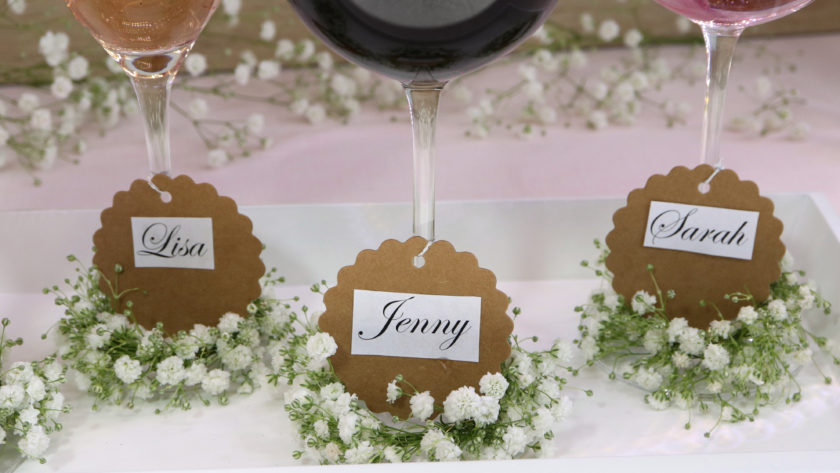
This DIY tutorial shows how to spice up a champagne or wine glass with some Baby’s Breath. The lower part of the glasses are decorates with a small wreath made out of Baby’s Breath. Furthermore, a name label is added to the glasses. This DIY is perfect when you are expecting some guests and want to serve individual glasses.
Tools
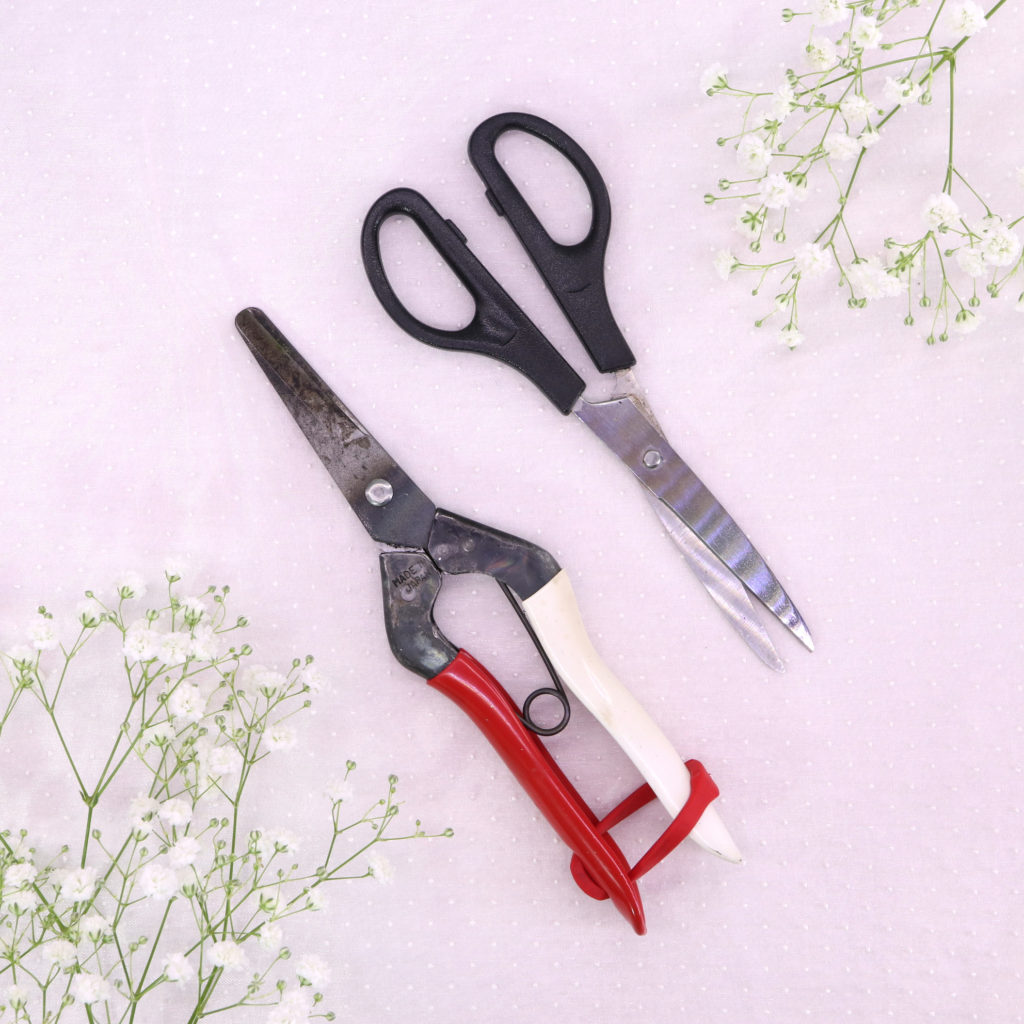
Here, you see which tools I used: Harvest shears, household scissors, and a computer & printer to make and print the labels.
| Tool | Search on… |
|---|---|
| Harvest shears | |
| I use the Japanese harvest shears Okatsune 304 | |
| Household scissors | |
| Computer | |
| Printer |
Materials
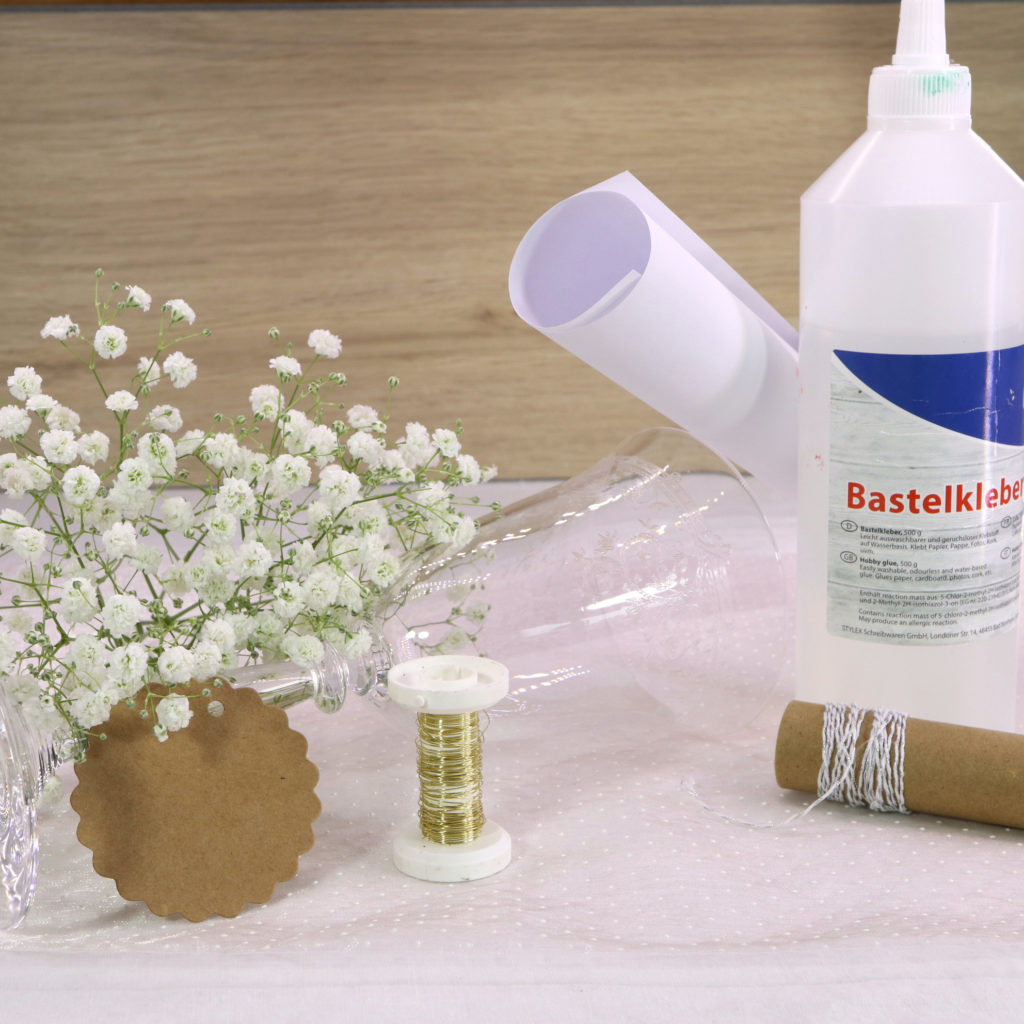
These are the materials that I used for the DIY: stem glass, baby’s breath, golden wire, twine, paper label, printer paper and craft glue.
| Material | Suche auf |
|---|---|
| Wine glass/Champagne glass/Stem glass | |
| Baby’s breath (white) | |
| Wire (gold) | |
| Twine (silver/white) | |
| Paper label | |
| Printer paper | |
| Craft glue |
Guide
Step 1: Prepare the golden wire
The first step is to cut the golden wire to the right length. Ideally, the golden wire fits a bit more than two times around the lower part of the glass.
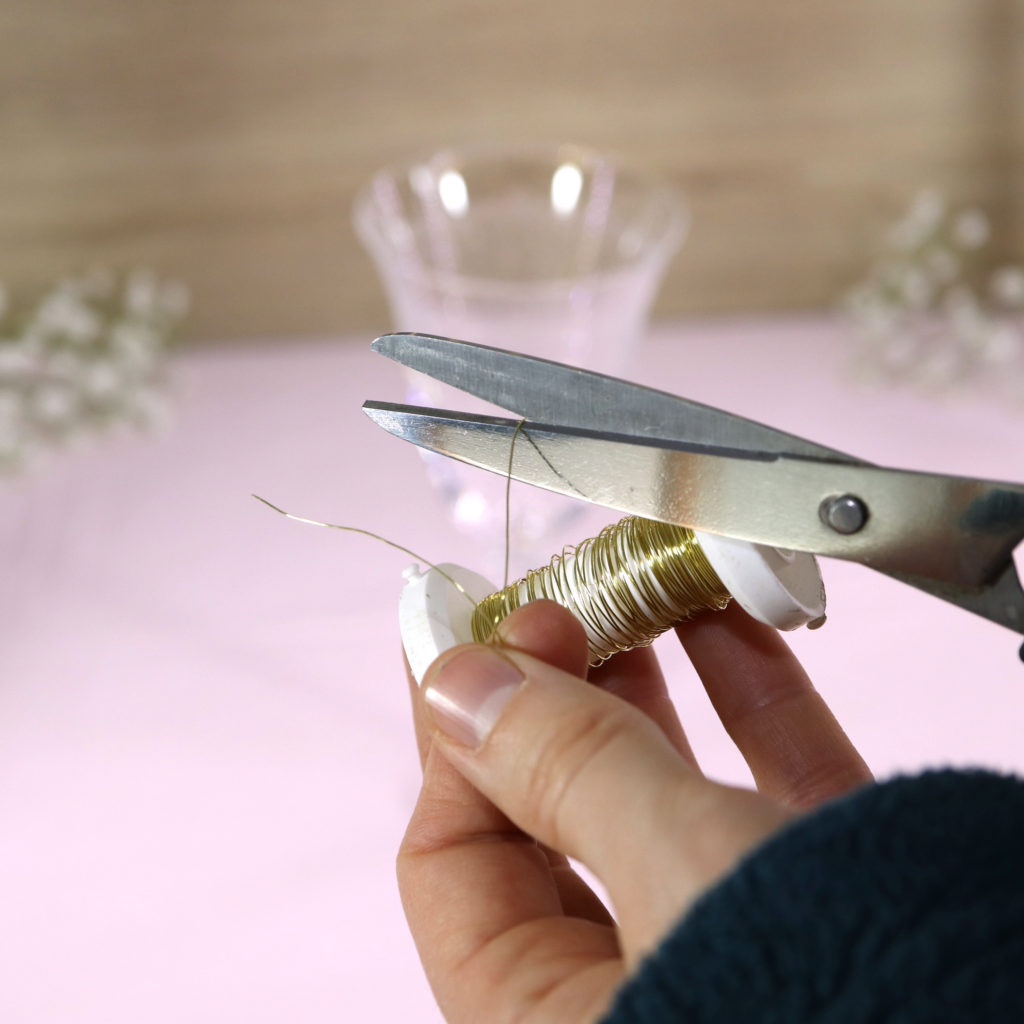
Next, I use a pair of household scissors to cut the wire.
Step 2: Make some baby’s breath sprigs
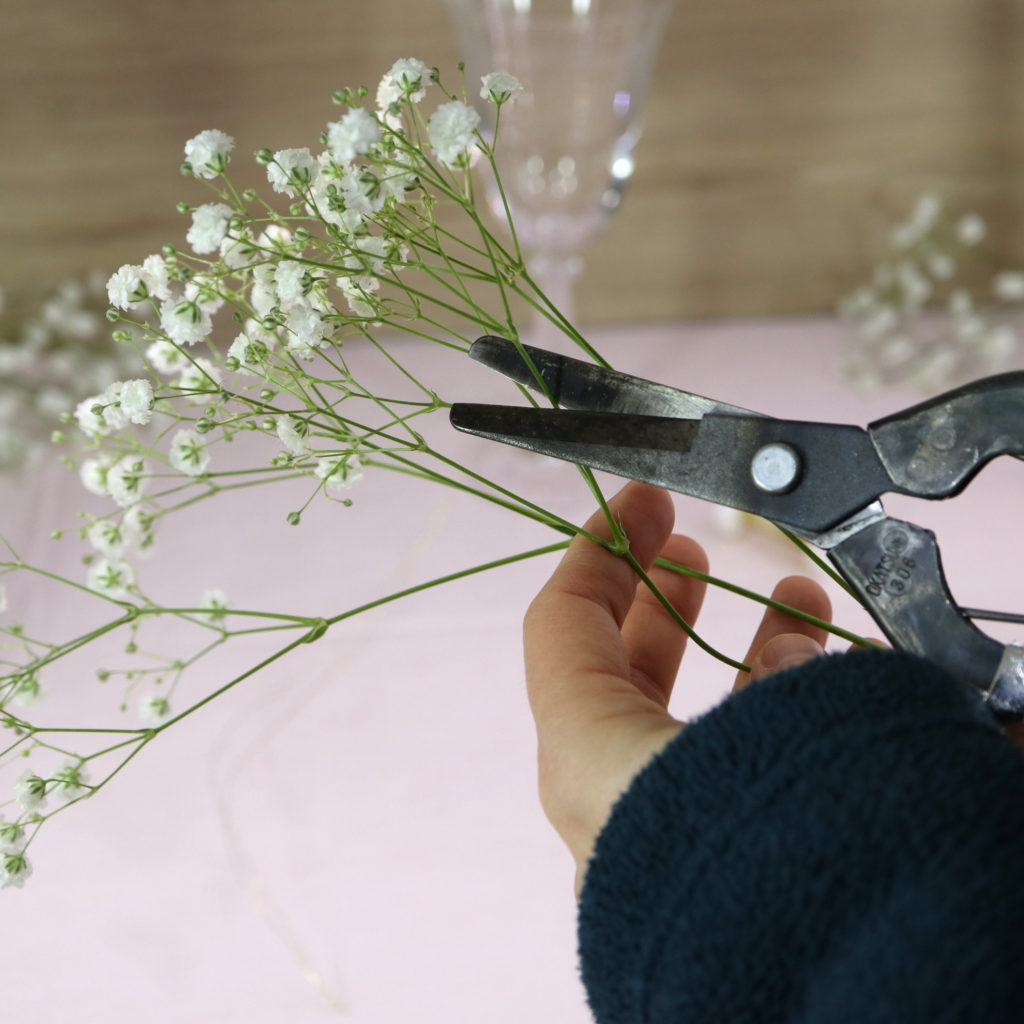
Next, the baby’s breath is cut to make some sprigs. For this task, I make use of the harvester shears.
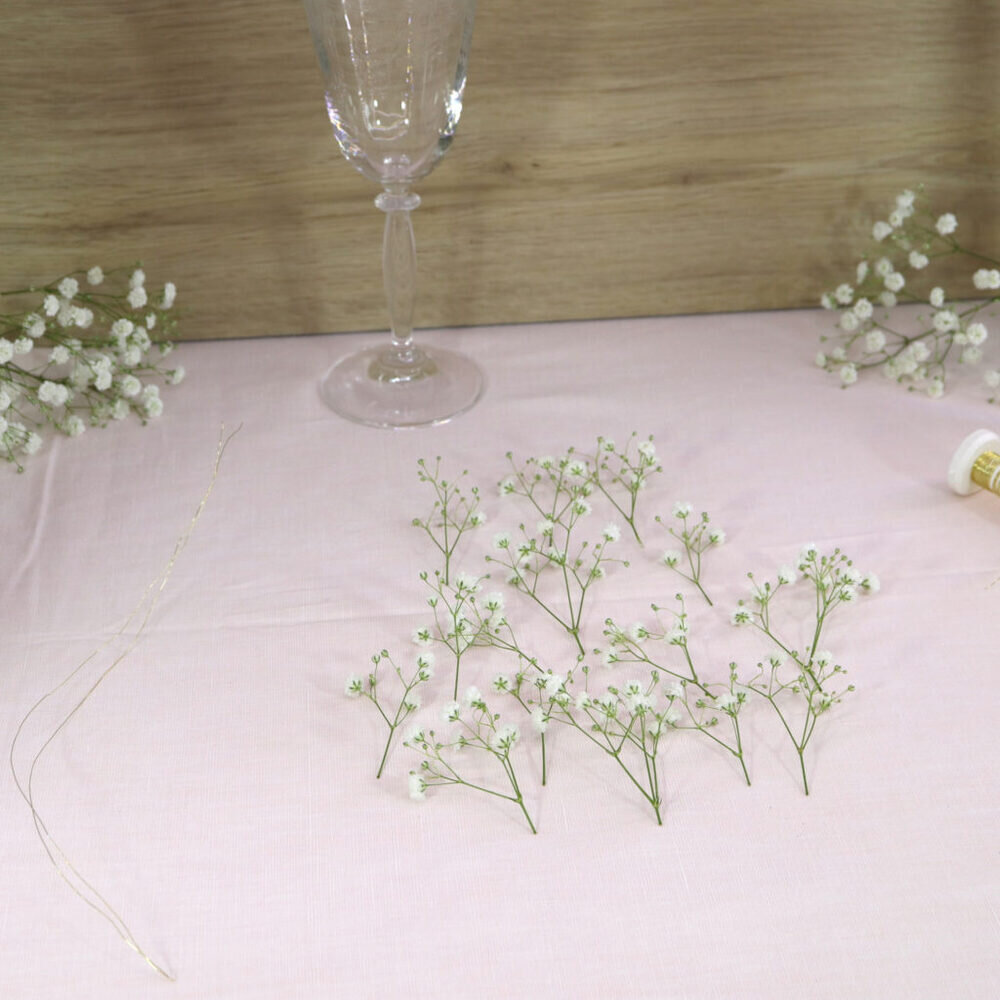
I use the golden wire for the sprigs. You need between five and ten twigs for a typical stem glass.
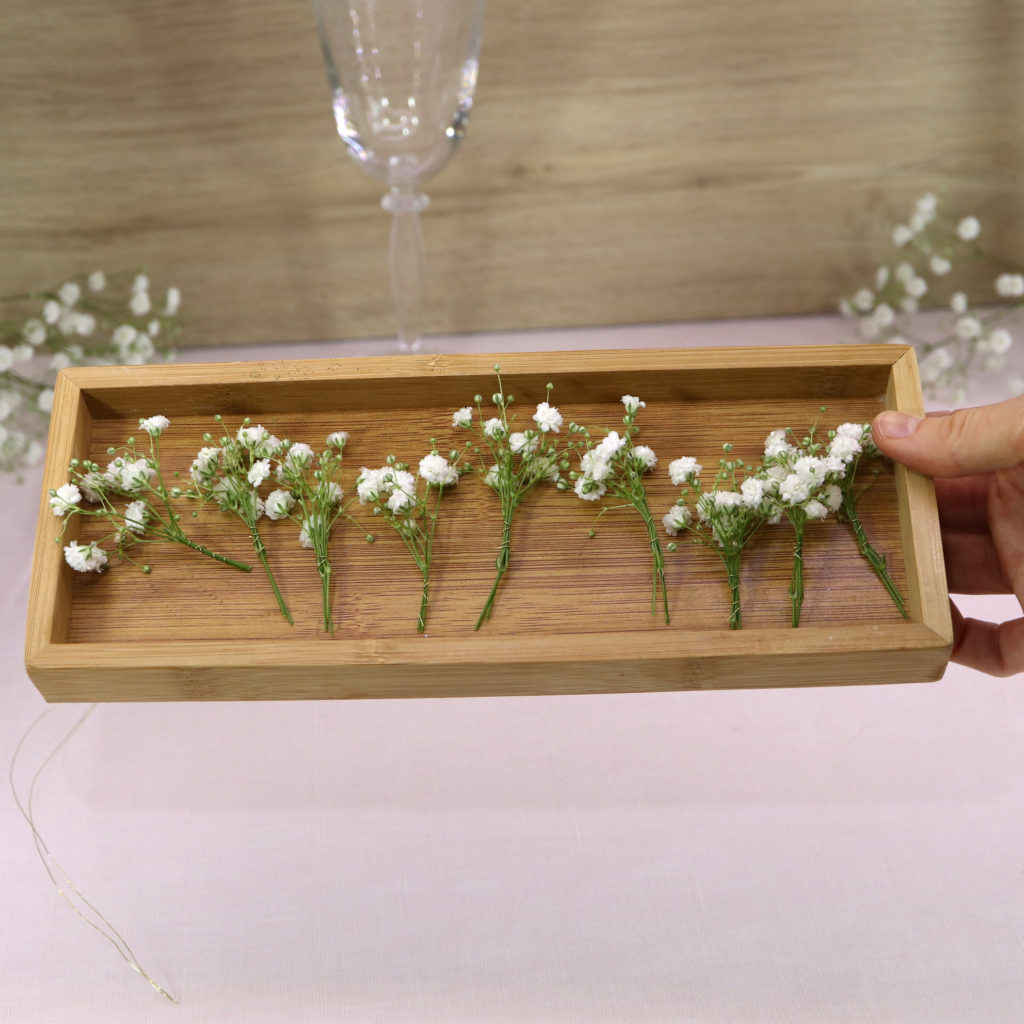
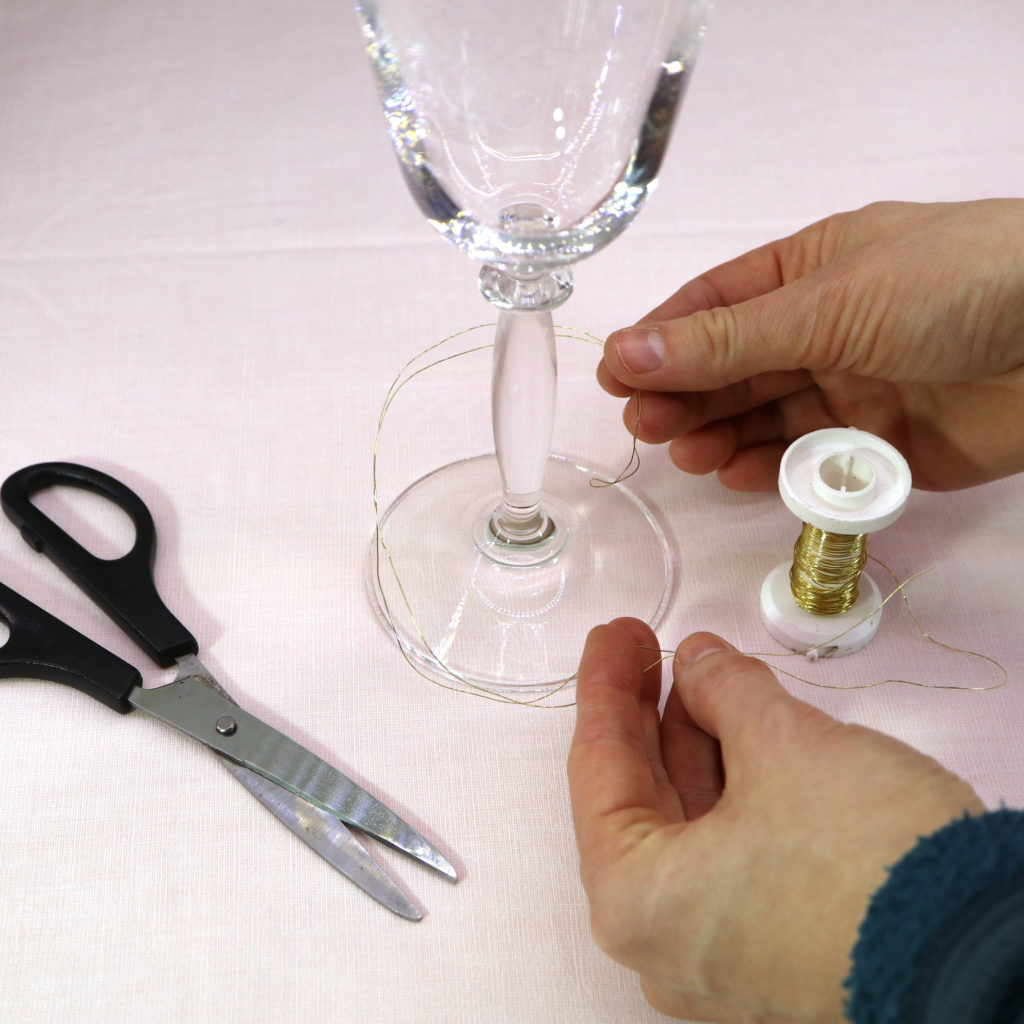
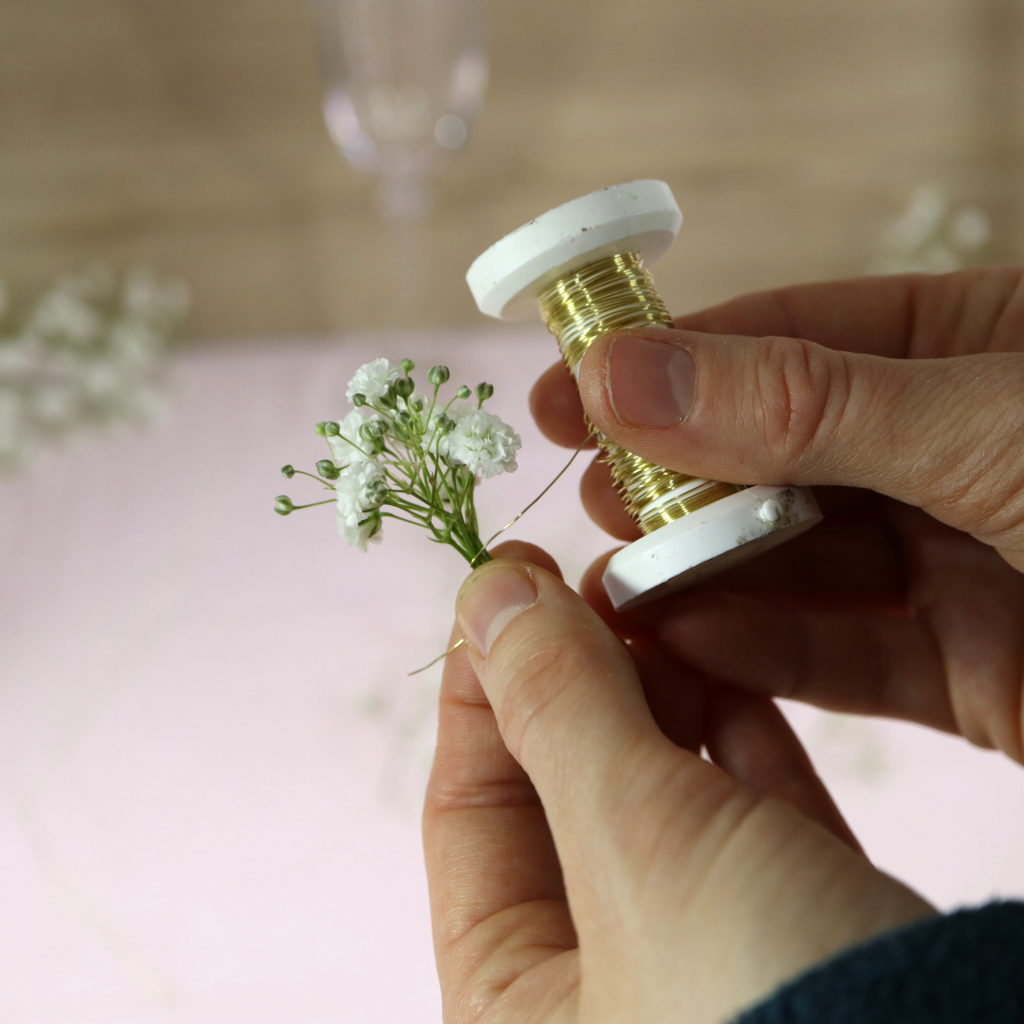
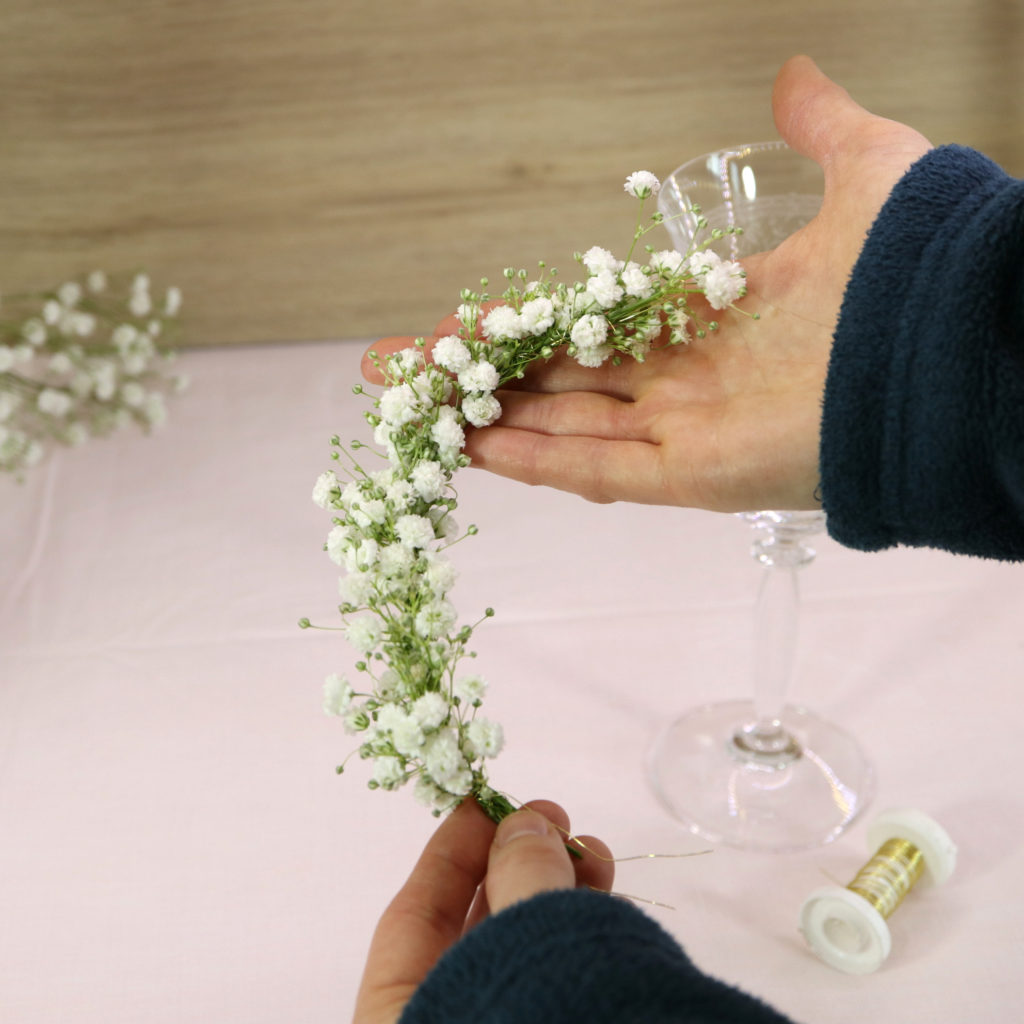
Step 3: Make the Baby’s breath wreath
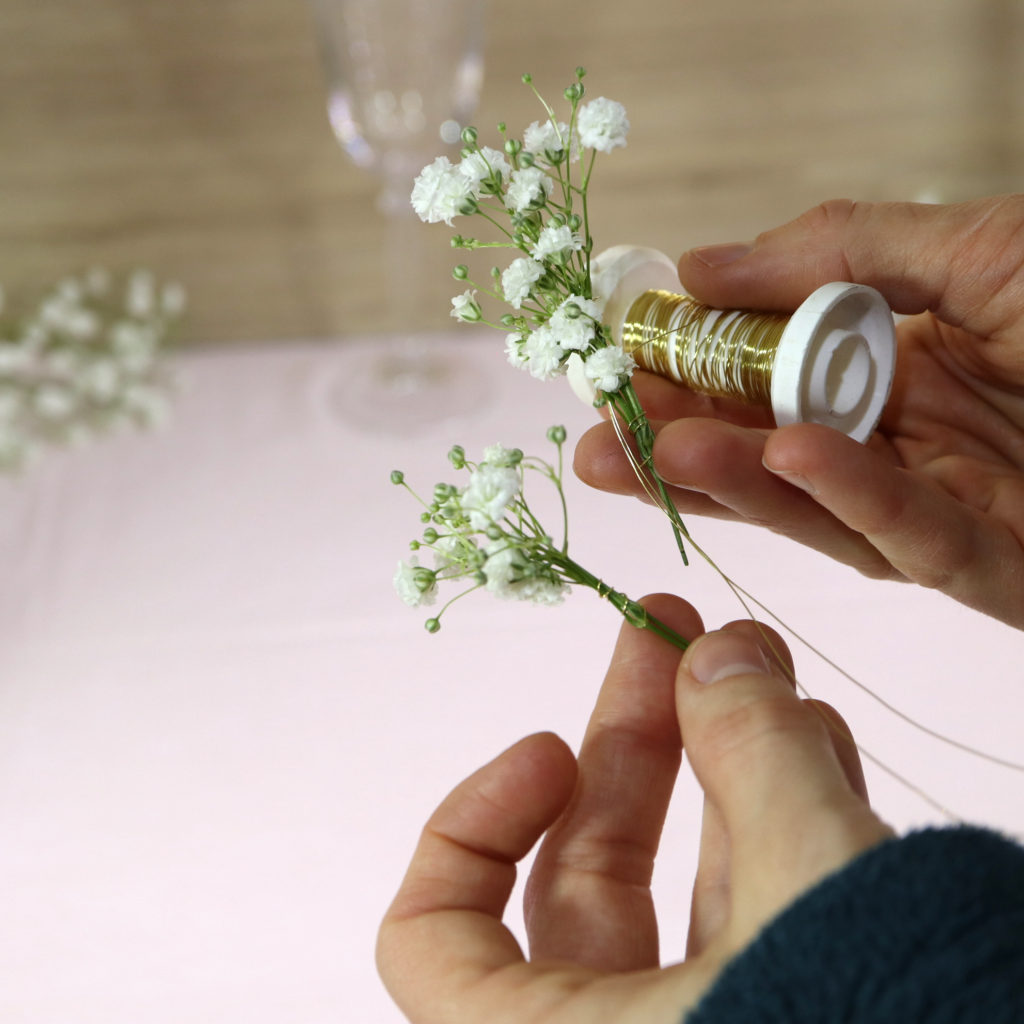
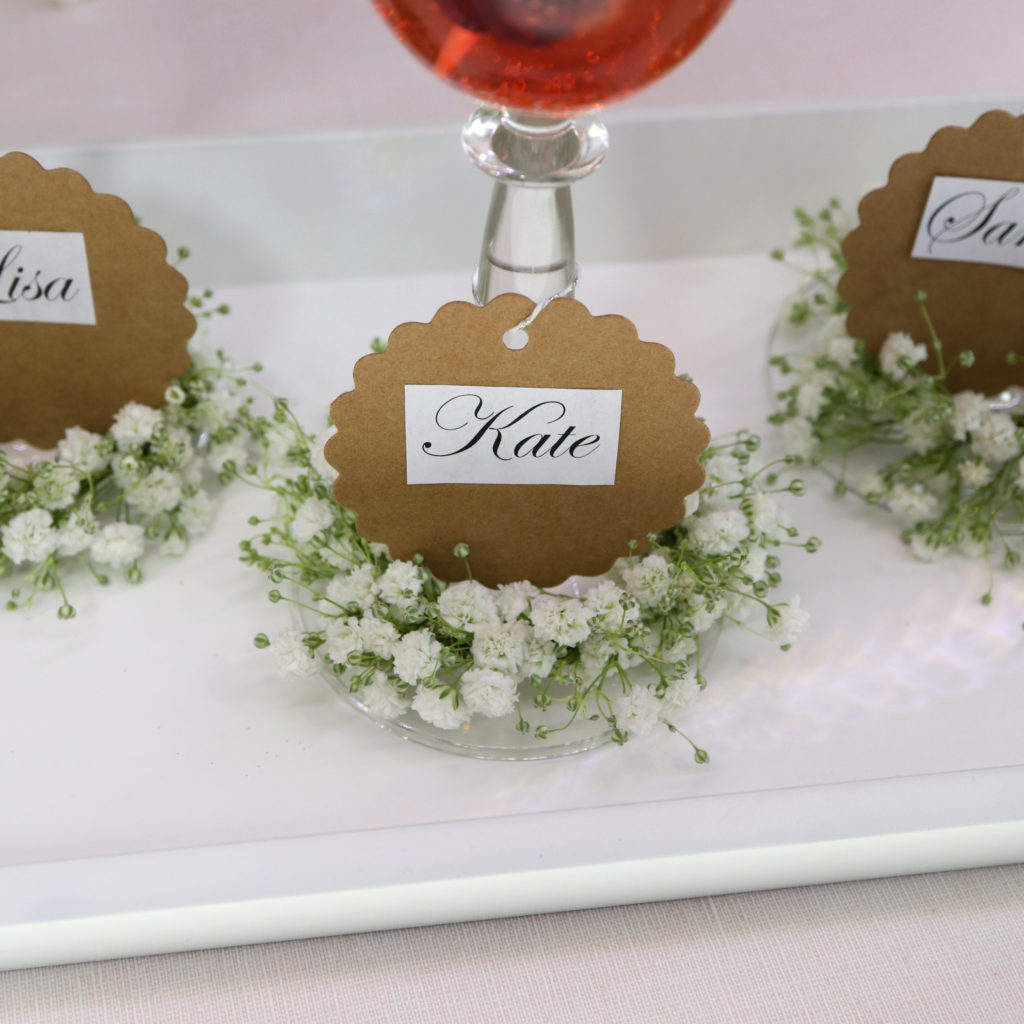
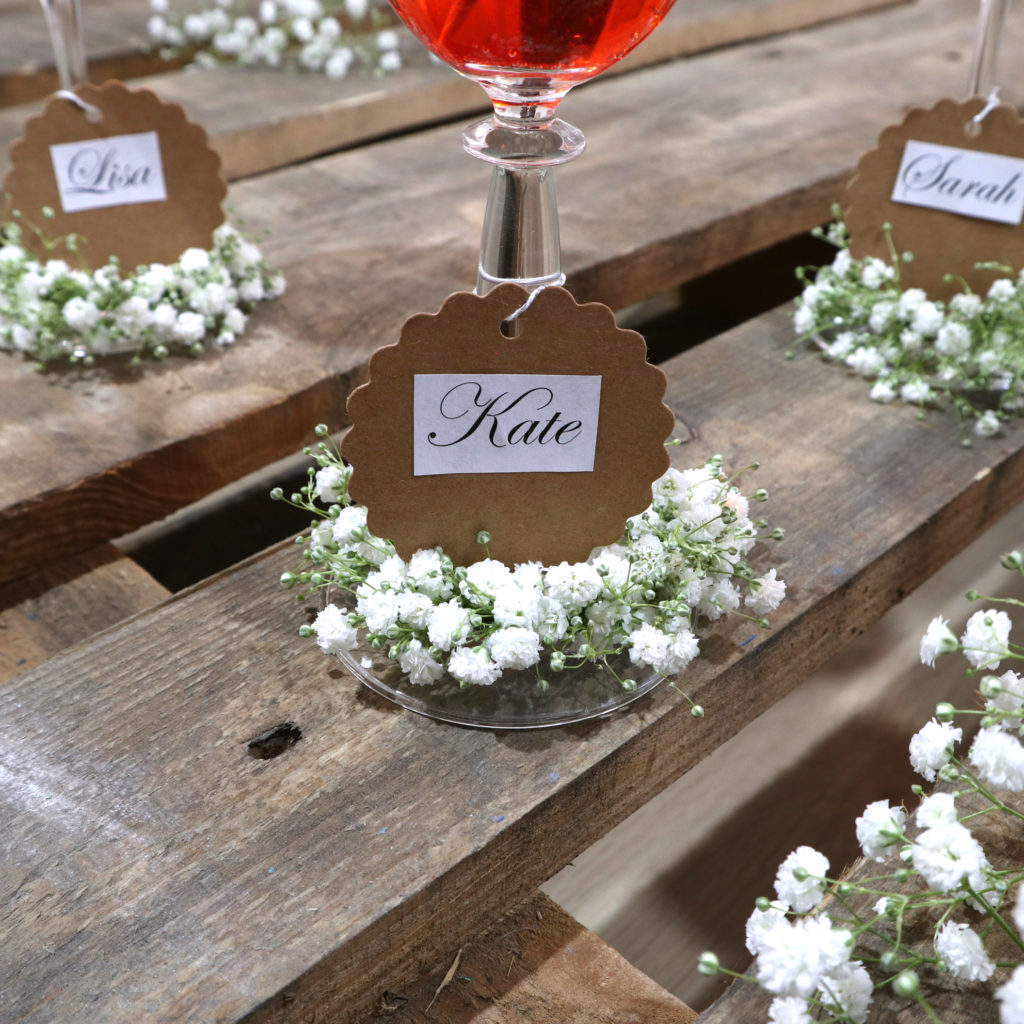
The next step is to make a breath out of the baby’s breath sprigs. The sprigs are tied to the ring wire that was made in the first step. I add each sprig by wrapping around some additional wire between the ring wire and the sprig. Keep in mind, that the wreath must fit around the stem glass. Moreover, the wreath is still open in this step (it’s more a like a garland).
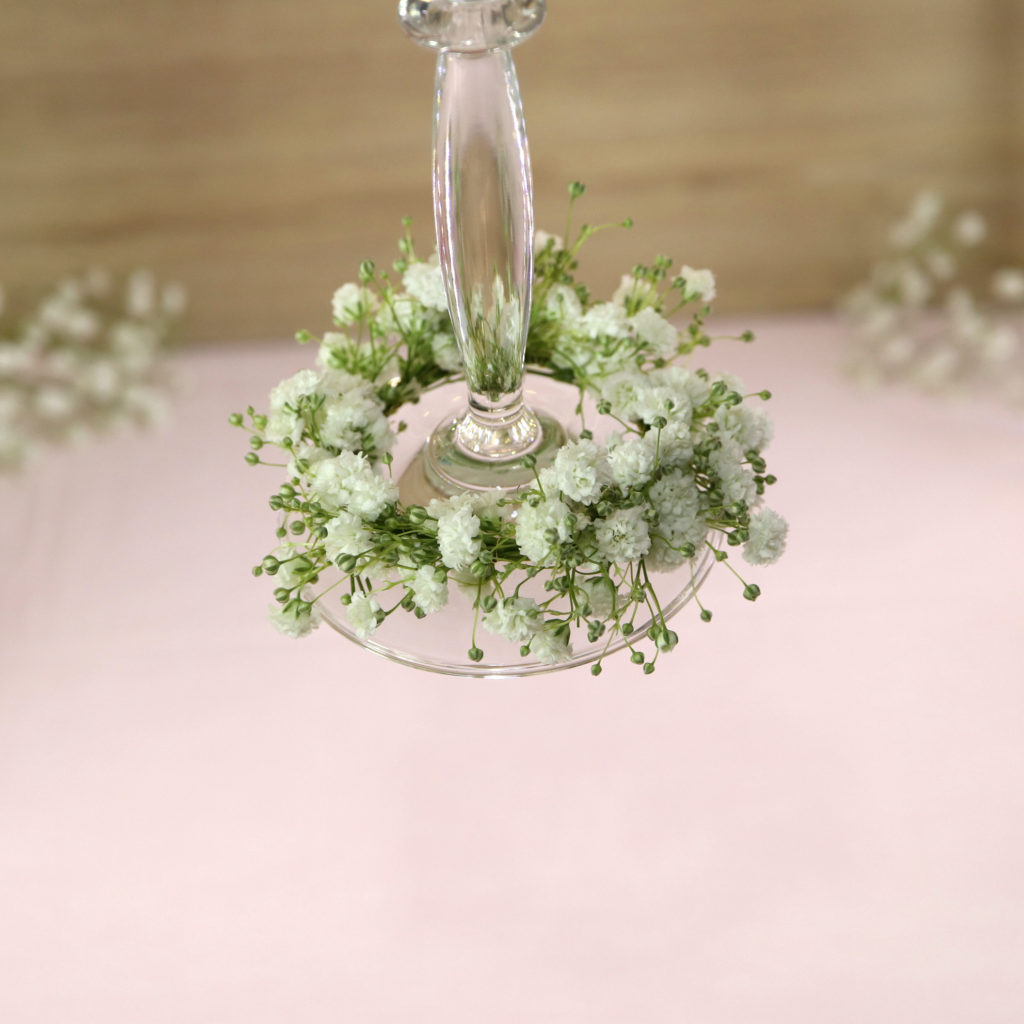
Step 4: Add the wreath to the glass
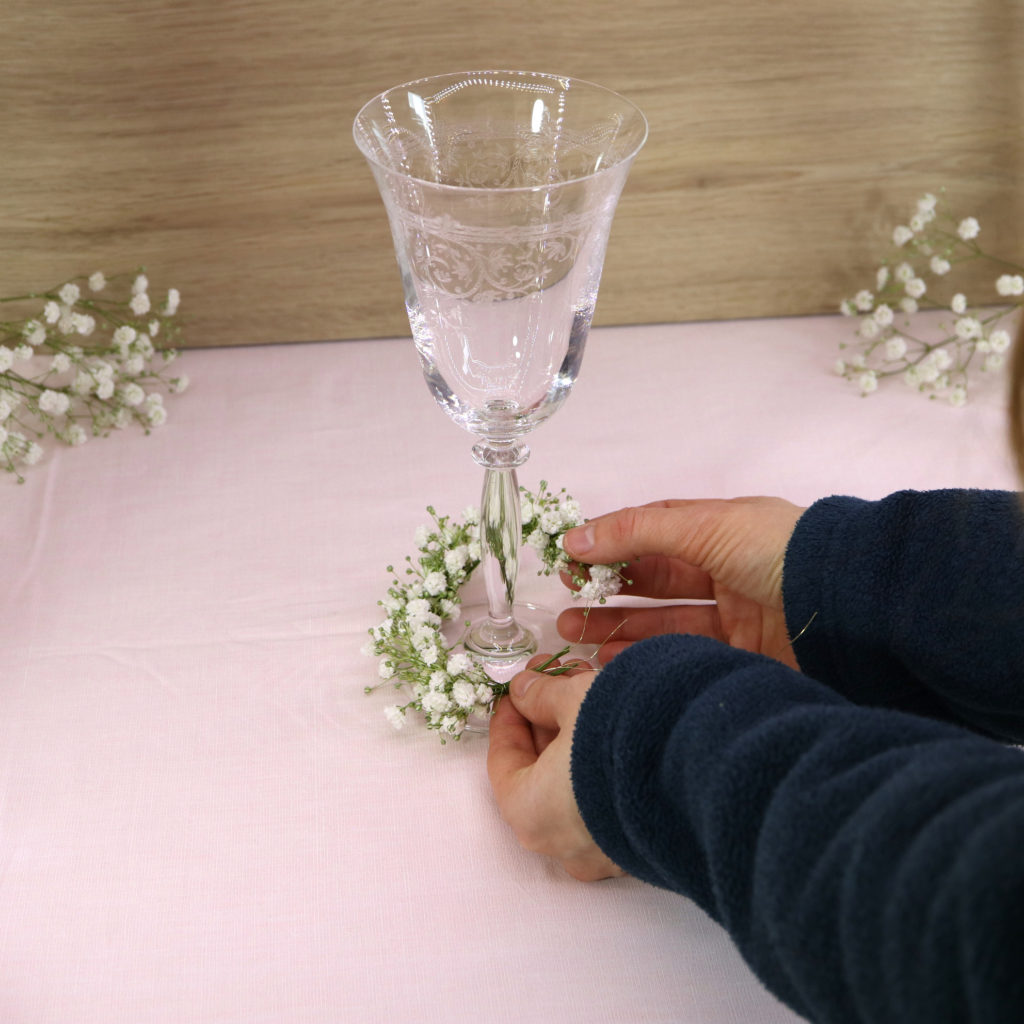
Now, the wreath is tied around the lower part of the stem glass.
Step 5: Create some name tags
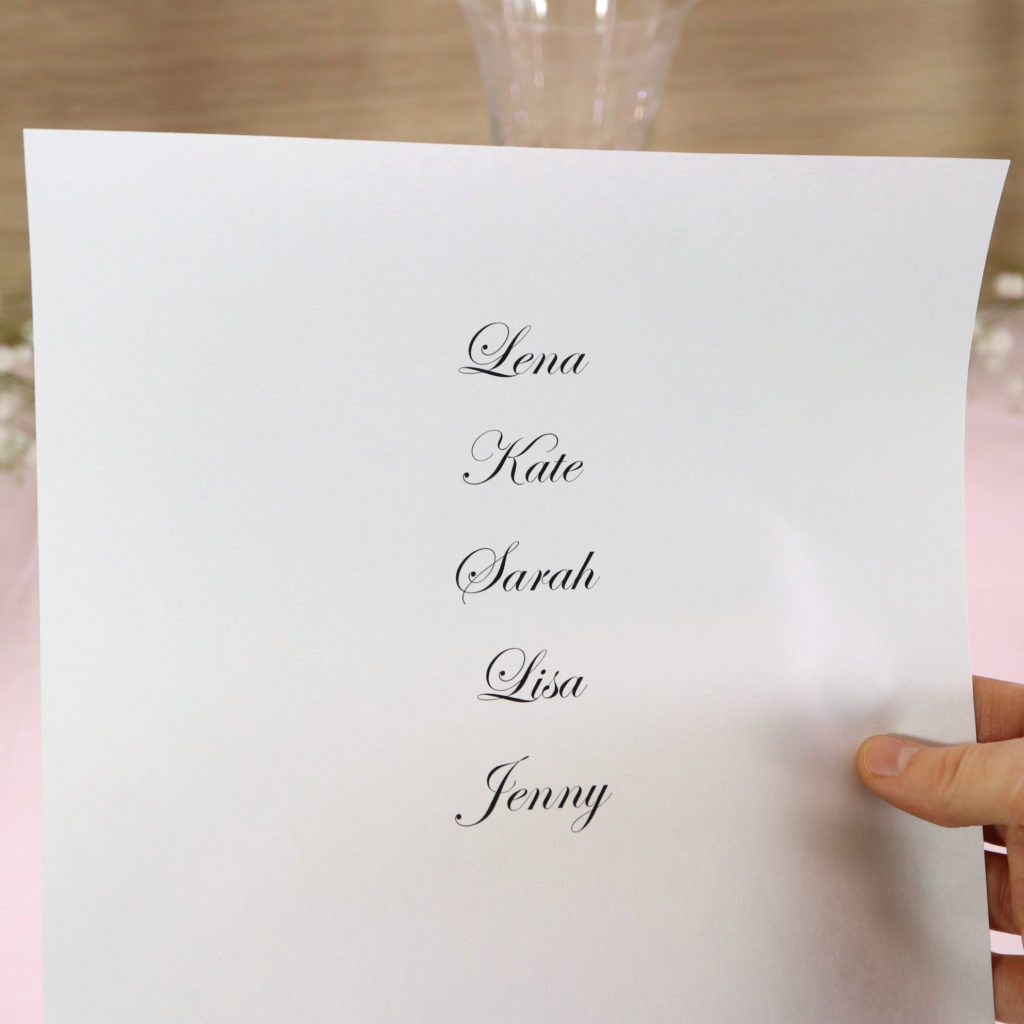
Now, some name tags are made. I use a word processing software to print some names on a printer paper. I decided to use the font type “Edwardian Script ITC”
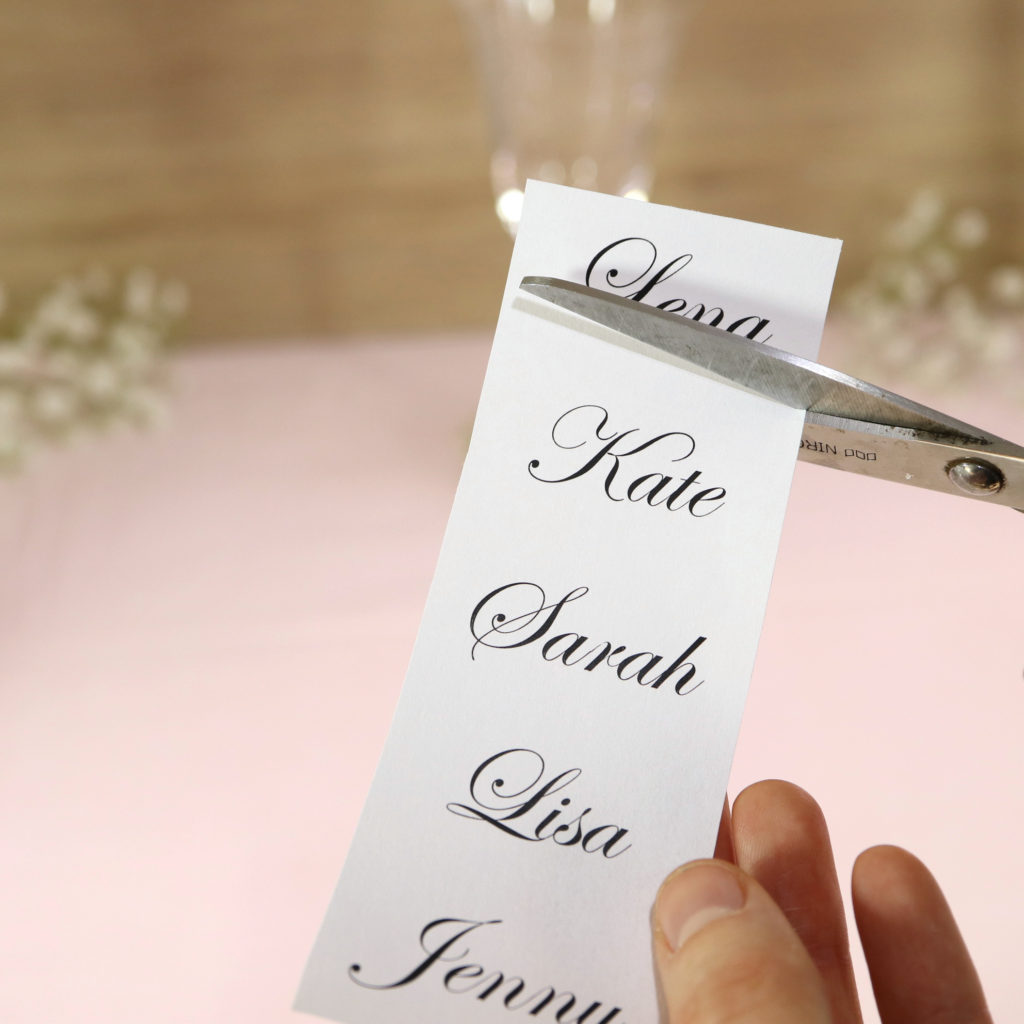
Then, I cut out the names.
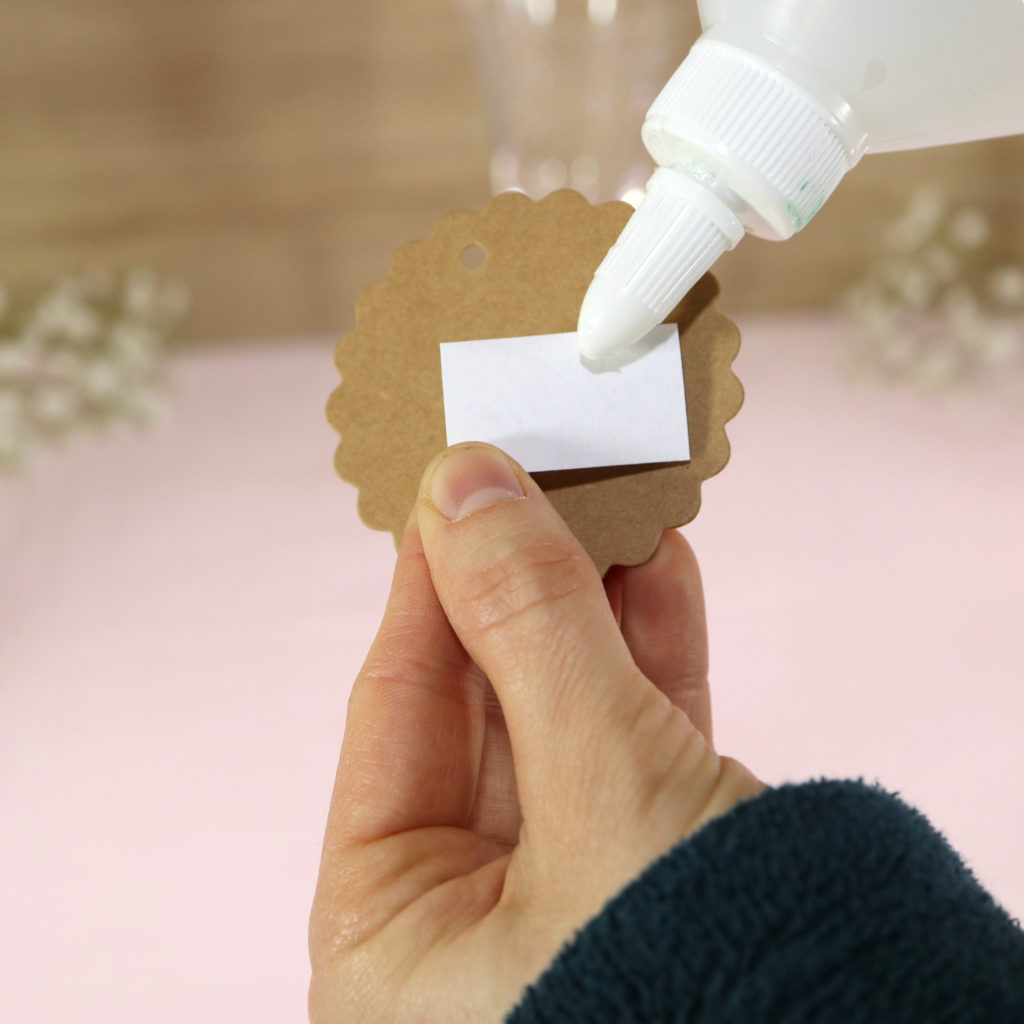
With some craft glue, I glue the names to a paper tag.
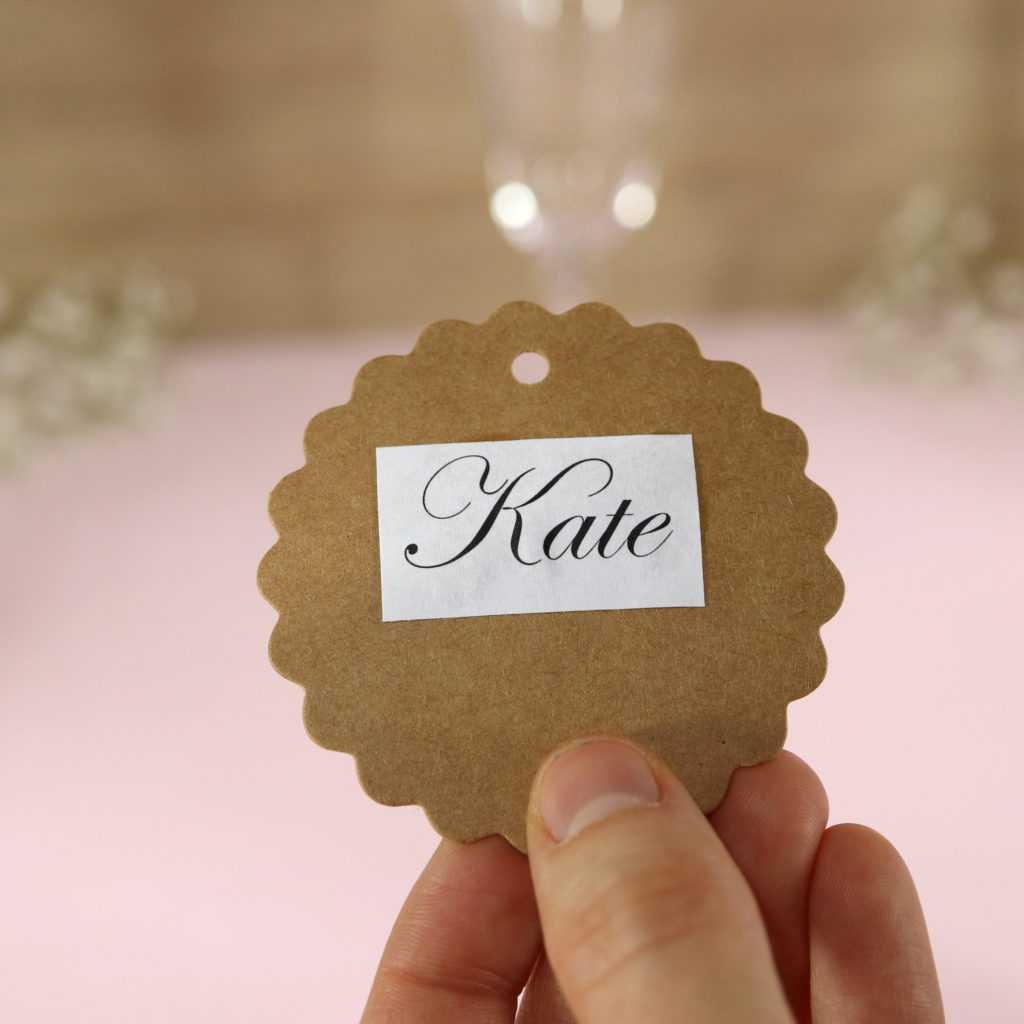
Step 6: Add name tag to glass
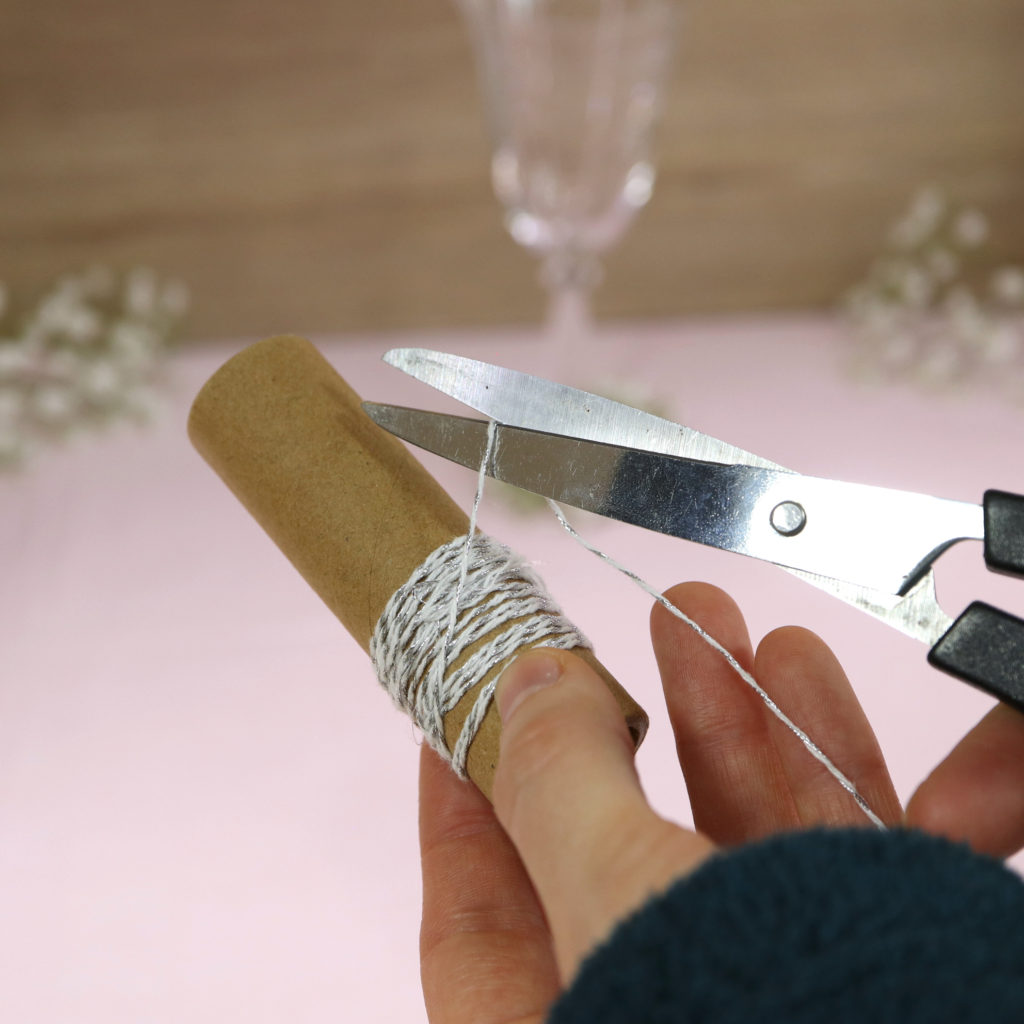
The last task is to add the name tag to the glass. I use some twine (silver/white) for this task.
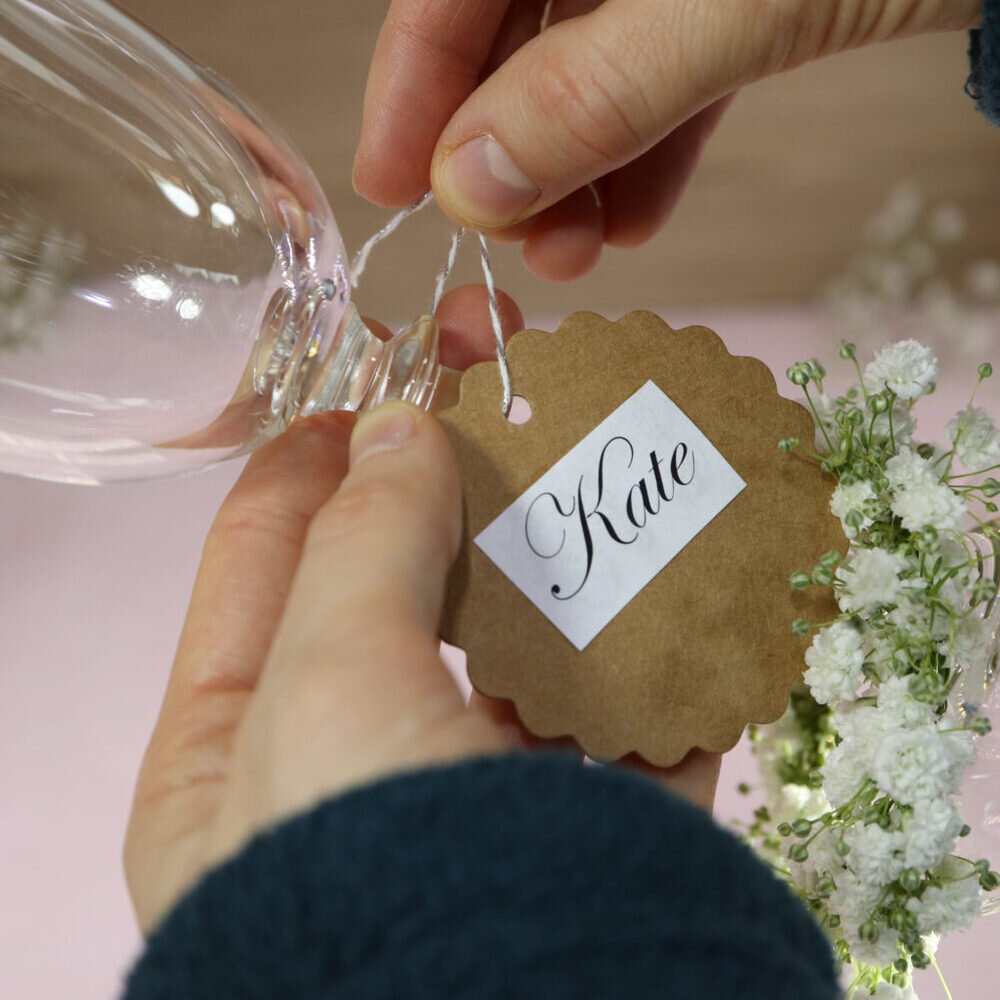
I tie a knot at the stem to fixate the name tag. I recommend to make the knot at the lower part of the stem. As a result, the name tag will not bother while drinking from the glass.
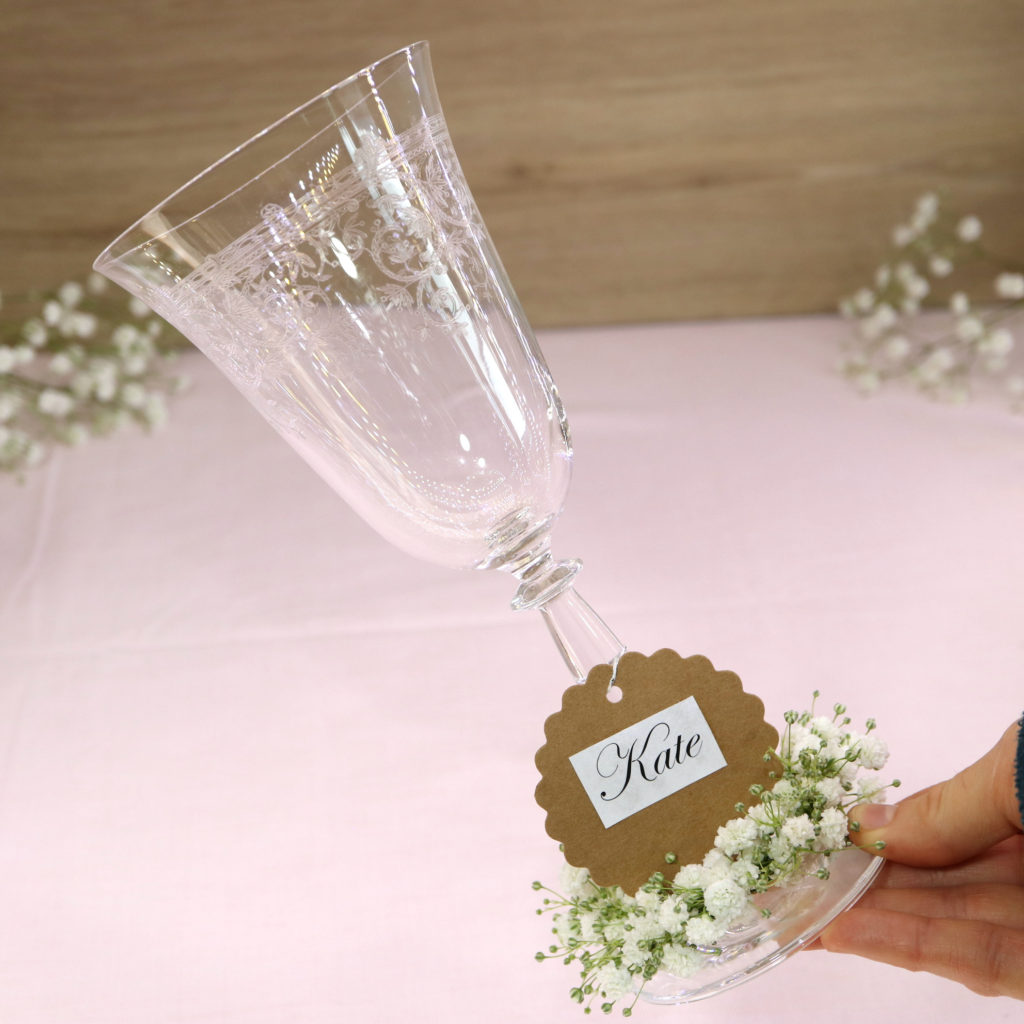
And that’s it. Now, you have some wonderful champagne and wine glasses with individual name tags. I hope you enjoyed this DIY!