Today I’ll show you how to make a heart bouquet with birch twigs and roses! Maybe you picked up a few fallen birch twigs on your last walk and are now asking yourself: What can I do with these birch twigs? I have an idea ;).
Birch twigs are great for making wreaths. Twigs are very flexible and can be easily shaped. It is also very easy to make a beautiful heart out of the twigs. If you combine the heart with roses and wax flowers, you get a great bouquet that is also great as a gift! Whether it’s Valentine’s Day, a birthday or Mother’s Day, loved ones are sure to be delighted with this homemade gift idea!

With the following step-by-step tutorial you can easily make the heart bouquet with birch twigs and roses yourself!
Tools
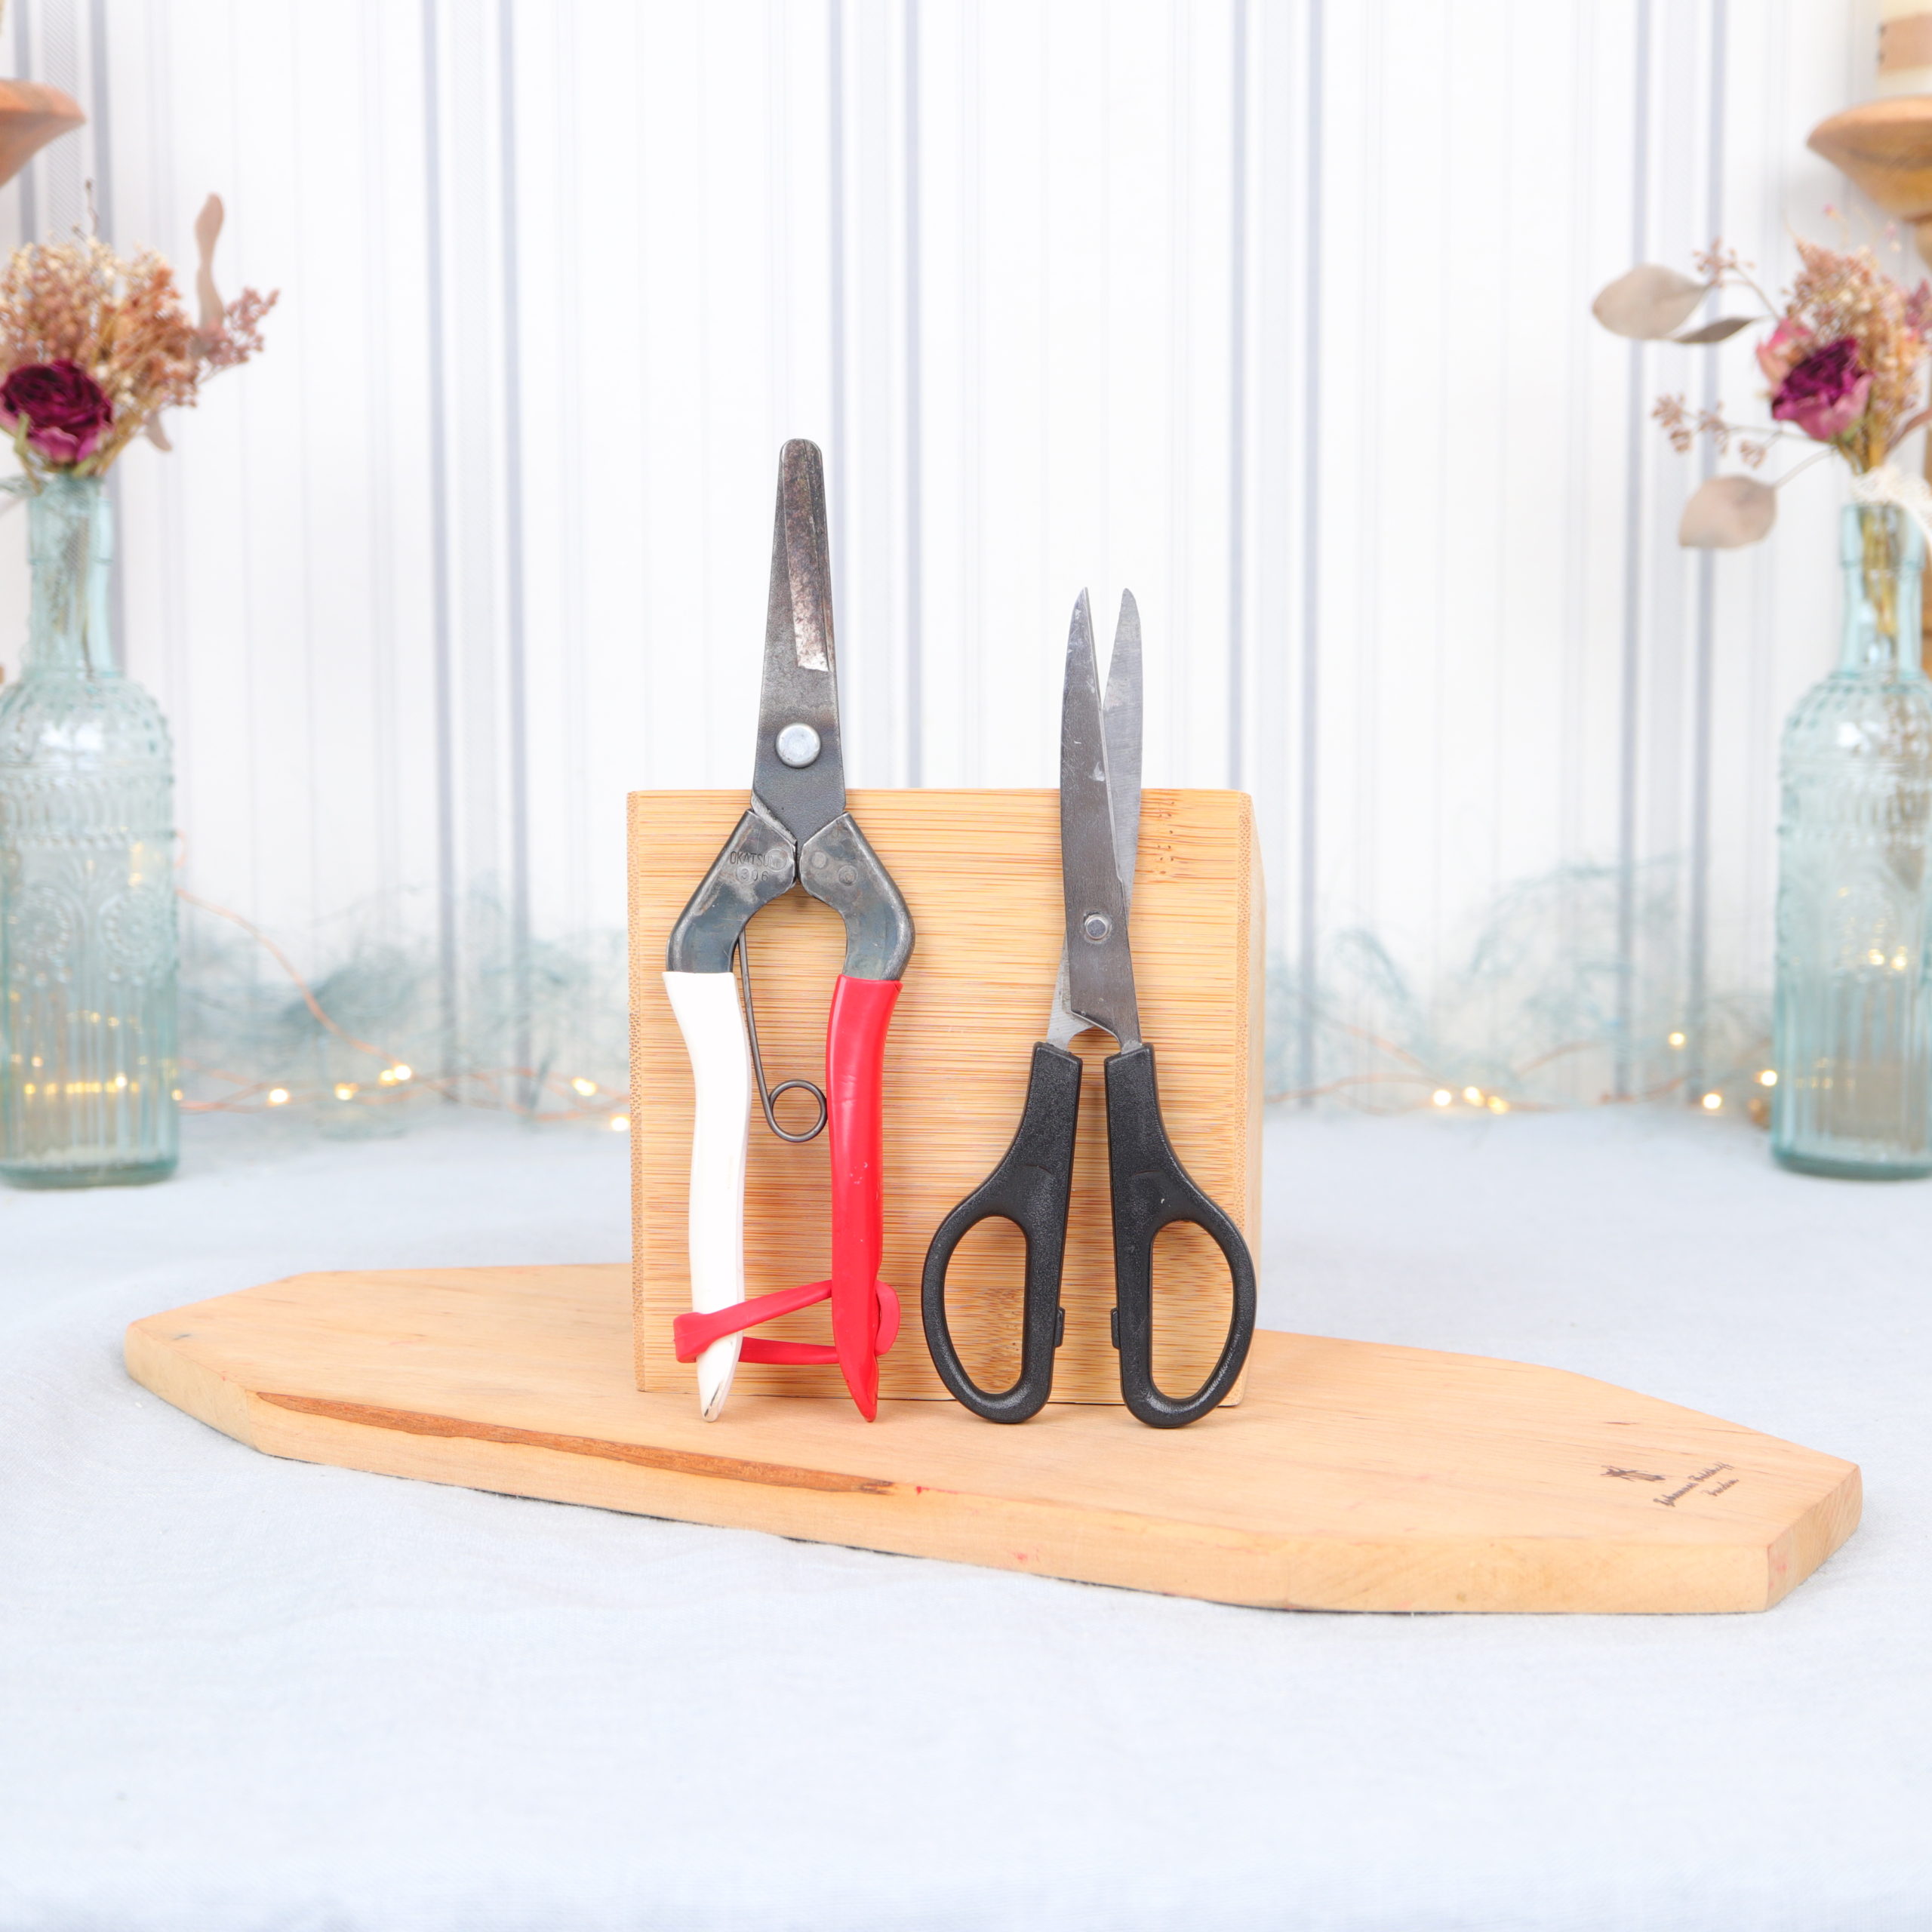
Here you can see which tools I used for the heart with flowers. You will need flower scissors to cut the birch twigs and flowers, and regular scissors to cut the raffia ribbon and decorative ribbon.
Materials
I used these materials for the flower heart: birch twigs, roses, wax flowers, raffia ribbon and a pink velvet ribbon.
Instructions | Heart bouquet with birch branches and roses
Step 1: Shape a heart out of birch twigs
In the first step I form a heart out of the birch twigs.
Tip: In preparation, I cut three pieces of the raffia ribbon to wrap them around the twigs, so it’s easier and faster later!
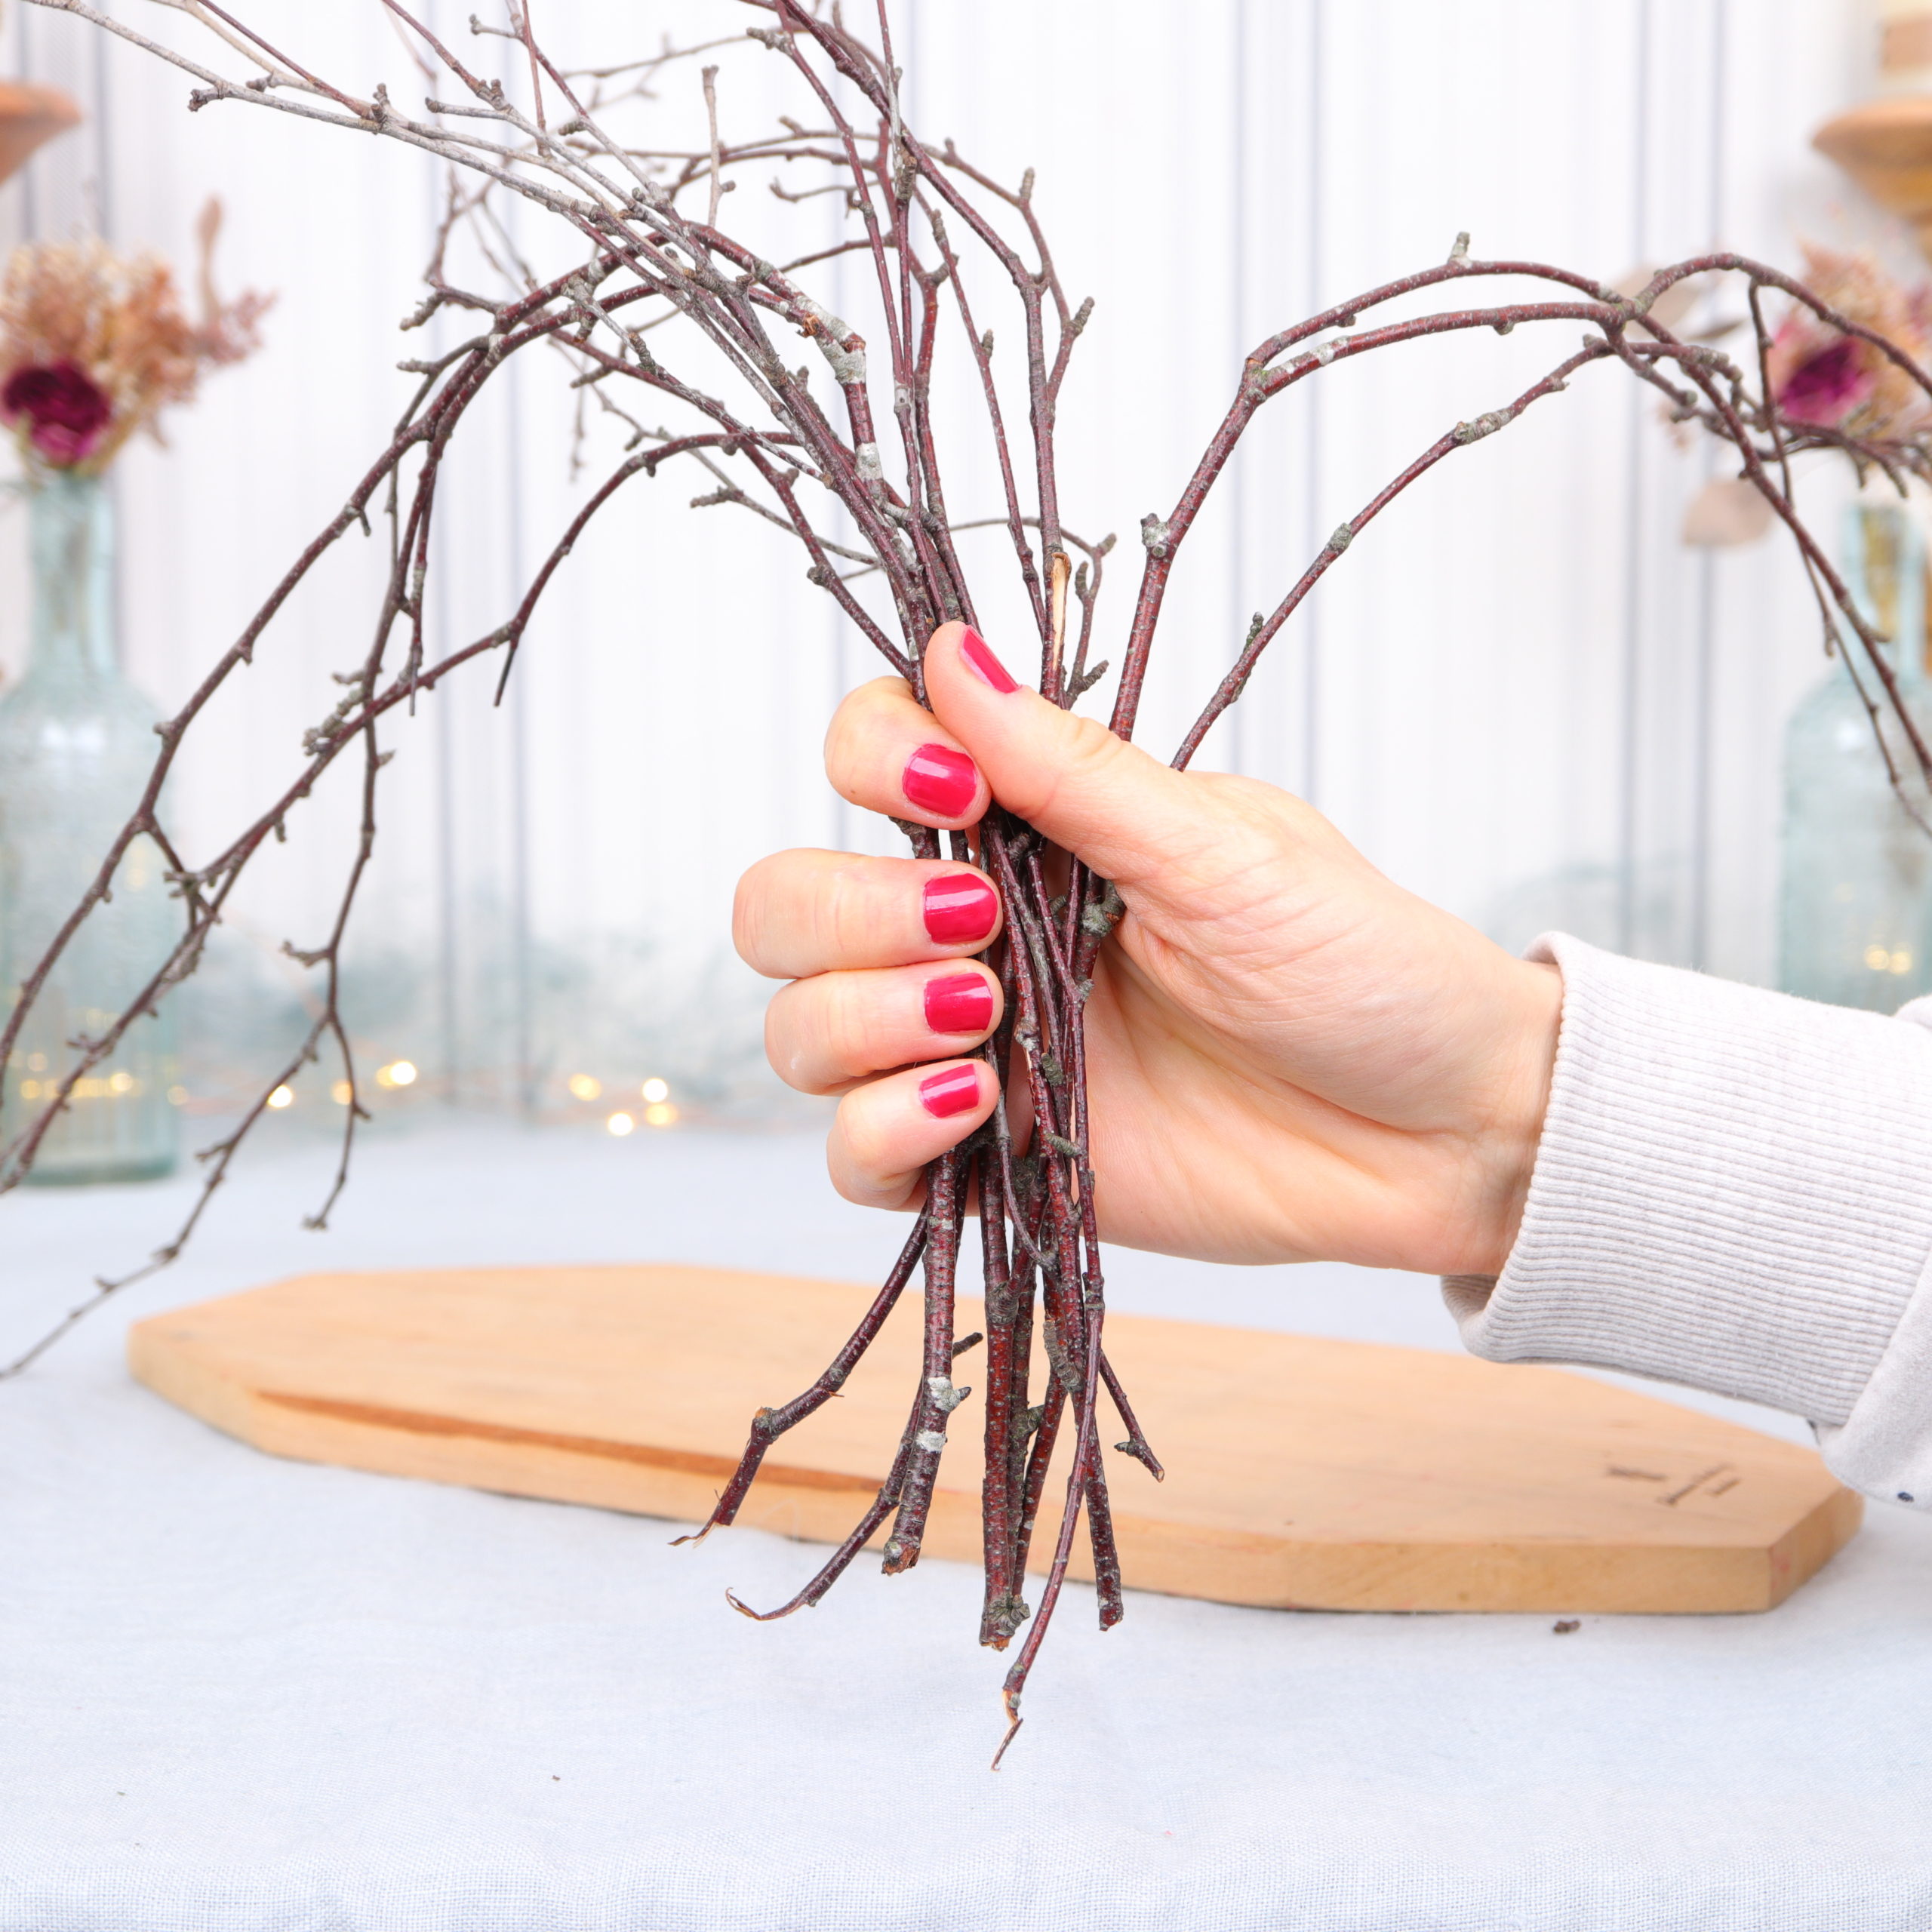
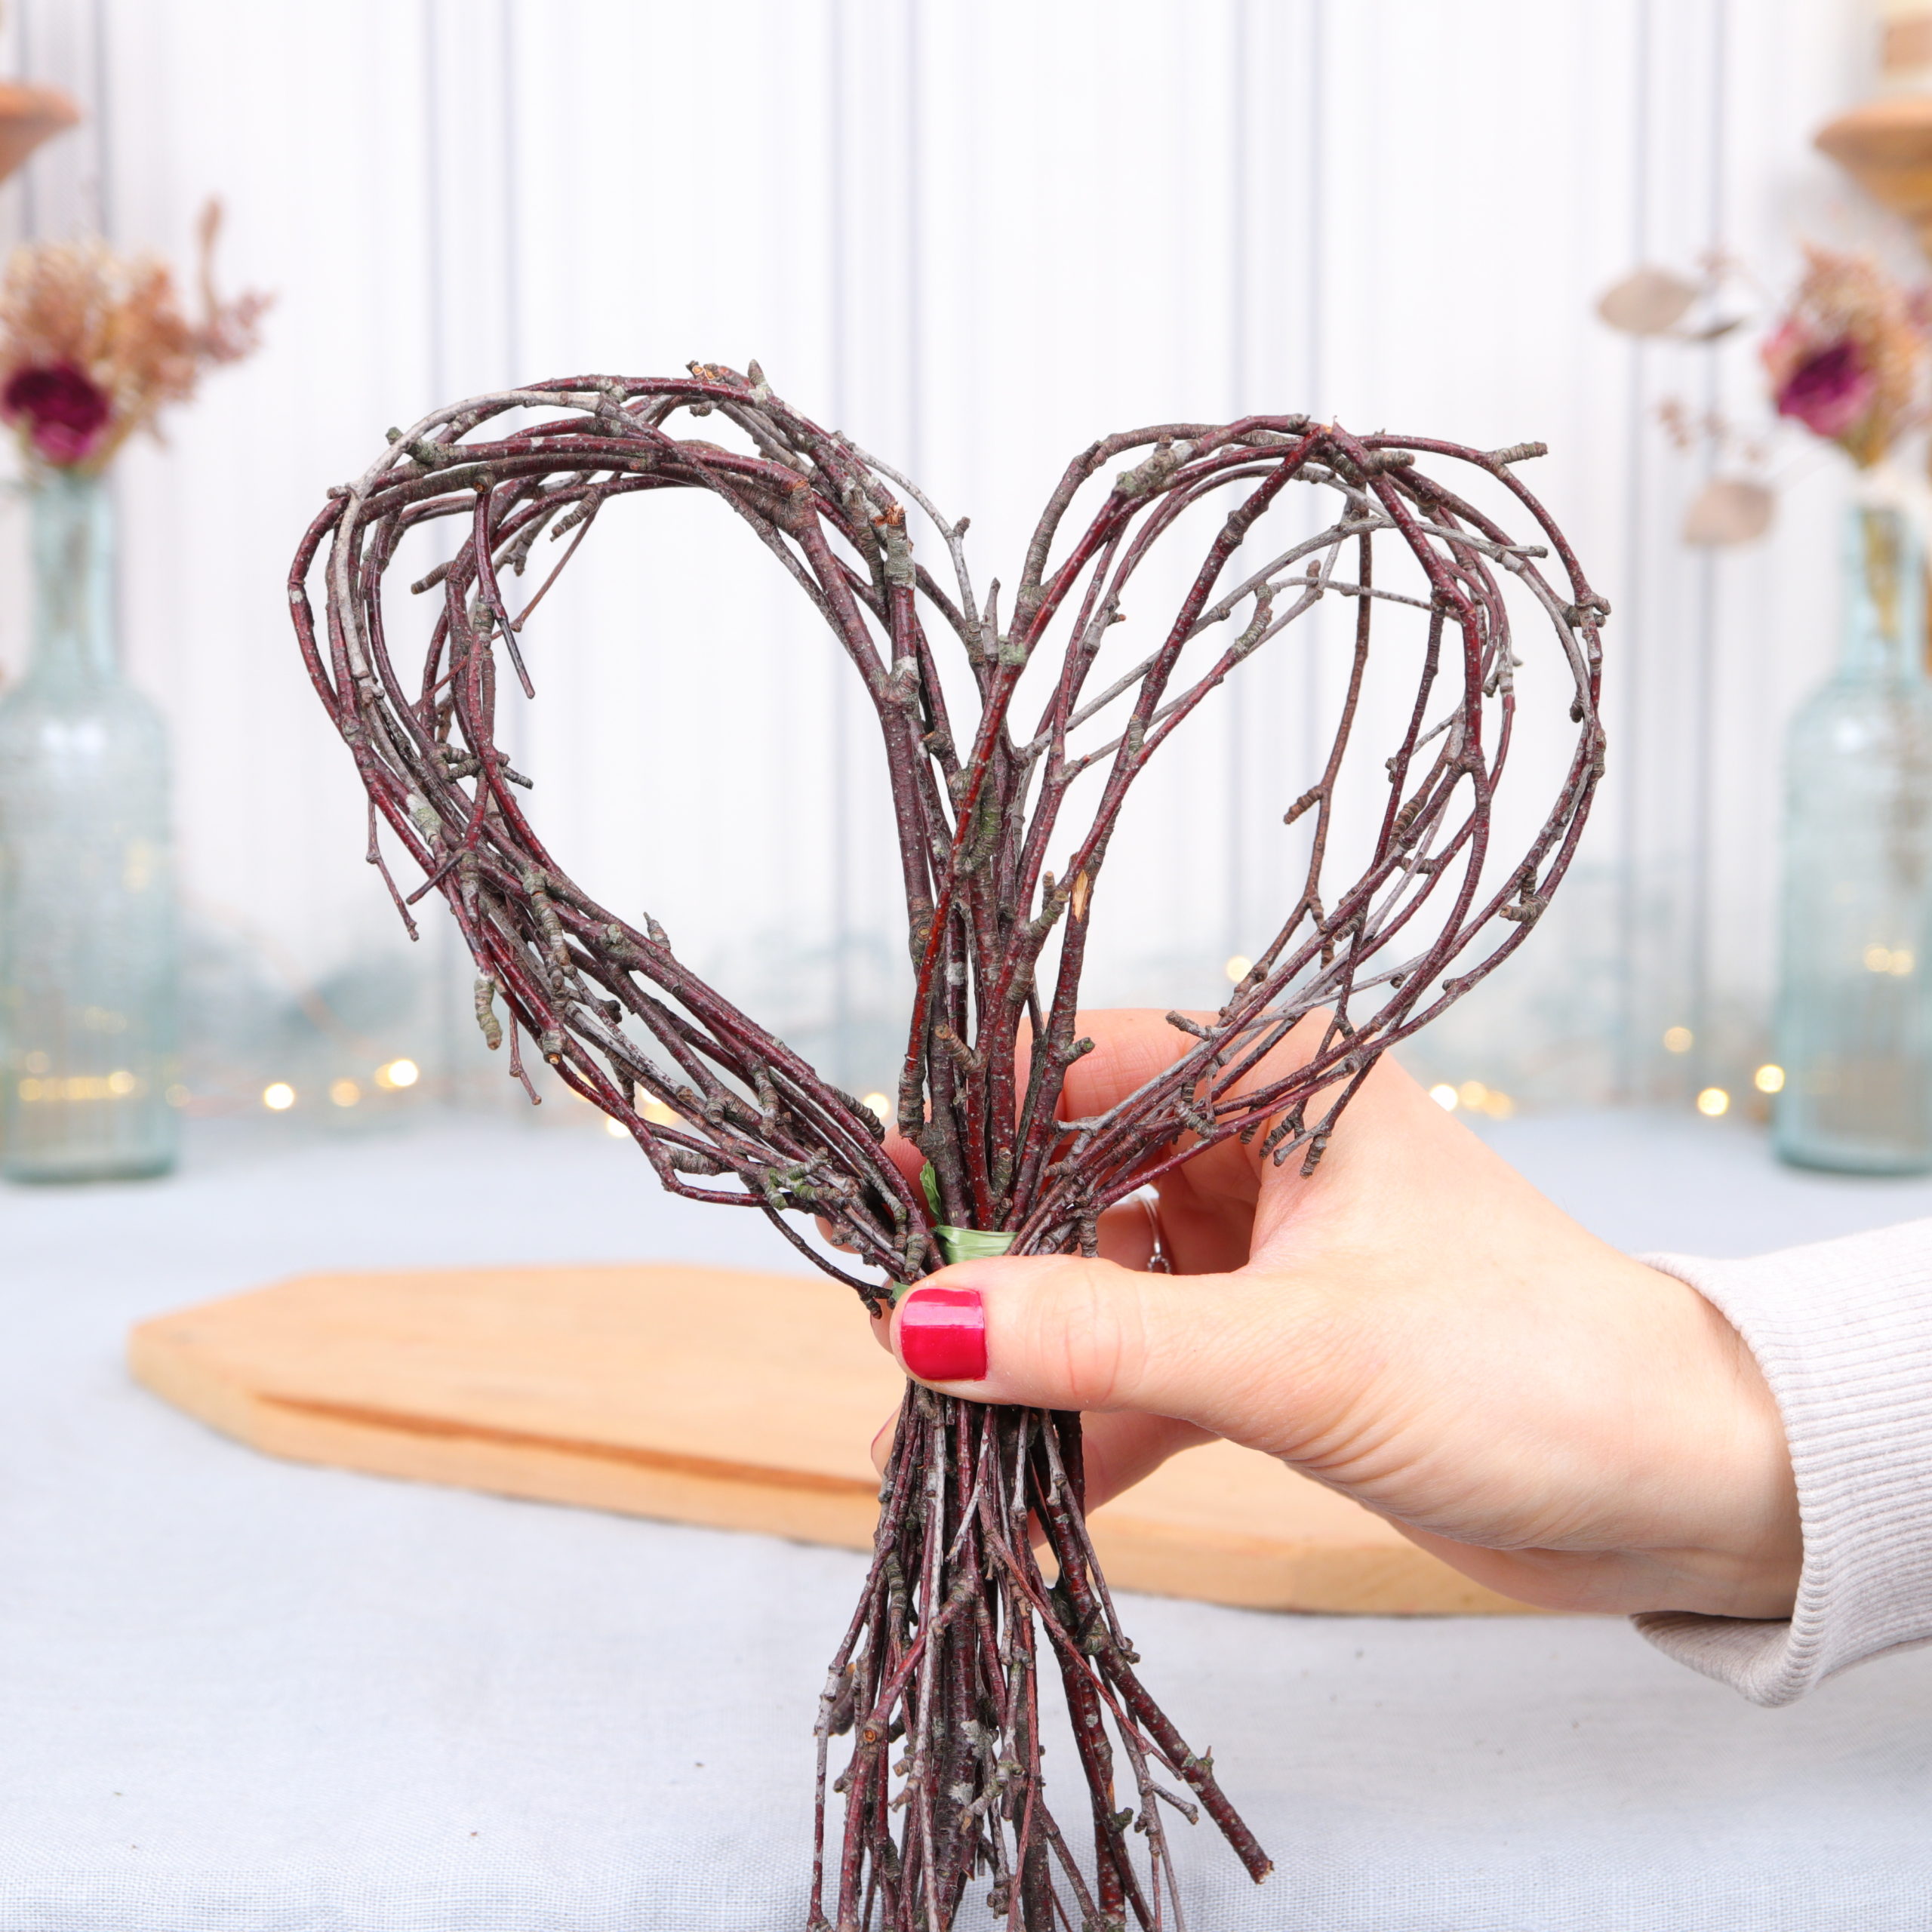
To form the heart, I take multiple branches.
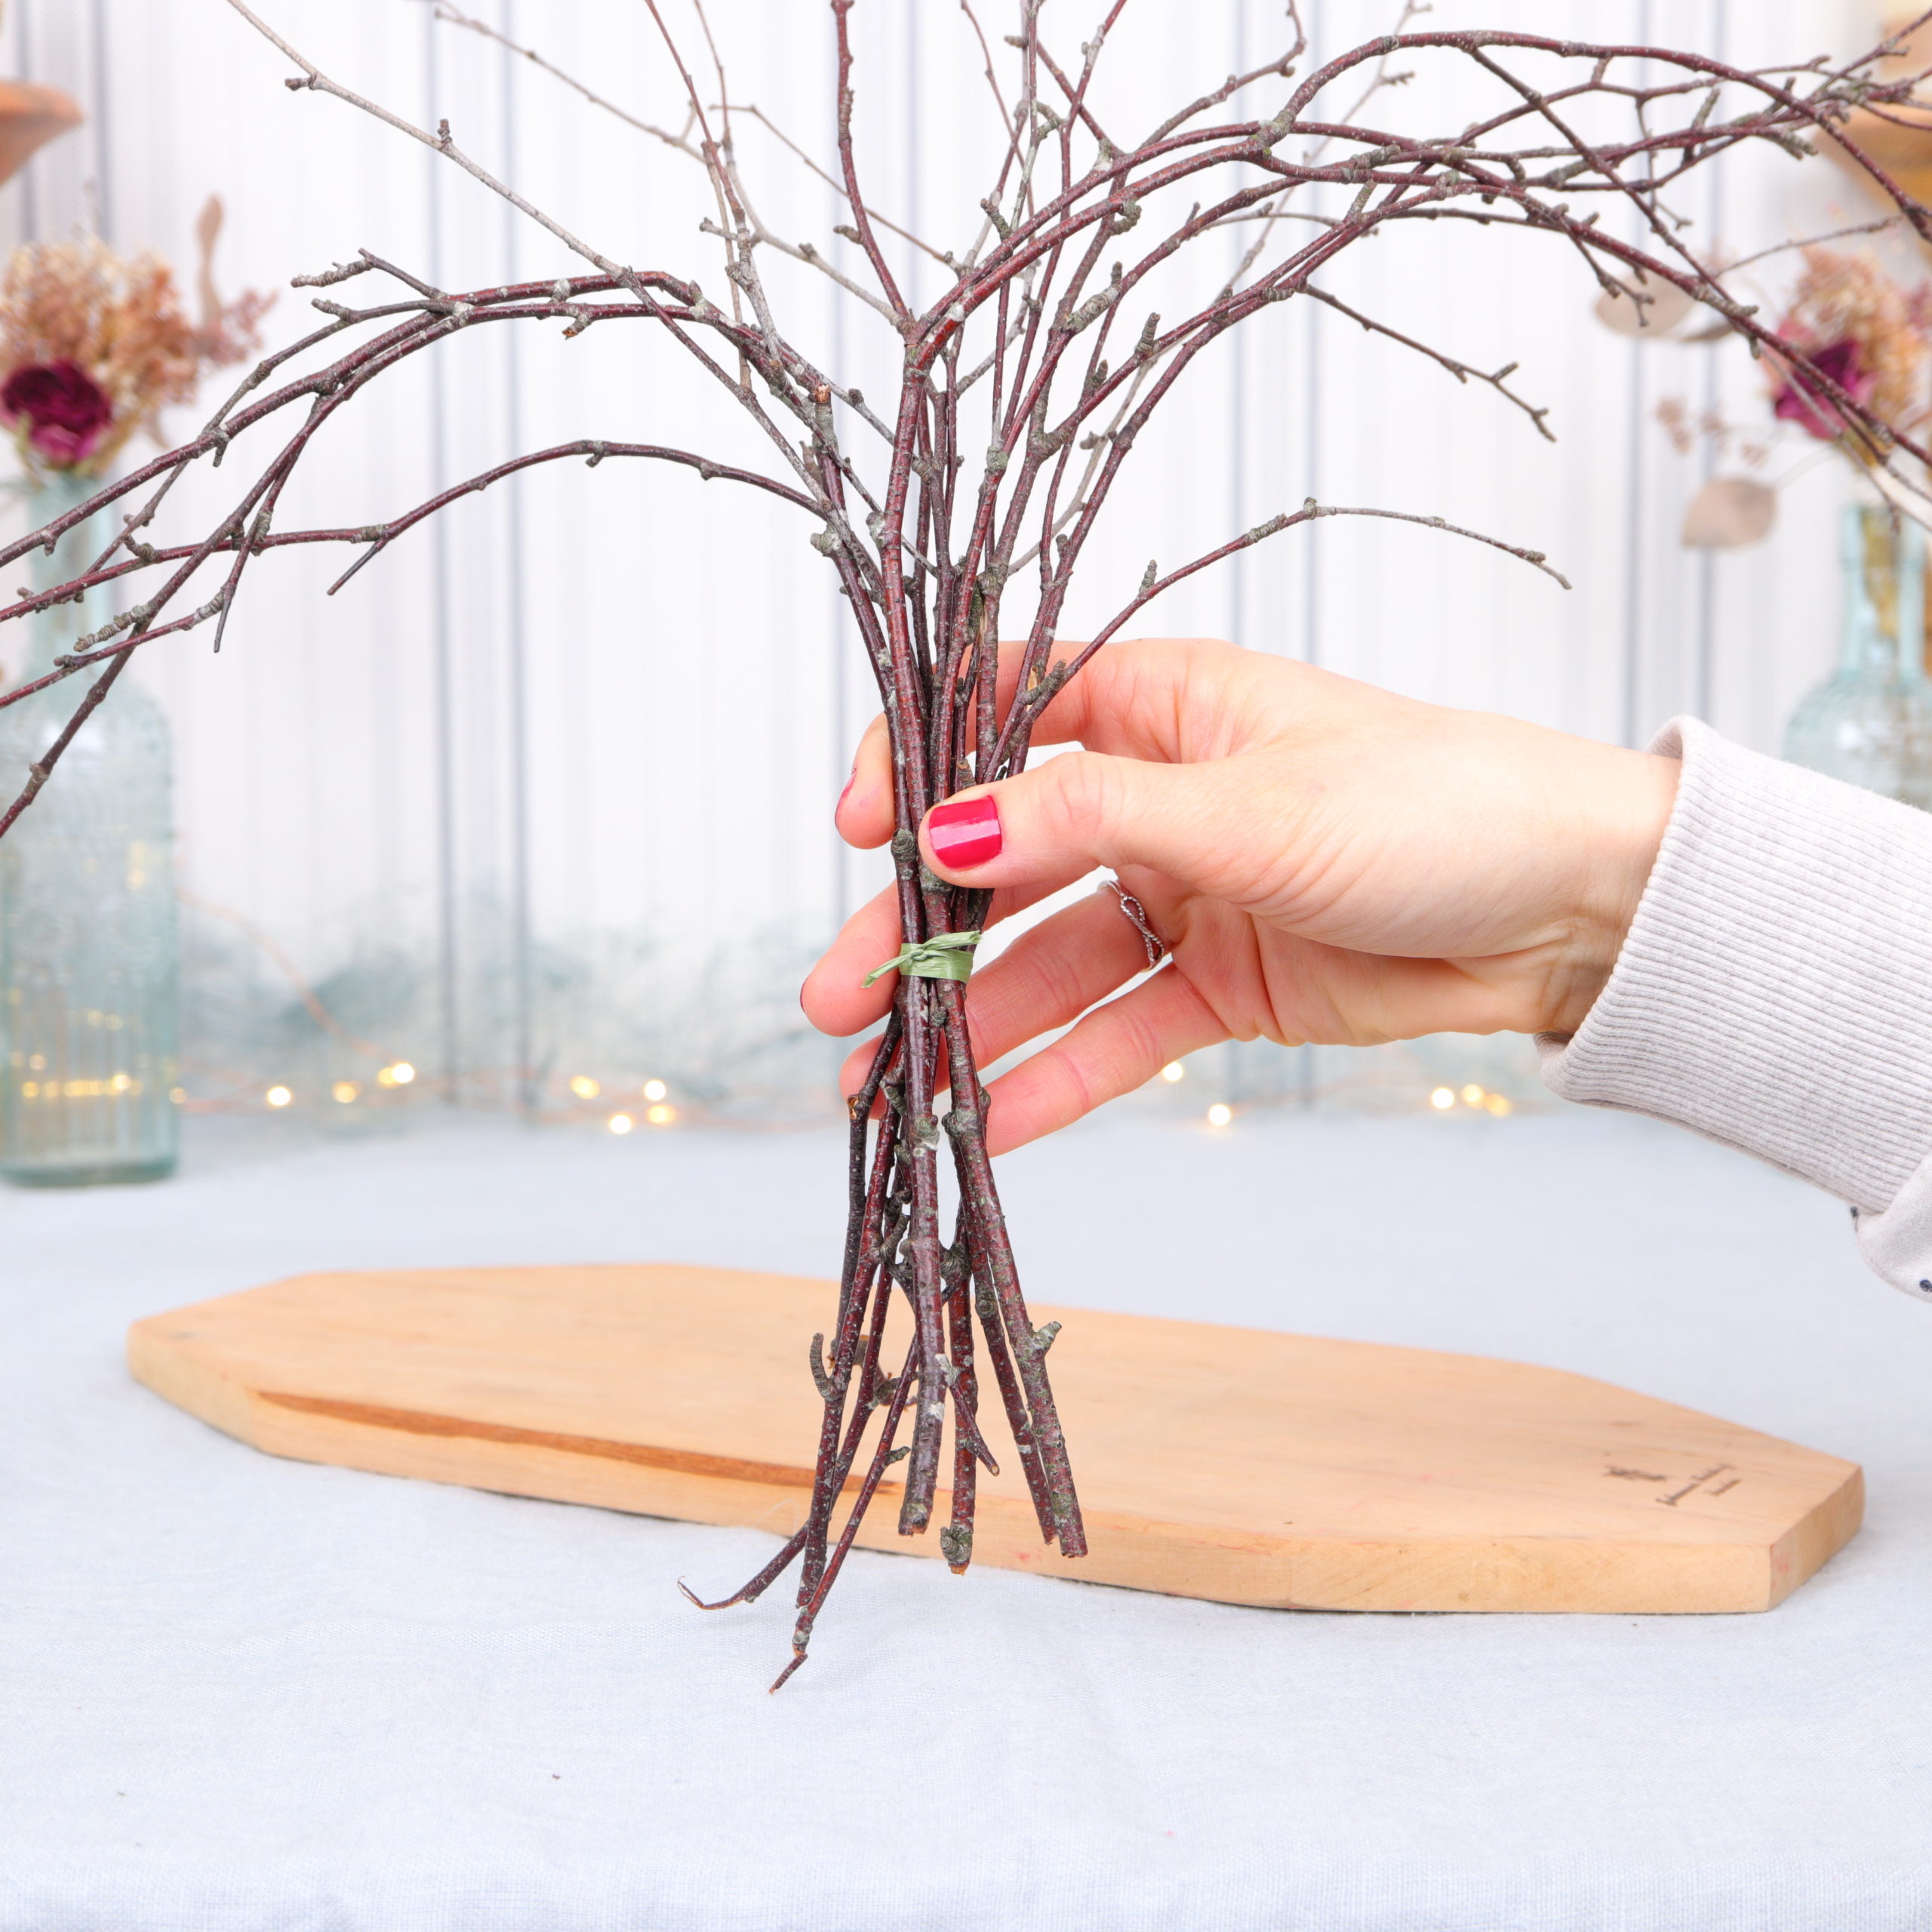
I wrap and knot the twigs with the raffia ribbon at the bottom so that everything holds together tightly.

Now I divide the bundle in the middle.

I start with one side and bend the branches down.
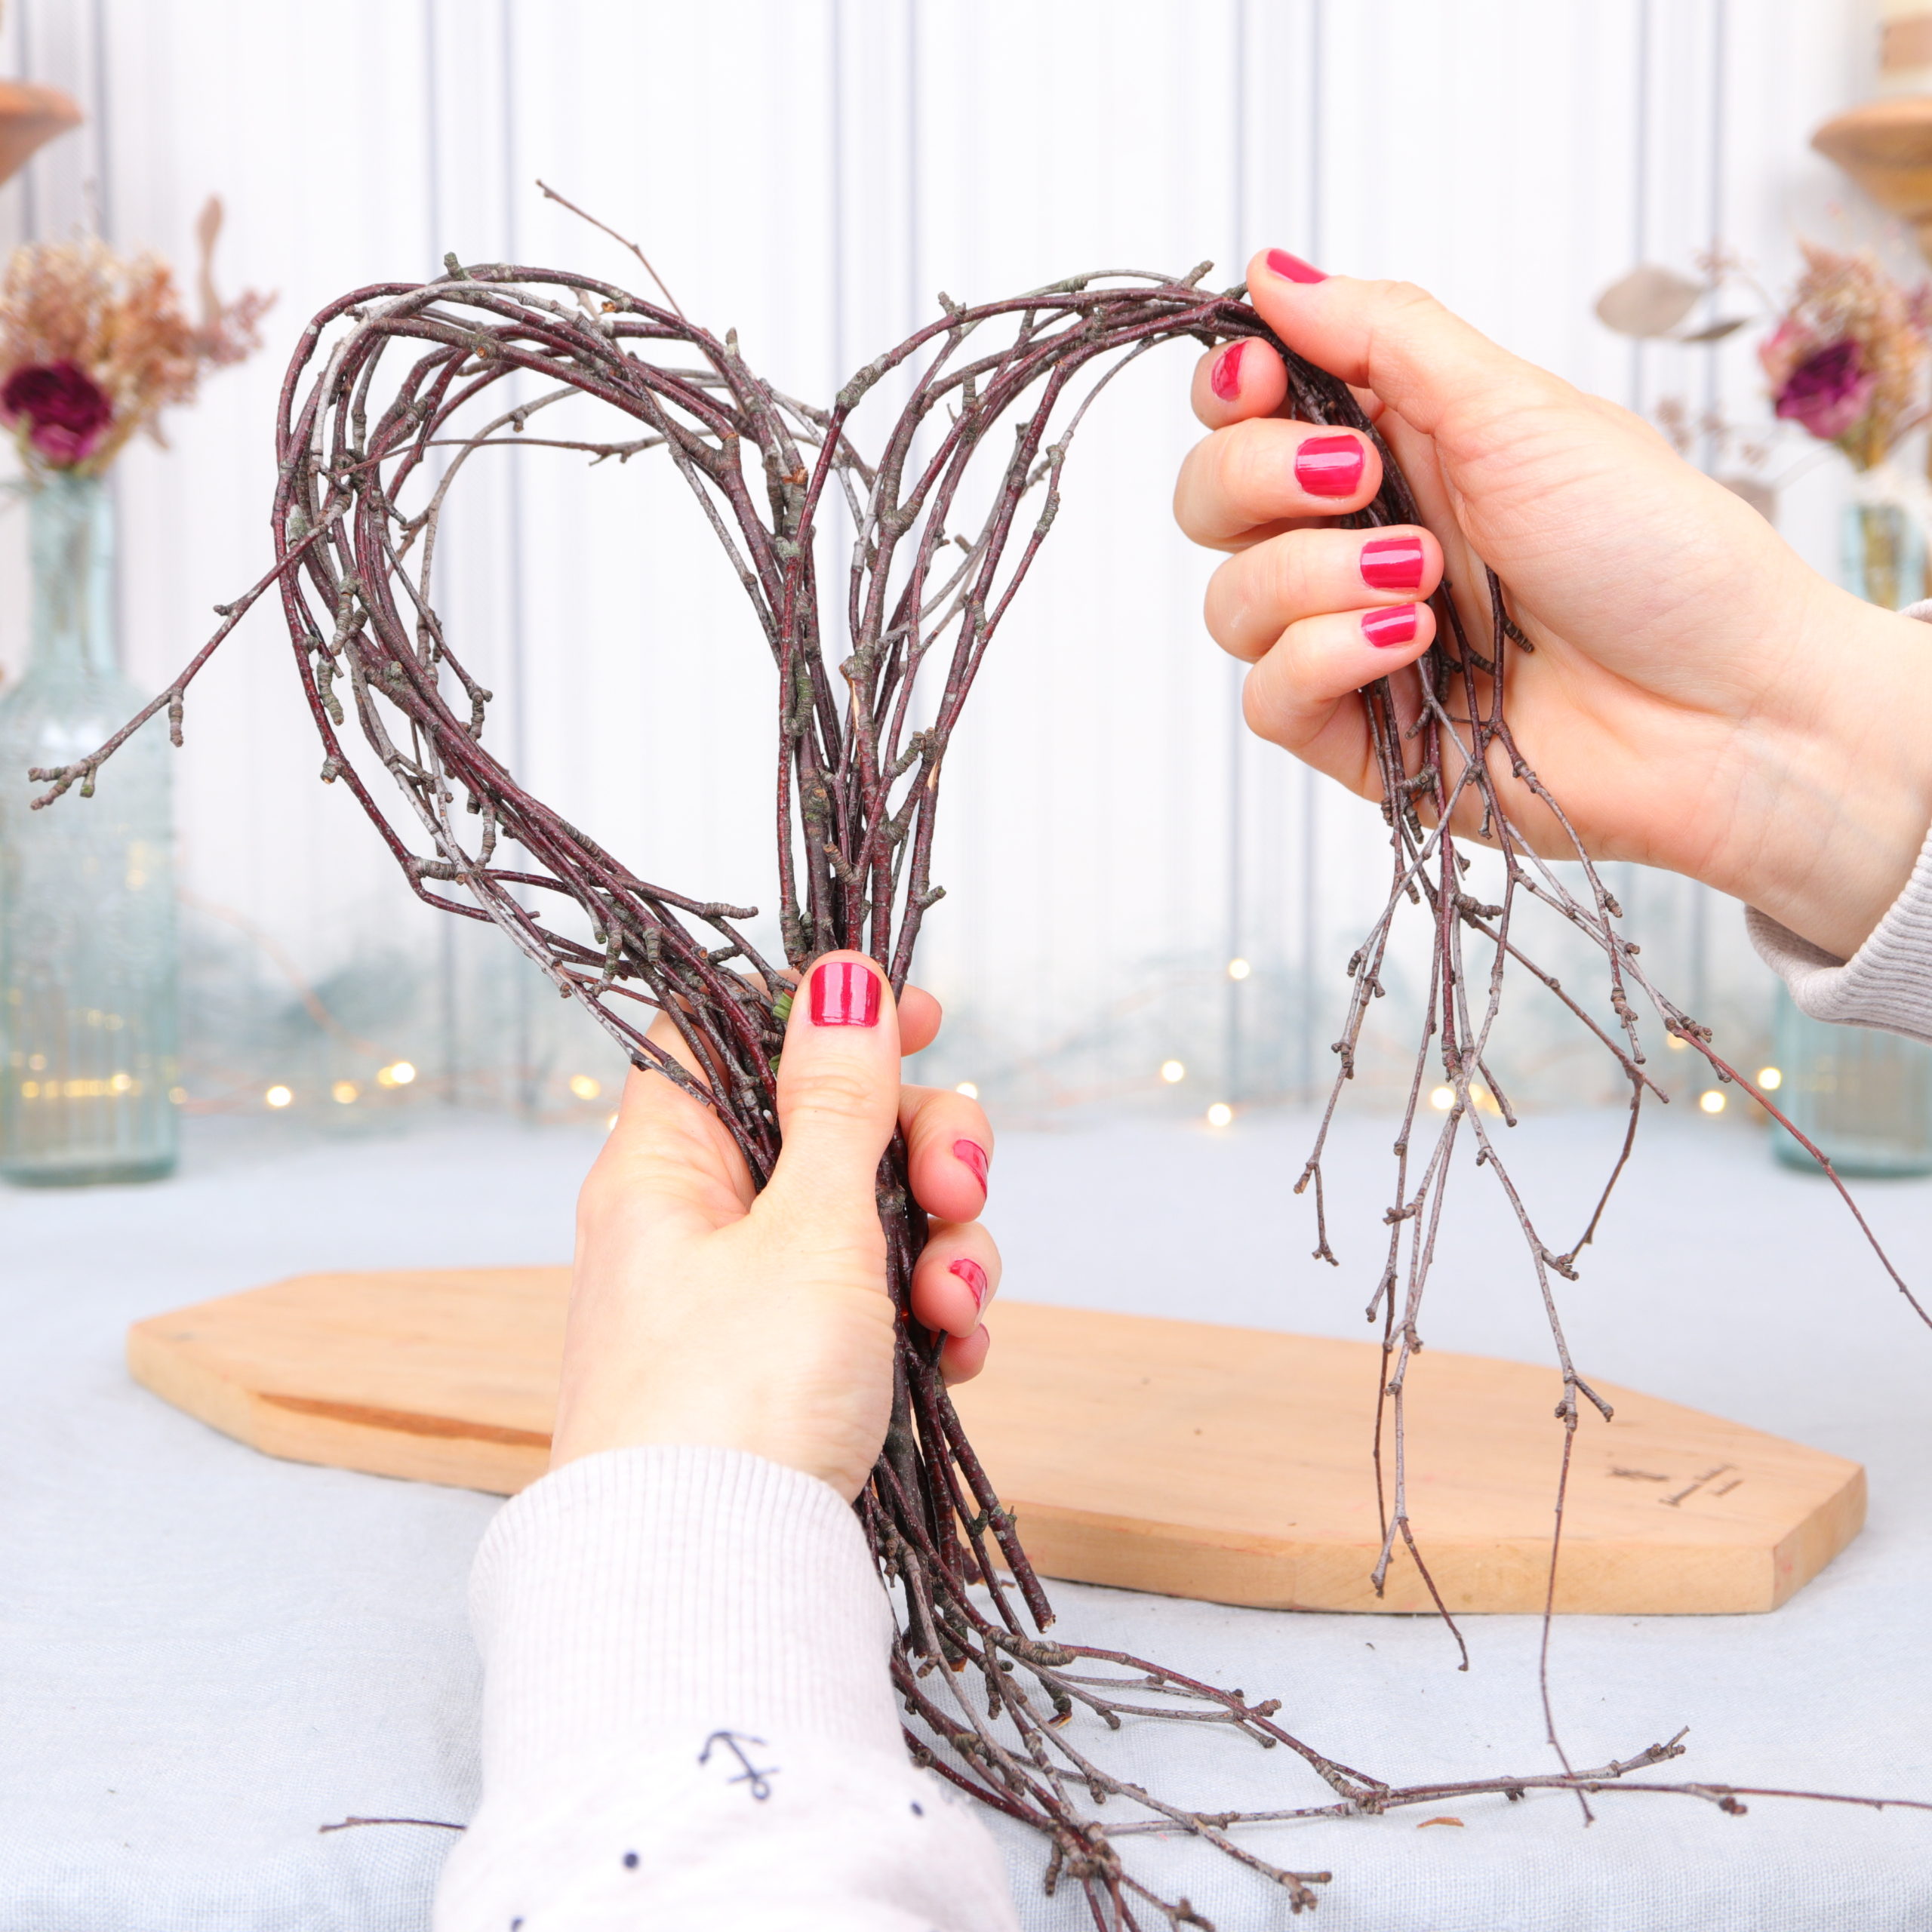
With one hand I hold the branches, with the other hand I bend the branches of the other side down.
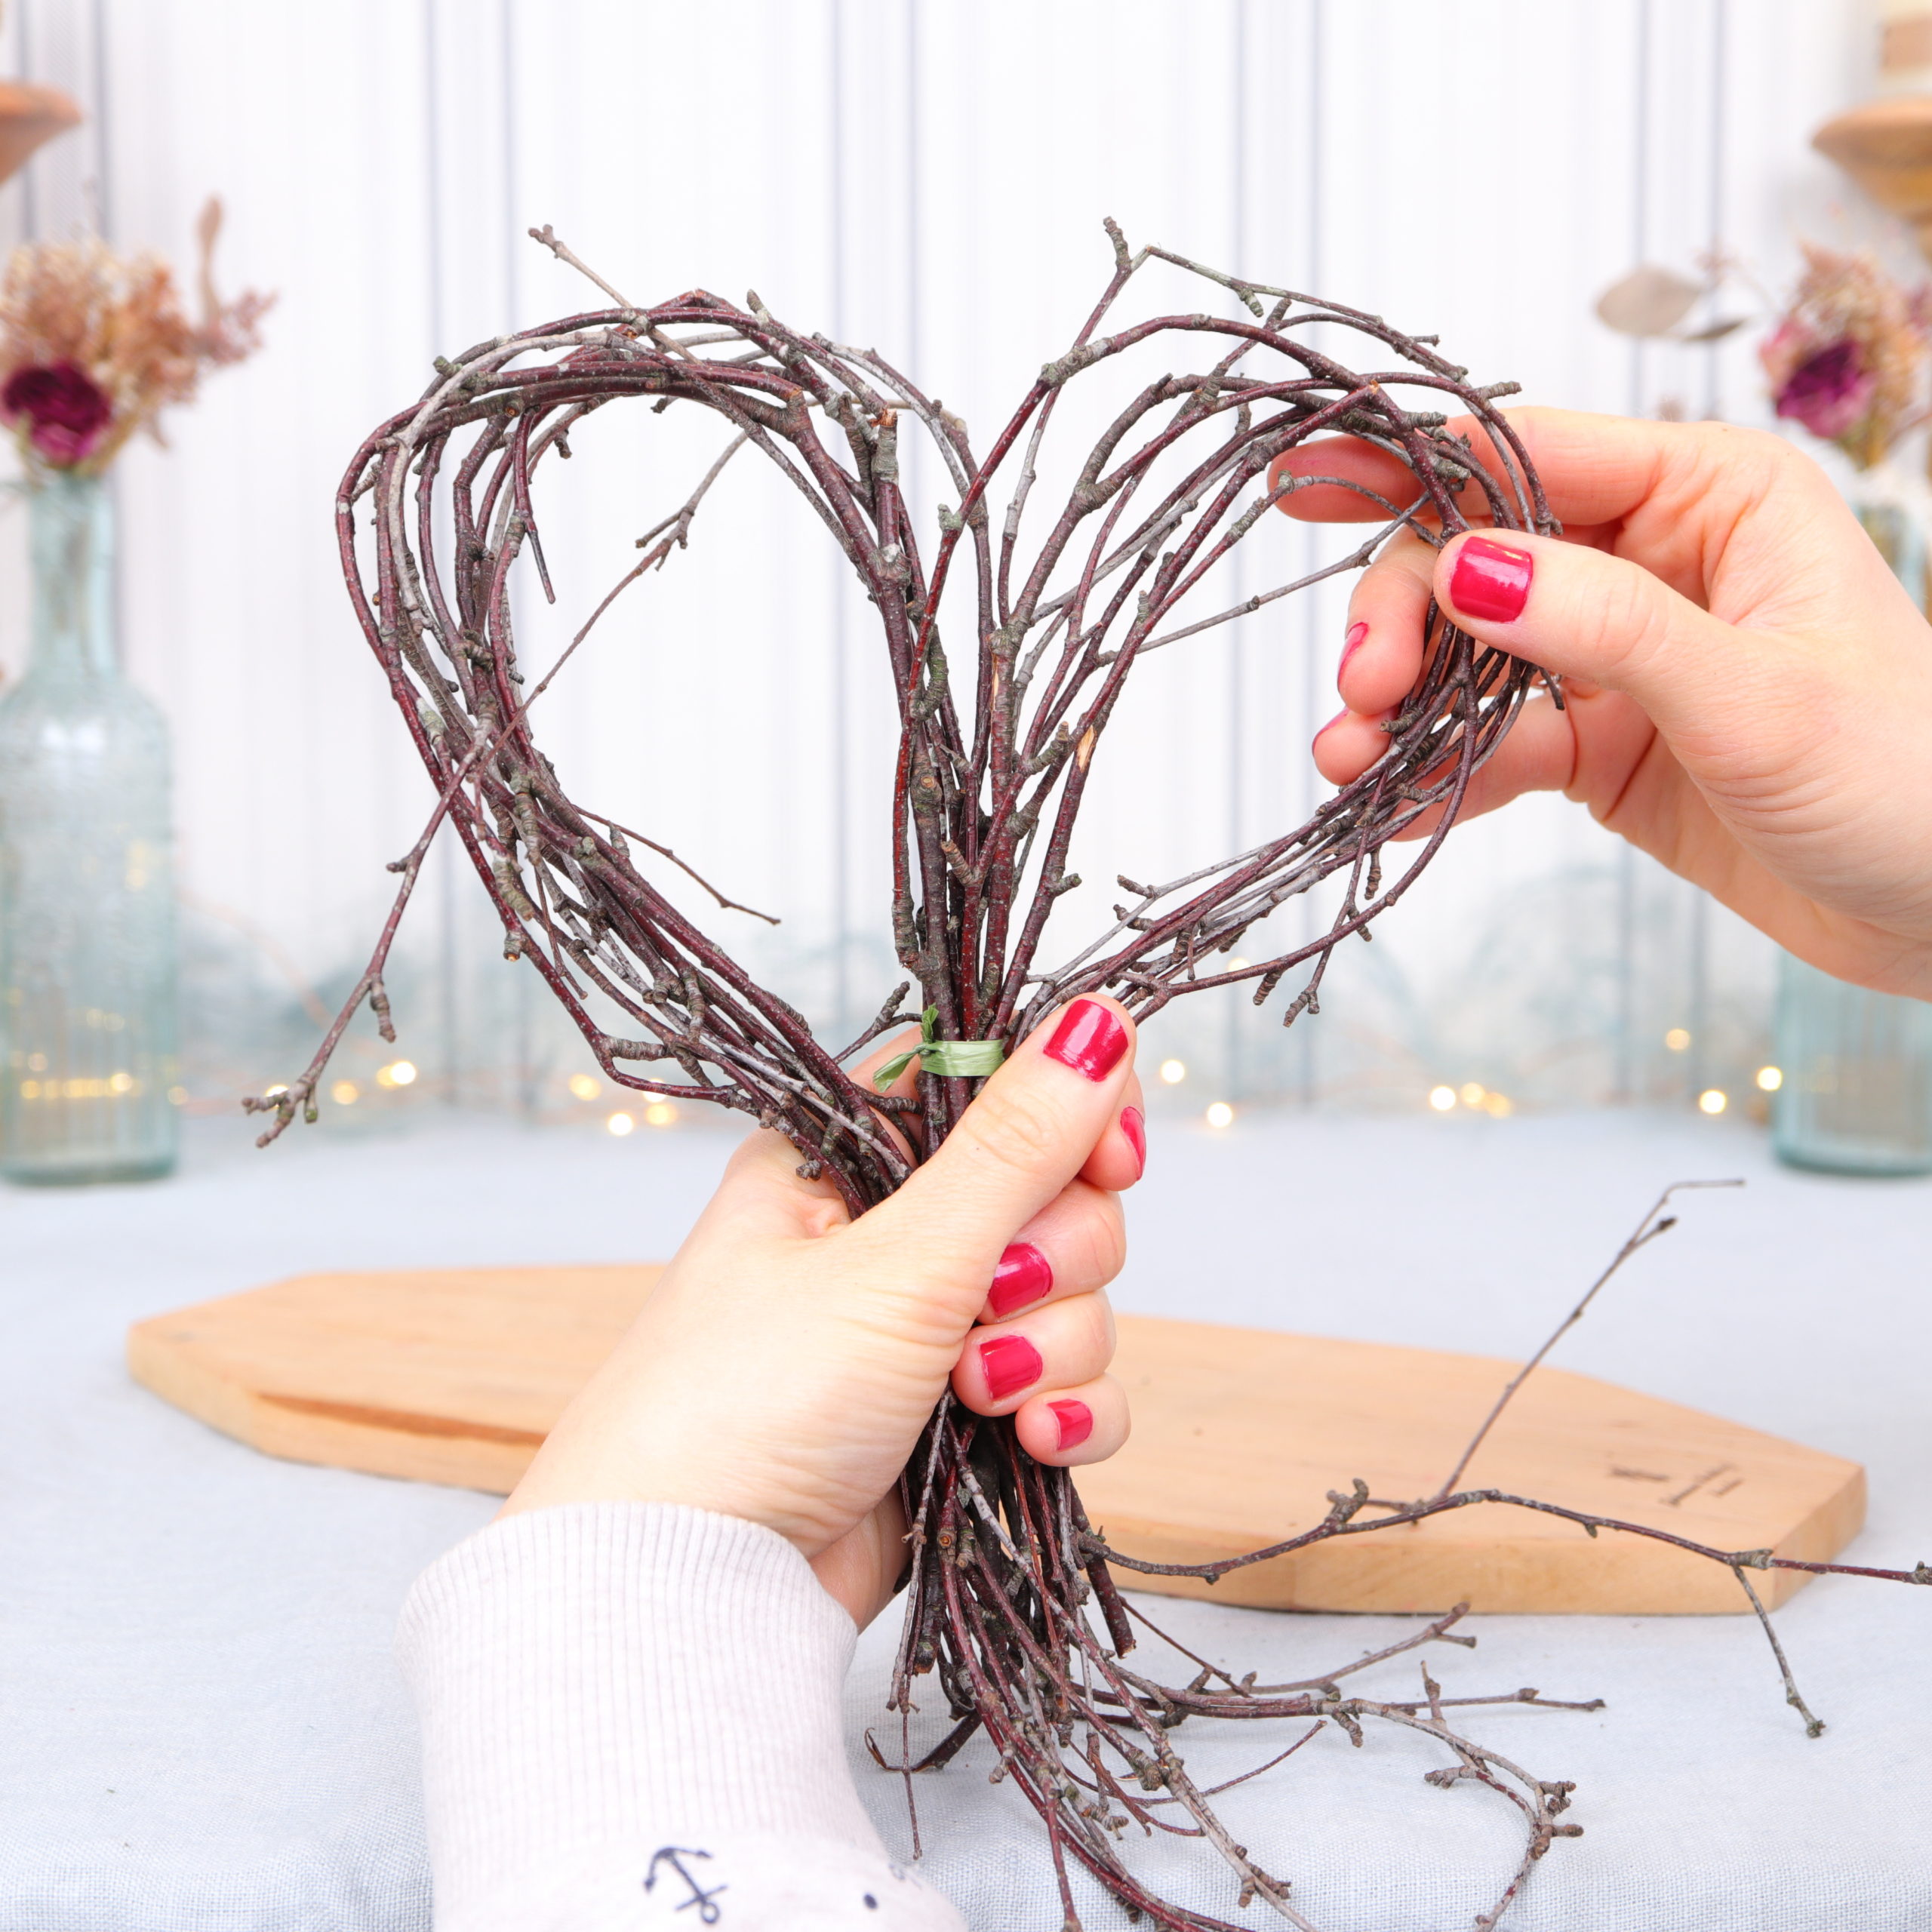
I clasp the twigs tightly with my hand and wrap the raffia ribbon around everything with the other hand and tie a knot.
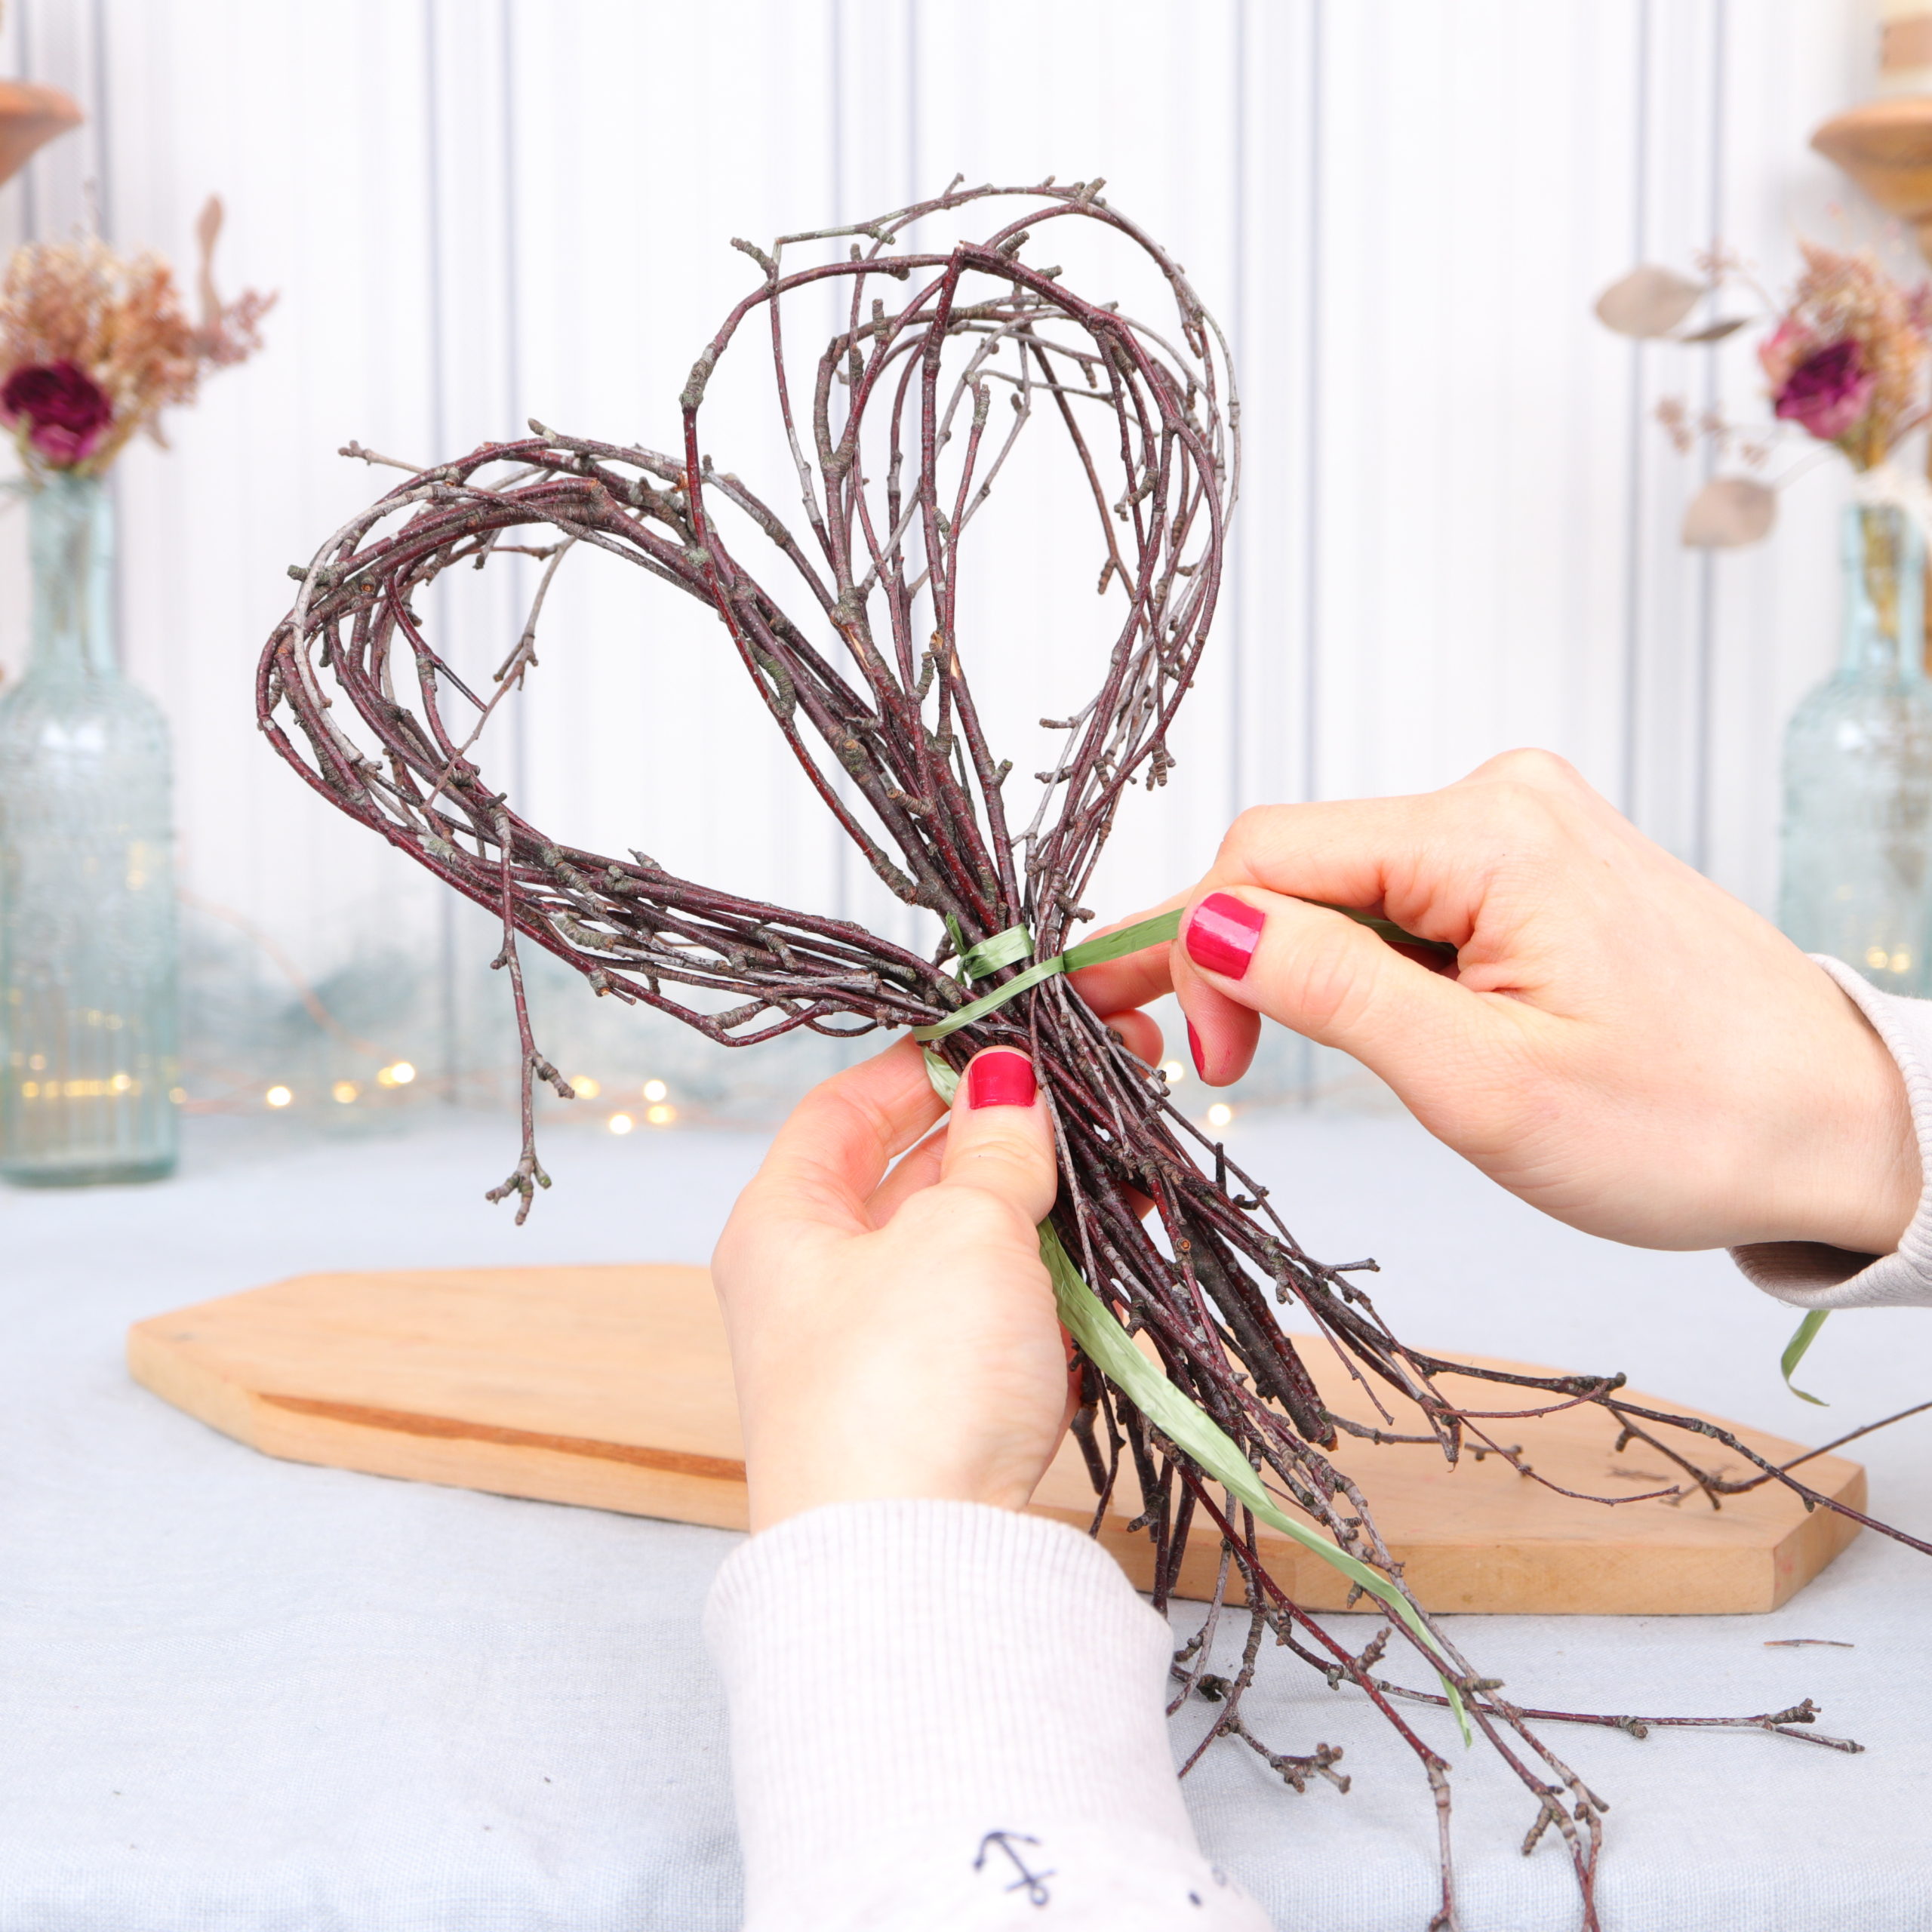
Now I’ll correct the shape. To do this, I simply cut off any protruding small branches with the flower scissors.

My finished heart looks like this:
Step 2: Prepare flowers
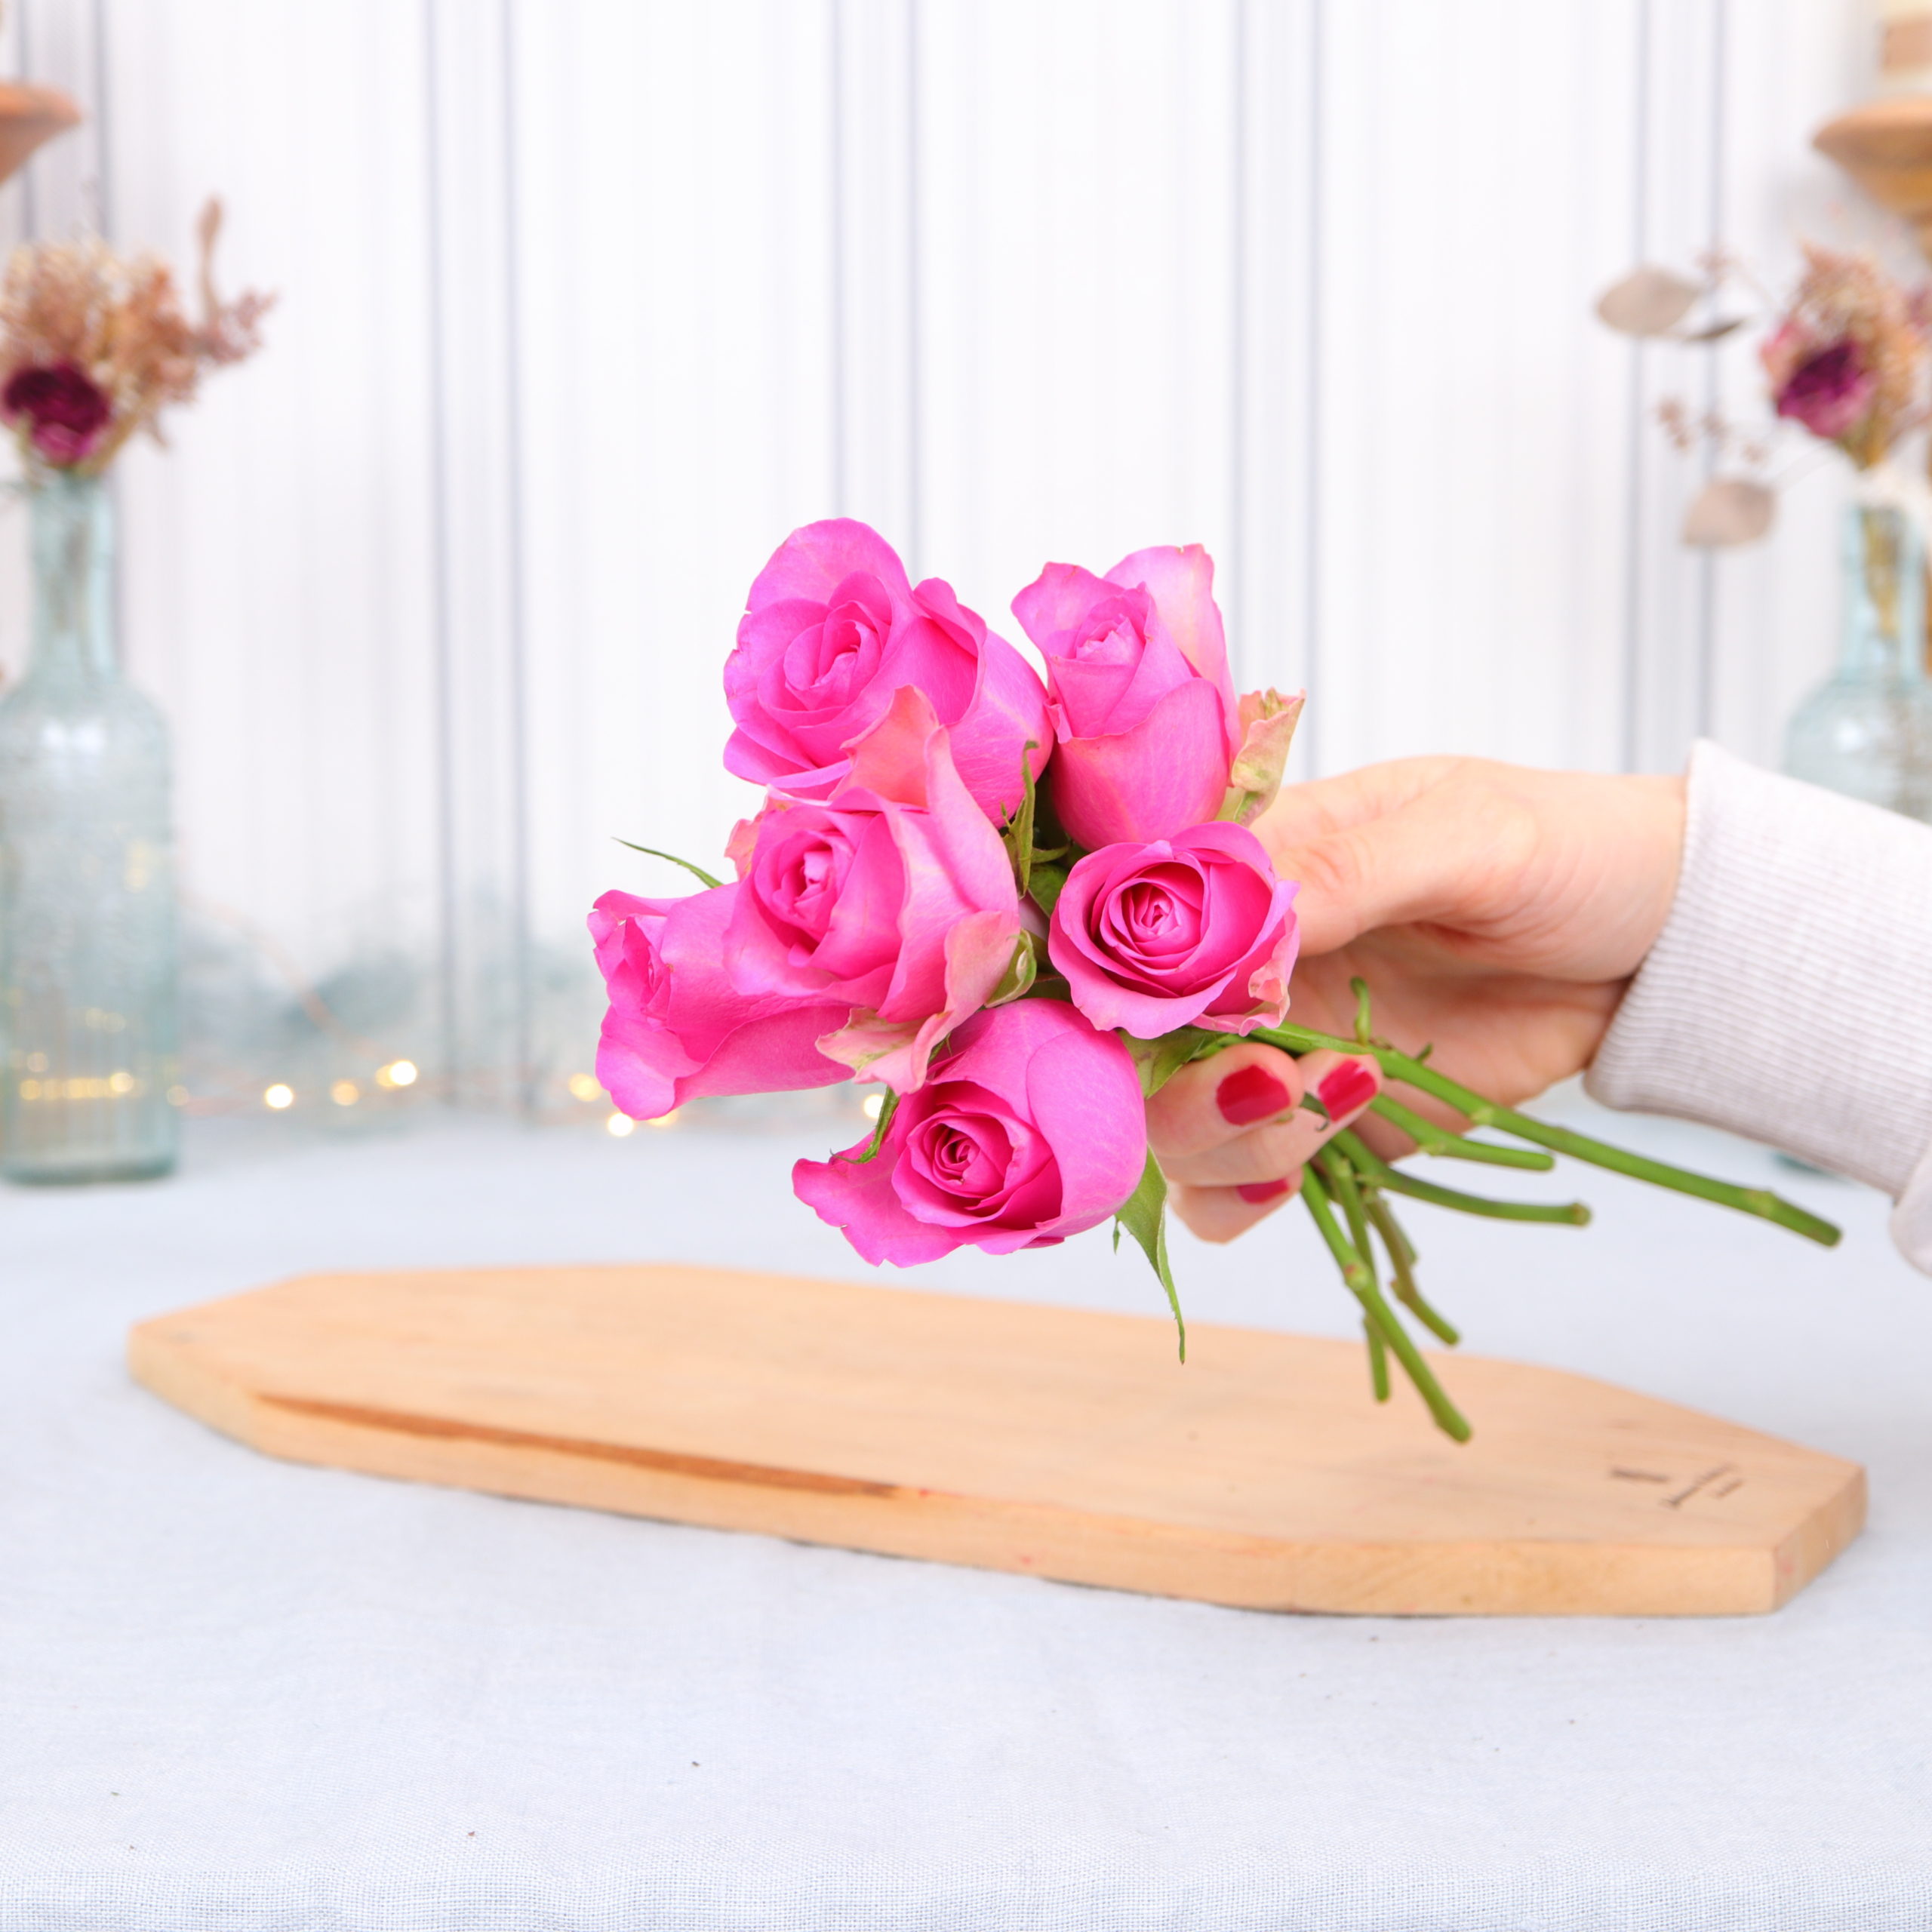
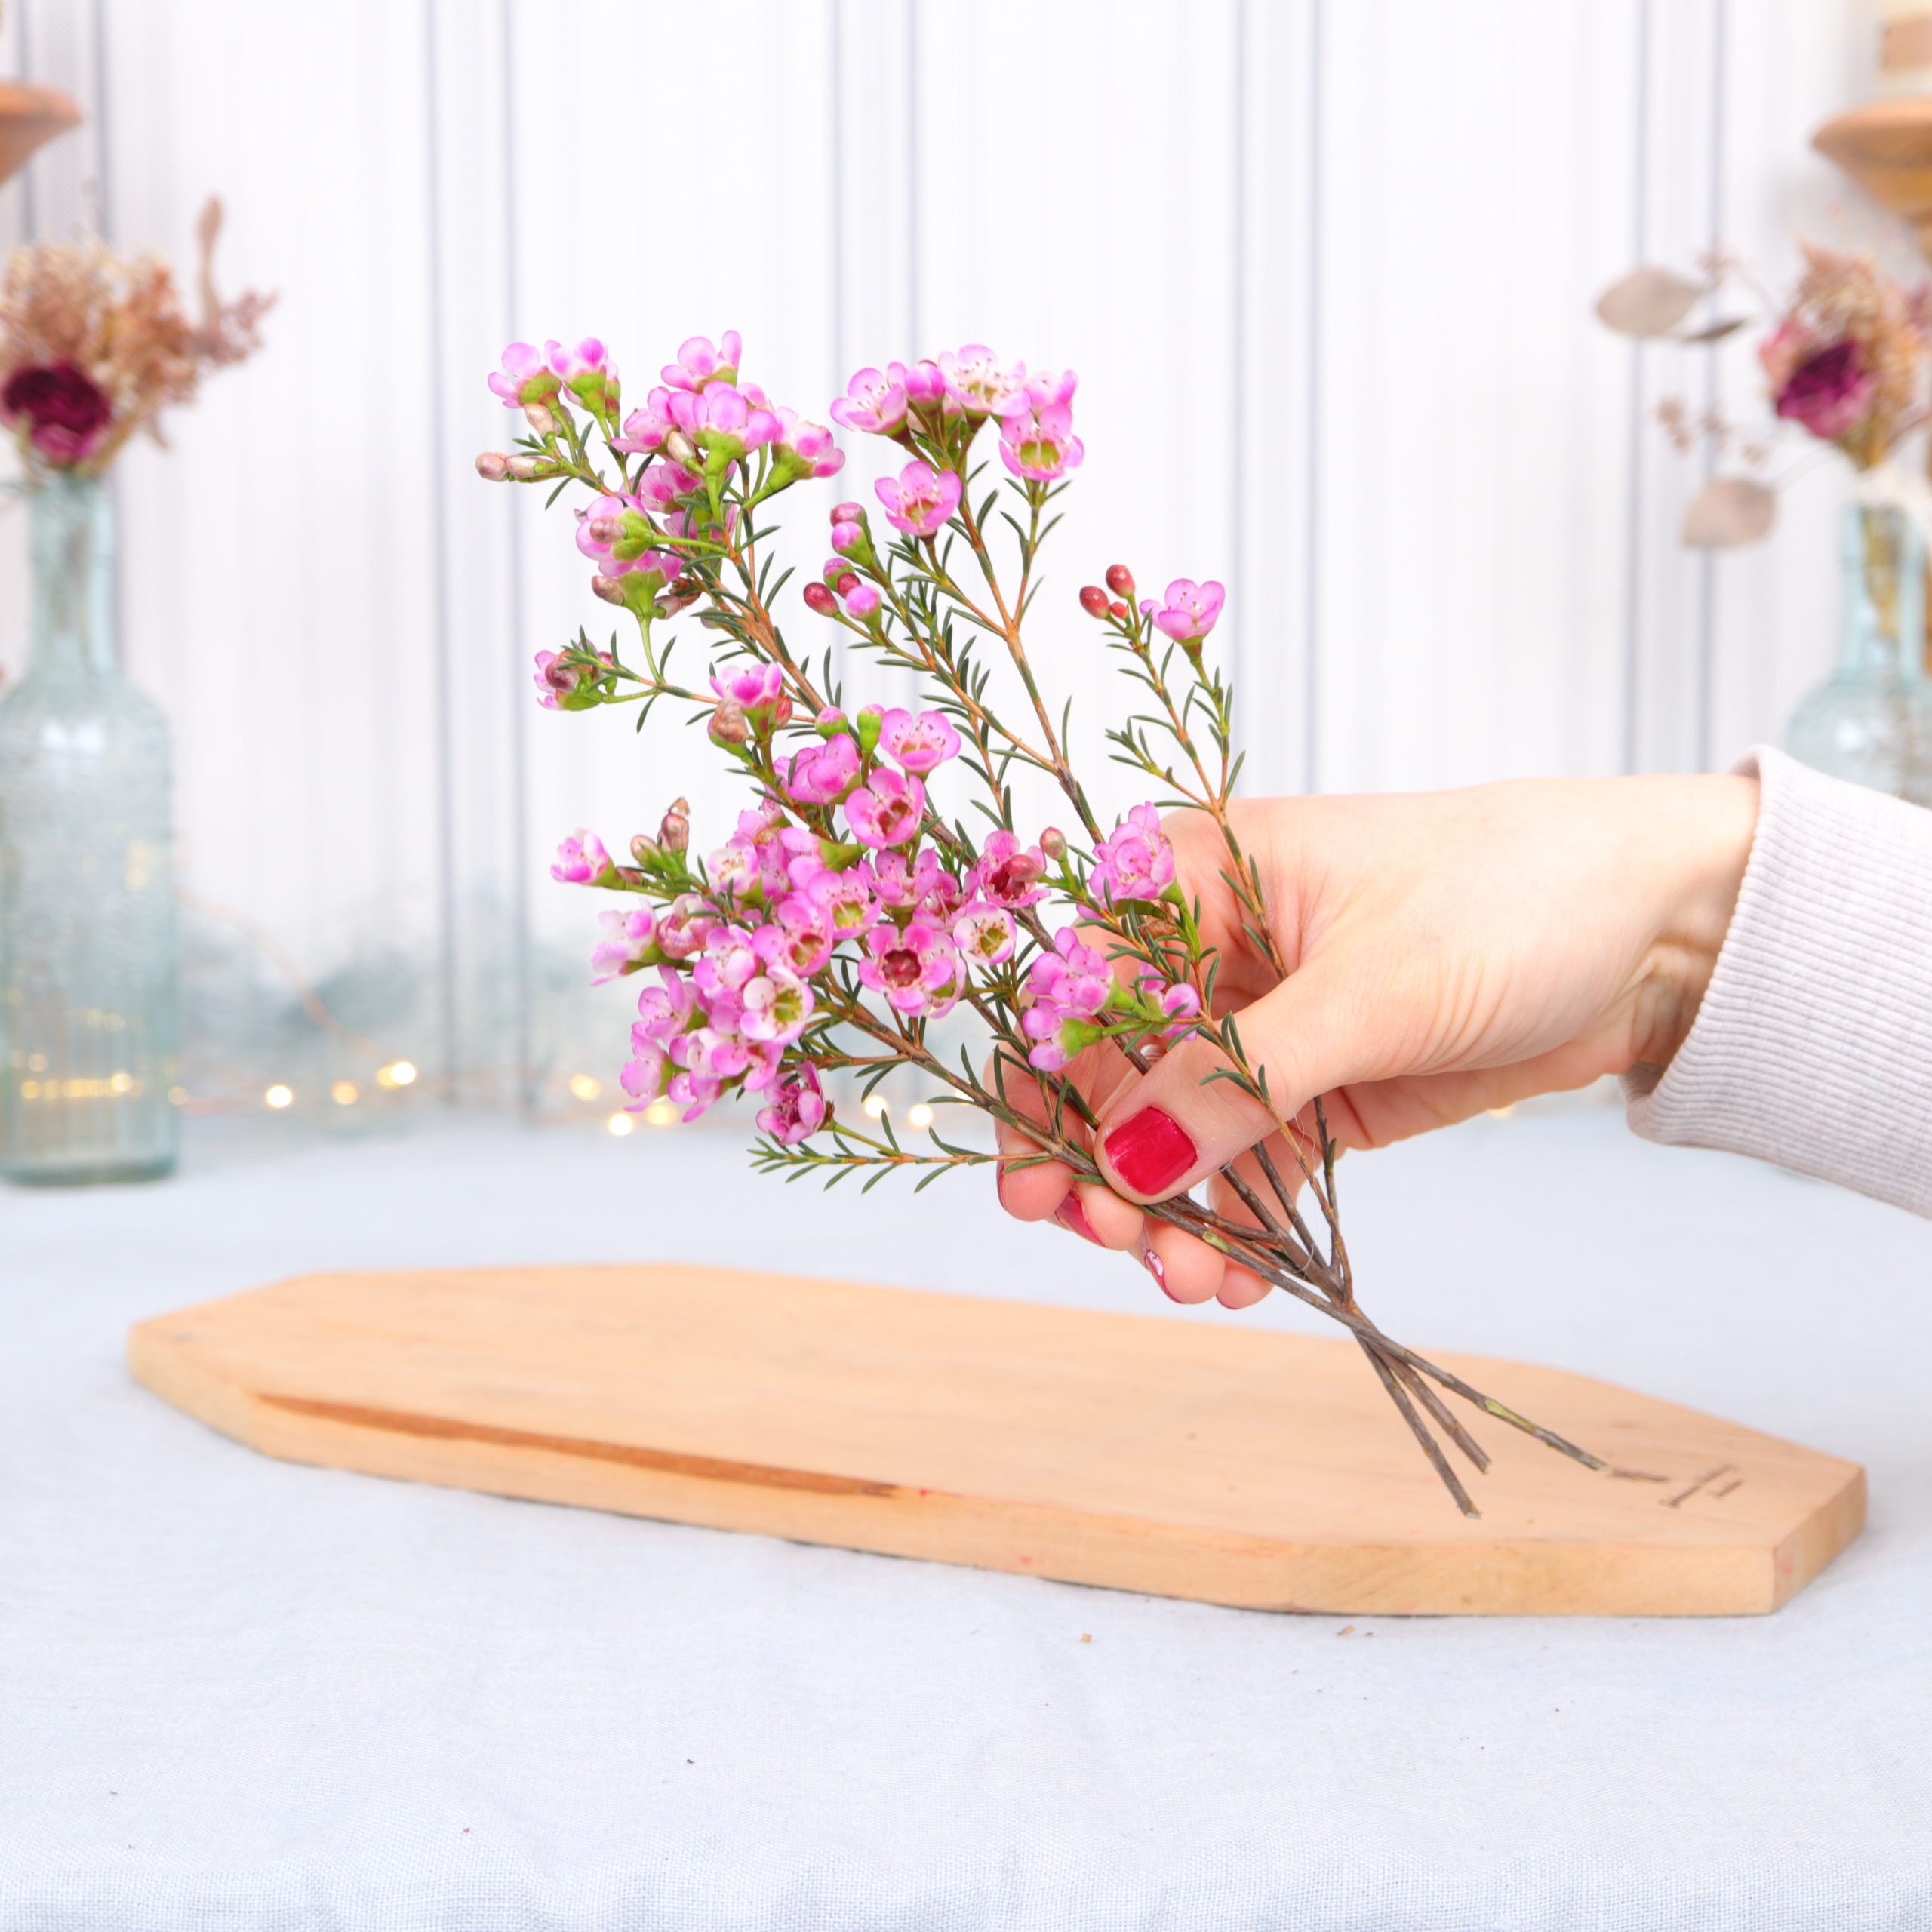
In the next step I prepare the roses and wax flowers for the bouquet.
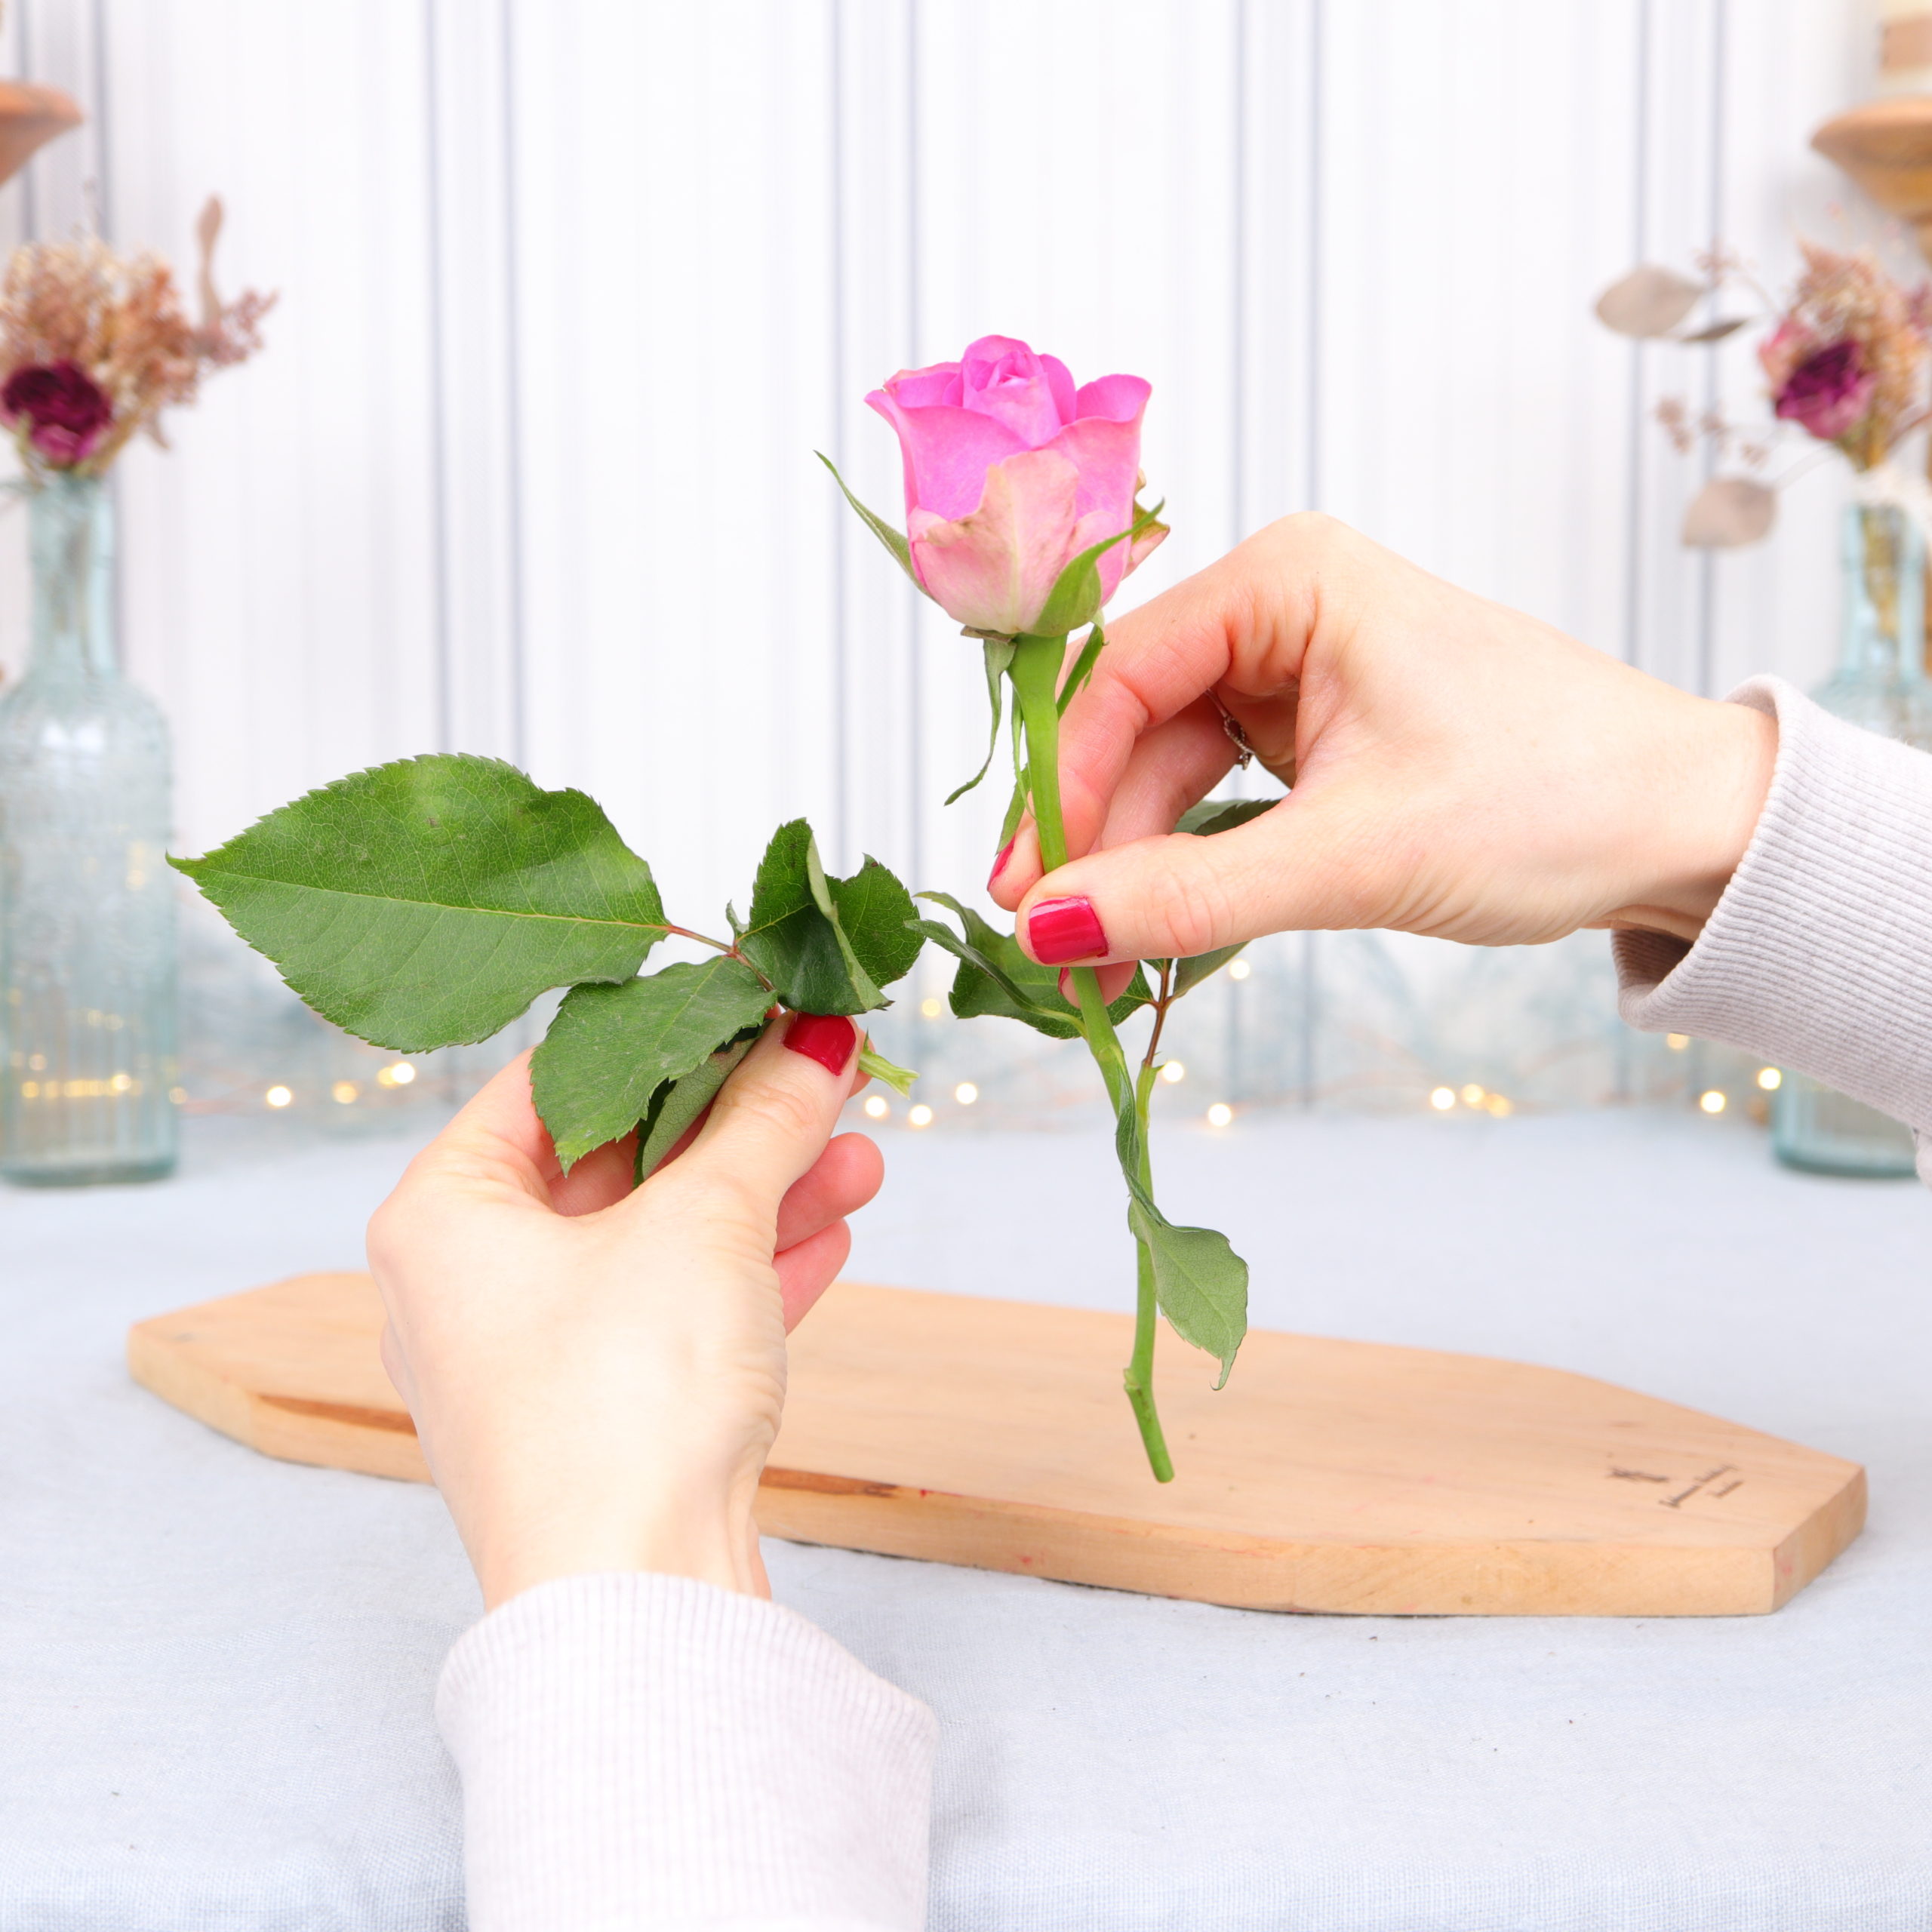
I remove all the leaves from the roses. I just pluck them off with my hand.
I also remove the leaves from the wax flowers so that only the stem remains.
It’s important to remove the leaves at the bottom of the stem to keep them from standing in the water and getting rotten.

Step 3: Tie the bouquet
Now I bring the heart of branches and the flowers together.
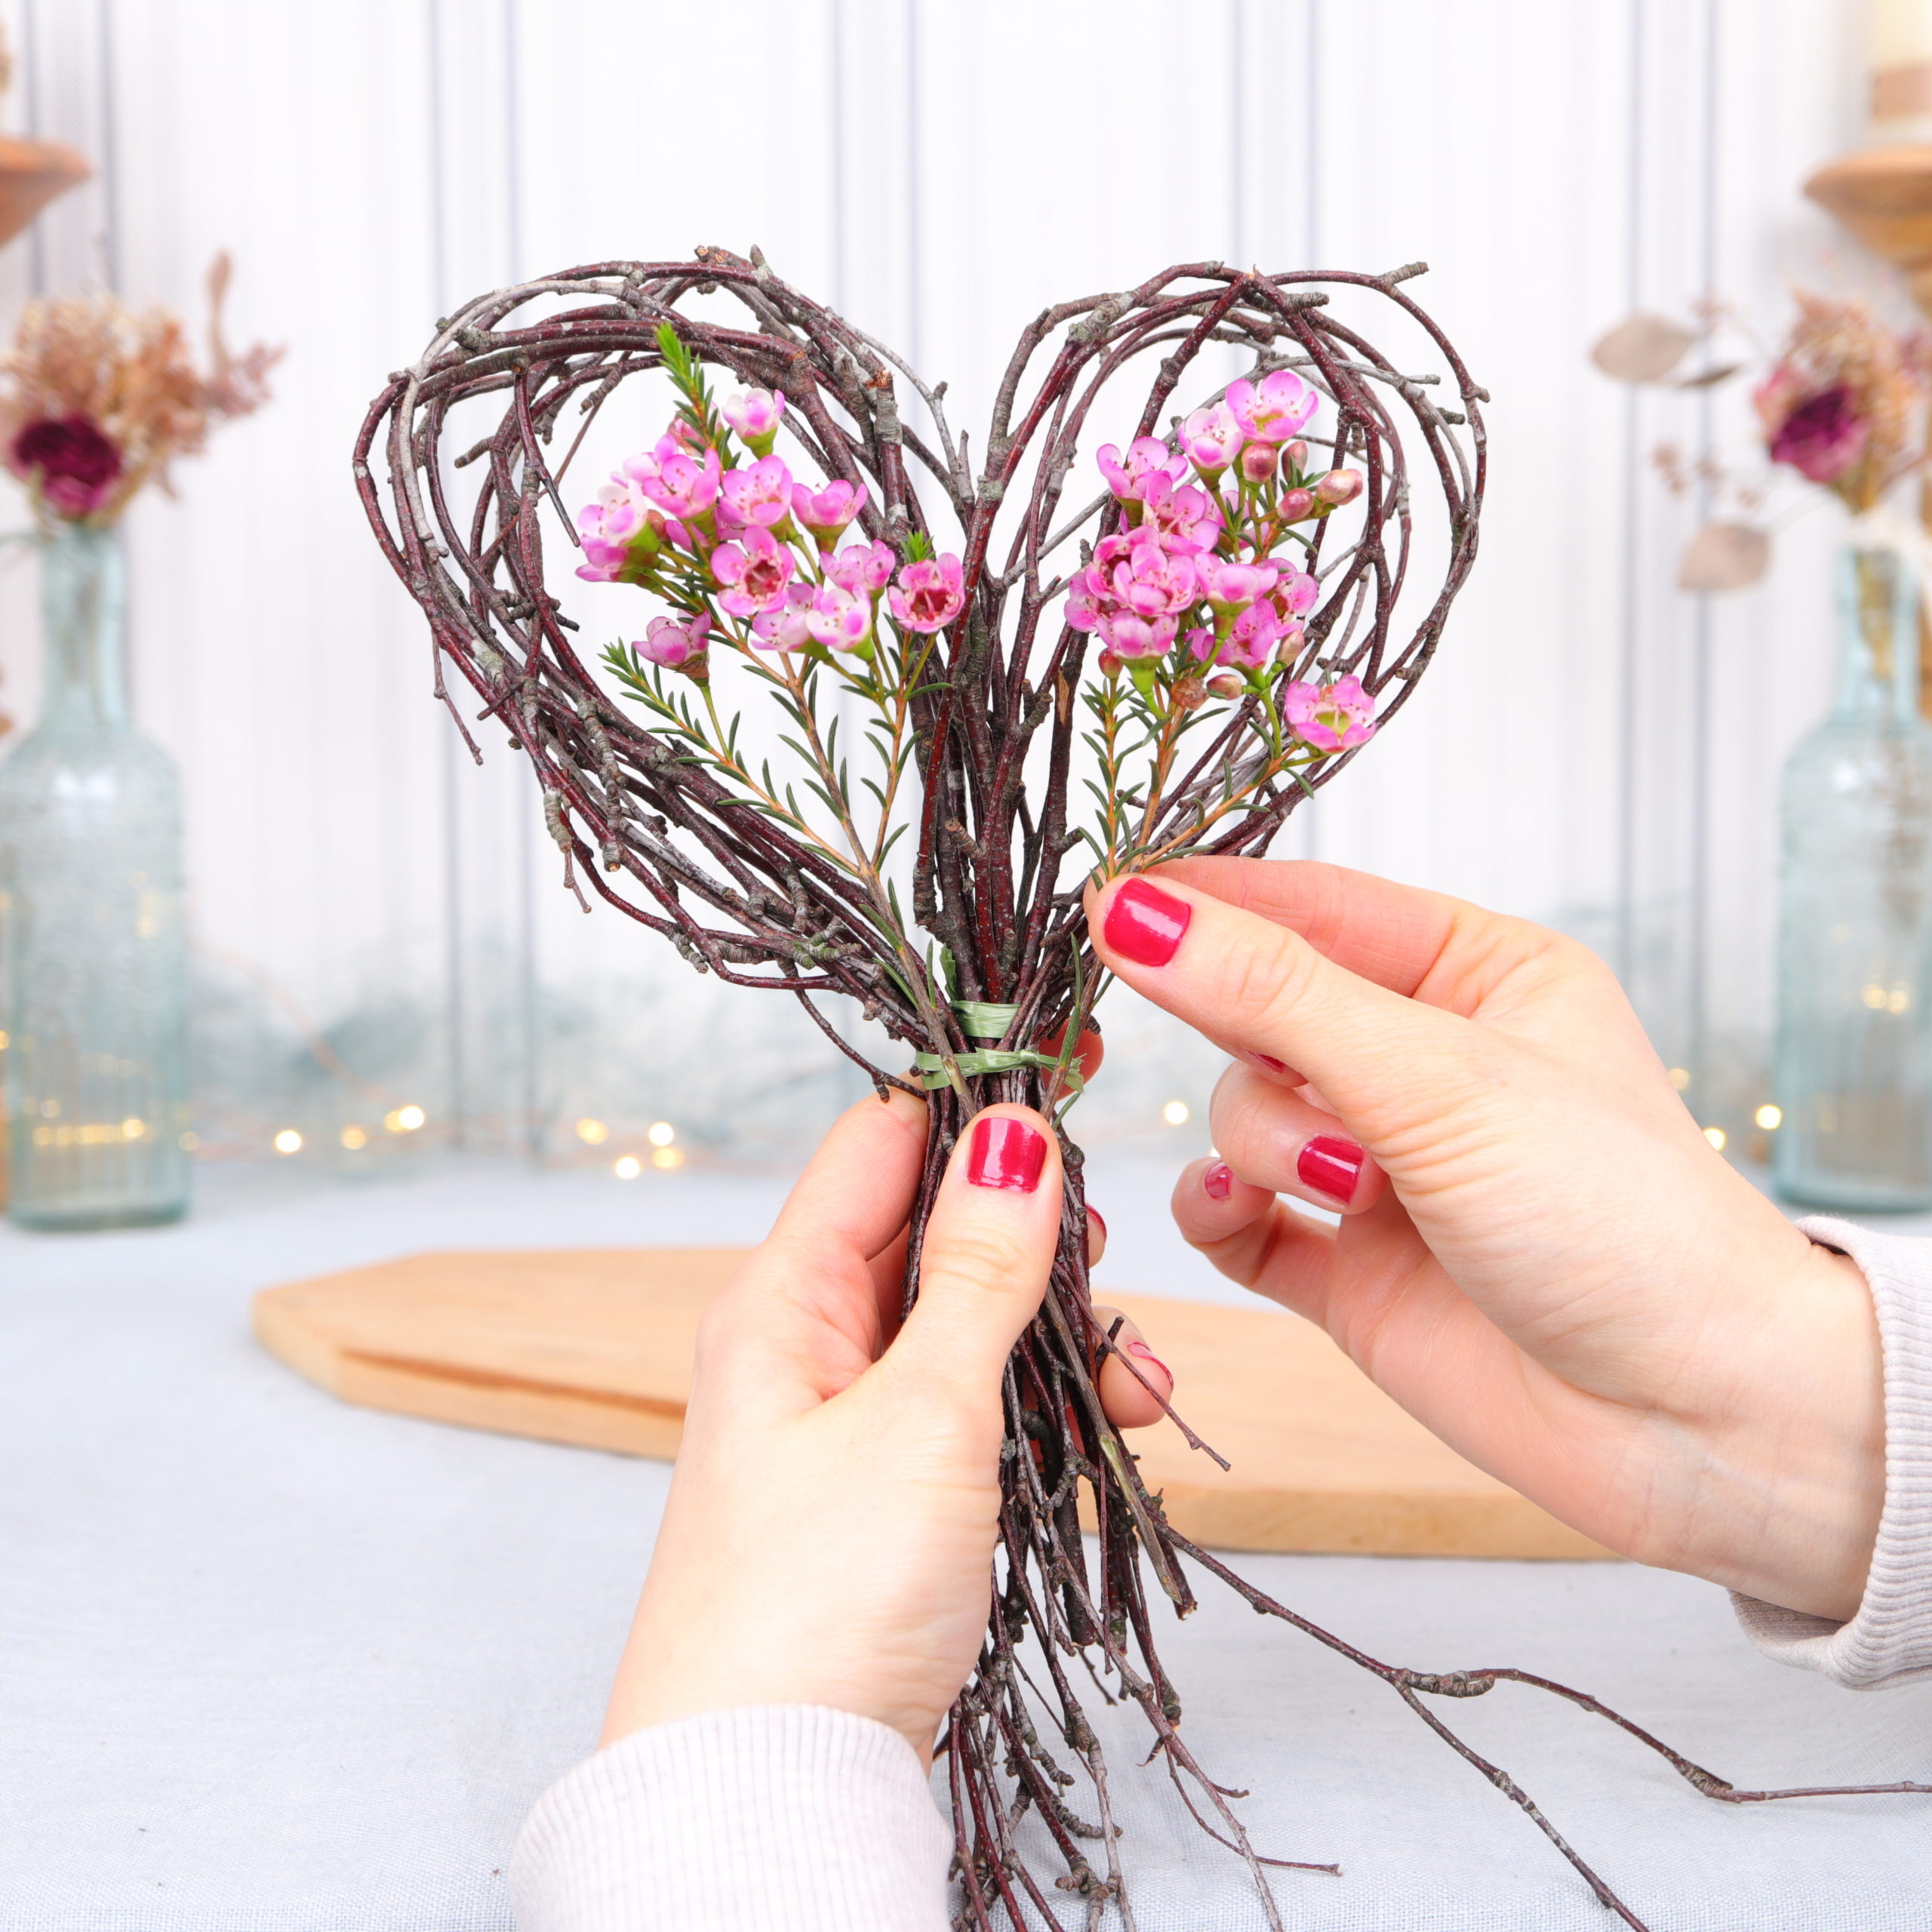
To do this, I take the heart in one hand and simply place flowers on it.
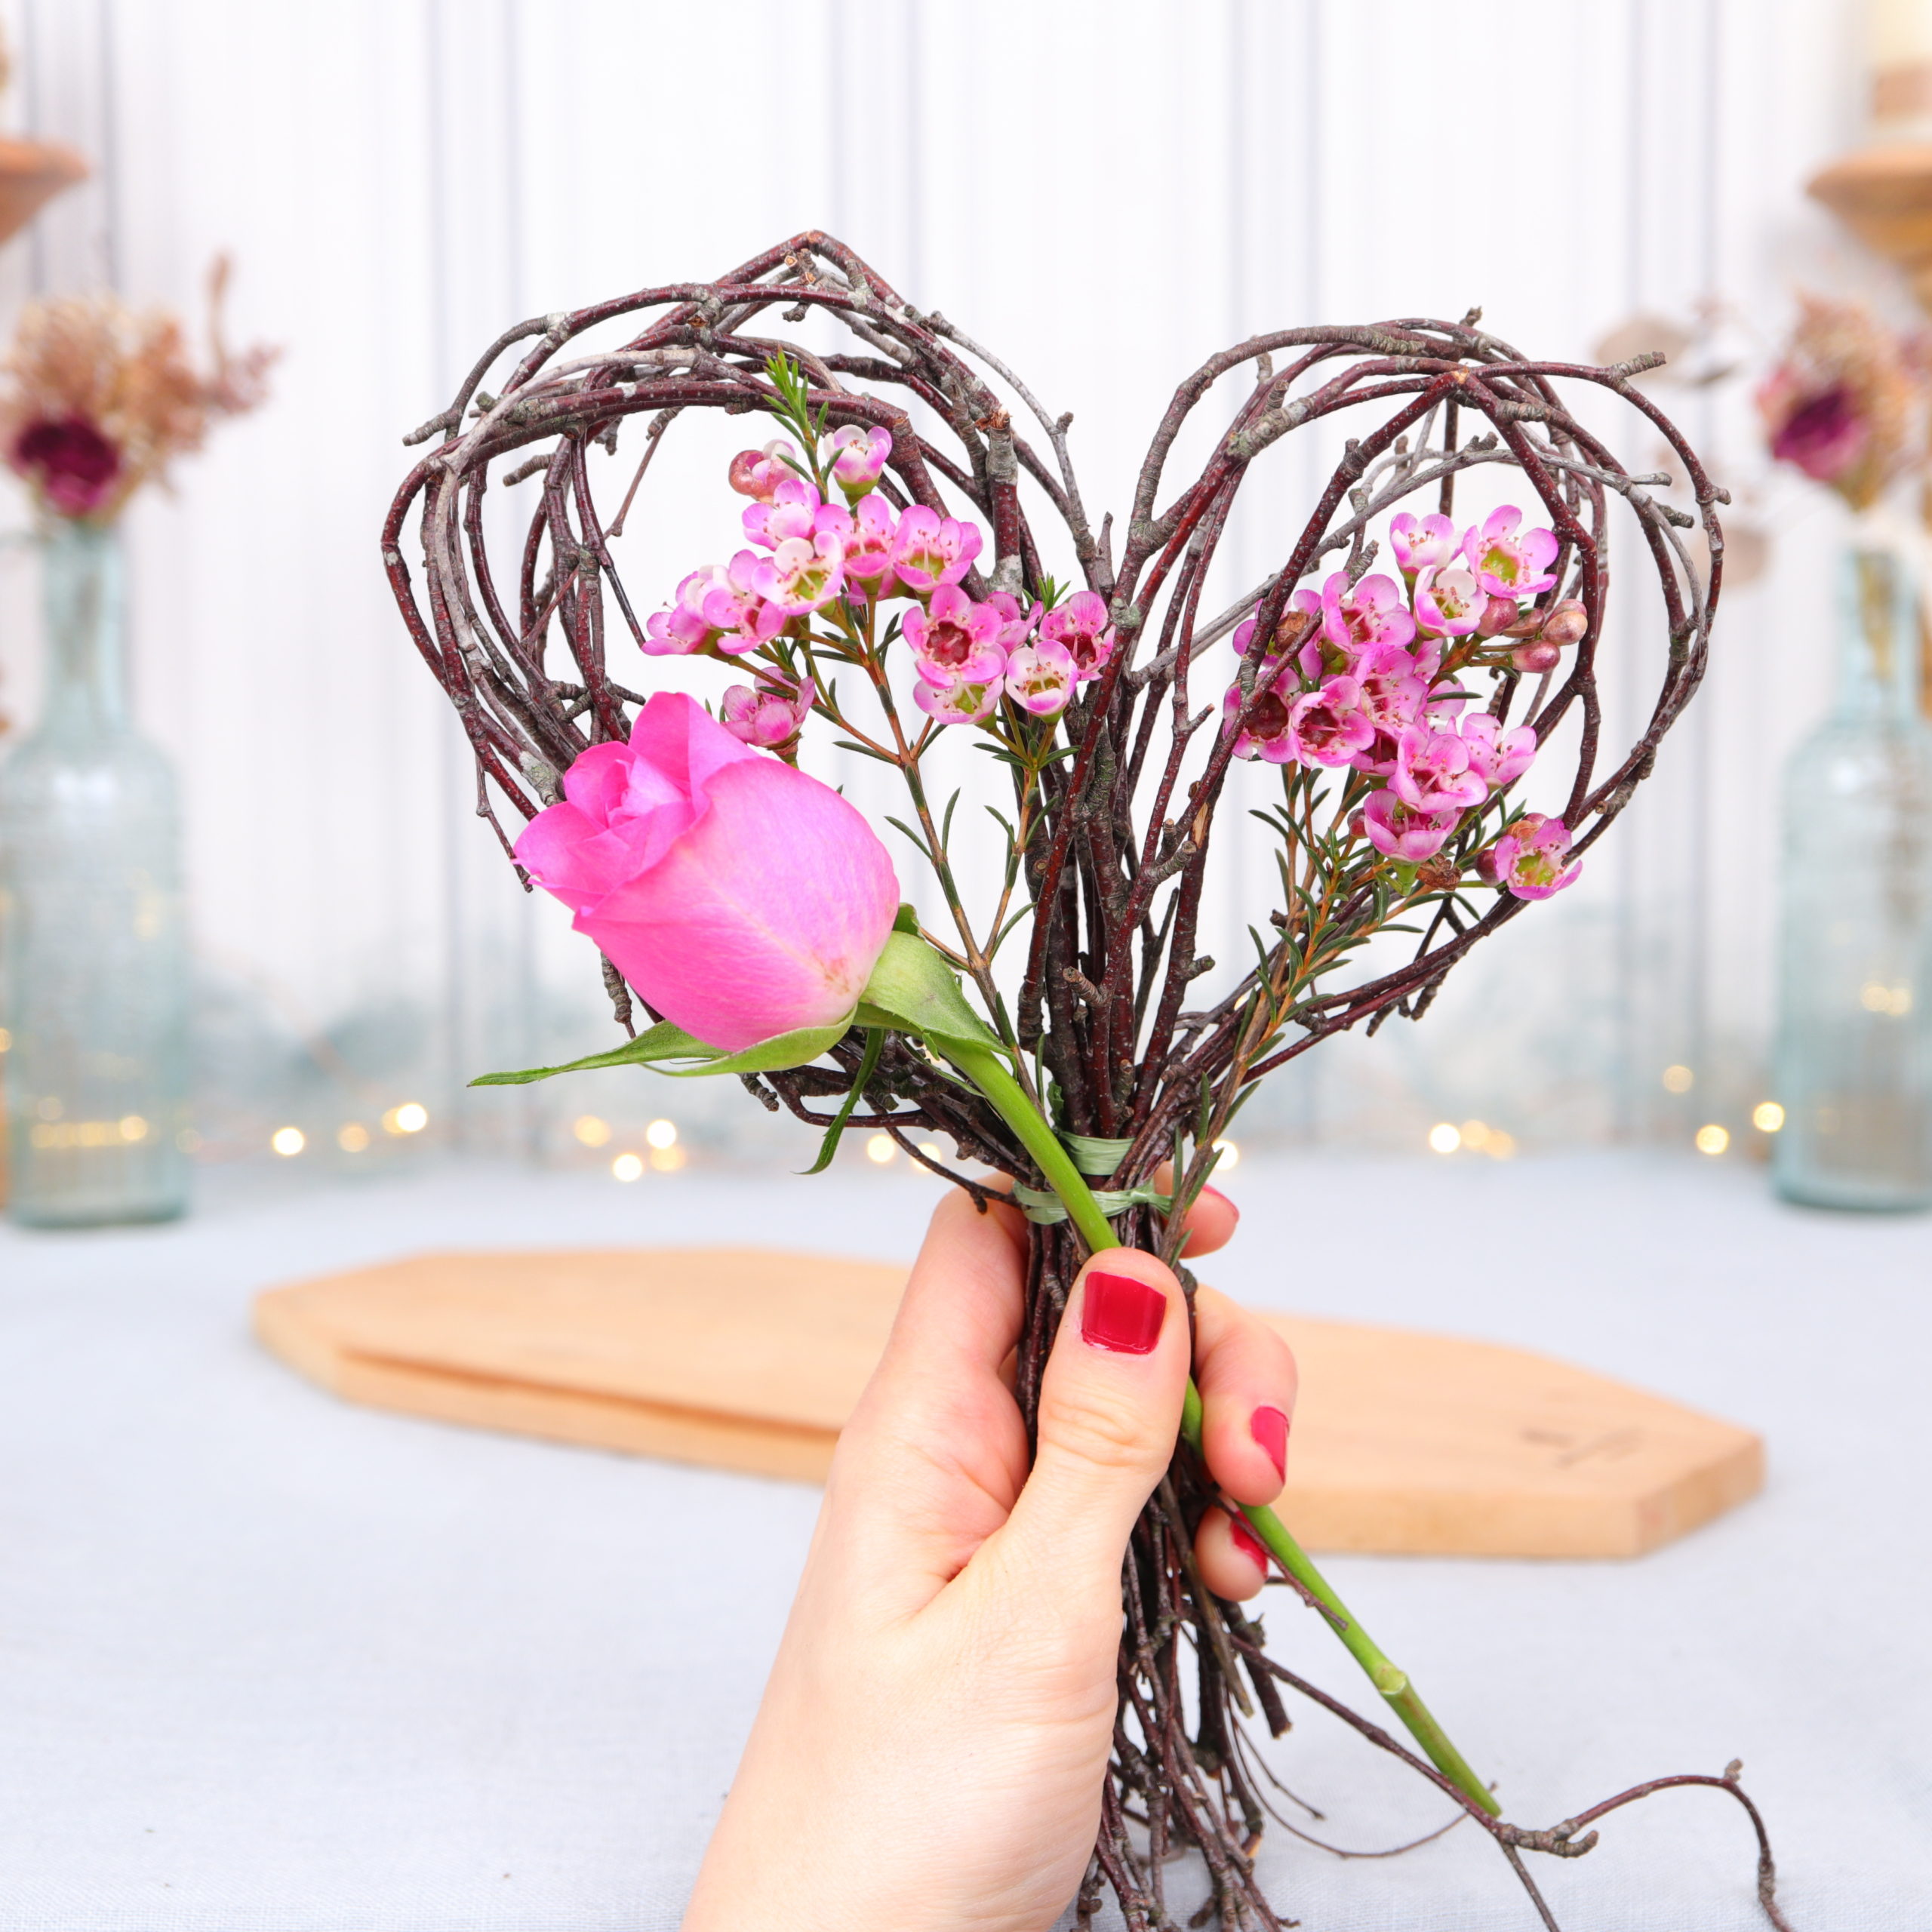
I hold the flowers with my thumb and place them on the heart at different heights.
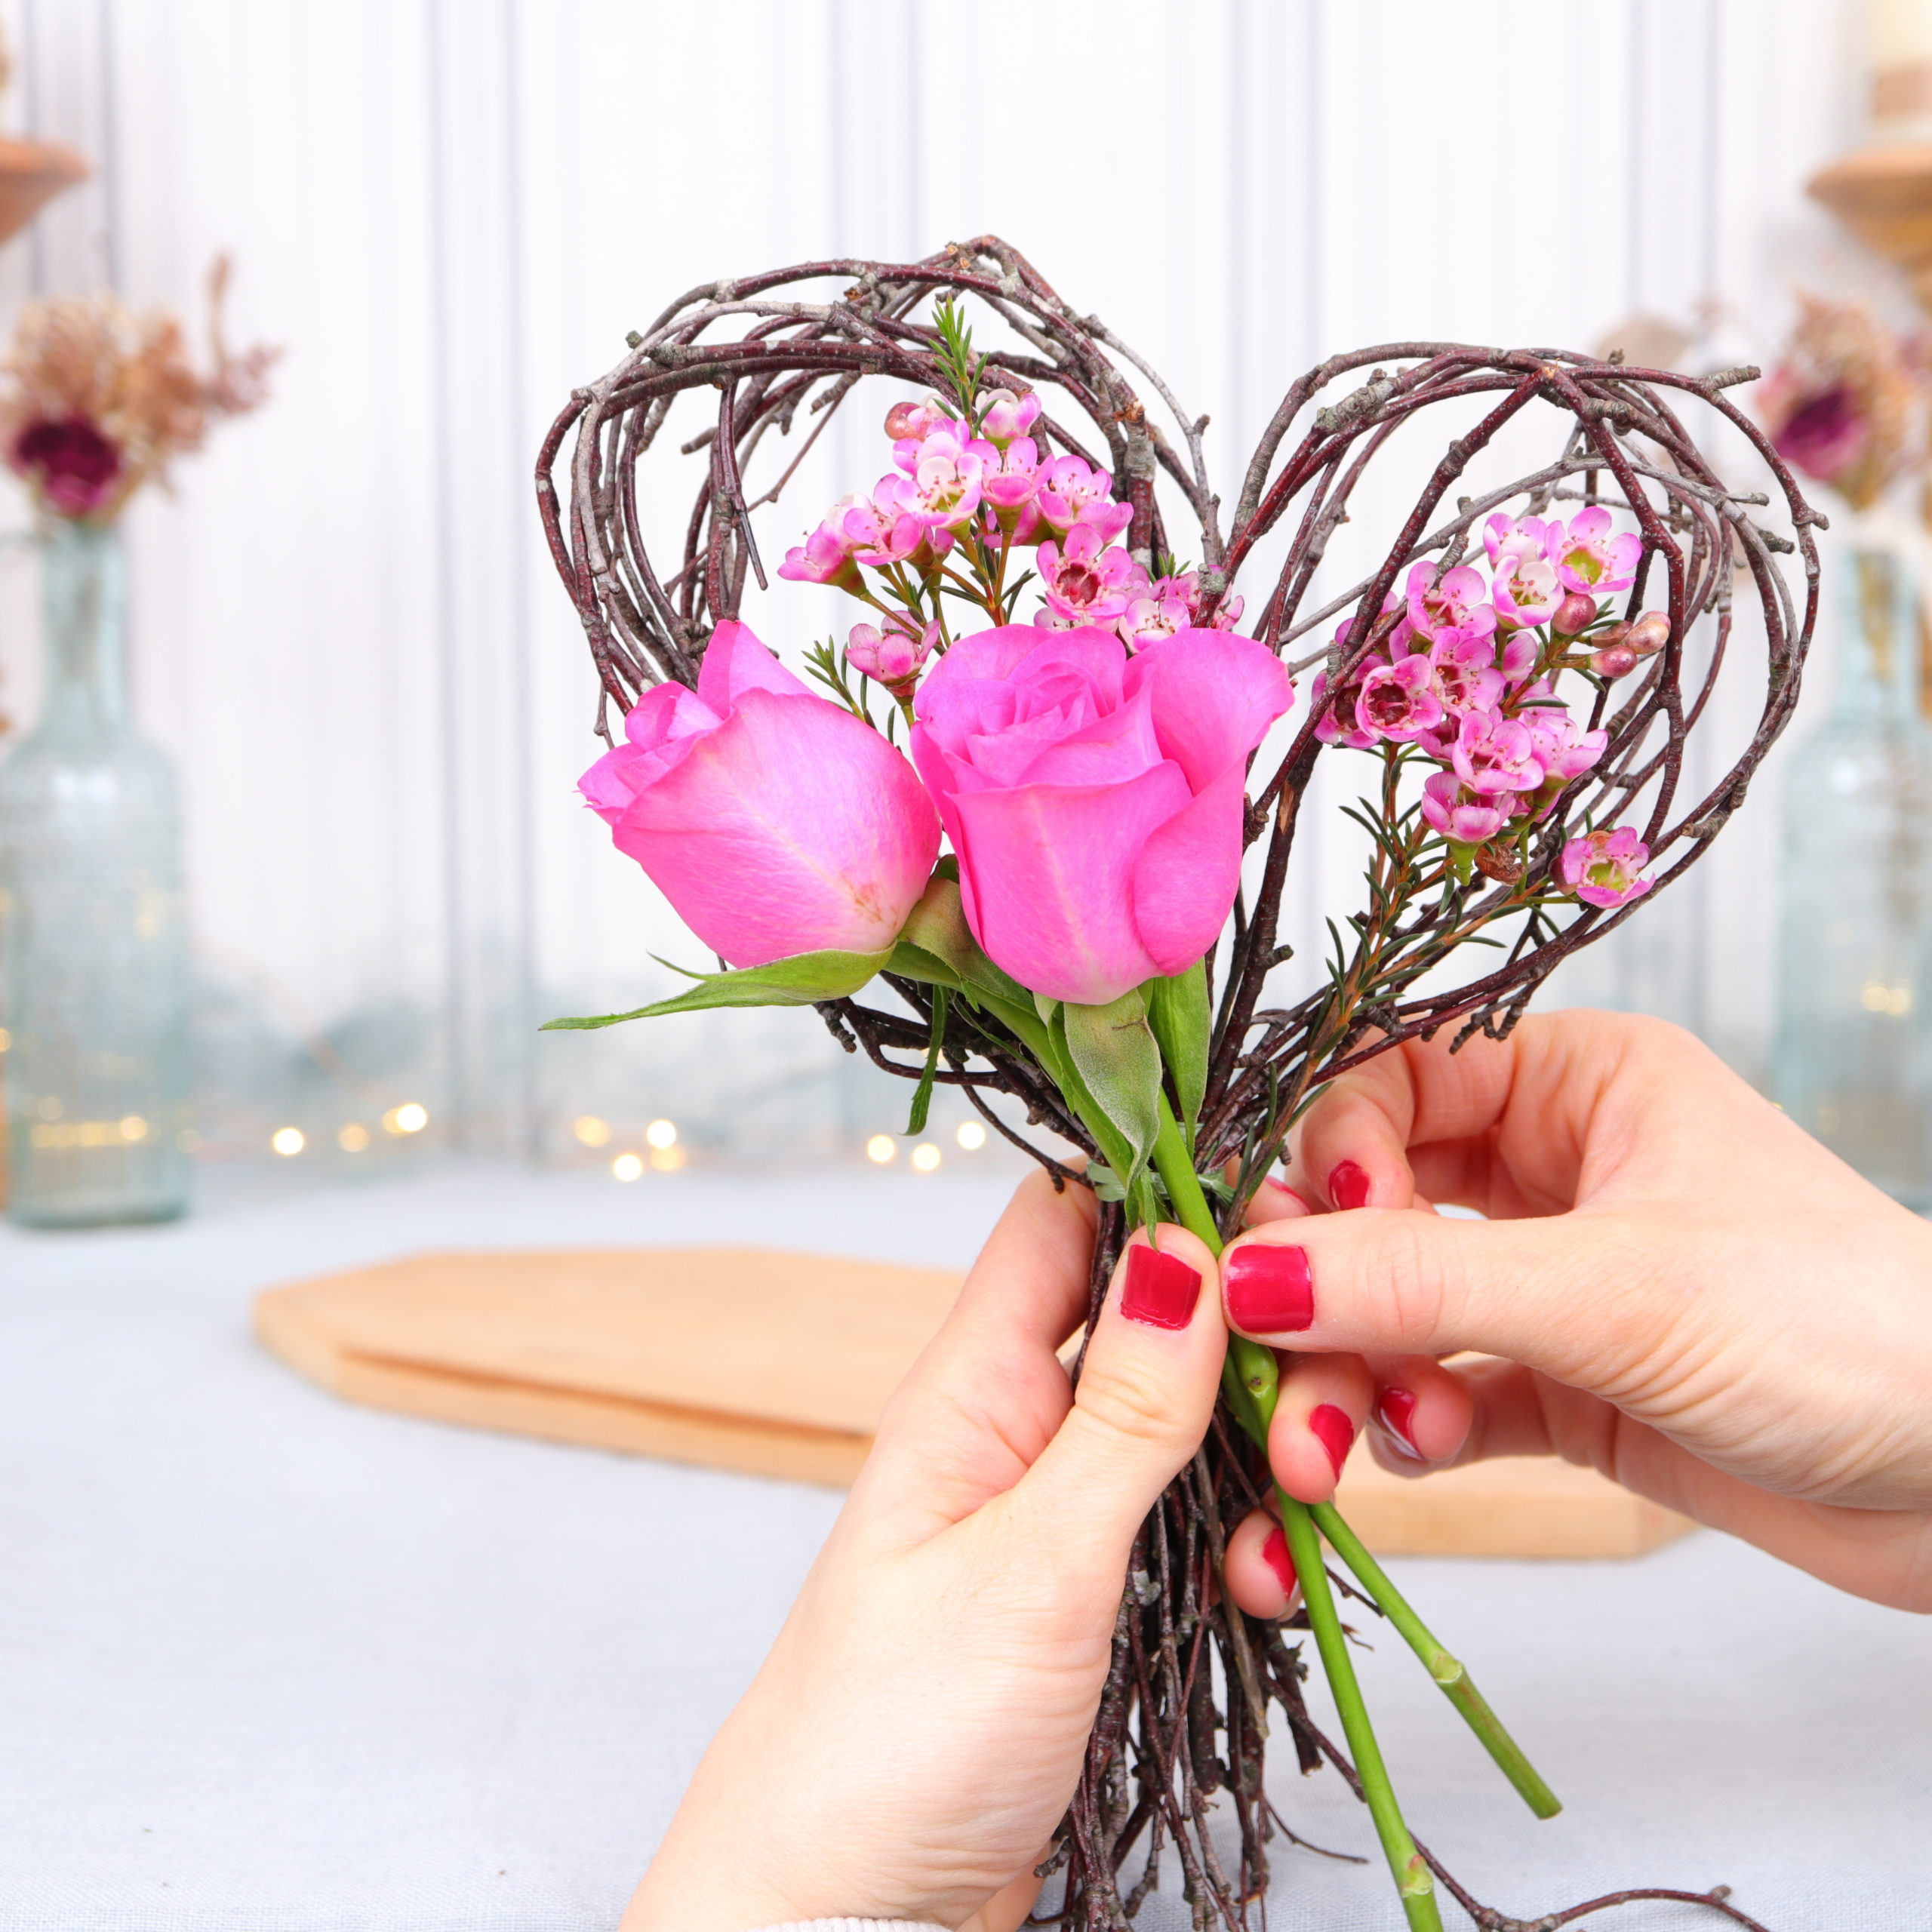
I swap between roses and wax flowers to get a nice shape.

To ensure that everything holds together well, I finally take a piece of binding raffia ribbon and wrap the stems several times with it and knot them.

Tip: It is easier to tie a knot if you lay the bouquet in front of you.
Step 4: Cut off the stems
In the next step I shorten the stems with the flower scissors.
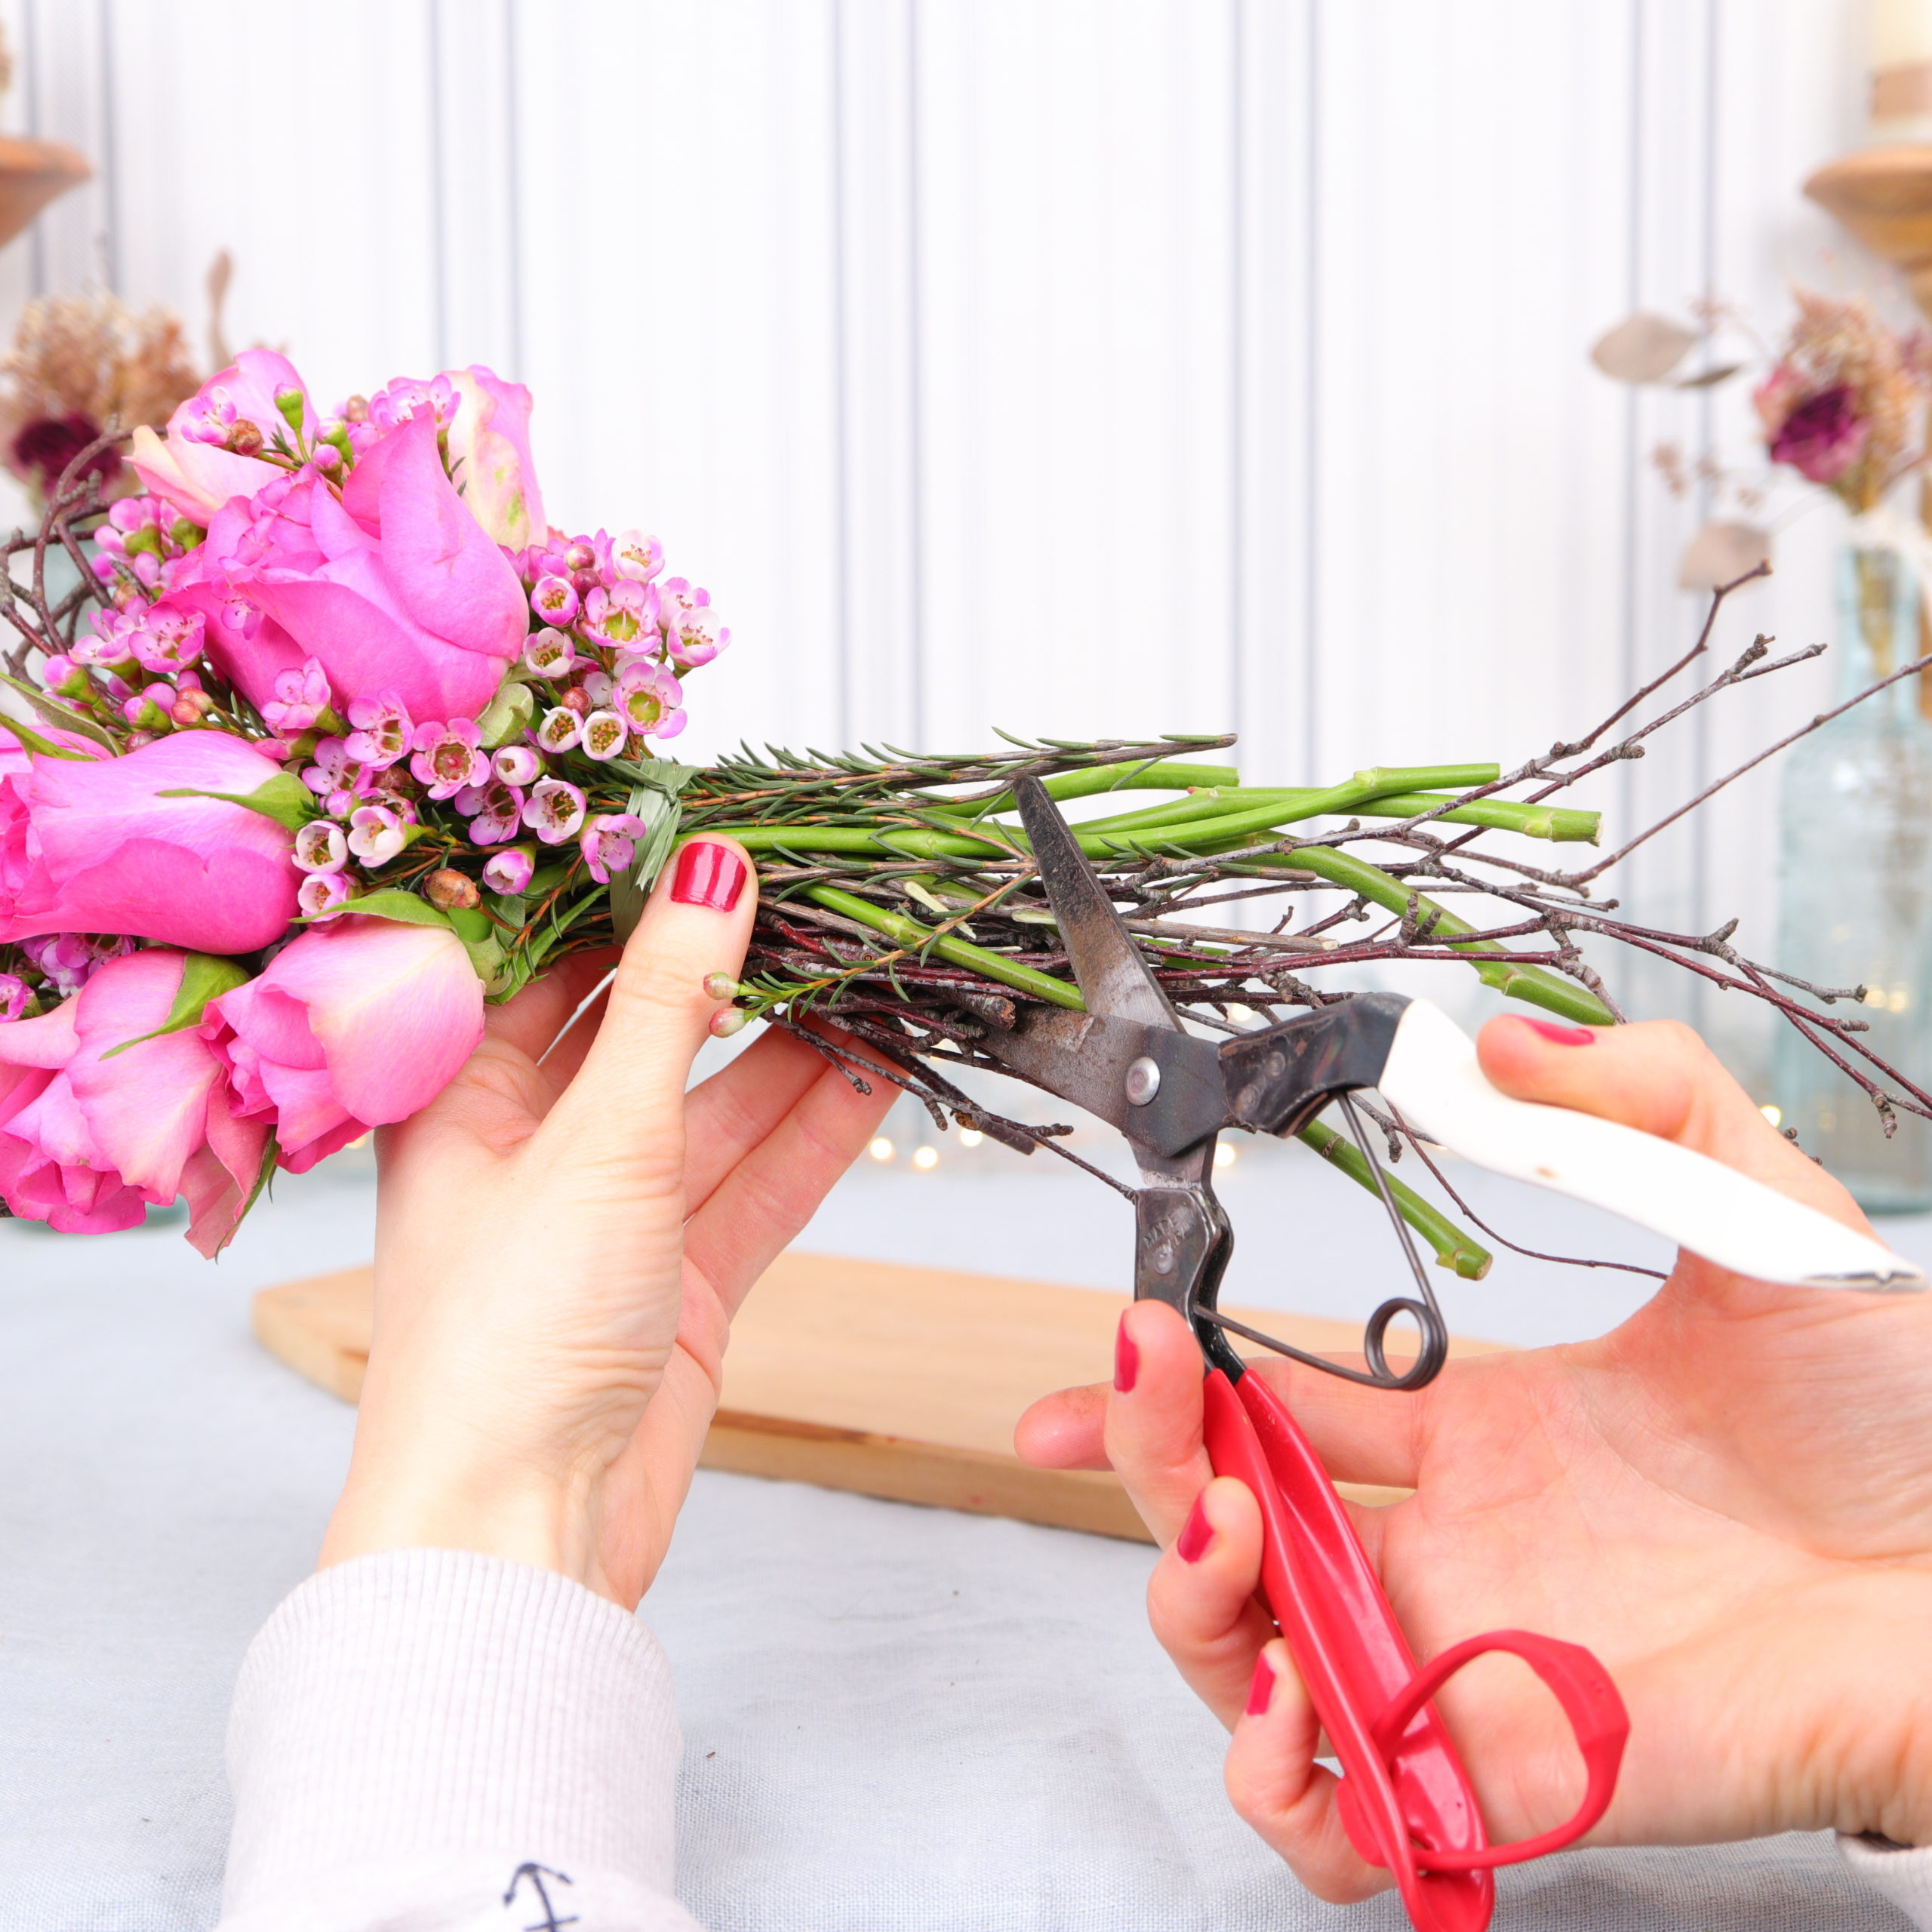
Tip: I kept the stems quite short because I want to decorate the heart in a shallow bowl with little water. For a vase, it is better to keep the stems longer.

Tip: You could also let the heart dry, as the materials are very suitable for this. Just make sure to then hang the heart upside down to dry so the flowers stay in shape.
Step 5: Attach velvet ribbon
Now I attach the pink velvet ribbon to the bouquet.
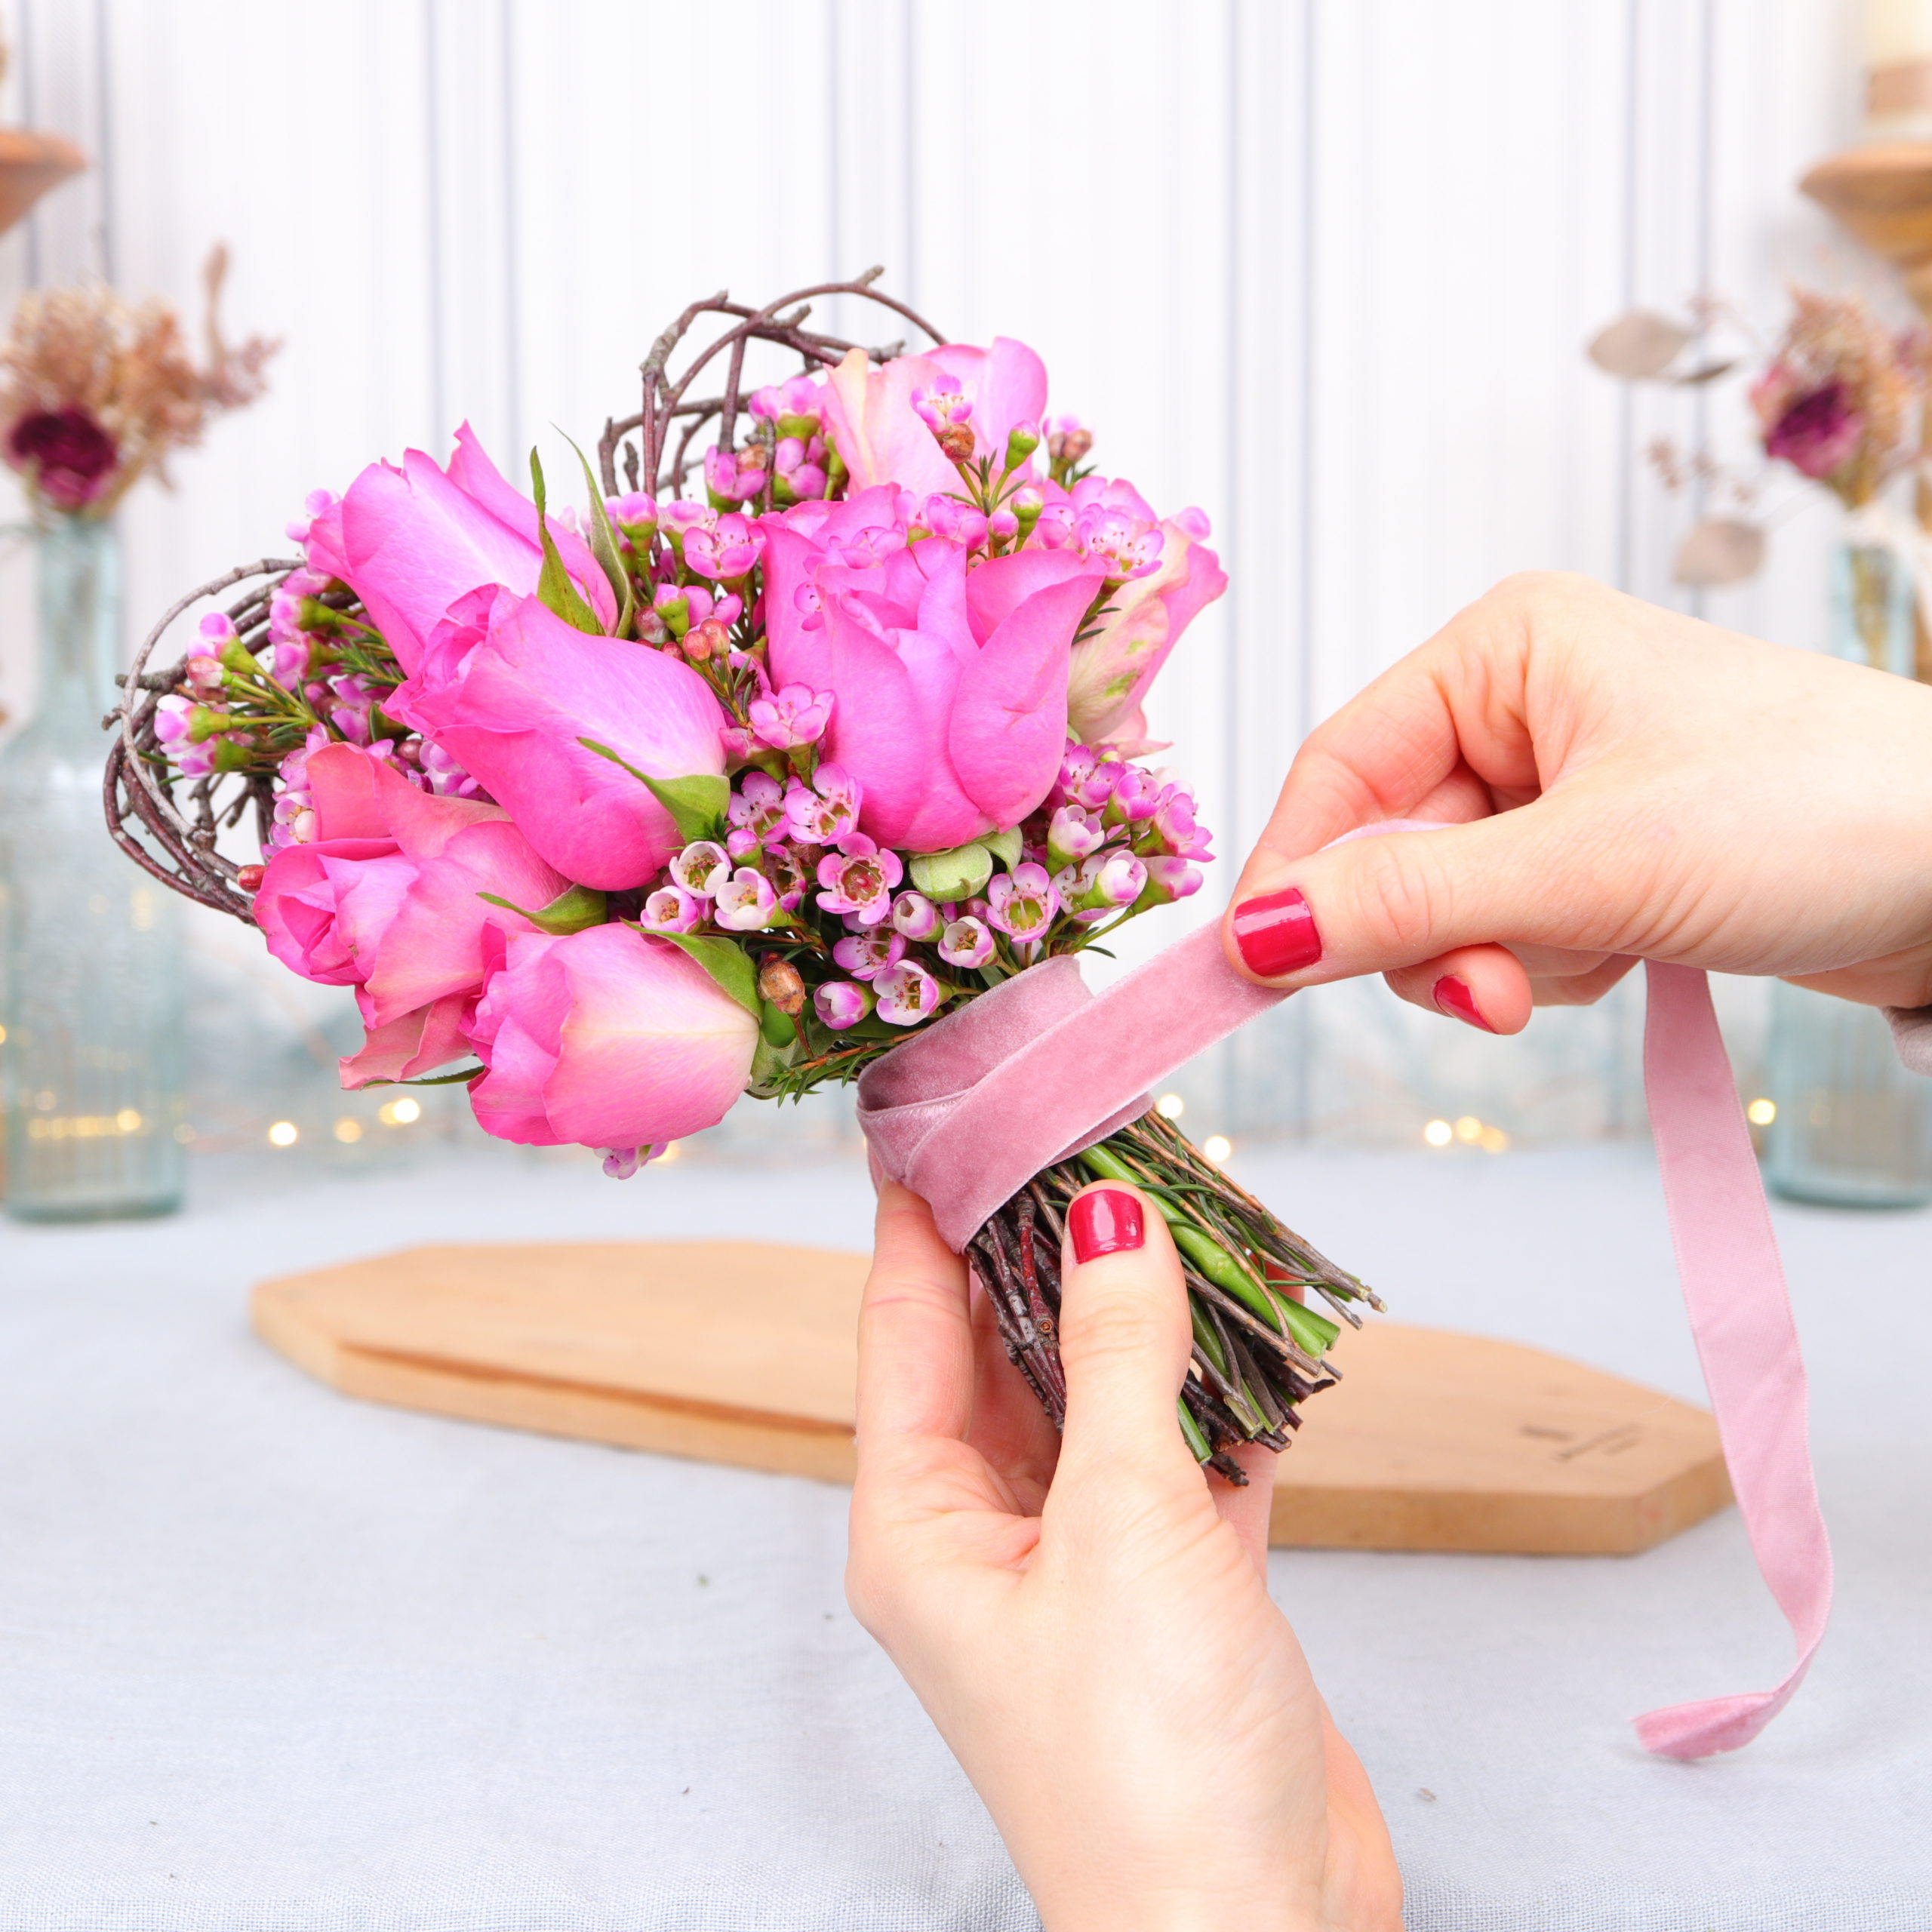
I wrap this several times around the raffia ribbon and close it with a knot on the back.
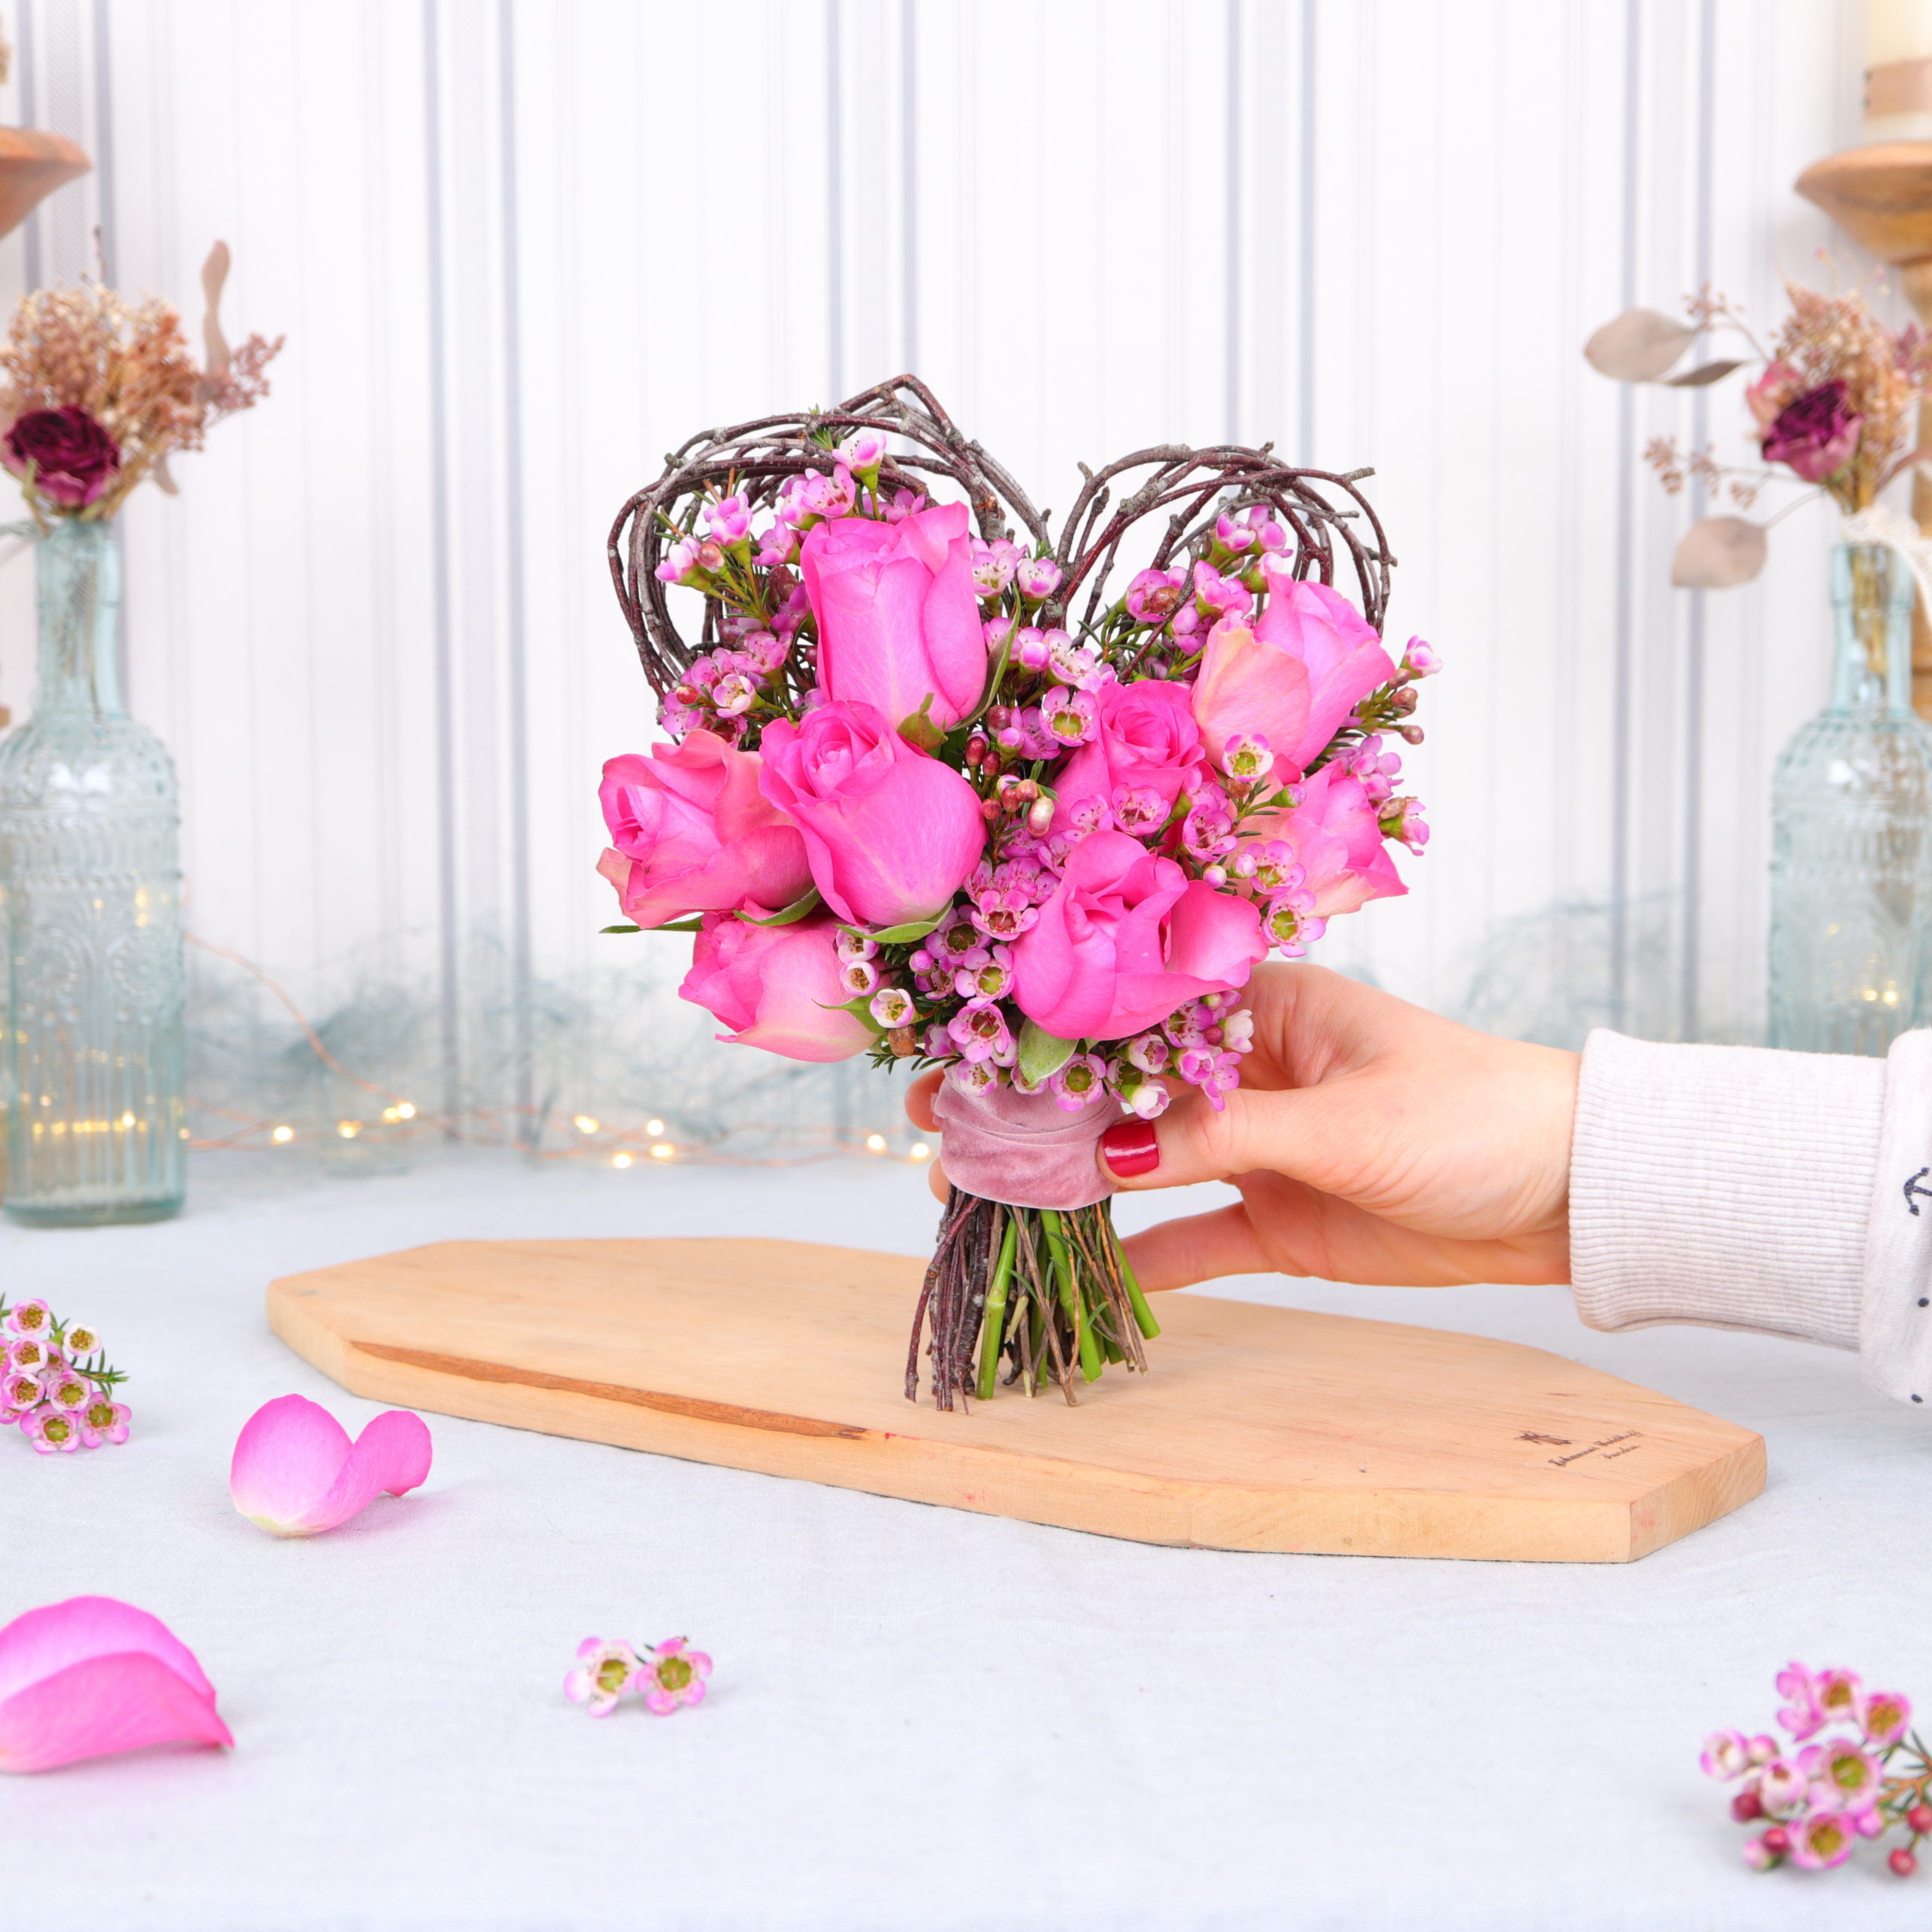
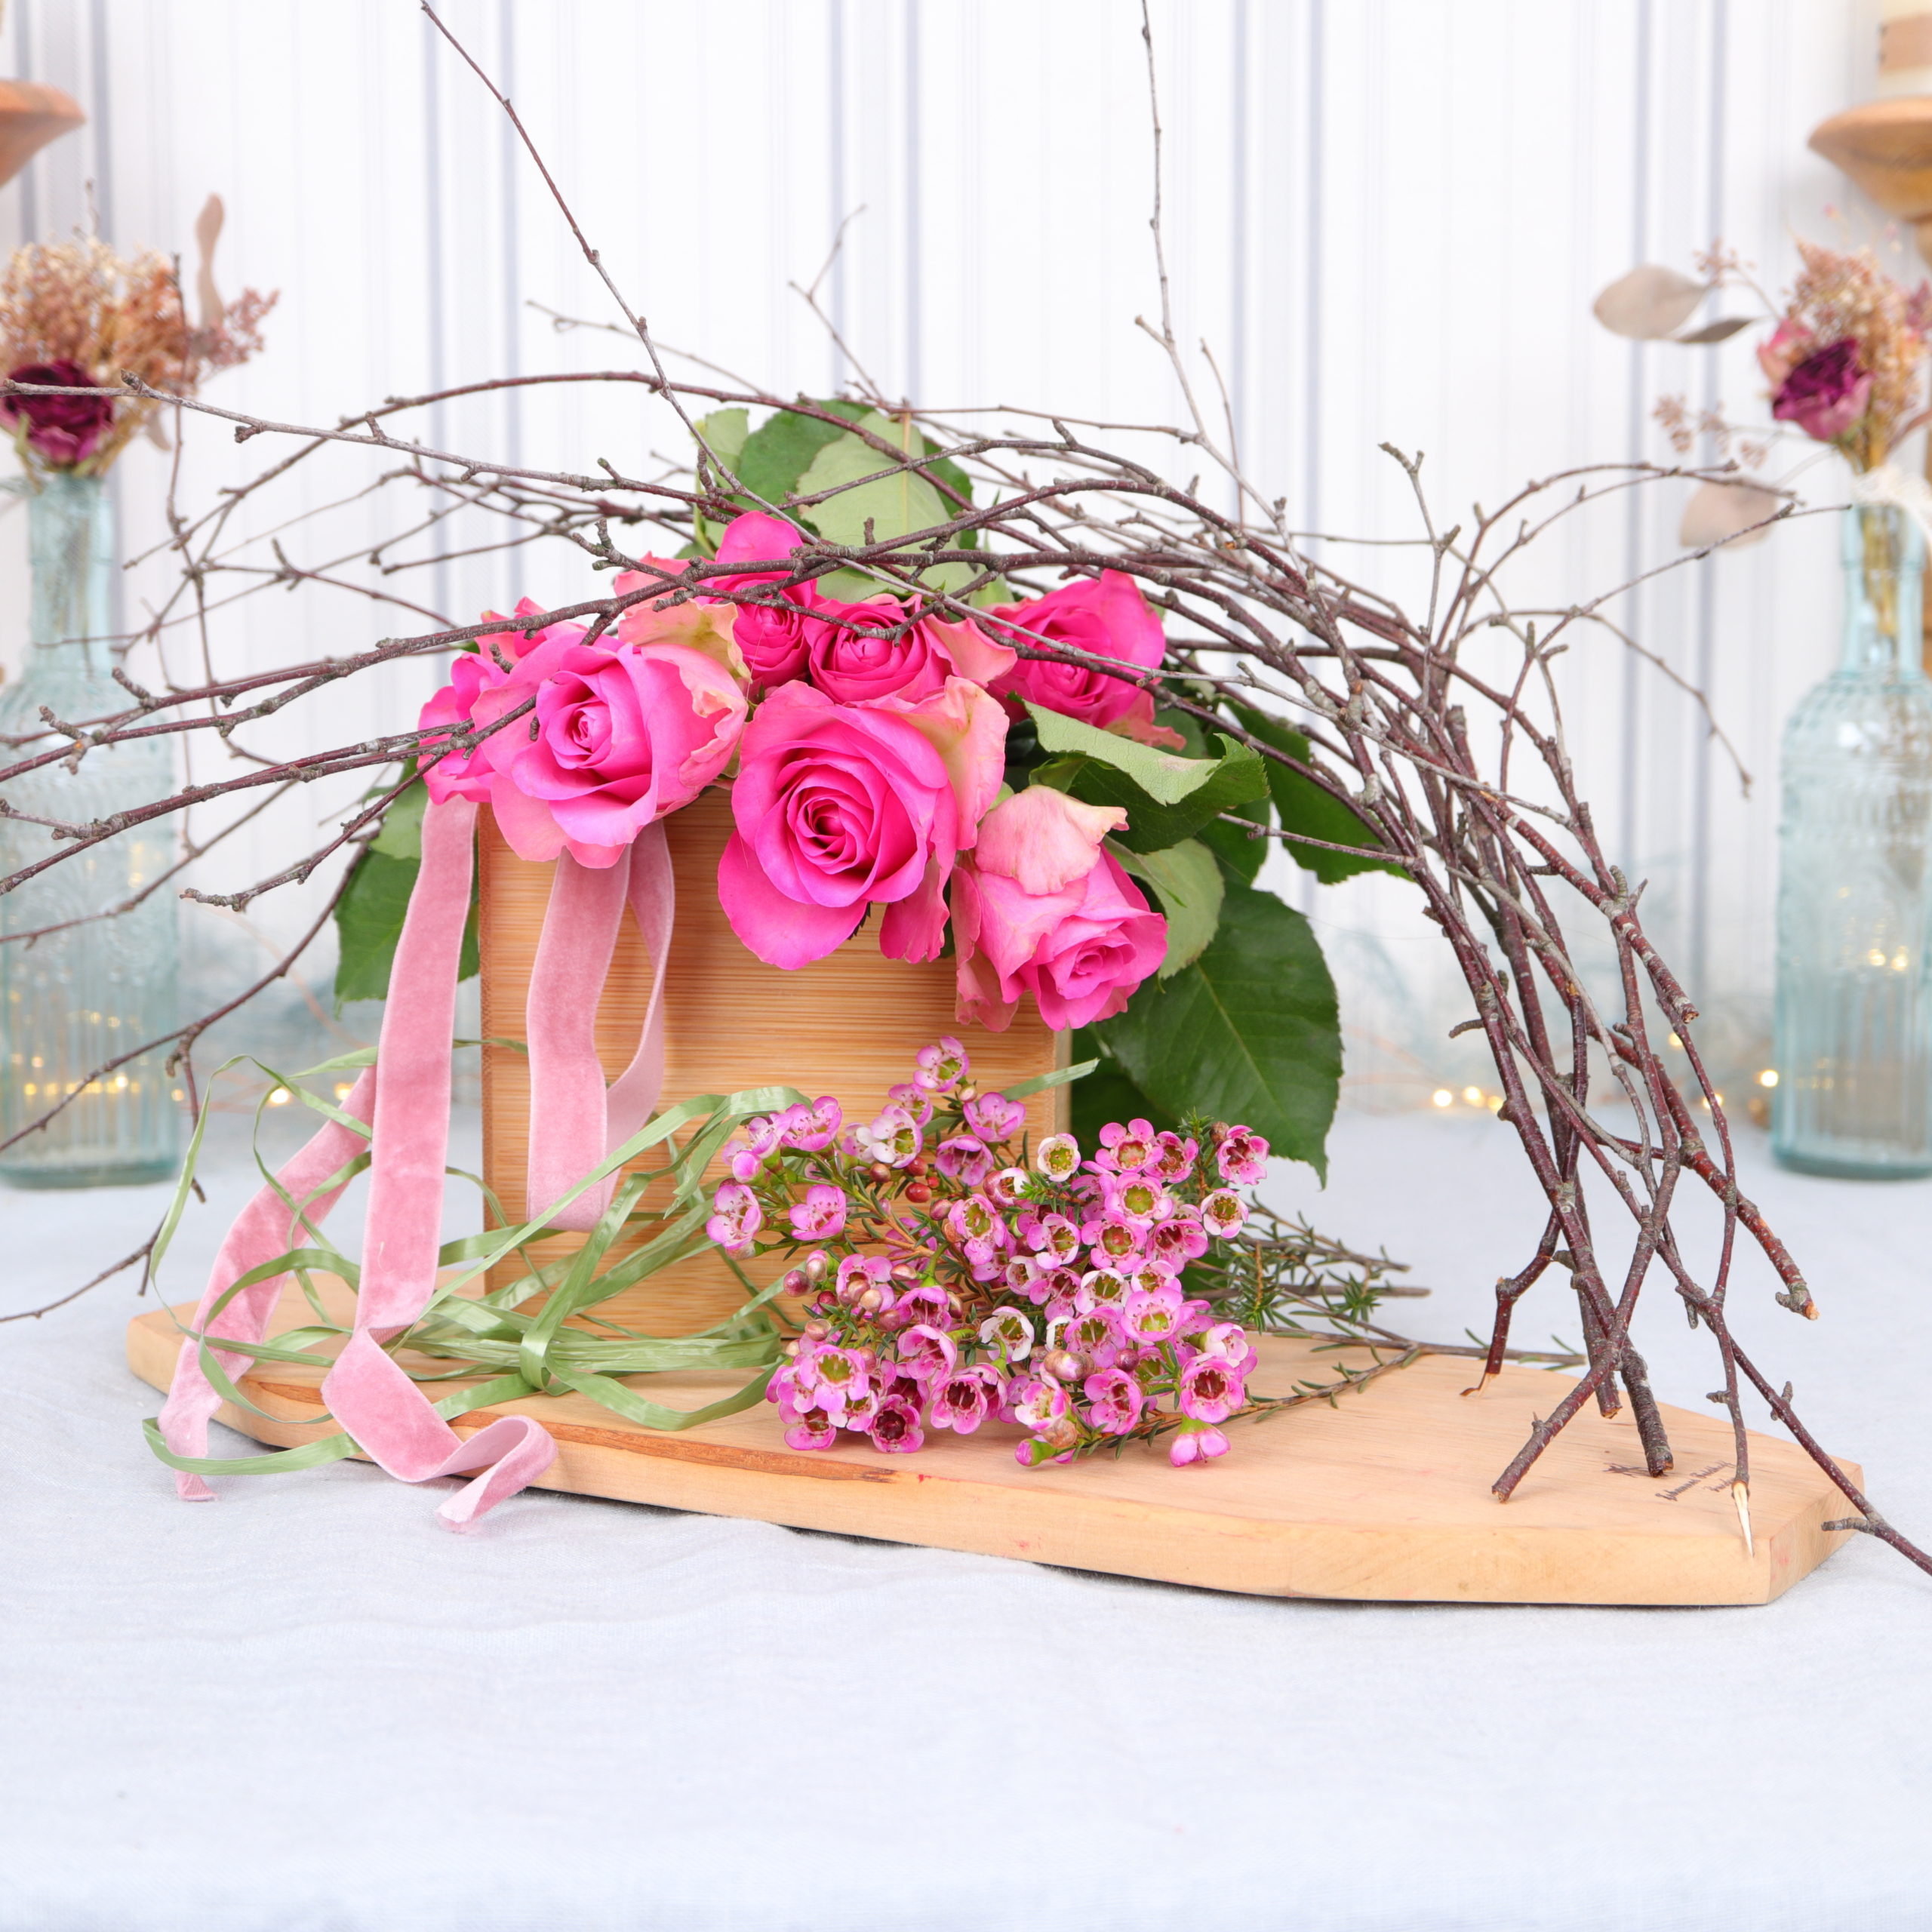
And the heart bouquet with birch twigs and roses is ready! I hope you enjoyed this DIY as much as I did and that you delight yourself or others with the rose heart!


Are you looking for more cute DIY ideas? Then have a look here:
- Heart Pendants with Dried Roses
- Handicrafts with Hot Glue: Paper Clip Heart with Dried Flowers
- Flower Bouquet with Flower Wreath from Ivy in the Shape of Heart
Have a nice day! <3
Jenny